- Home
- Guides
- TAPPO Management
- Product Management
Create A Meal
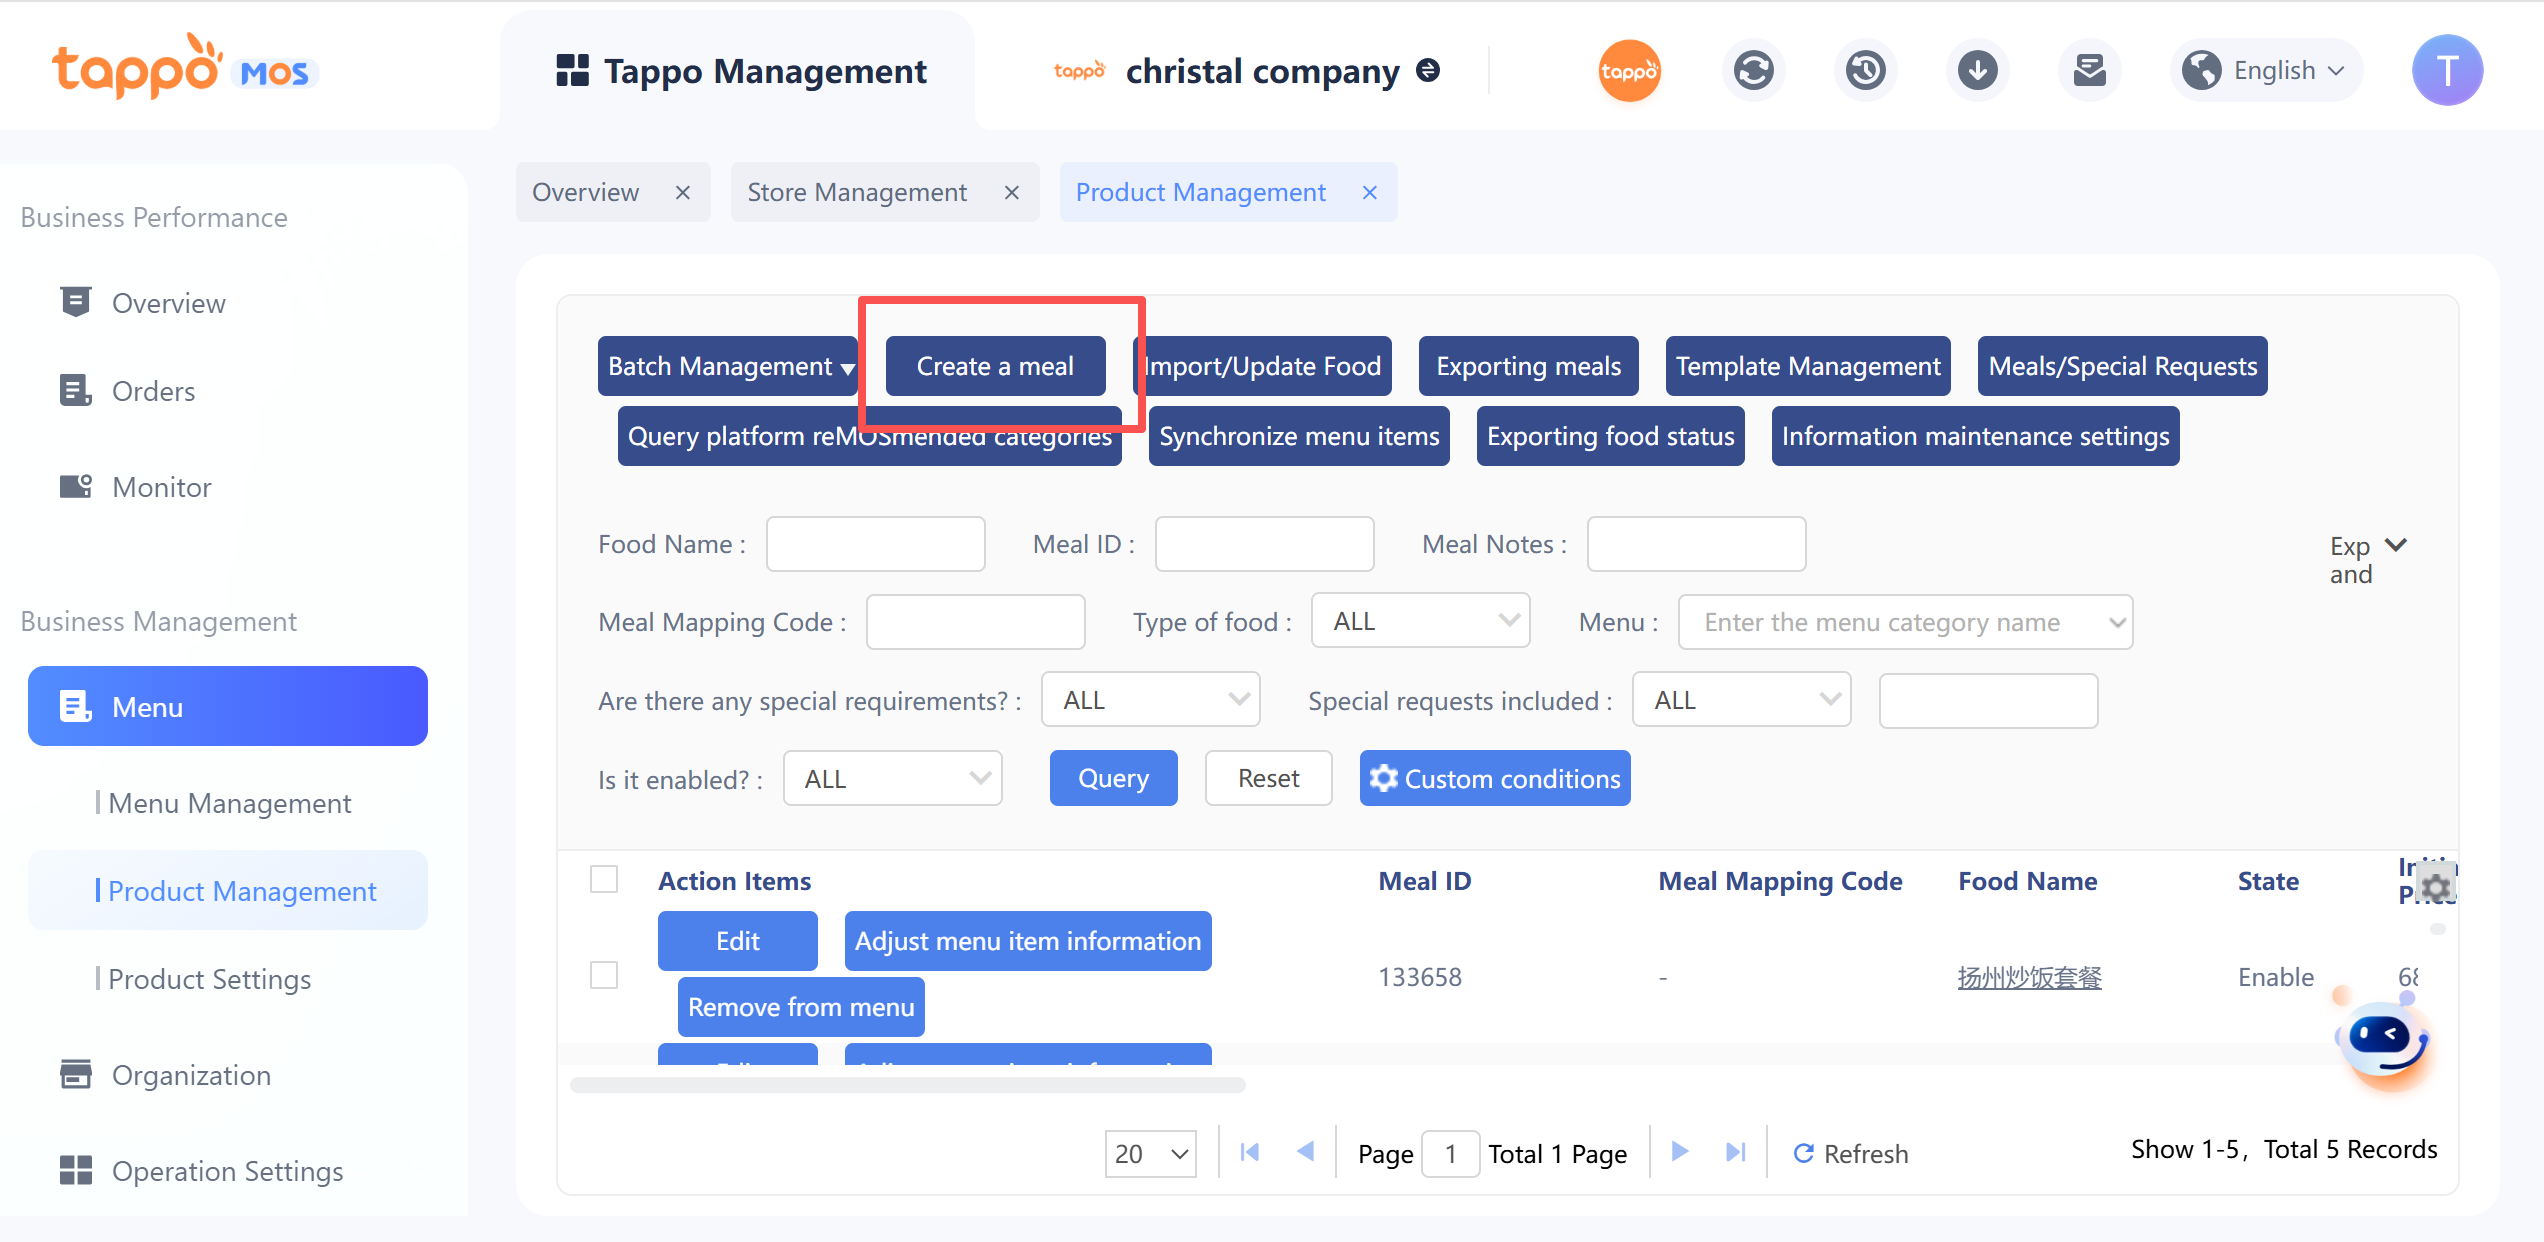
On the dish list, click [Create a meal] to enter the dish creation page.

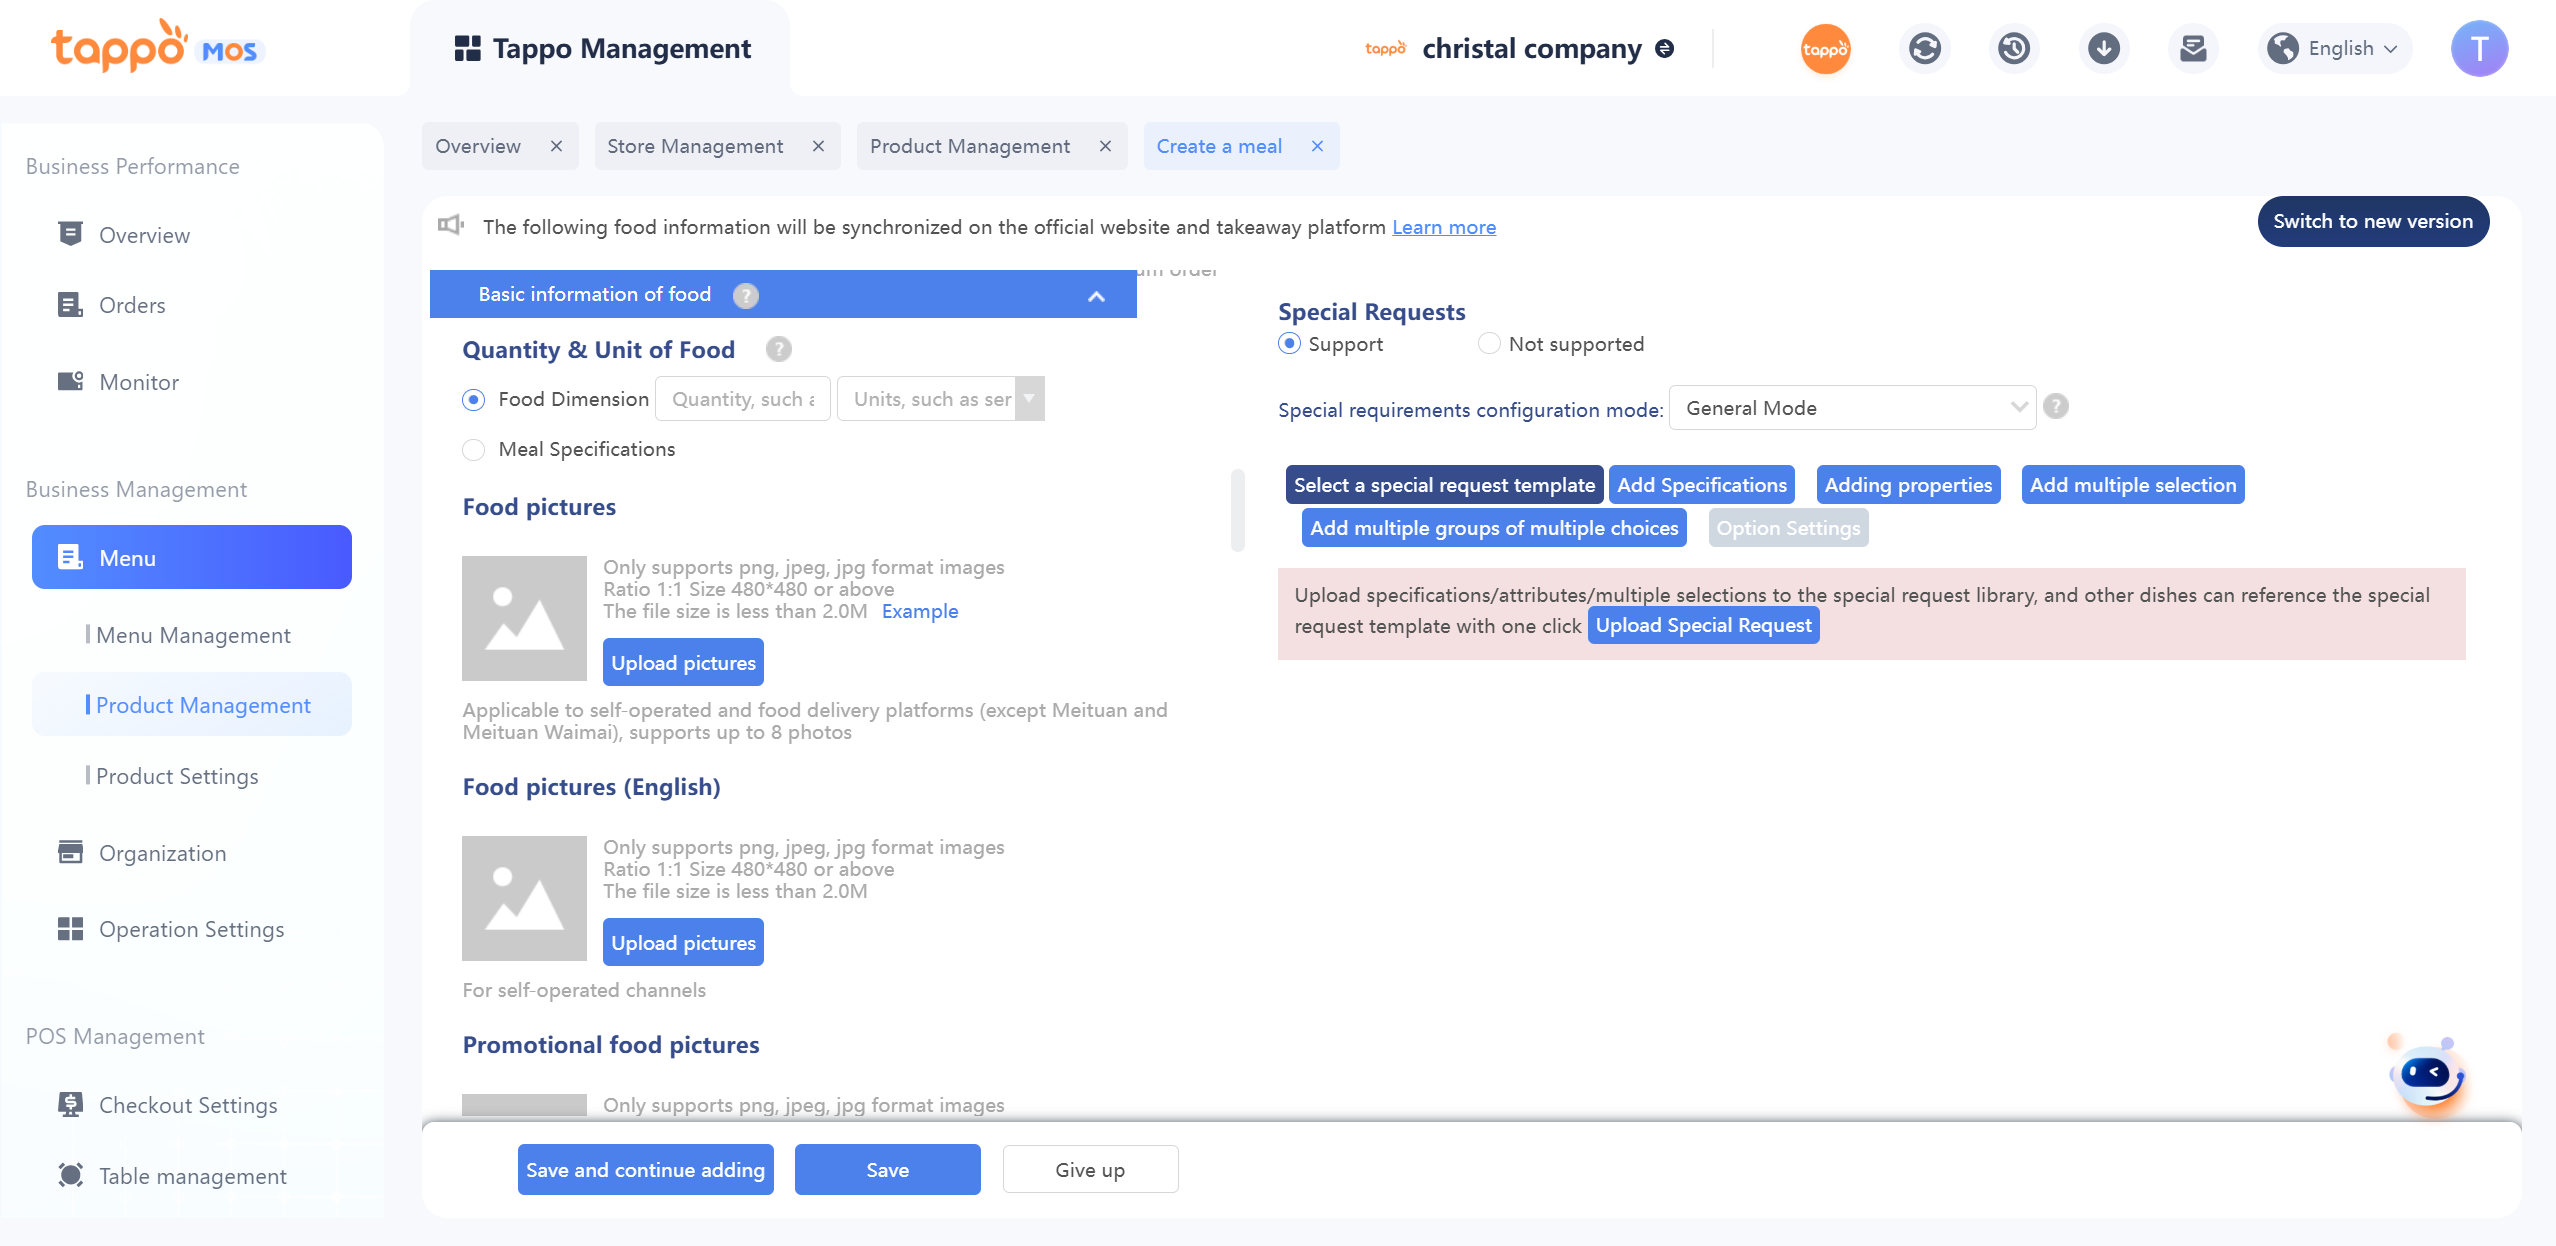
1. Dish Type: Set as a single dish or set meal.
2. Dish Name: Limited to 50 characters.
3. Dish Tags: Multiple tags can be set for the dish, for self-operated channels.
4. Initial Price: The initial price of the dish. The same dish can be set at different prices in different menus, with the initial price as the default, which can be modified in the menu. If the initial price is modified, the dish price in existing menus will not change, and it will only take effect on dishes newly added to the menu. When synchronizing to food delivery platforms, the dish price in the menu will be used.
5. Initial Packaging Fee: The same dish can be set with different packaging fees in different menus, with the initial packaging fee as the default, which can be modified in the menu. If the initial packaging fee is modified, the dish packaging fee in existing menus will not change, and it will only take effect on dishes newly added to the menu. When synchronizing to food delivery platforms, the packaging fee in the menu will be used.
6. Original Price: Displayed on self-operated channels, not synchronized to food delivery platforms.
7. Minimum Amount: Displayed on self-operated channels. If set, the front end will show “Starting from ¥X”.
8. Dish Description: Describe a dish or explain the composition of a set meal.
9. Minimum Purchase Quantity: Used for synchronizing to third-party food delivery channels; customizable for self-operated channels. The number of portions of the dish that can be selected in a single order on food delivery channels.
10. Dish Unit: Used for food delivery platforms, such as portion, bowl, bottle; default is portion if left blank.
11. Dish Remarks: Used to mark dishes to distinguish dishes with the same name efficiently. Both remark fields can be used, and the remark information will be concatenated when displayed. Fuzzy search is also supported.
12. Printing Alias: Used for printing dish aliases on Tappo POS.
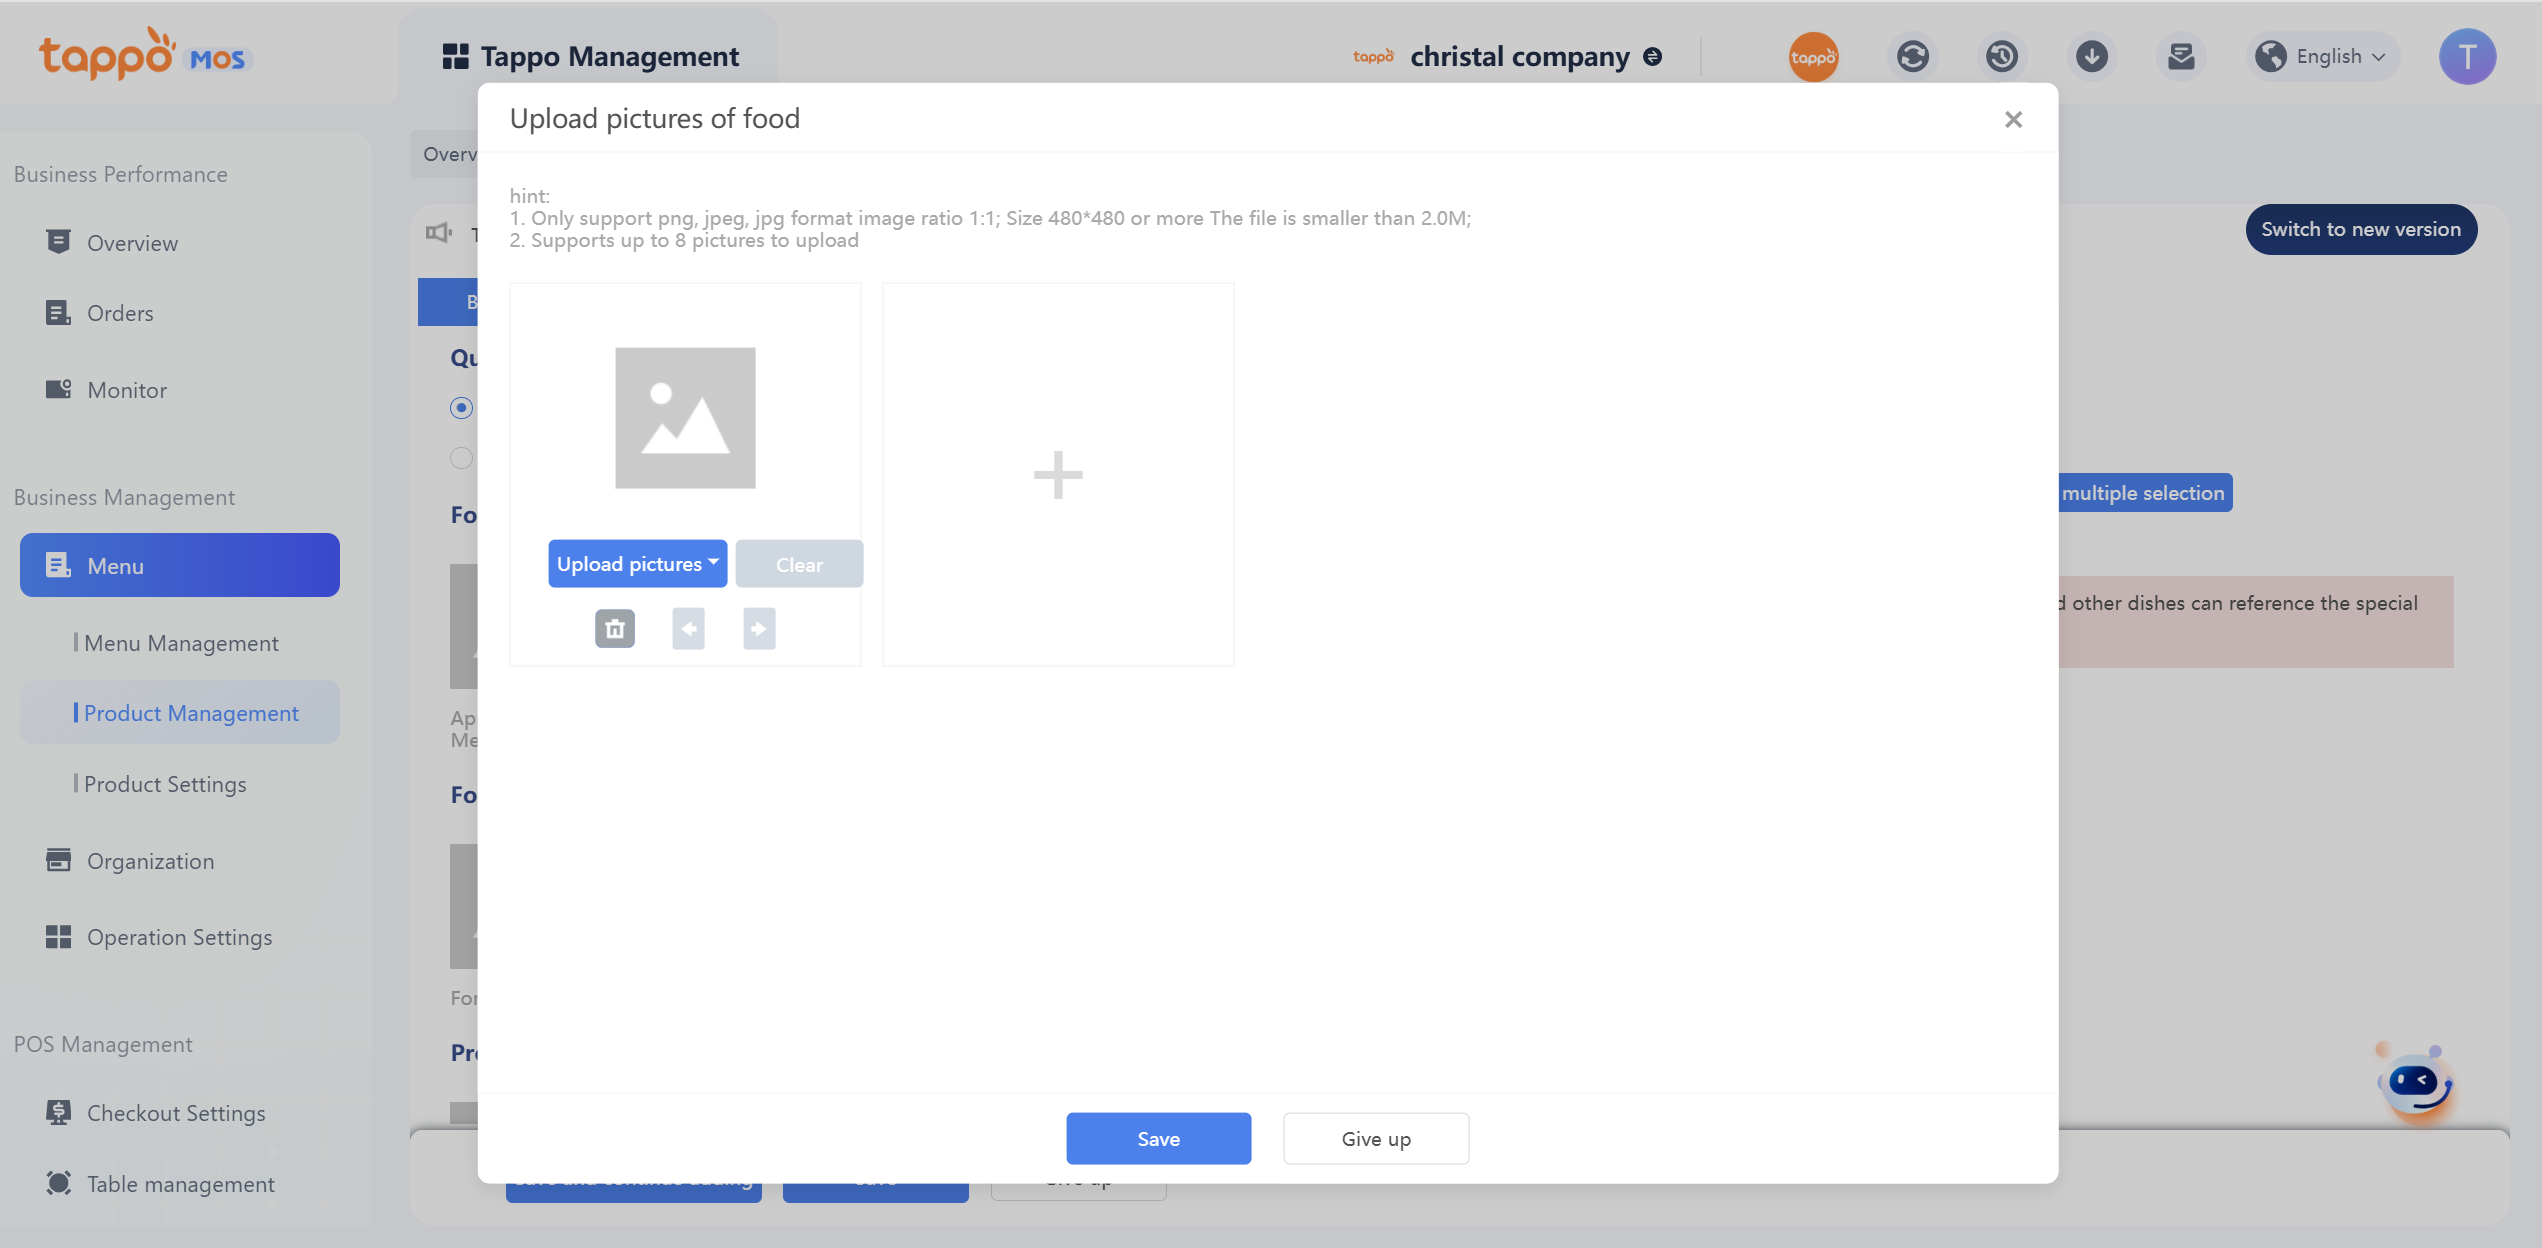
13. Dish Images: Used for self-operated channels and food delivery platforms. Only supports png, jpeg, jpg formats, 1:1 ratio, 480*480 pixels or higher, and file size less than 2.0M. Drag-and-drop upload is supported. Currently, users can upload up to 8 dish display images, as follows:
• Dish Video: Used for Ele.me. Only supports MOV, MP4 formats, 1:1 ratio, up to 15 seconds, and file size less than 30M.
• Supply Time: The supply time of the dish can be set to follow the business hours of the corresponding brand or store, or a specified time. Dates, days of the week, and multiple time periods can be set.
• Weighing Method: Used by delivery companies to arrange delivery vehicles based on dish weight. Select “Dish Weighing” if the entire dish is weighed, or display the weight input for specification items if weighed by dish specification.
• Raw Materials: Required for synchronization to some food delivery platforms.
• Packaging Cost: Used for cost-profit report calculations.
• Raw Material Cost: Used for cost-profit report calculations.
• Packaging Cost: Used for cost-profit report calculations.
• Fresh Ingredient Dish: Used to mark fresh tax-exempt dishes.
• Attribute Tags: Mark dish attributes for big data analysis.
• Dish Identifier: Mark dish types, such as hot food and retail, to determine whether to display the dish on each client.
• Initial Dish Commission: The dish commission agreed between the intermediary and the store.
• Dish Tax Rate: Used for invoicing with different tax rates for each dish.
• Tax Classification Code: Required if the dish tax rate is filled in; hidden if the dish tax rate is blank.
• Production Time: Can record the production time of the dish for the kitchen system.
• Valid Membership Level Setting: Used for self-operated channels. If enabled, it is only visible to the corresponding membership level. For example, if set to be visible to premium members, other membership levels will not see the dish when viewing the menu, and it only takes effect for premium members; this setting can be modified in different menus.
• Dish Tags: Set dish tags under the dish object set in Tag Management.
Import/Update Food
In the corresponding brand’s dish library, you can import/update the list of dishes to add new dishes.
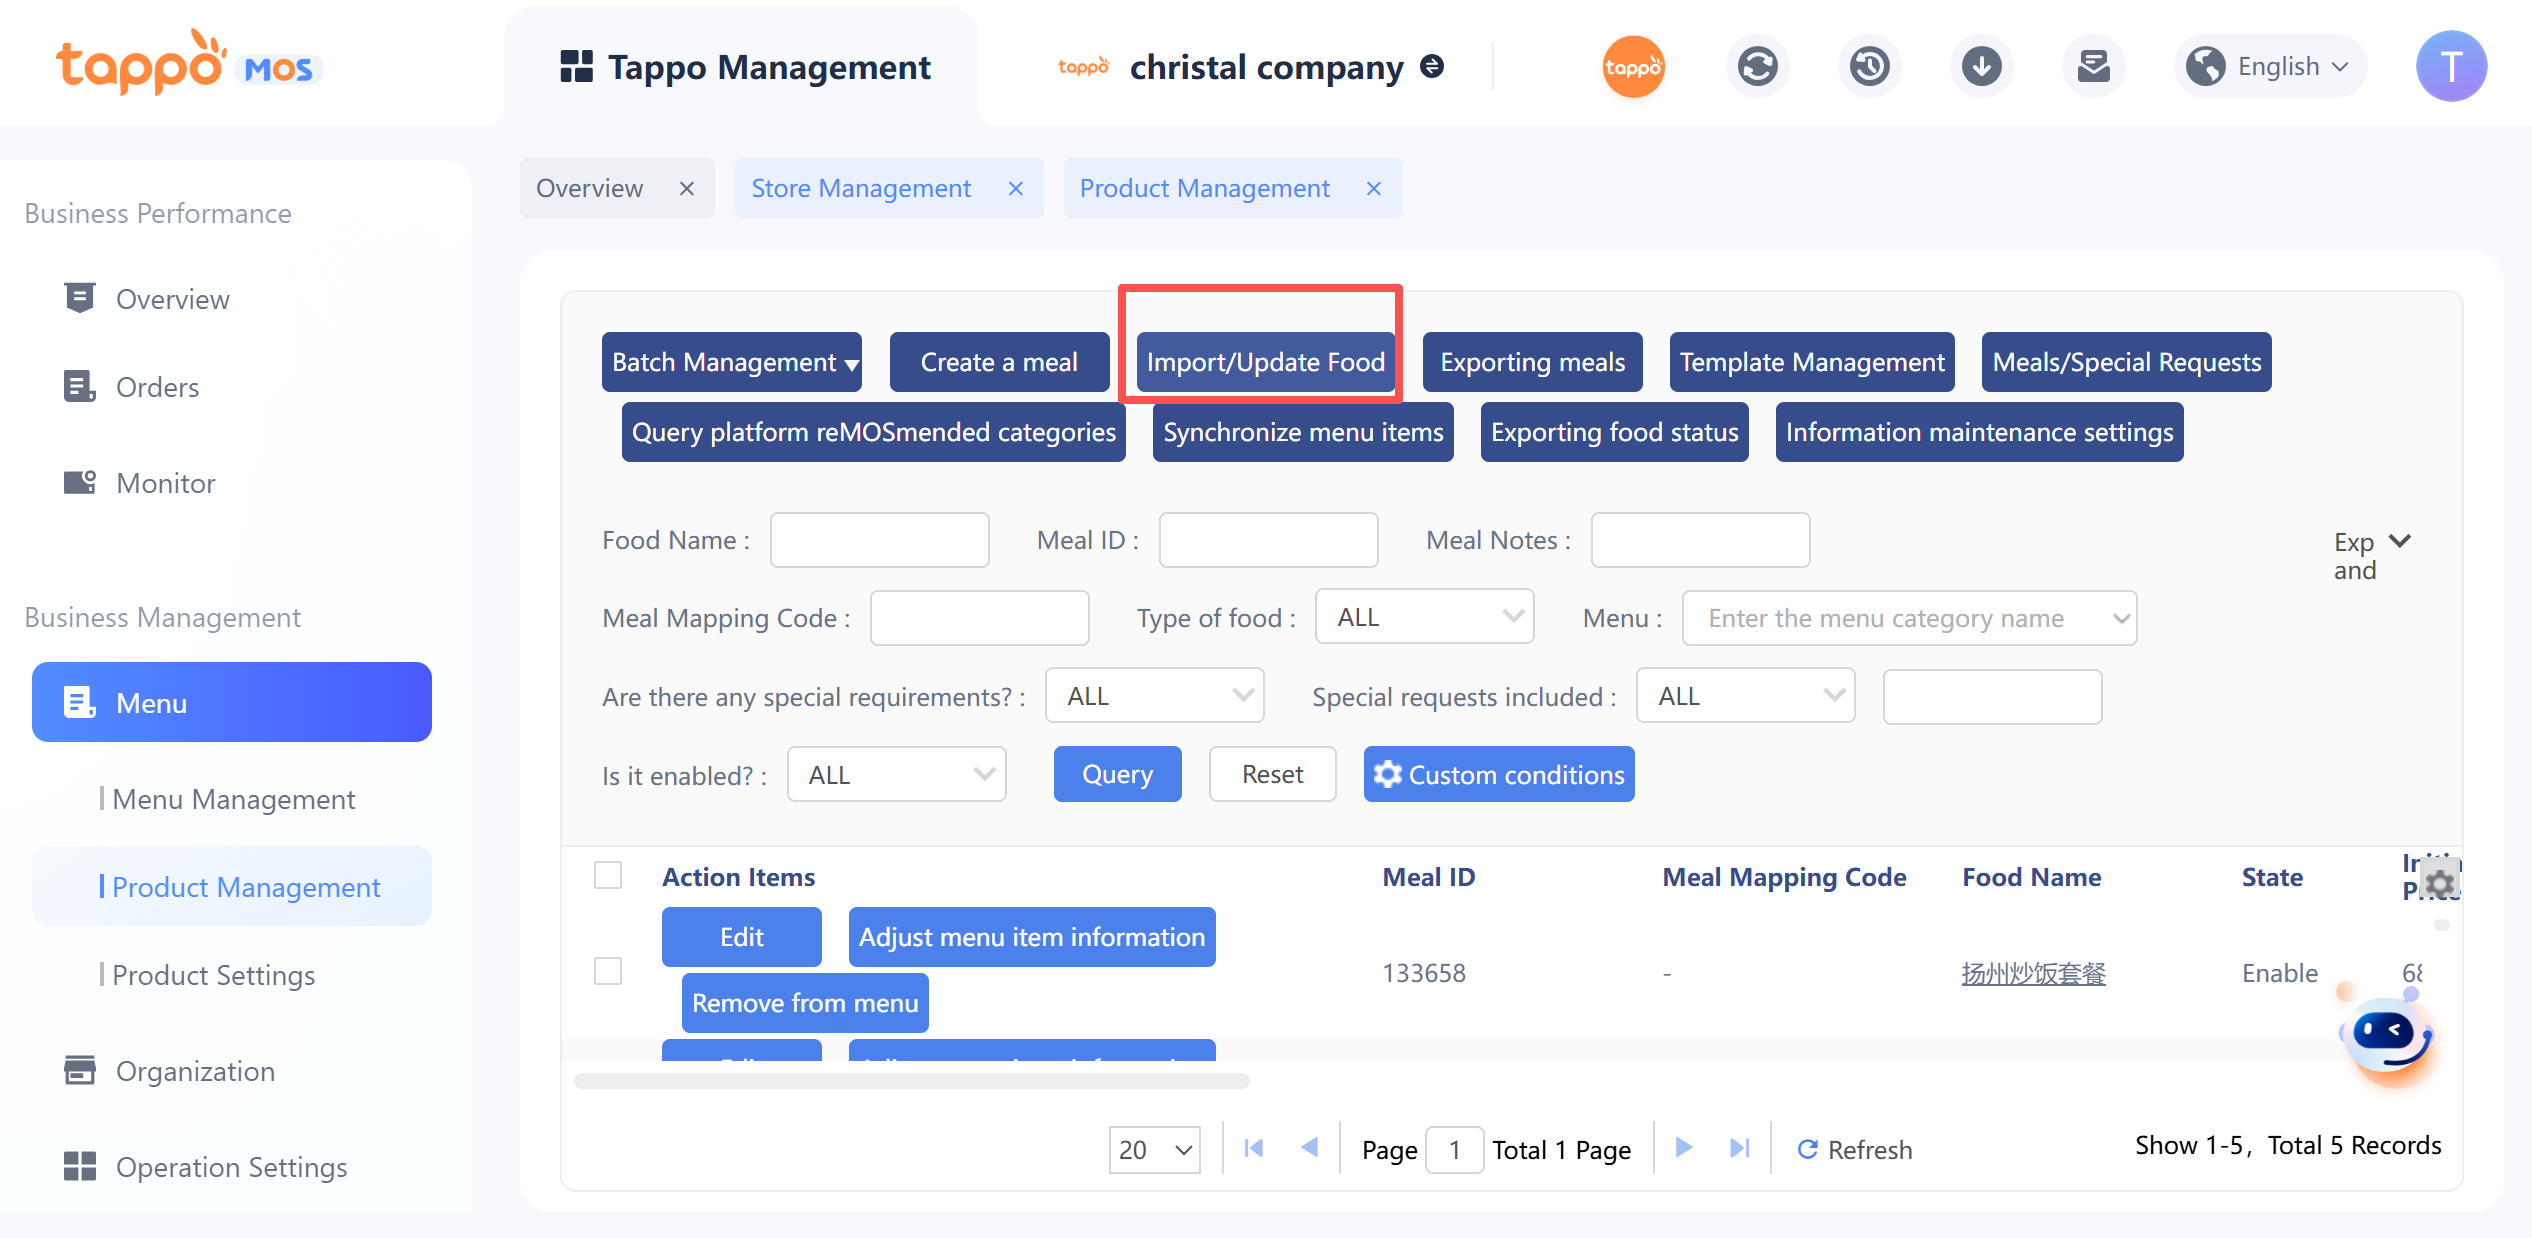
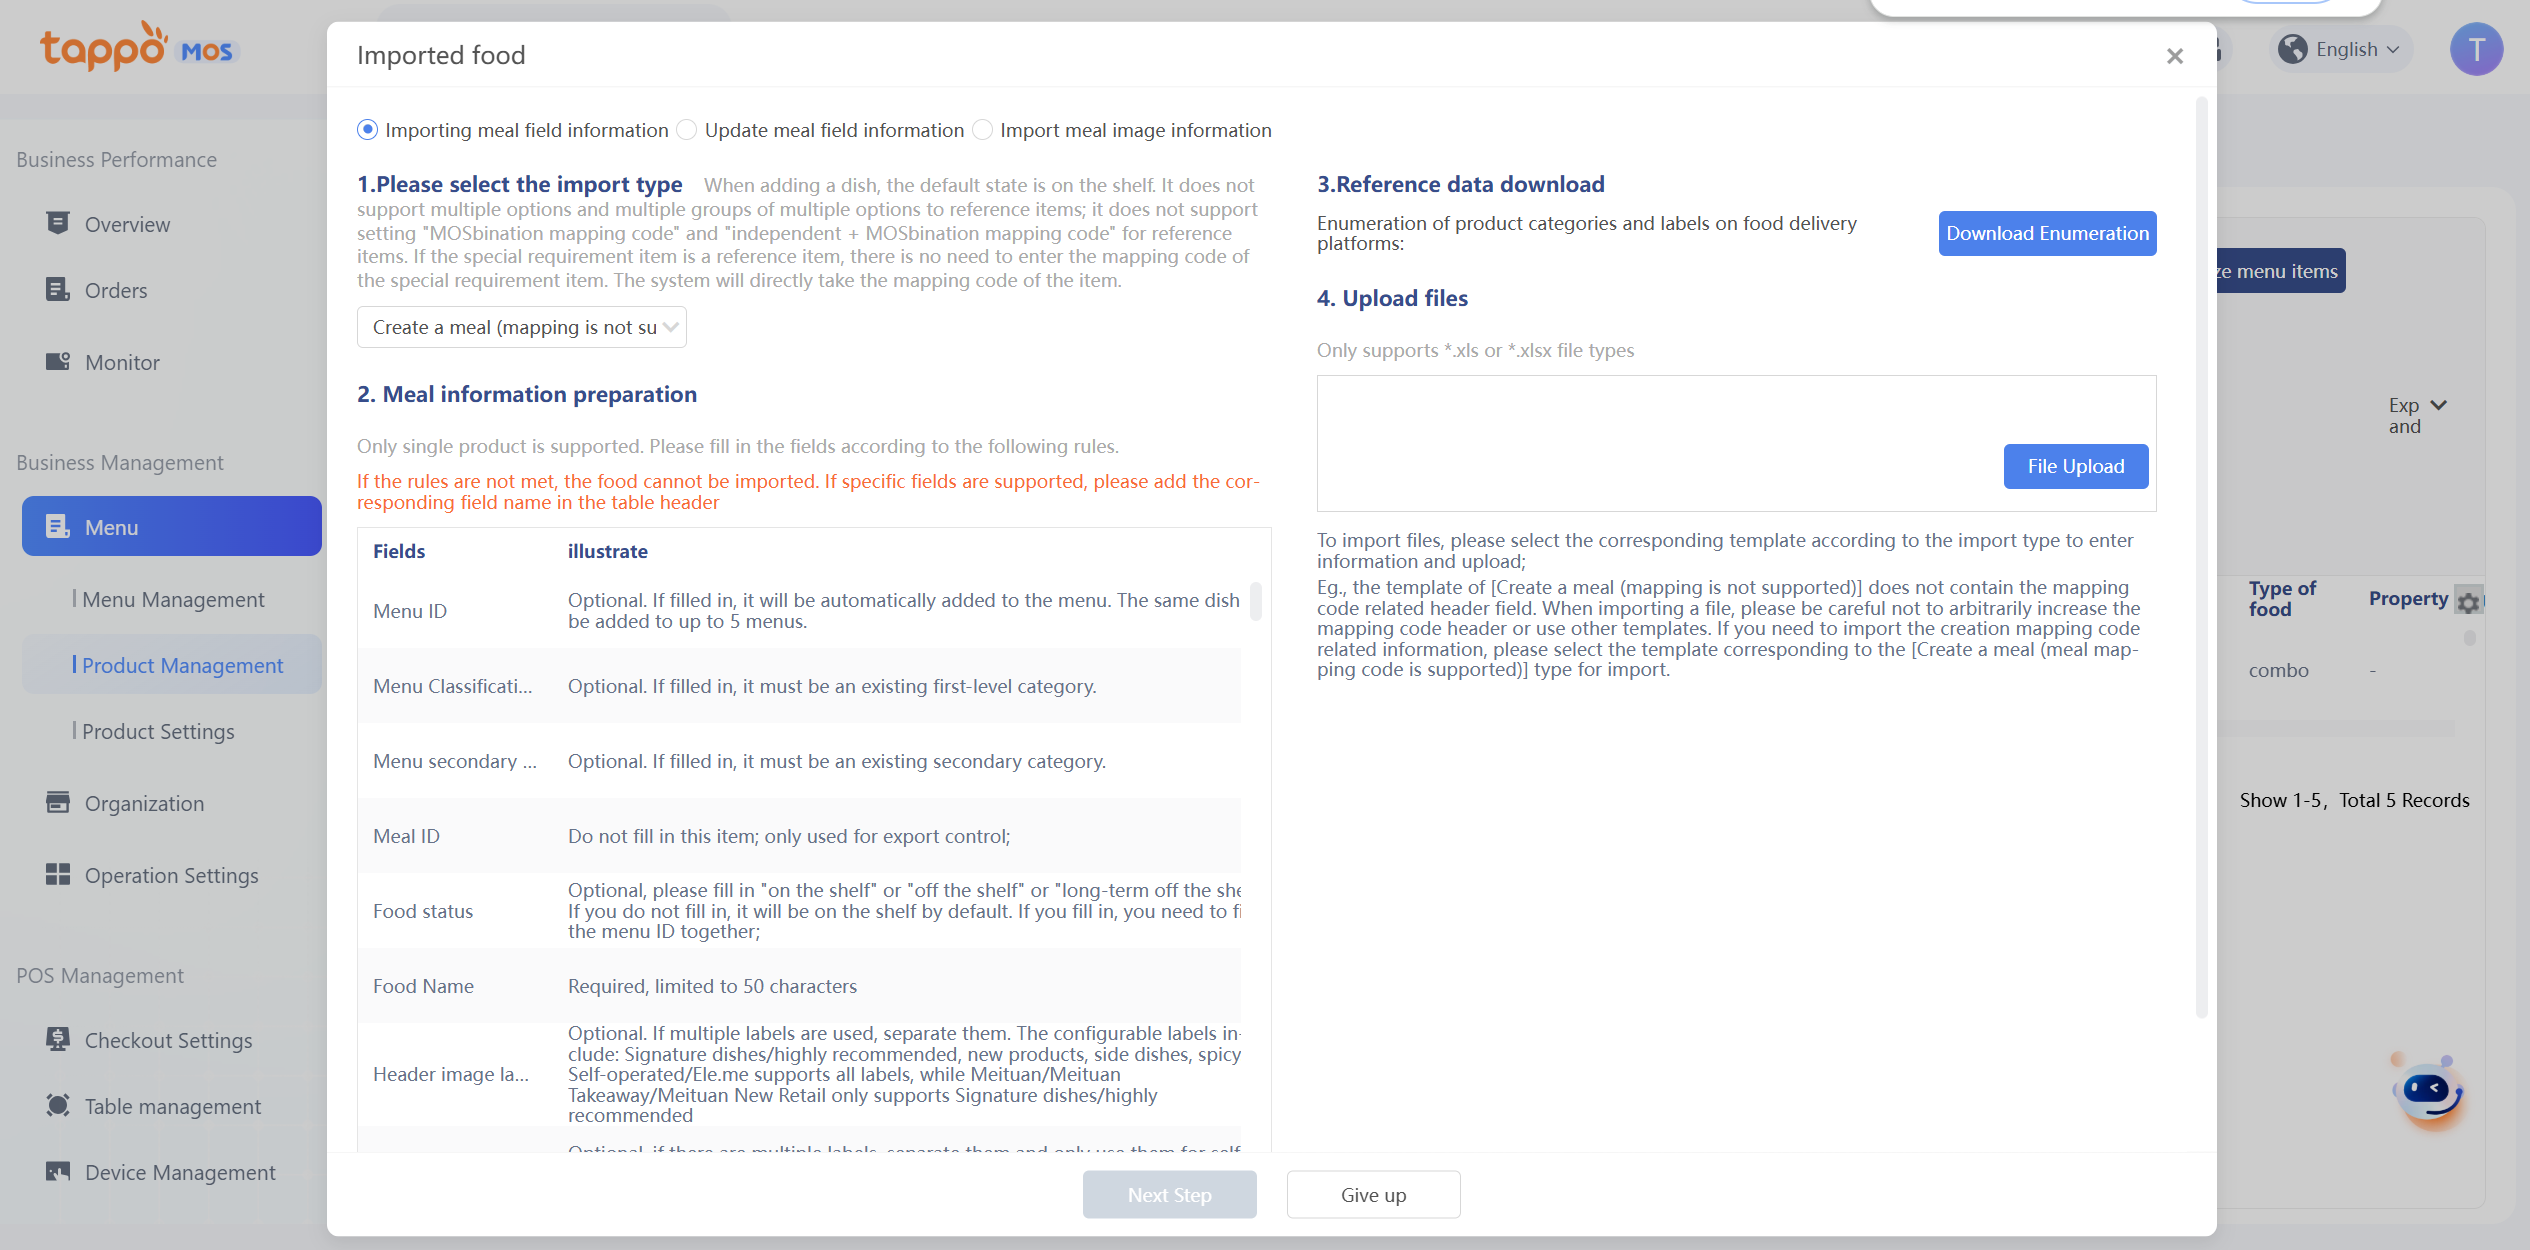
1. Click Import Dishes, select Import Dish Information or Update Dish Information. In the import dish window, you can download the import or update template.
2. Fill in the dish information to be imported according to the template, upload the import or update template. After uploading the table, you can proceed to the next step. If the system supports customized import fields, they can be added directly in the template.
3. You can preview whether the imported table data can be imported, and set dish images for individual dishes separately. Batch import or separate import can be performed in the list.
Supplement:
• Imported dishes are enabled in the dish library.
• The maximum number of dishes that can be imported at one time is 1000; any excess will be ignored.
It supports importing and updating dish information. Select the dish fields to be updated.
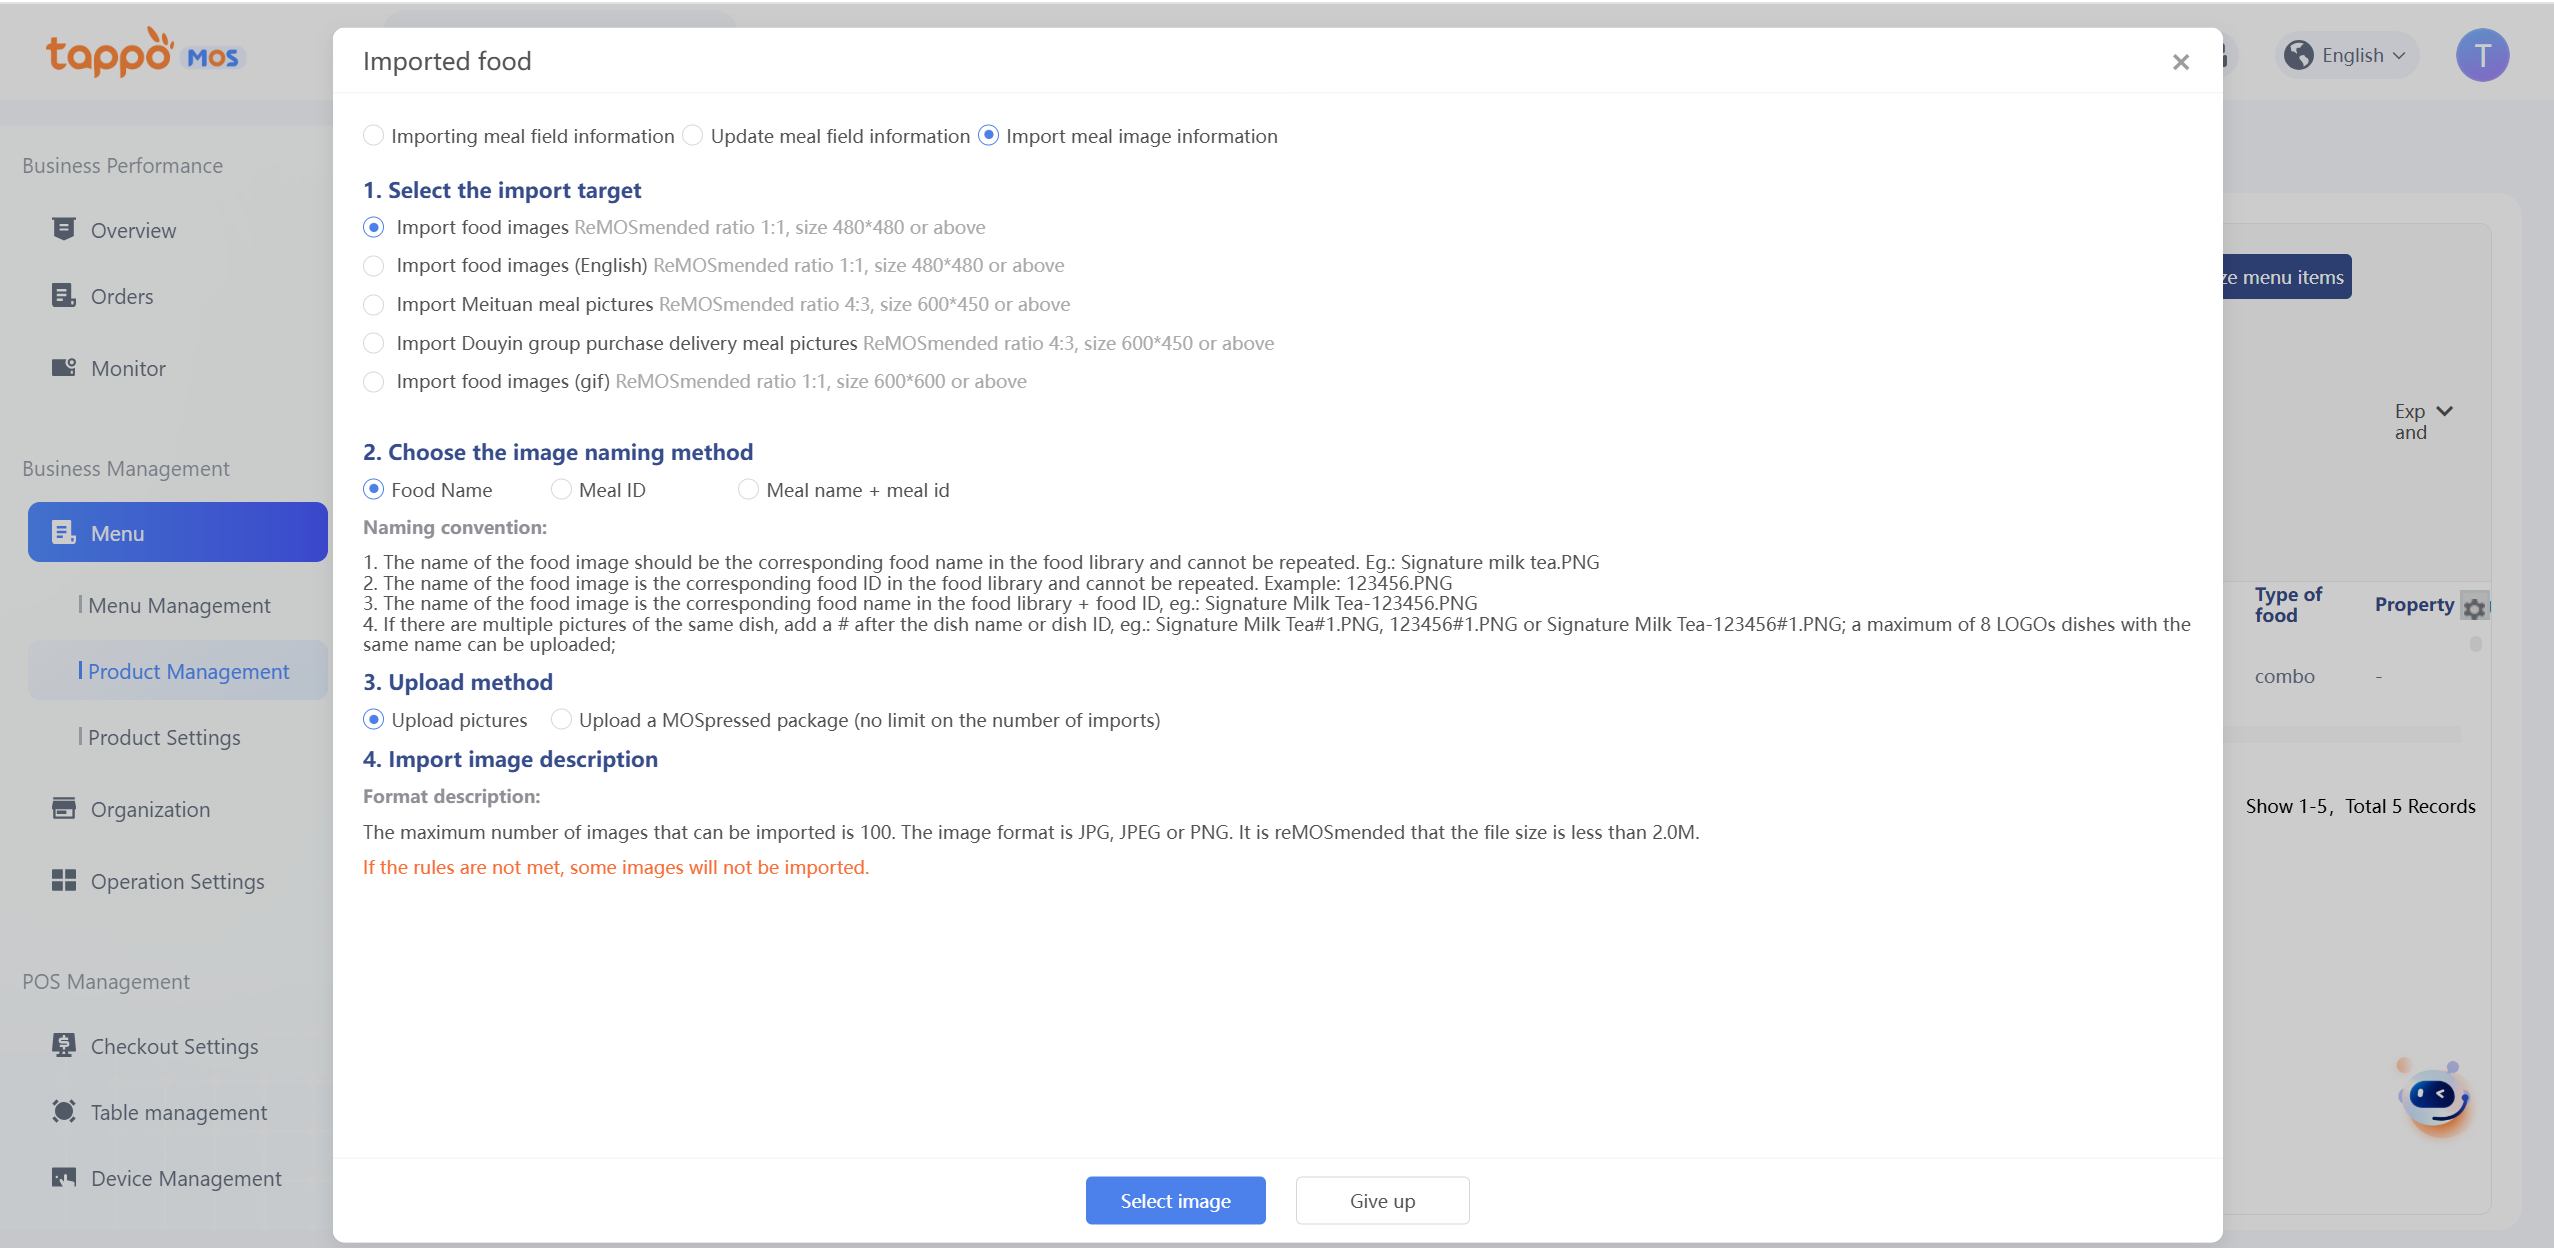
Select the type of dish images to be imported (logo or picture), select the dish images to be imported. Note: The name of the image is the name of the dish in the dish library, and the image size must meet the corresponding requirements. After selecting the dishes, the dish images to be uploaded will be displayed, and the system will verify whether the dishes meet the requirements and give corresponding prompts. Only when all uploaded images meet the requirements can they be uploaded.
Note: For dish logos, a maximum of 8 images can be uploaded per dish. The naming rule is Dish Name#1, for example: Signature Milk Tea#1. The corresponding images will be imported into the logos of all dishes named Signature Milk Tea in the dish library and sorted by the # number.
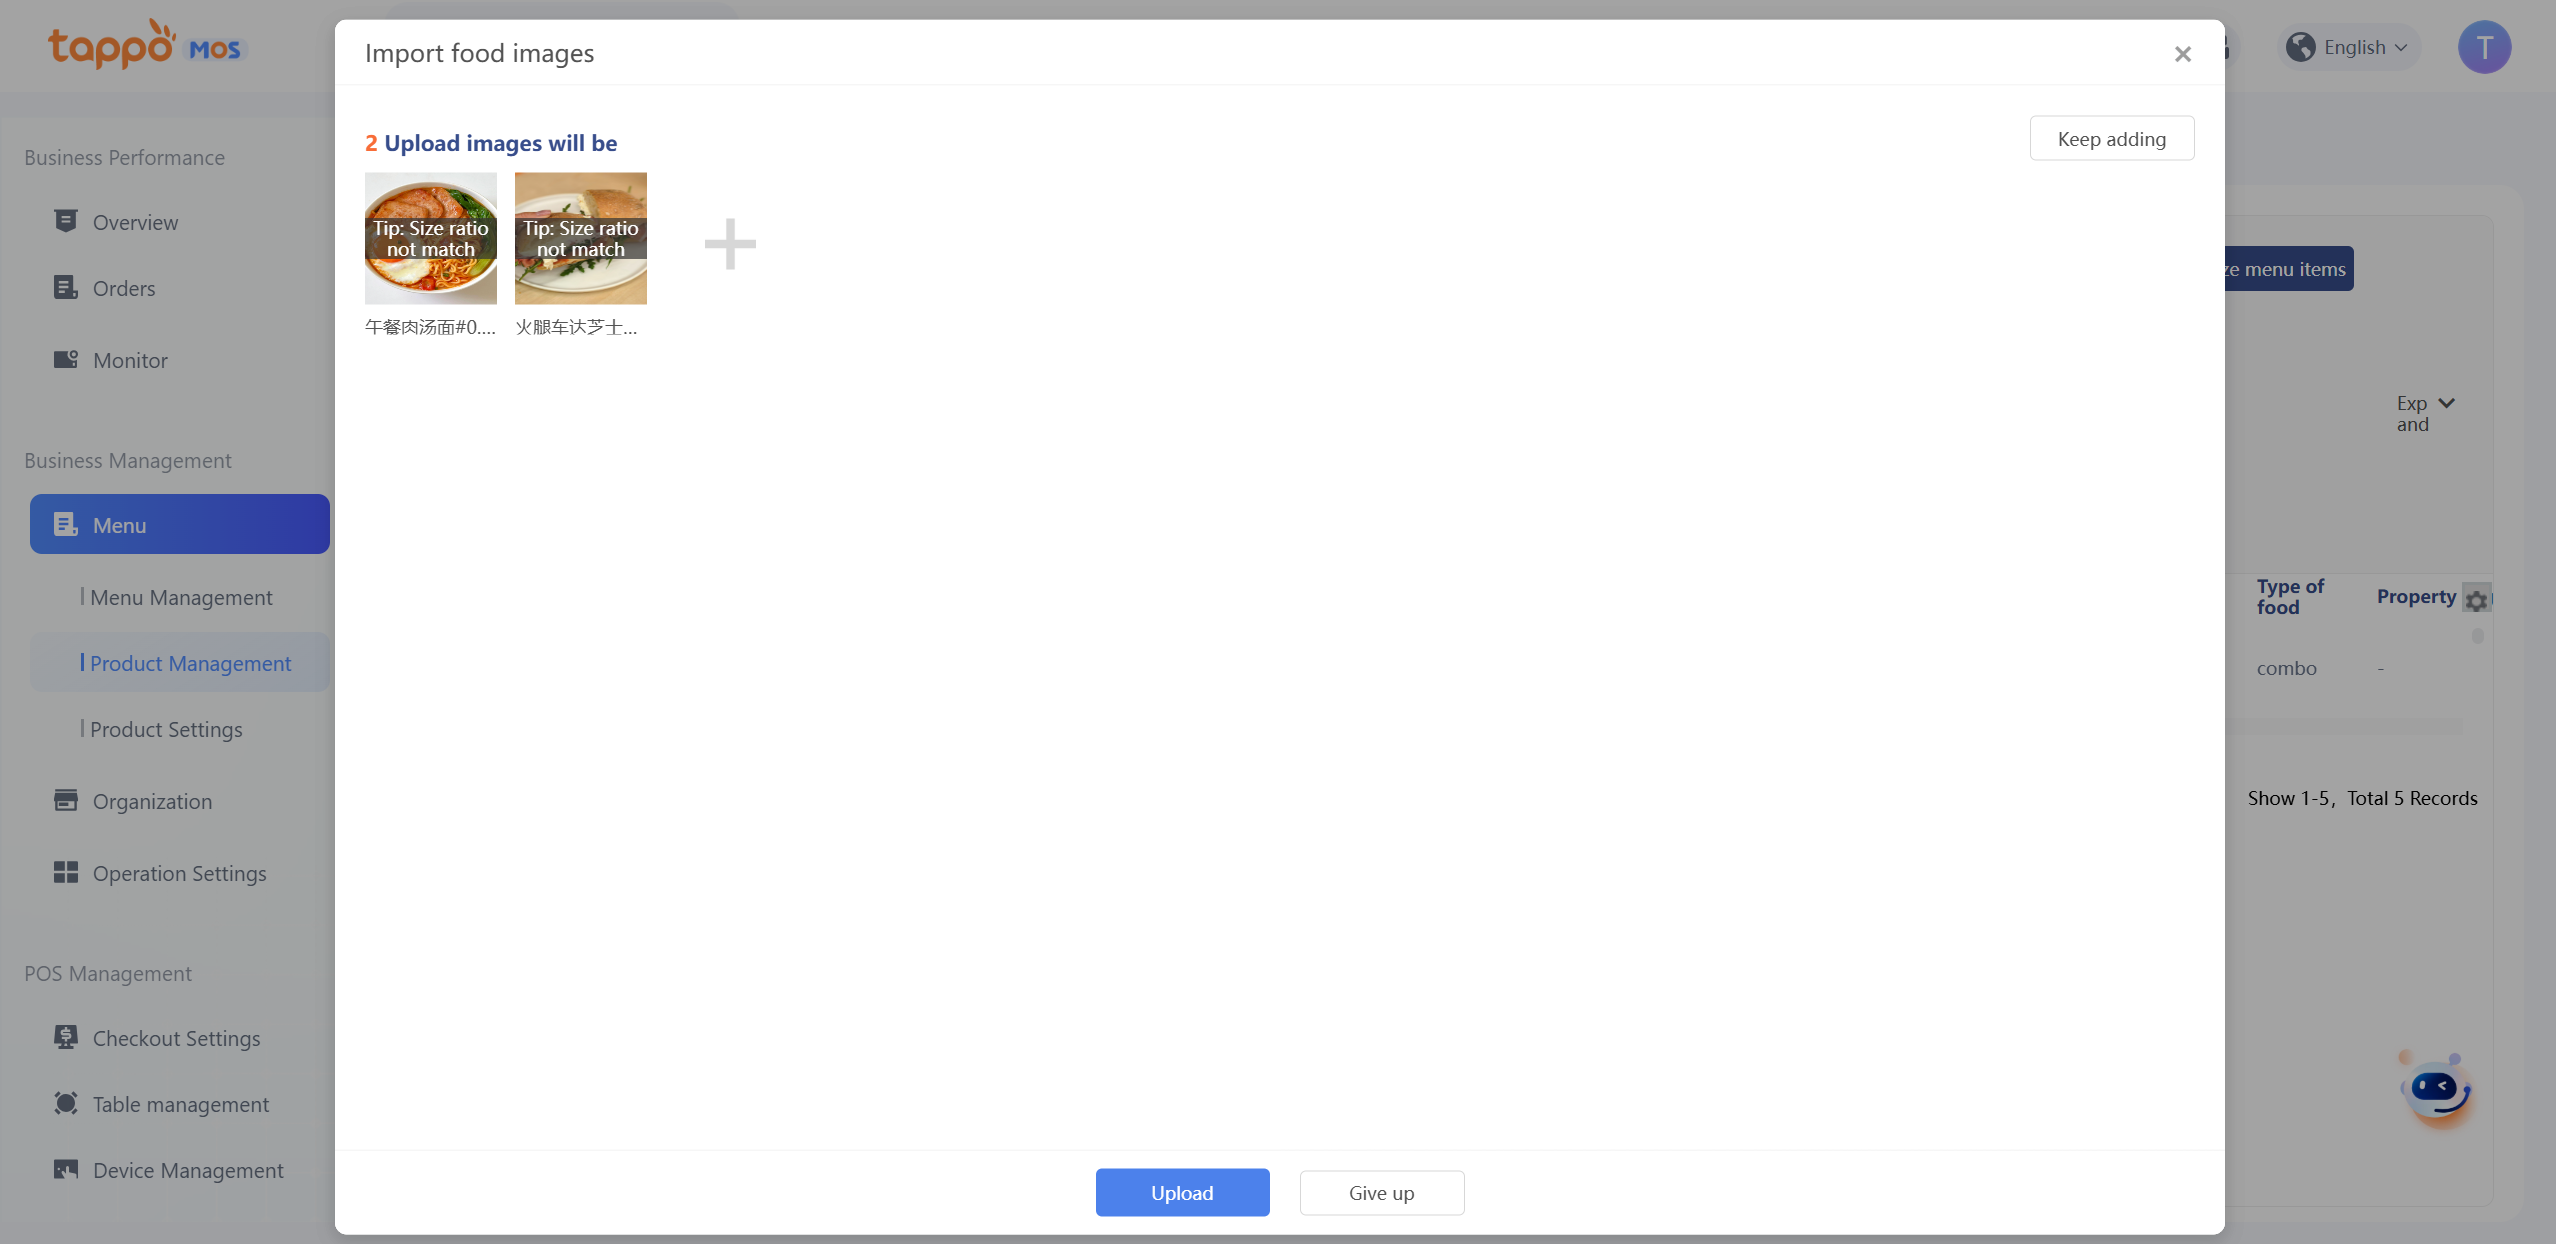
After verifying the dishes, click [Upload] to display the upload progress and results, then click Import.Click [Complete] to return to the previous upload interface and continue importing unimported images. Note: Multiple images can be uploaded, but a maximum of 50 images can be imported each time.
Template Management
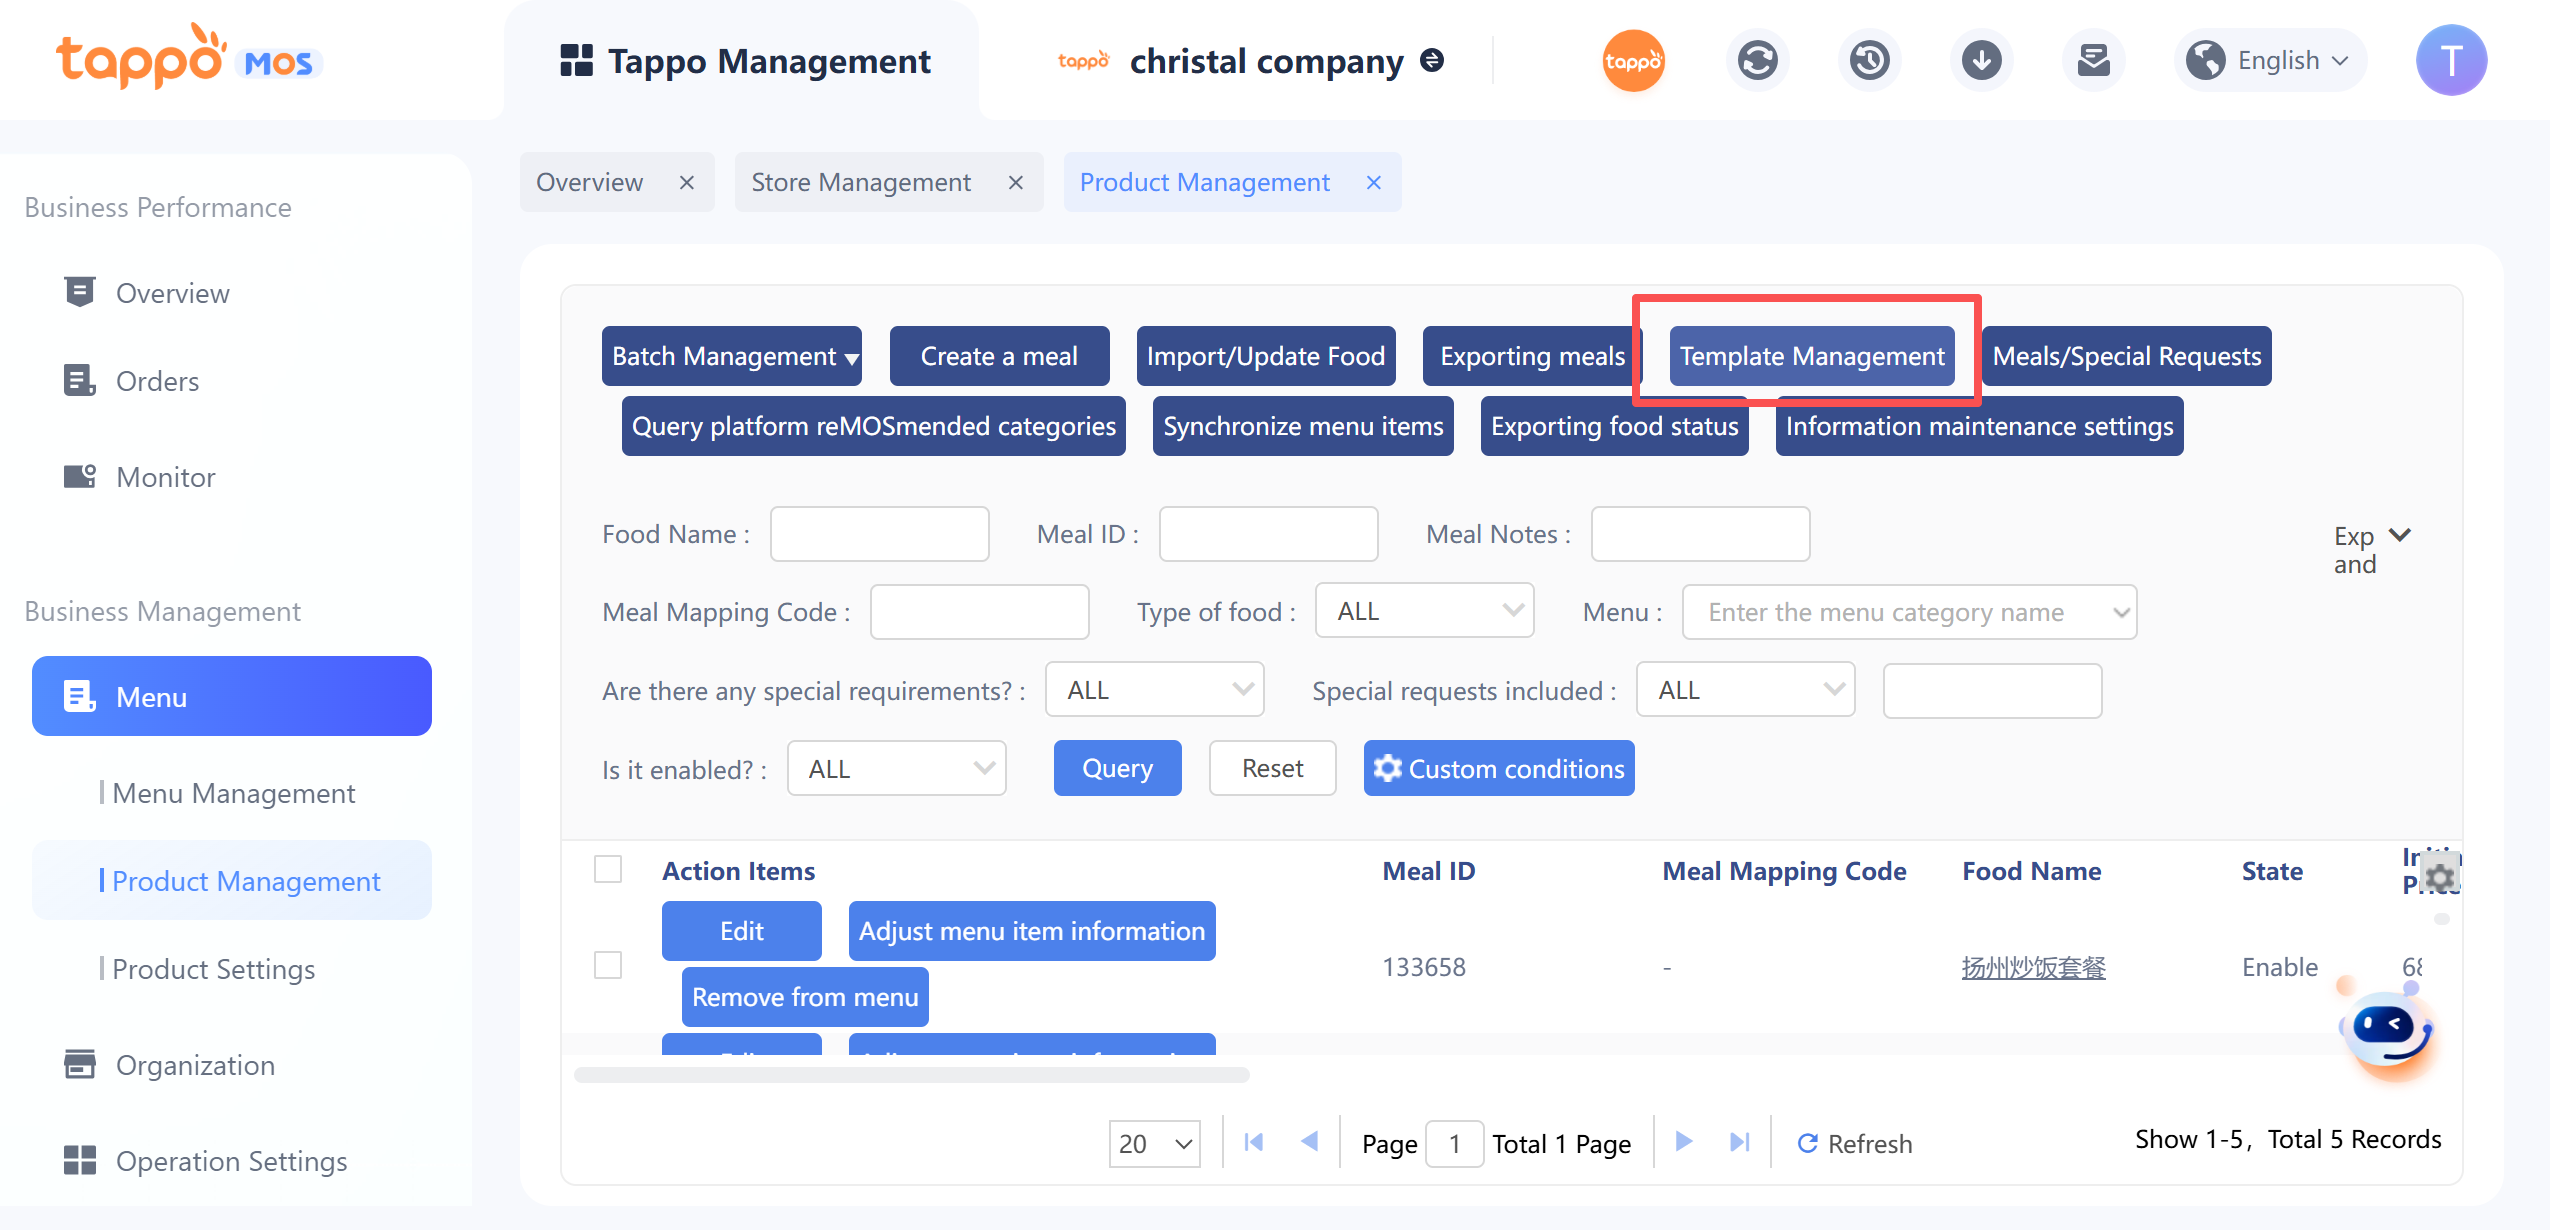
Special Requirest Template Library
Special requirements for single dishes can be created as special requirements templates. When editing special requirements for dishes, you can directly reference the template content:
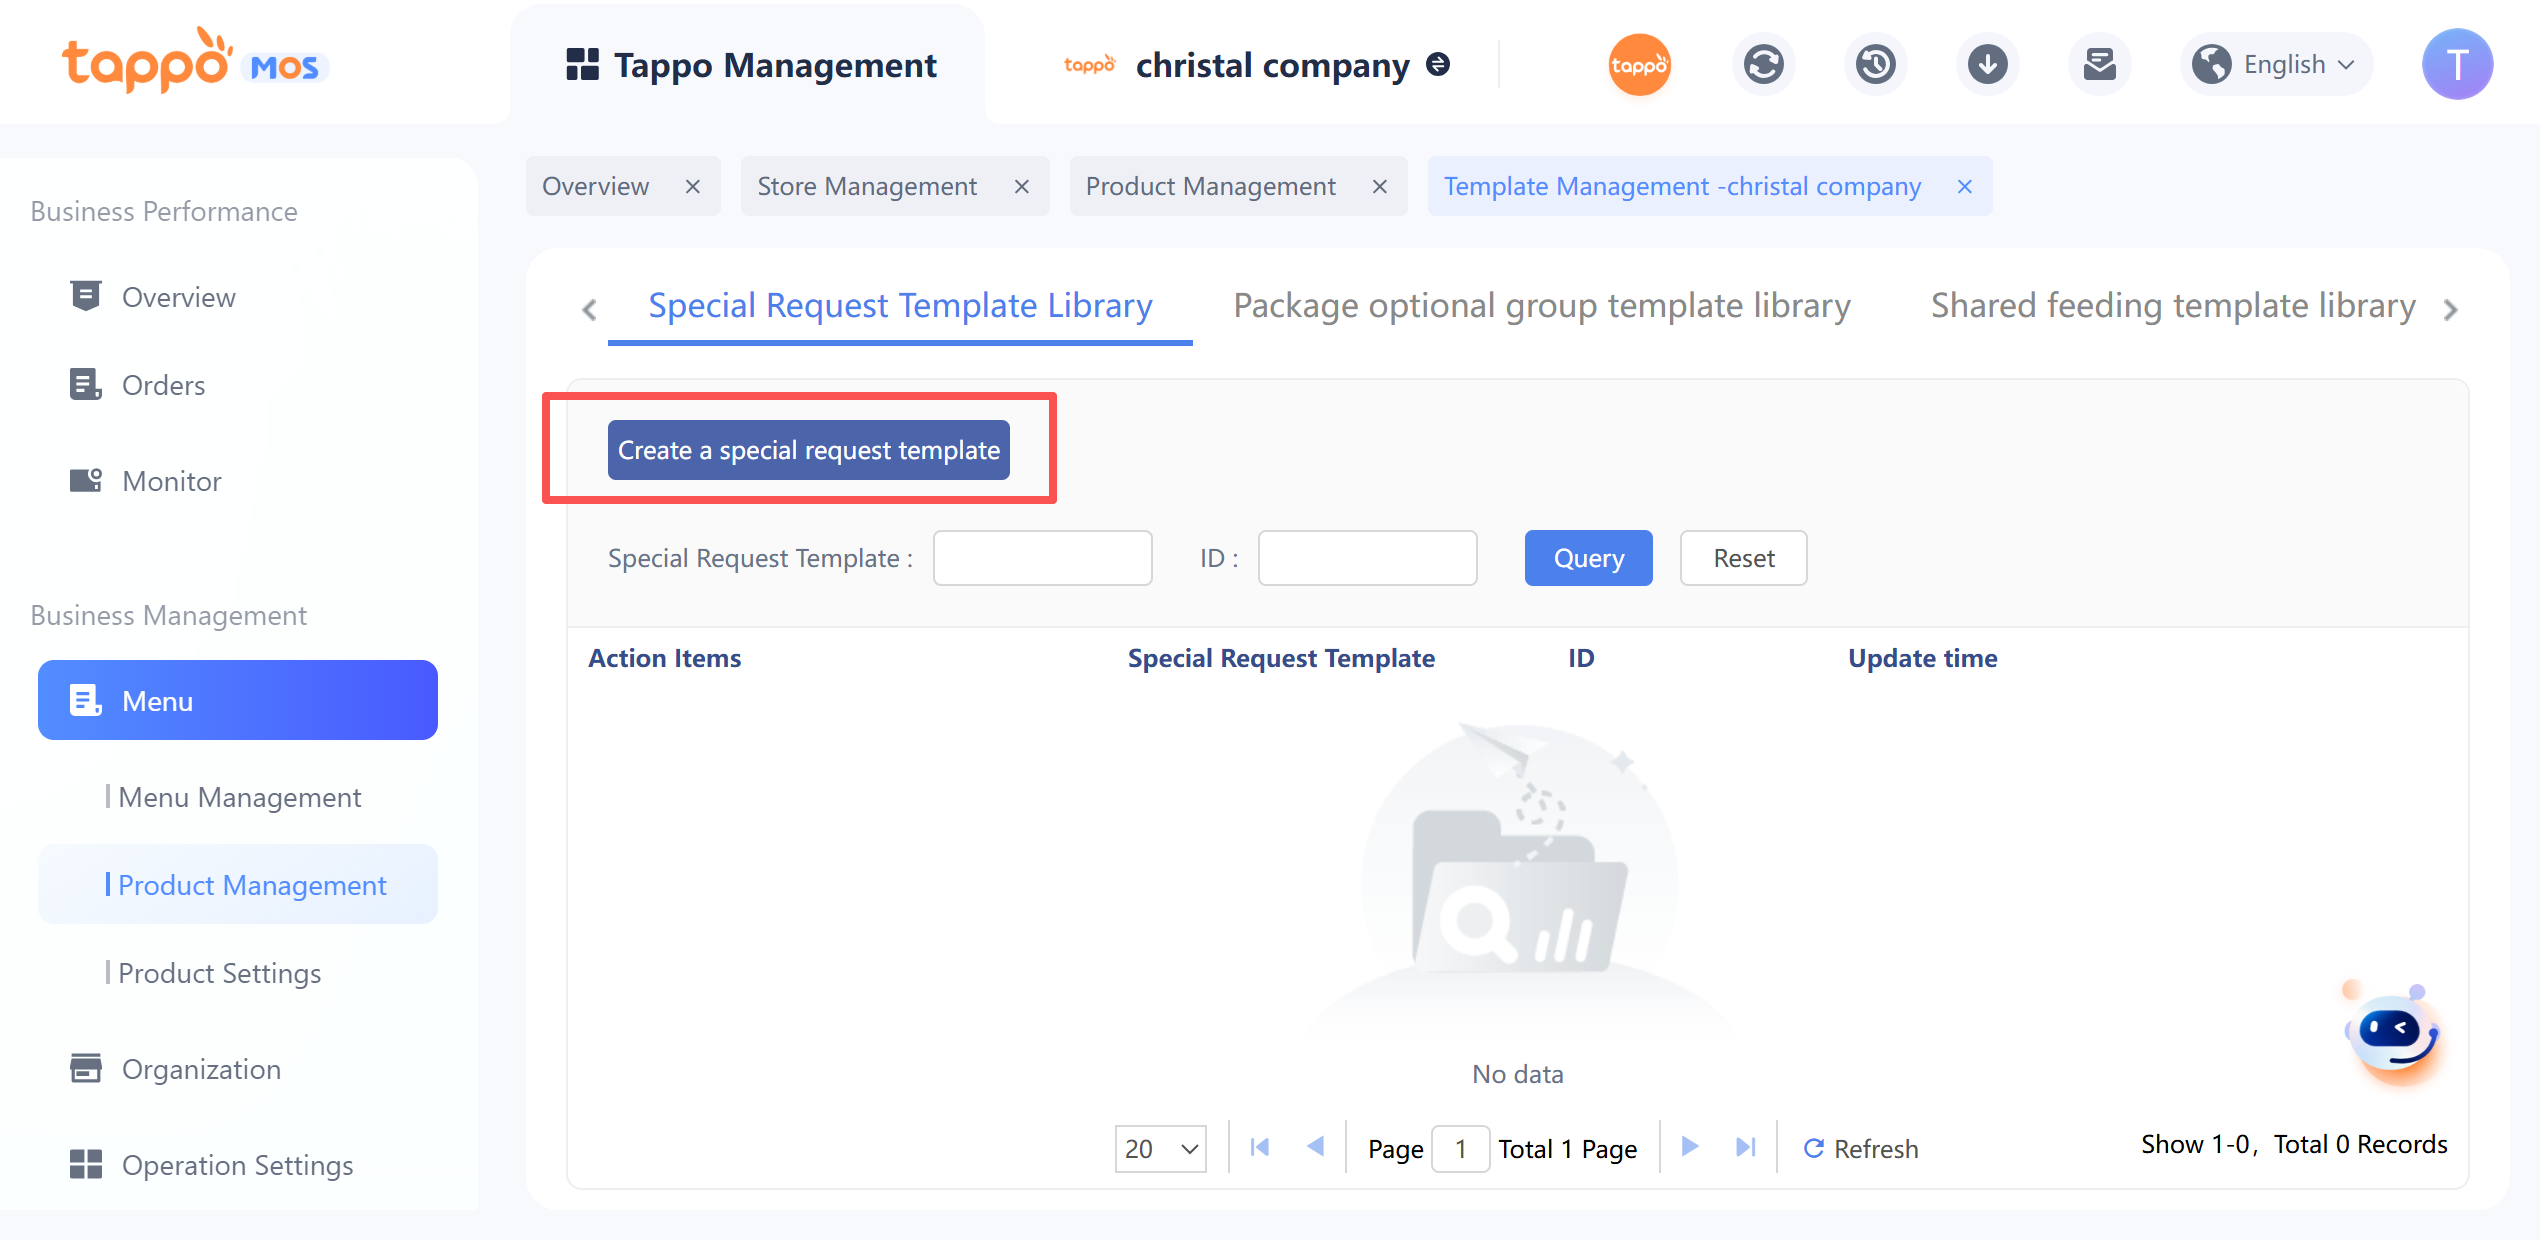
1. Click the [Create Special Requirements Template] button to enter the special requirements editing page.
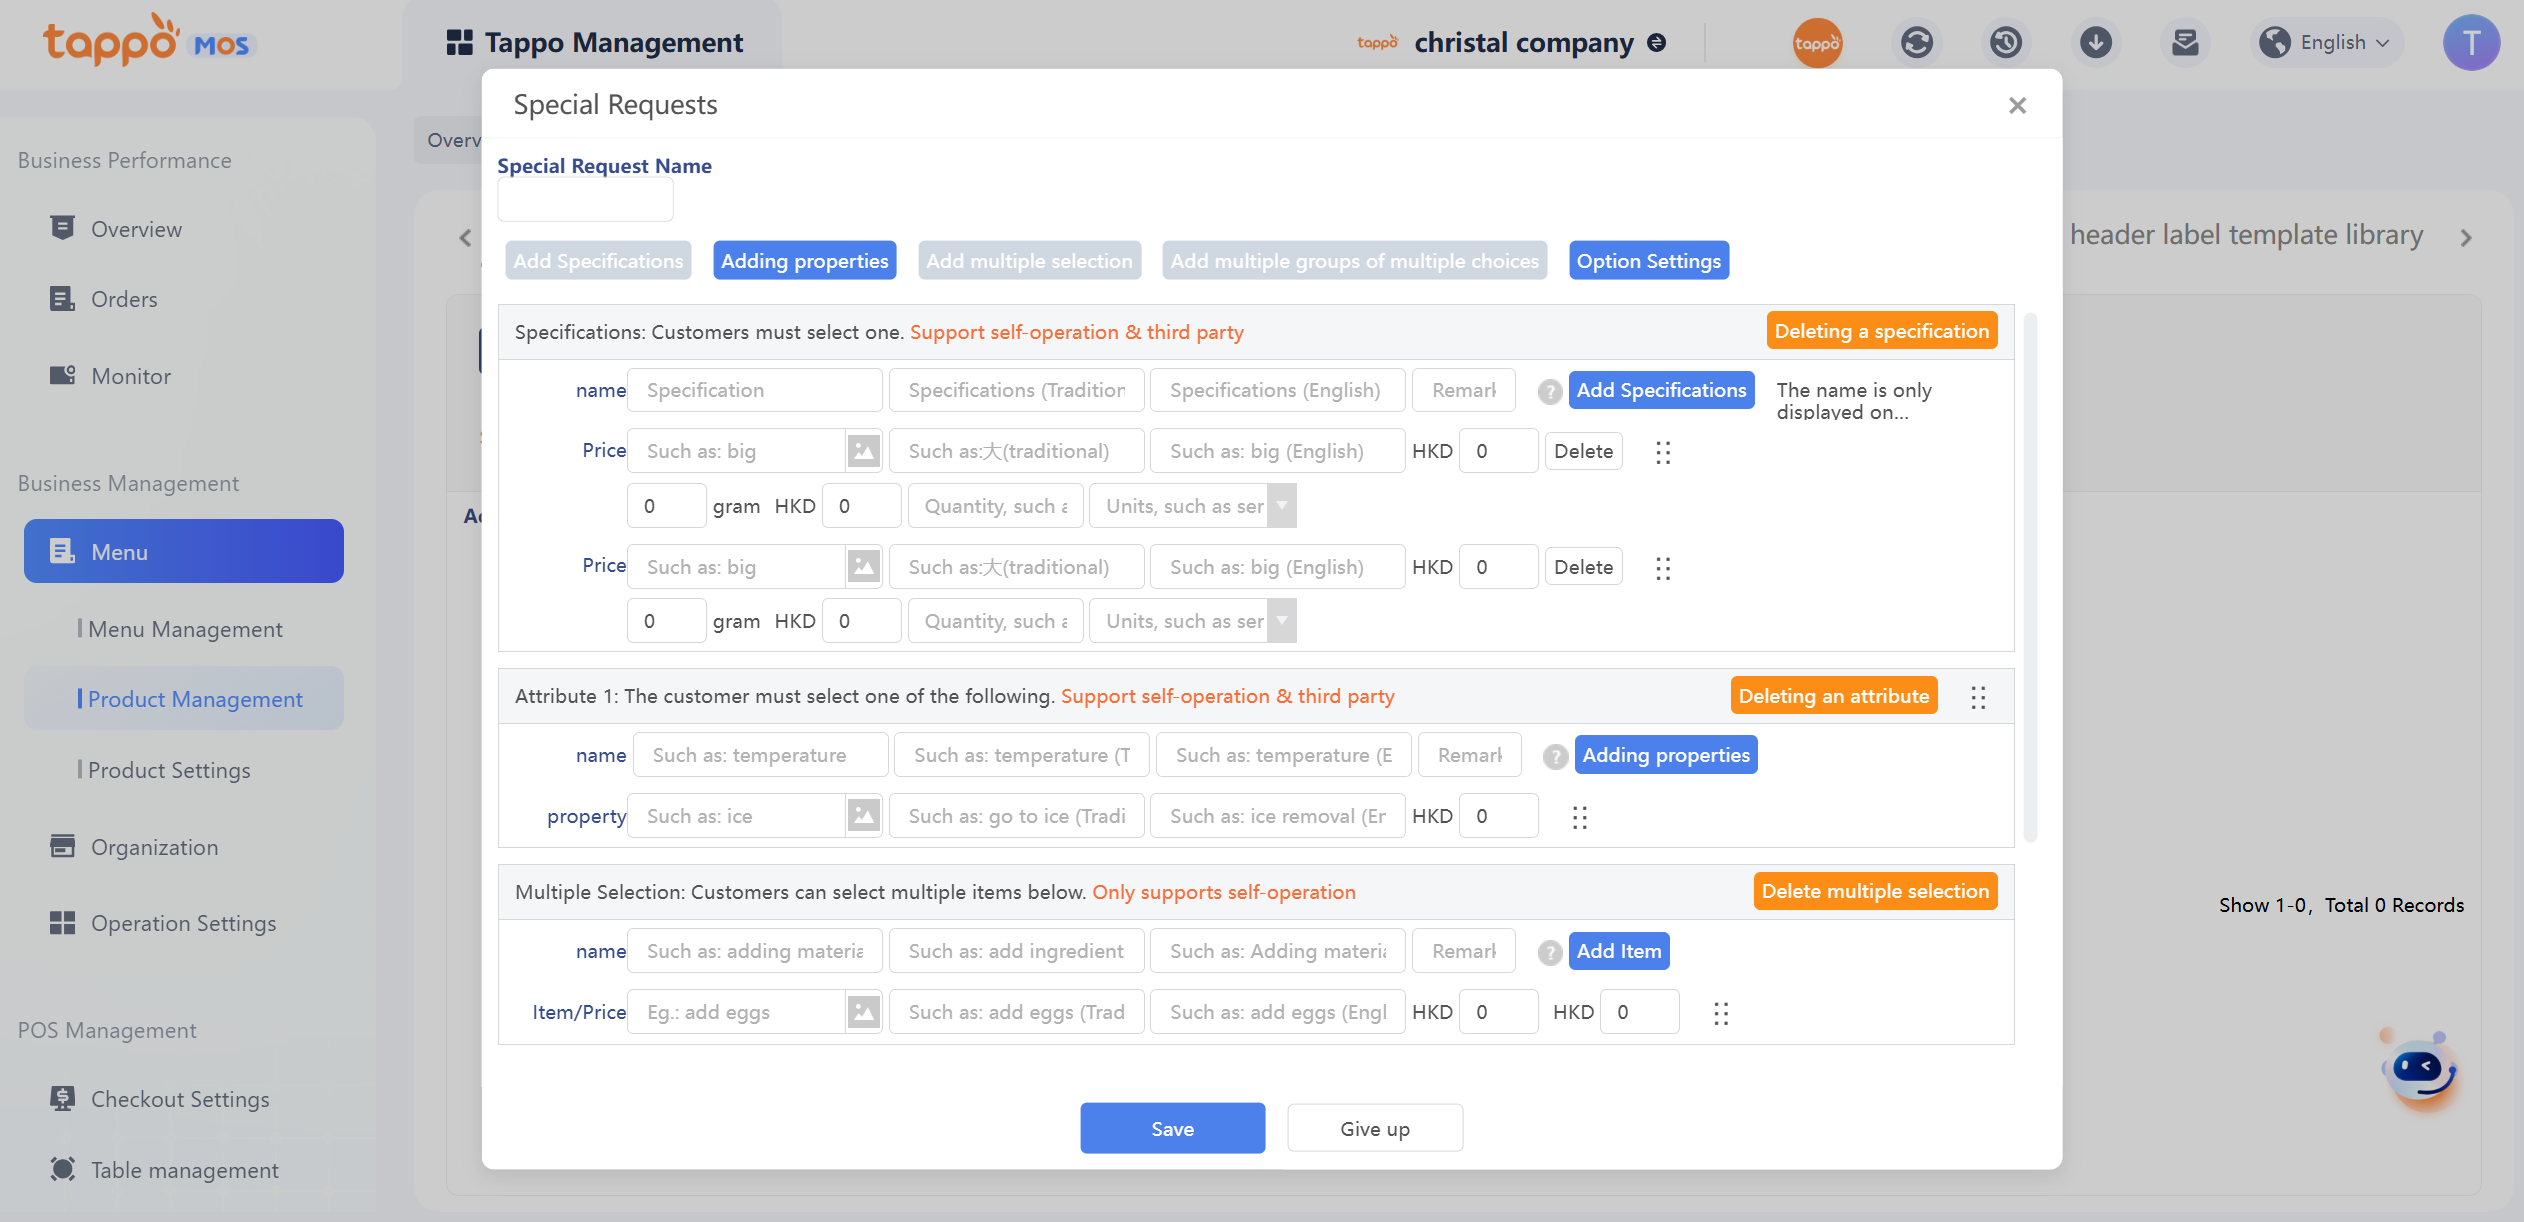
2. Fill in the name of the special requirements template, set the template’s specifications/attributes/multi-select options (same as editing special requirements for single dishes). Specifications can be set with UPC codes and dish weights.
3. Click [Save], and it can be referenced when editing special requirements for single dishes.
Meanwhile, you can maintain the brand’s shared toppings in the shared topping library. Shared toppings are defined as: if a topping is used in multiple dishes of a store and the inventory is managed uniformly, it can be set as a shared topping.
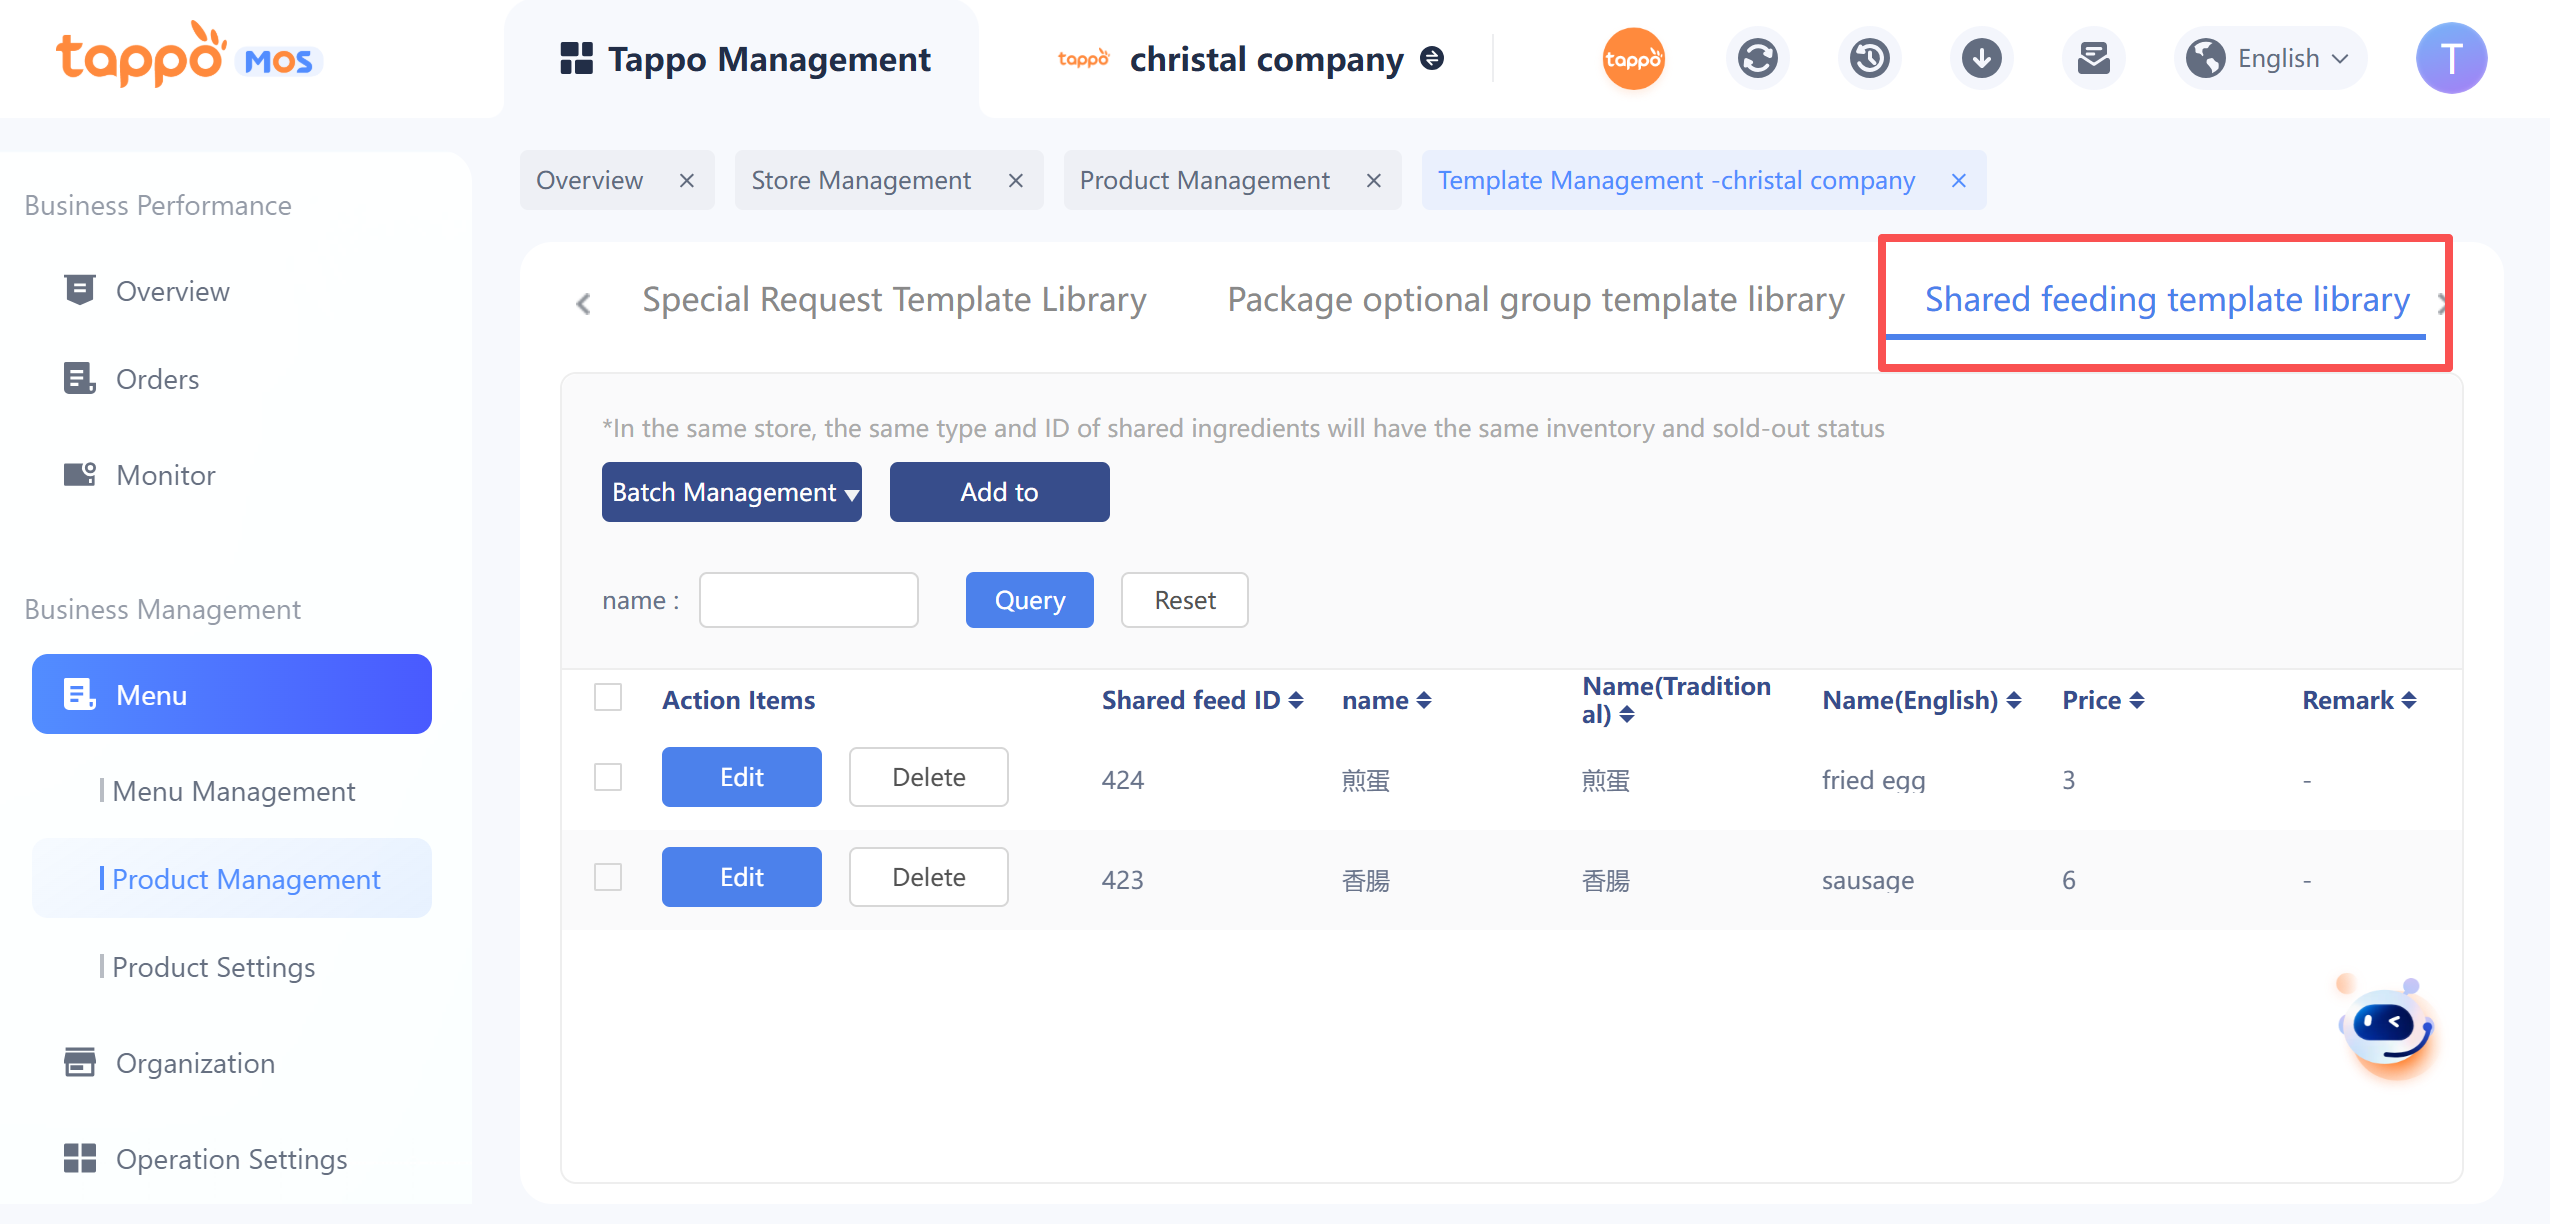
Shared Feeding Template Library
Click [Shared feeding template library] to enter the shared topping library and view all shared toppings in the brand’s shared topping library.
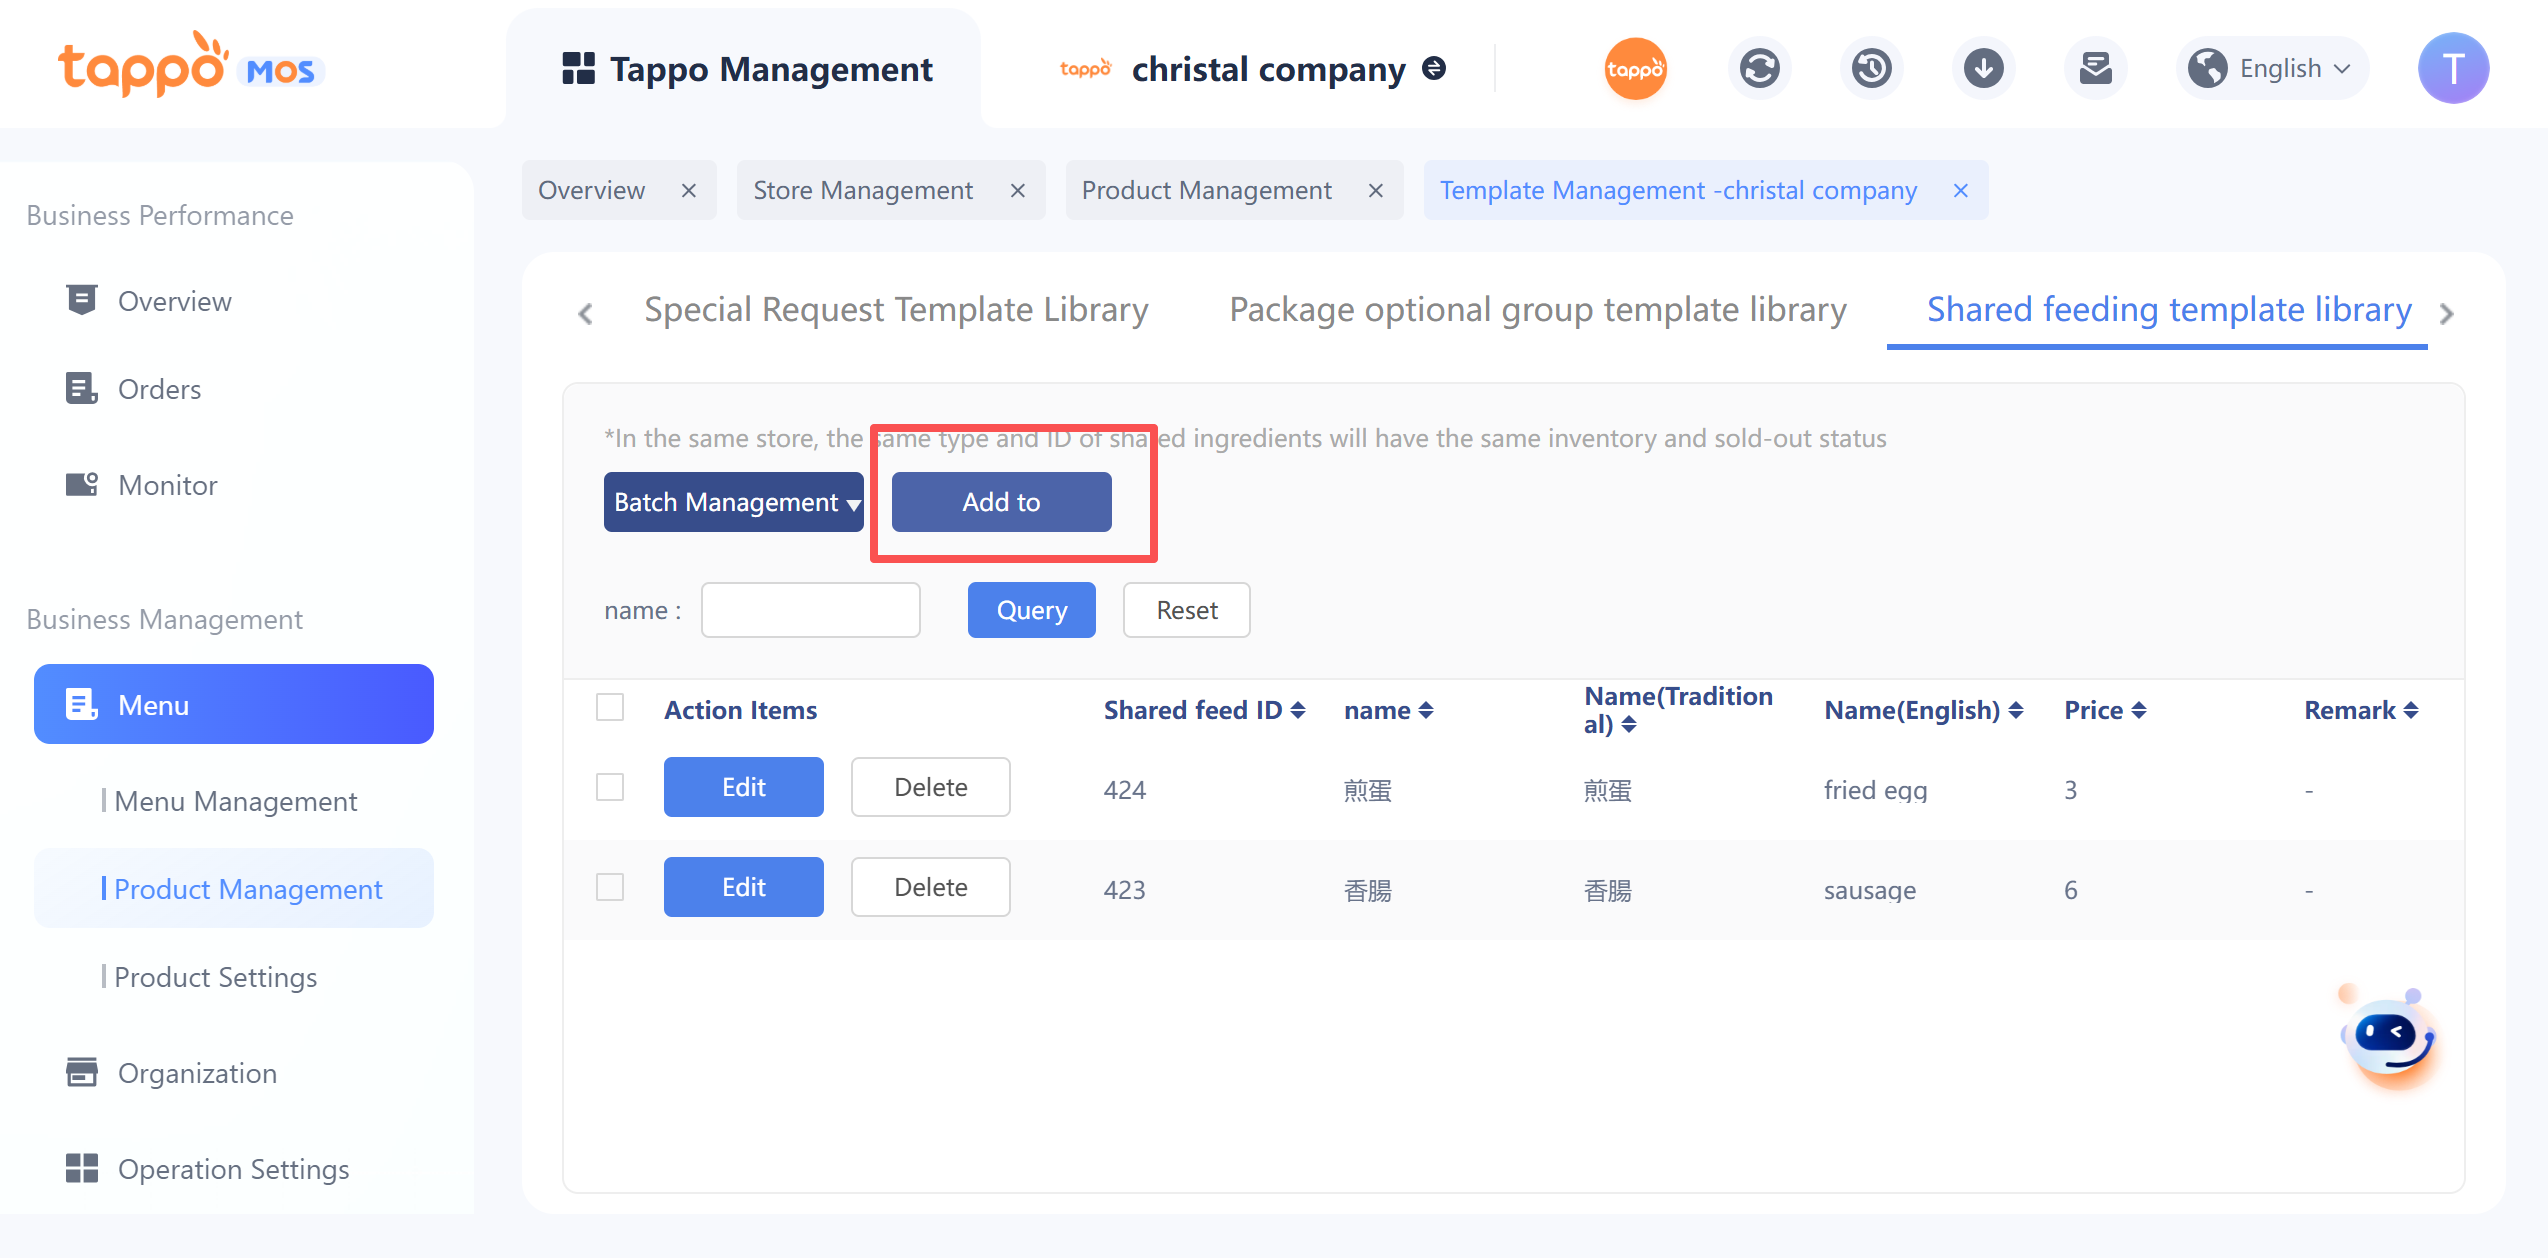
1. Click the [Add to] button and fill in the shared topping information as required.
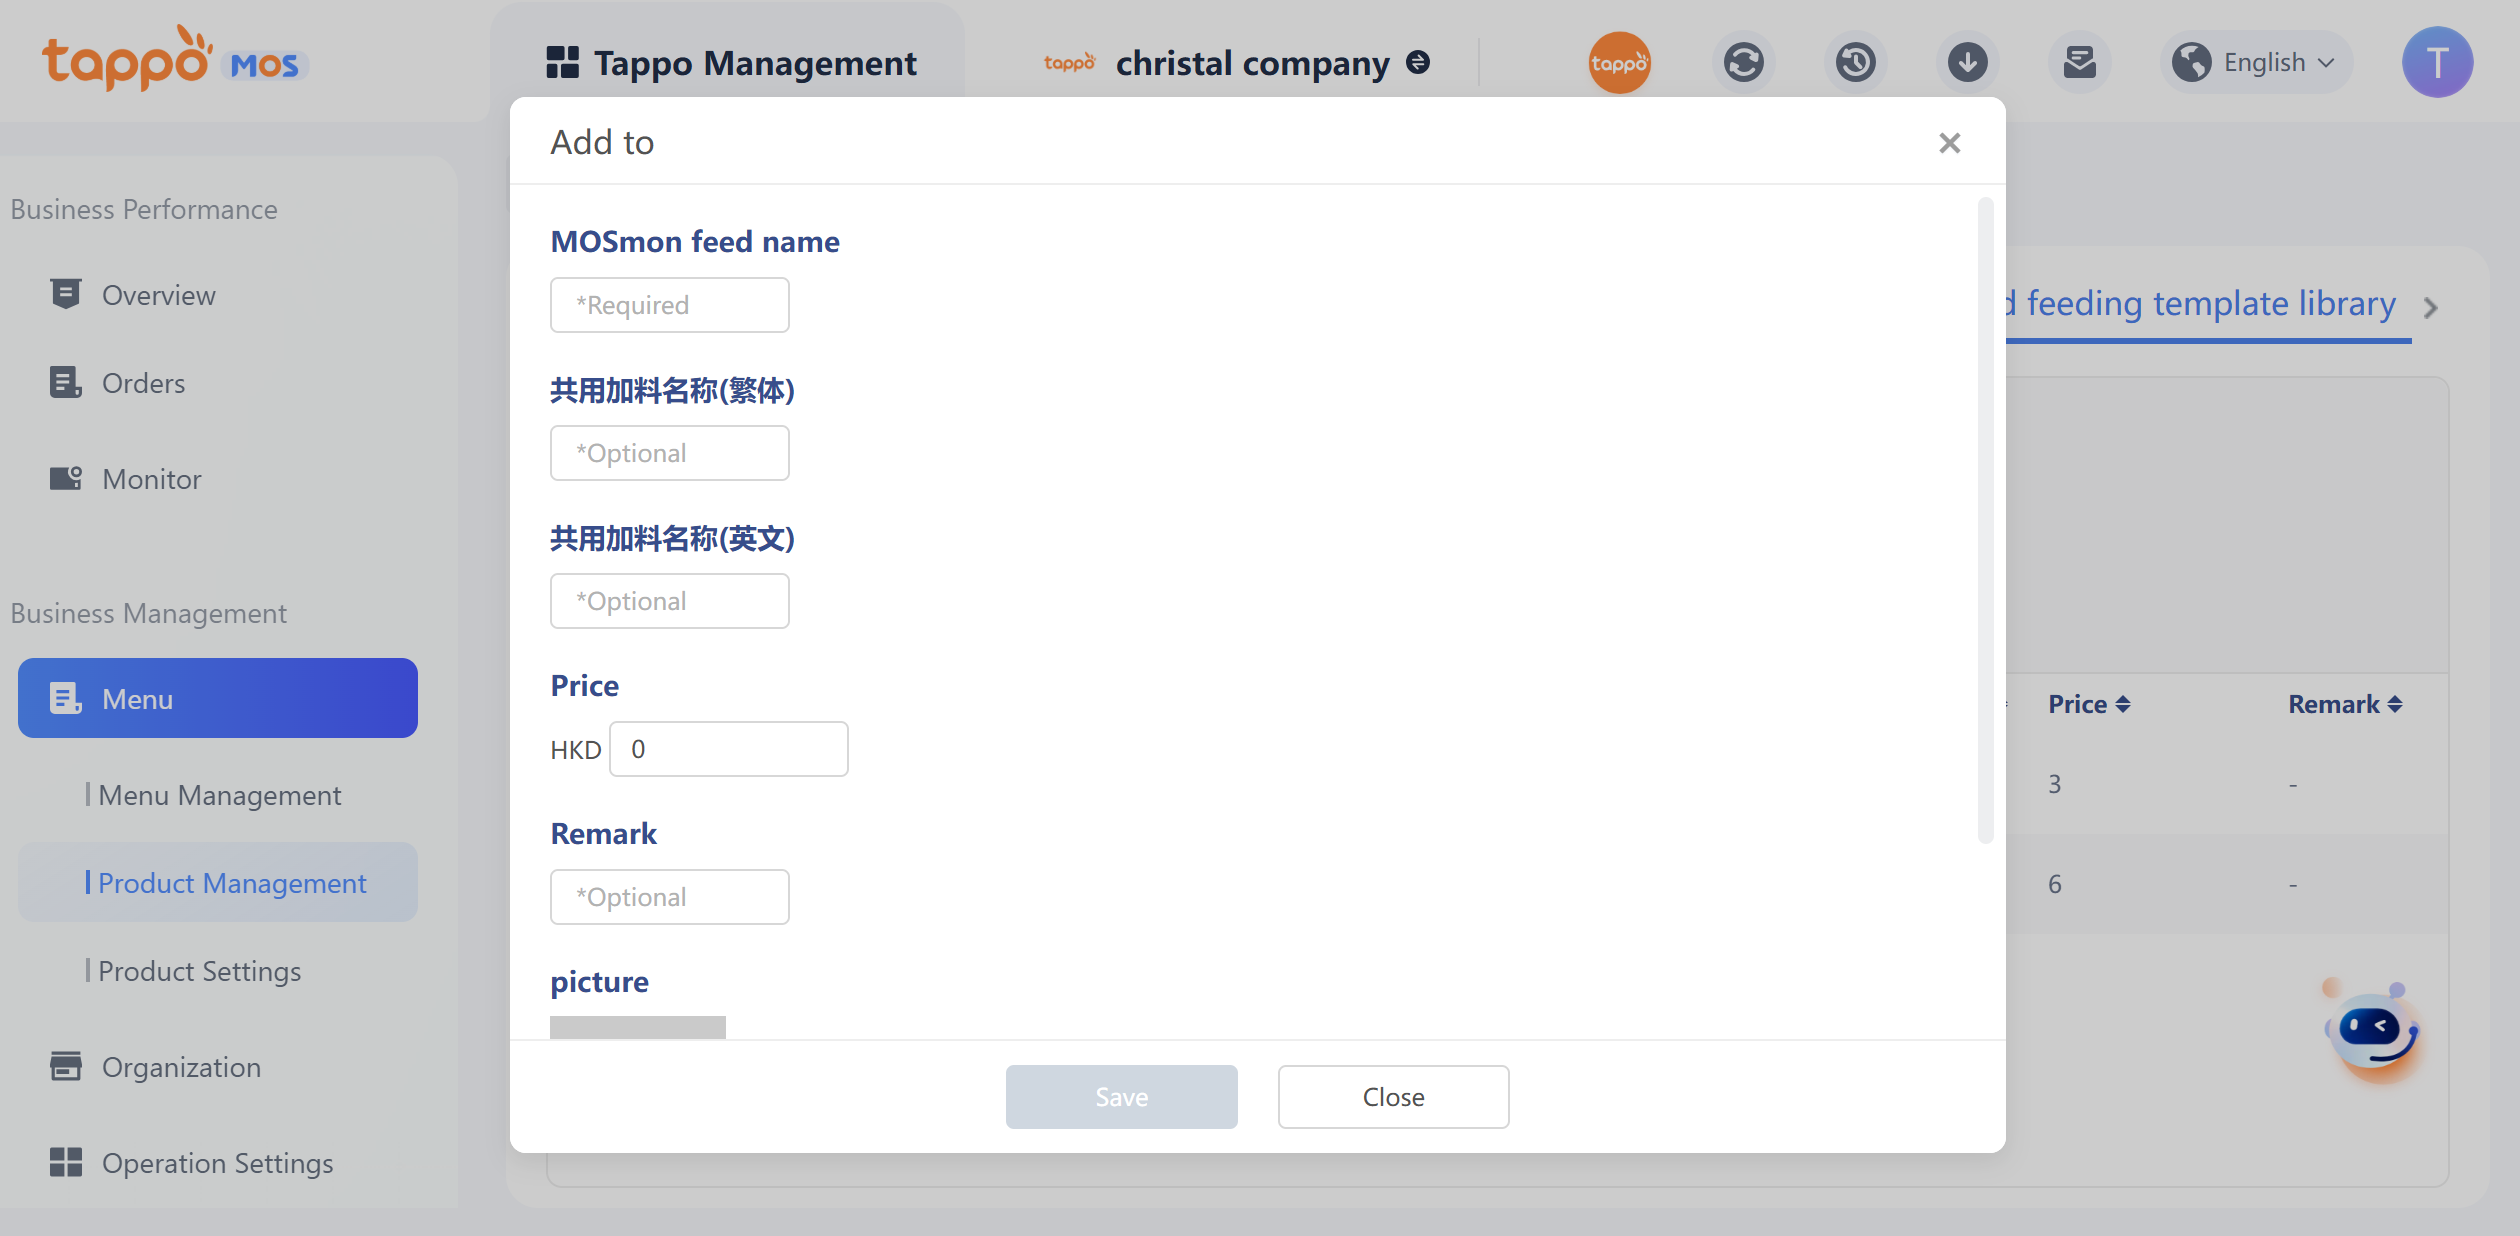
1. Click Save to view and modify the shared topping information in the list.
2. Once a shared topping is modified or deleted, the corresponding special requirements of all single dishes referencing the shared topping will be modified or deleted simultaneously.
Export Meals
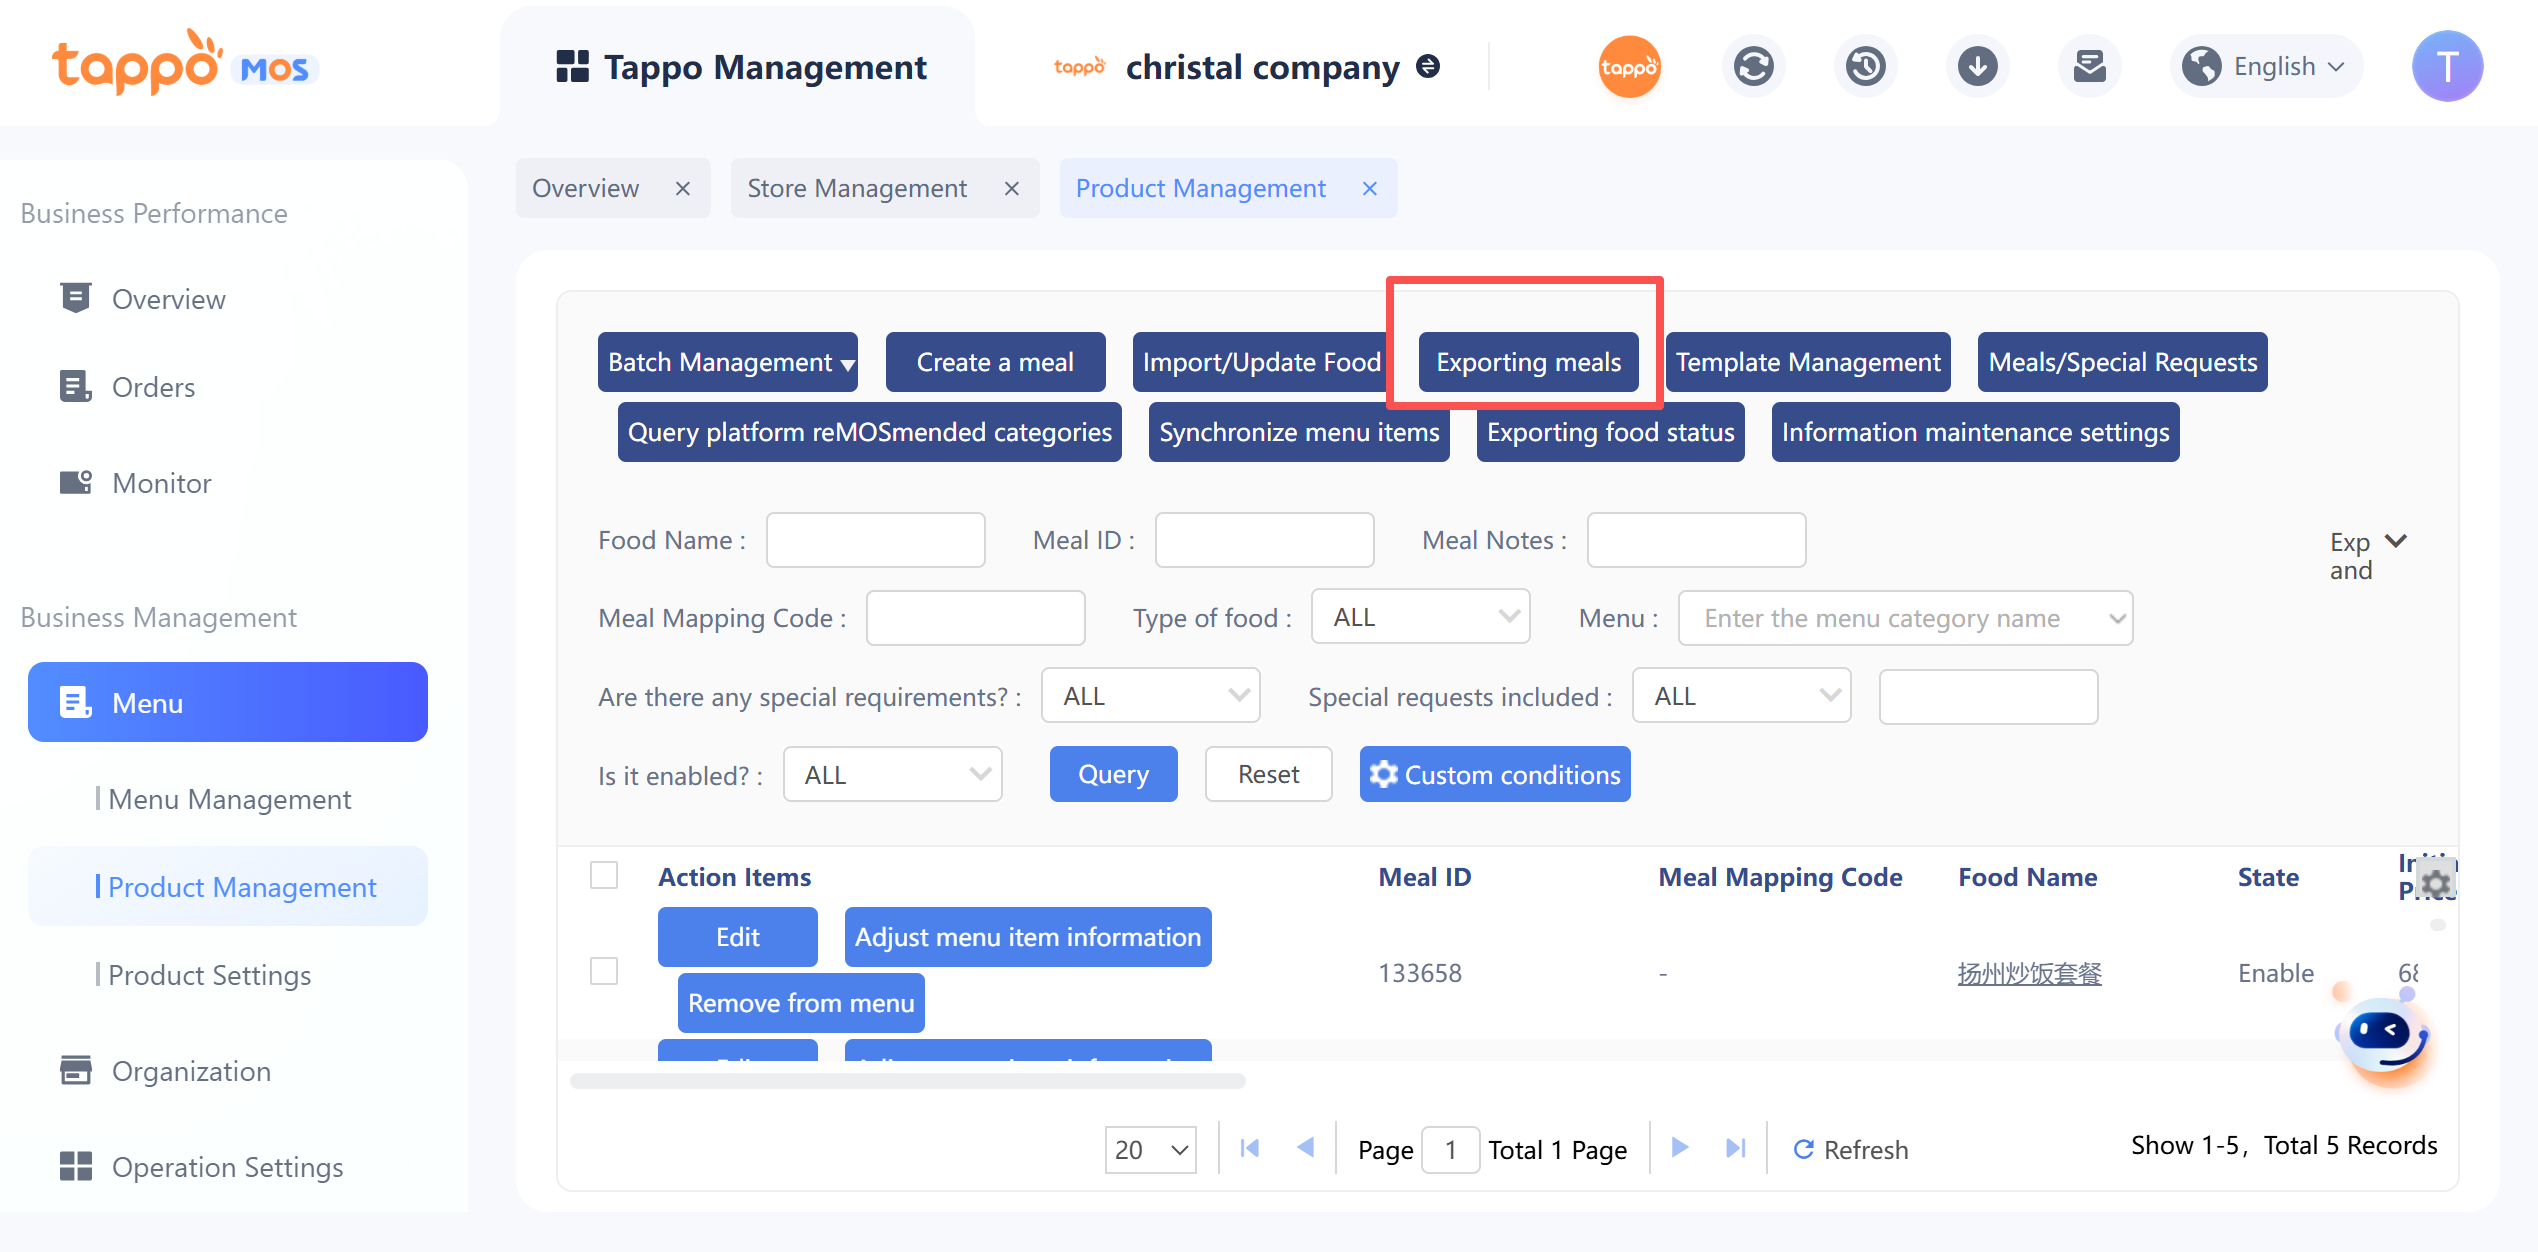
Dish information in the dish library can be exported to a specified email.
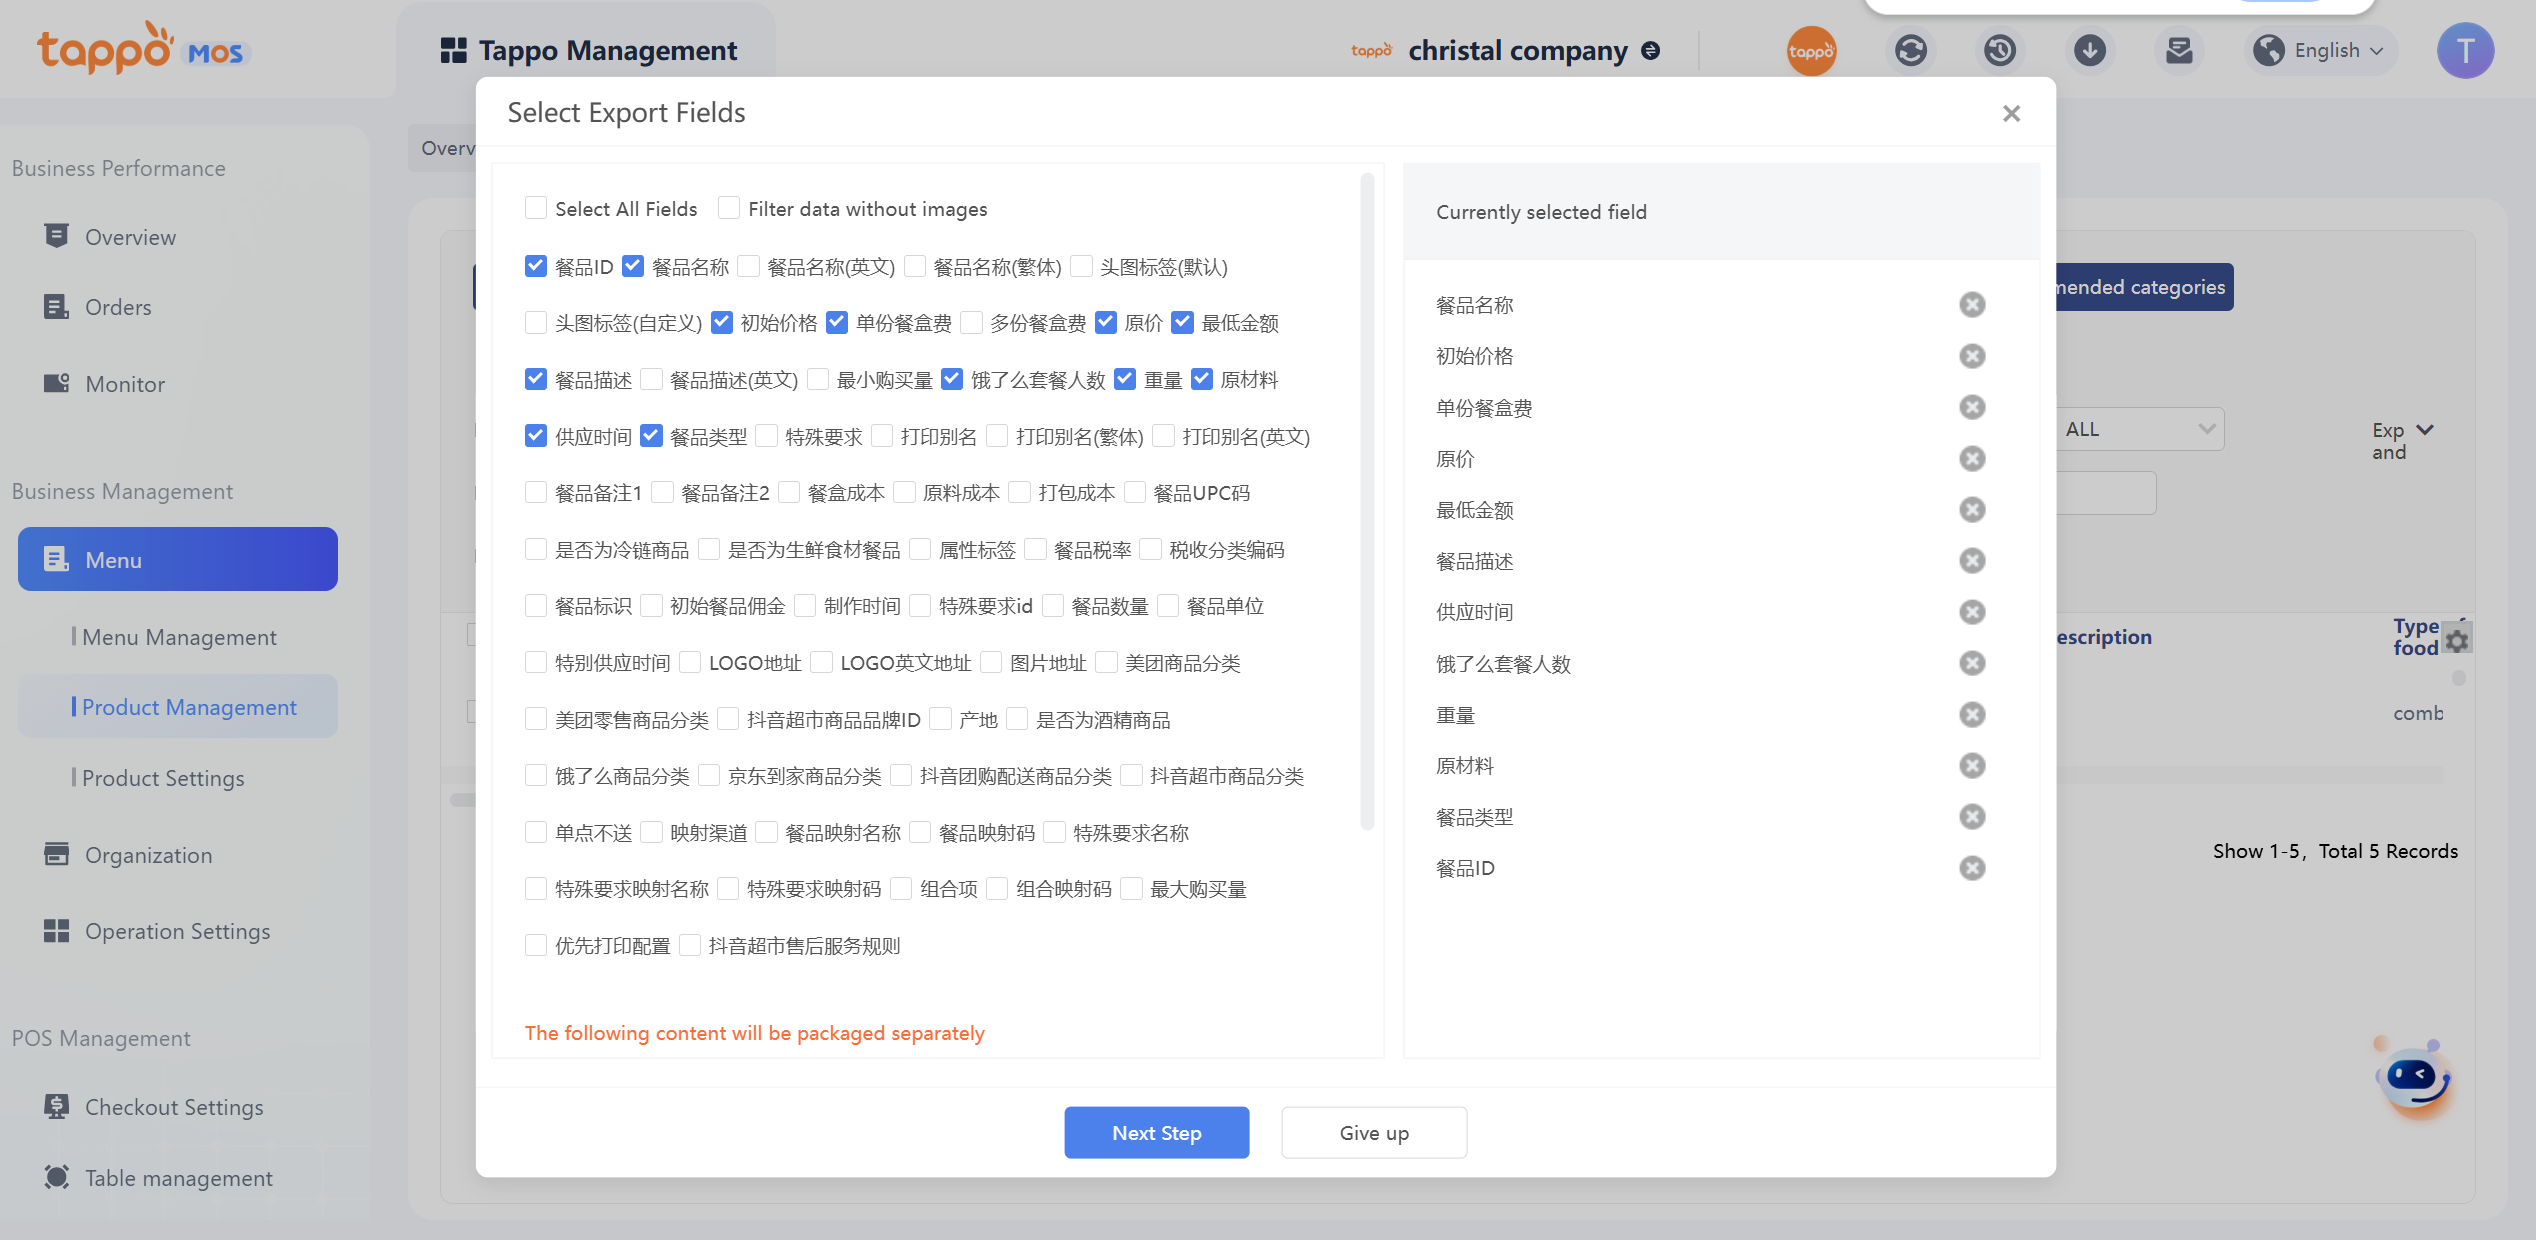
1. After selecting the brand, click Export Dishes to enter the dish field selection page. You can drag and drop the fields in the right list to set the display order of the exported table; fields placed higher will be displayed first in the exported table.
2. After editing the display fields, click Next to enter the email address to which the exported file will be sent. Multiple email addresses can be entered, separated by commas (,).
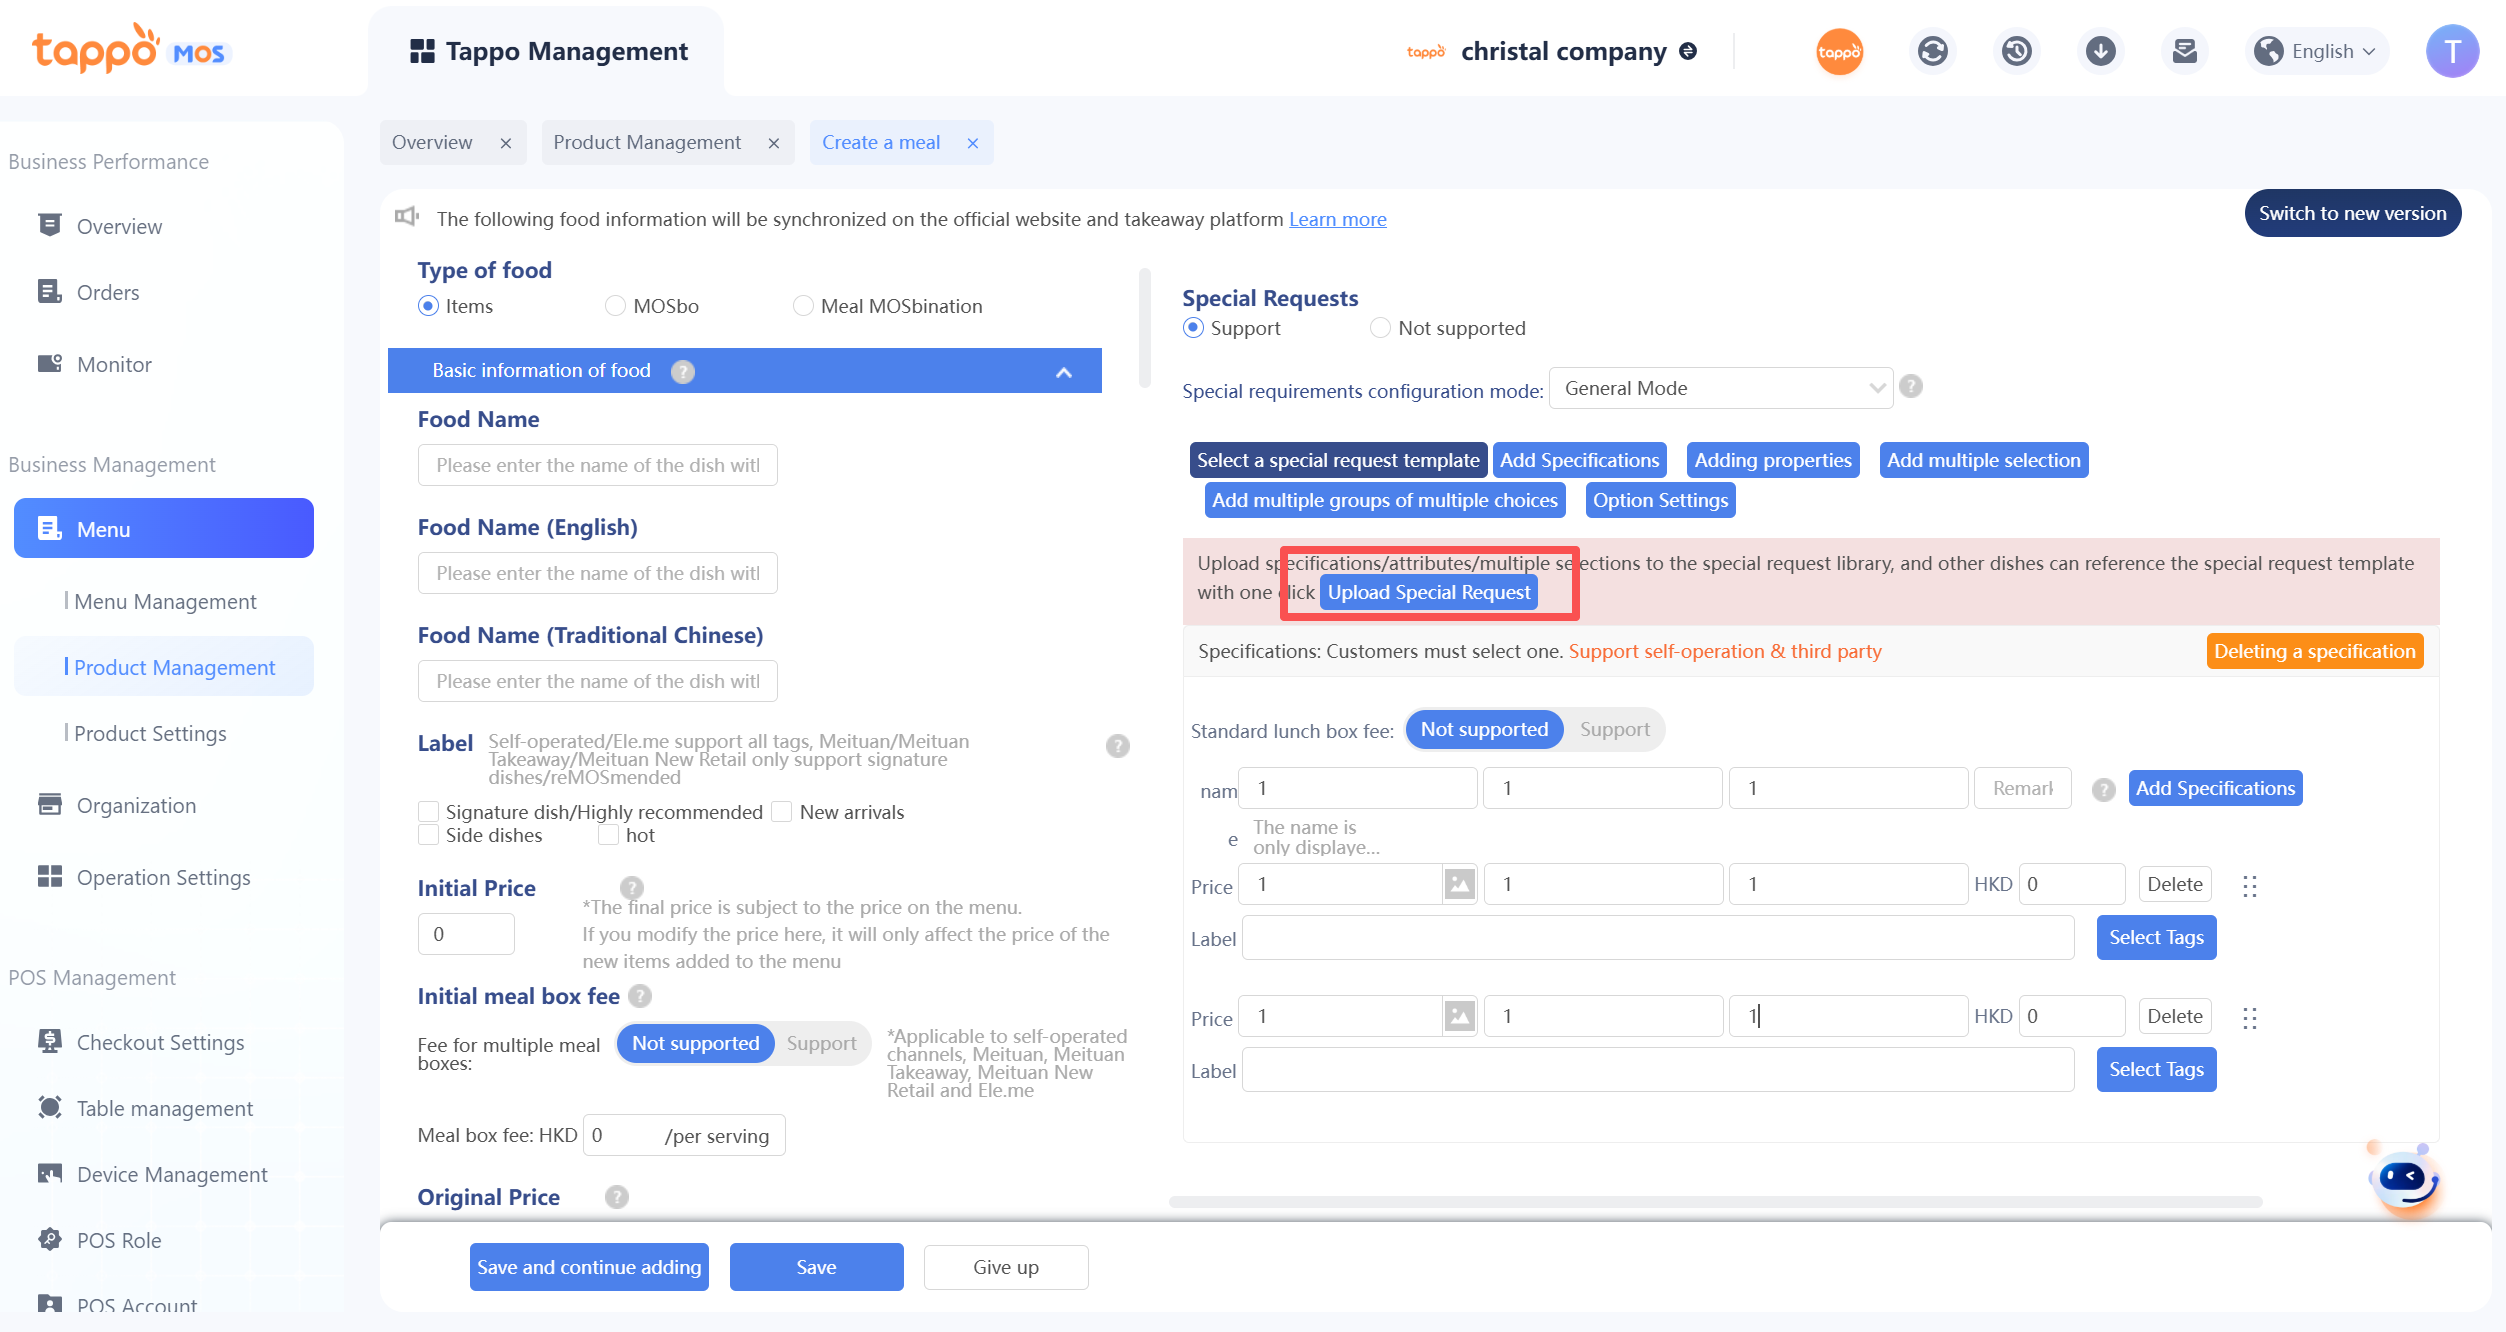
Special Requirements for Item

When a single dish is set to support special requirements, specifications, attributes, and multi-select items can be configured on the right. Long-pressing the mouse allows dragging to sort.
• Specifications: Represent options that require additional payment; customers must select one. The final dish price = initial price + specification price. To synchronize special requirements to food delivery platforms, specifications must be set, the initial price of the dish must be set to 0, and the dish price must be set in the specification price. Specifications are not required for self-operated channels.
• Attributes: Represent options that do not require additional payment; customers can select one or none. Multiple groups of attributes can be added, such as sweetness, temperature, etc. Synchronization to food delivery platforms is supported.
• Multi-select: Only supported for self-operated channels; option prices can be set. Customers can select multiple items.
• Remarks: Mark specifications, attributes, and multi-select as types to distinguish set meals from special requirements on POS.
• Set Shared Toppings: When editing special requirement sub-items (specifications/attributes/multi-select), the system will associate shared toppings from the brand’s shared topping library based on the entered content. If you need to set it as a shared topping, click to select it (marked with #Shared Topping#); if not, ignore it. Special requirements set as shared toppings cannot be edited and can only be uniformly edited and managed in the shared topping library.
• Upload Special Requirements: If the currently configured special requirements are also applicable to other single dishes, they can be uploaded to the special requirements library. When configuring special requirements for other dishes, clickto select templates from the library, as shown in the figure below.
Option Settings: If there are mutually exclusive relationships between specifications, attributes, and multi-select items in the special requirements of a single dish (e.g., the “Add Pearl” specification cannot be selected with the “Heated” temperature attribute), click [Option Settings] to set mutually exclusive restrictions. It supports setting by specifications, attributes, and multi-select, and all three methods take effect simultaneously. For the corresponding item to be set (e.g., Add Pearl), uncheck other options that cannot be selected (e.g., Heated).
Combo
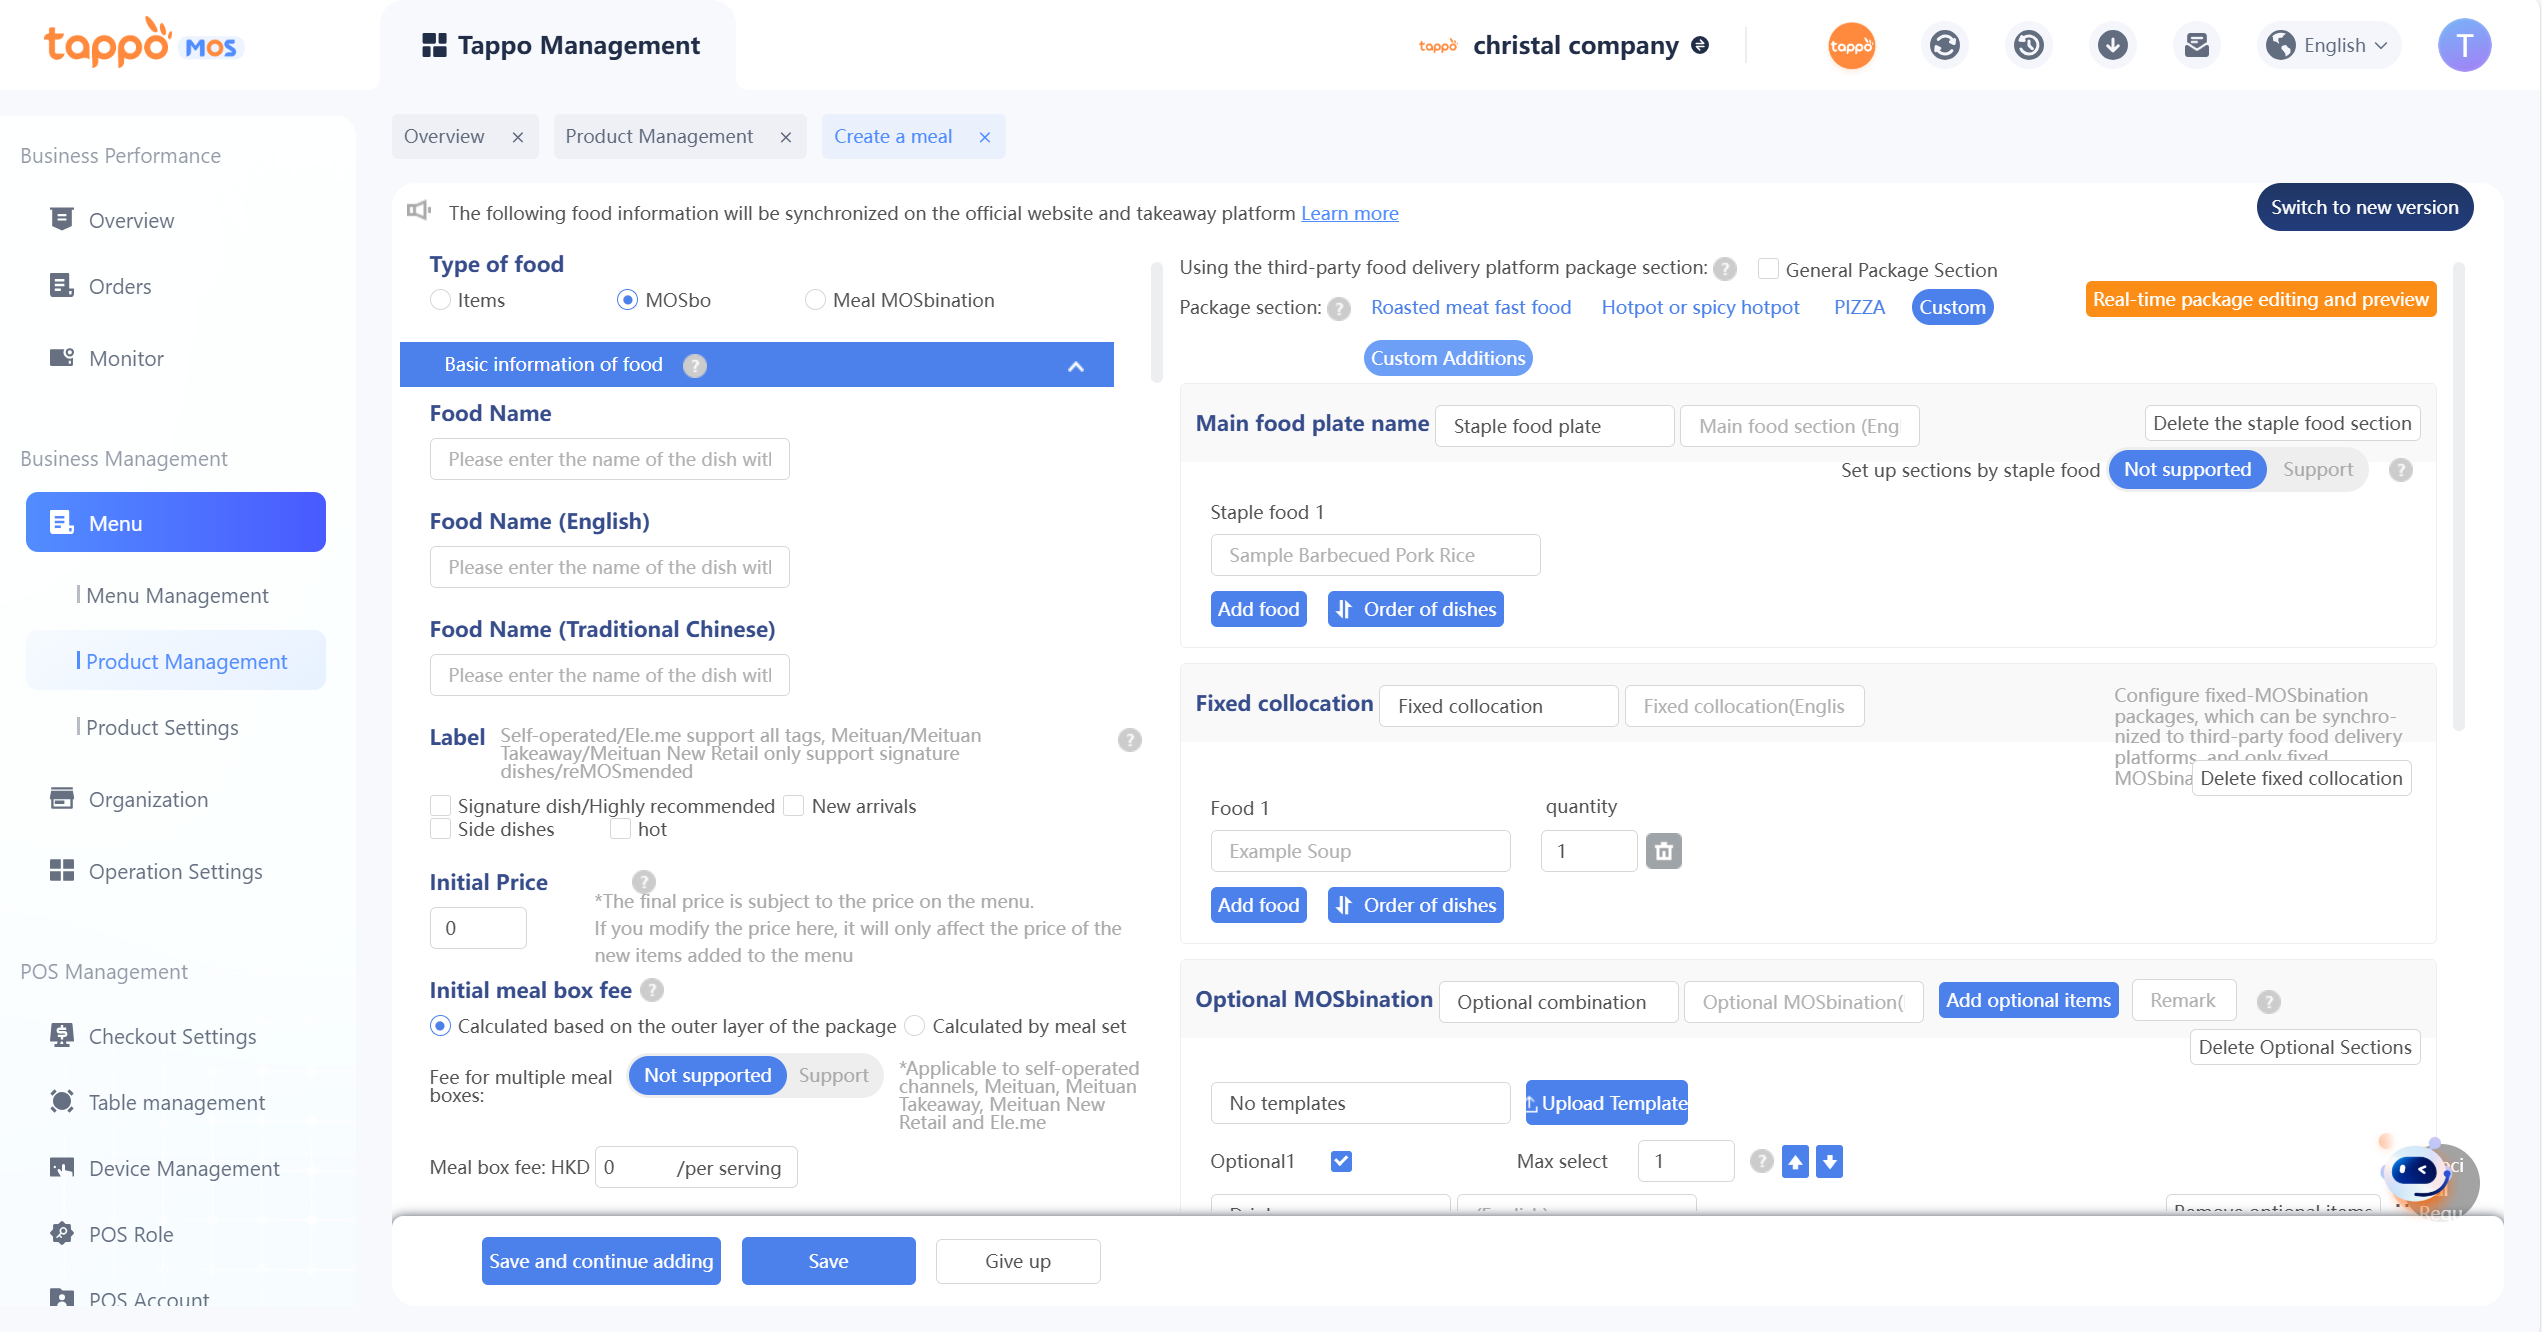
The system provides multiple set meal formats for selection:
1. Main Course Section: Refers to the main course in the set meal. Multiple main courses can be configured for customers to select one. After configuring the main course, at least one of the following must be configured: fixed combinations, optional combinations, optional toppings.
2. Fixed Combinations: Refers to fixed side dishes in the set meal. Multiple fixed side dishes can be configured and the quantity can be set.
3. Optional Combinations: Refers to dishes or drinks that can be selected by customers in the set meal. Multiple categories of optional dishes can also be added. If there are the same optional combination items, they can be added in the maximum selectable quantity. Customers can only select one item from each category. For example: optional drinks (can be upgraded to other drinks for an additional fee or switched between hot and cold at different prices); or add snacks (snack upgrades require an additional fee).
4. Optional Toppings: Refers to side dishes/ingredients that customers can add to the set meal. The maximum number of selections and prices can be limited. Example: Common spicy hot pot, where multiple side dishes can be added infinitely for an additional fee per selection; or when a customer orders a rice dish, options like adding extra rice or vegetables can be provided with restrictions.
Adjust Packaging Fees for Meals in Each Menu
Batch editing of packaging fees for dishes in each menu is supported.
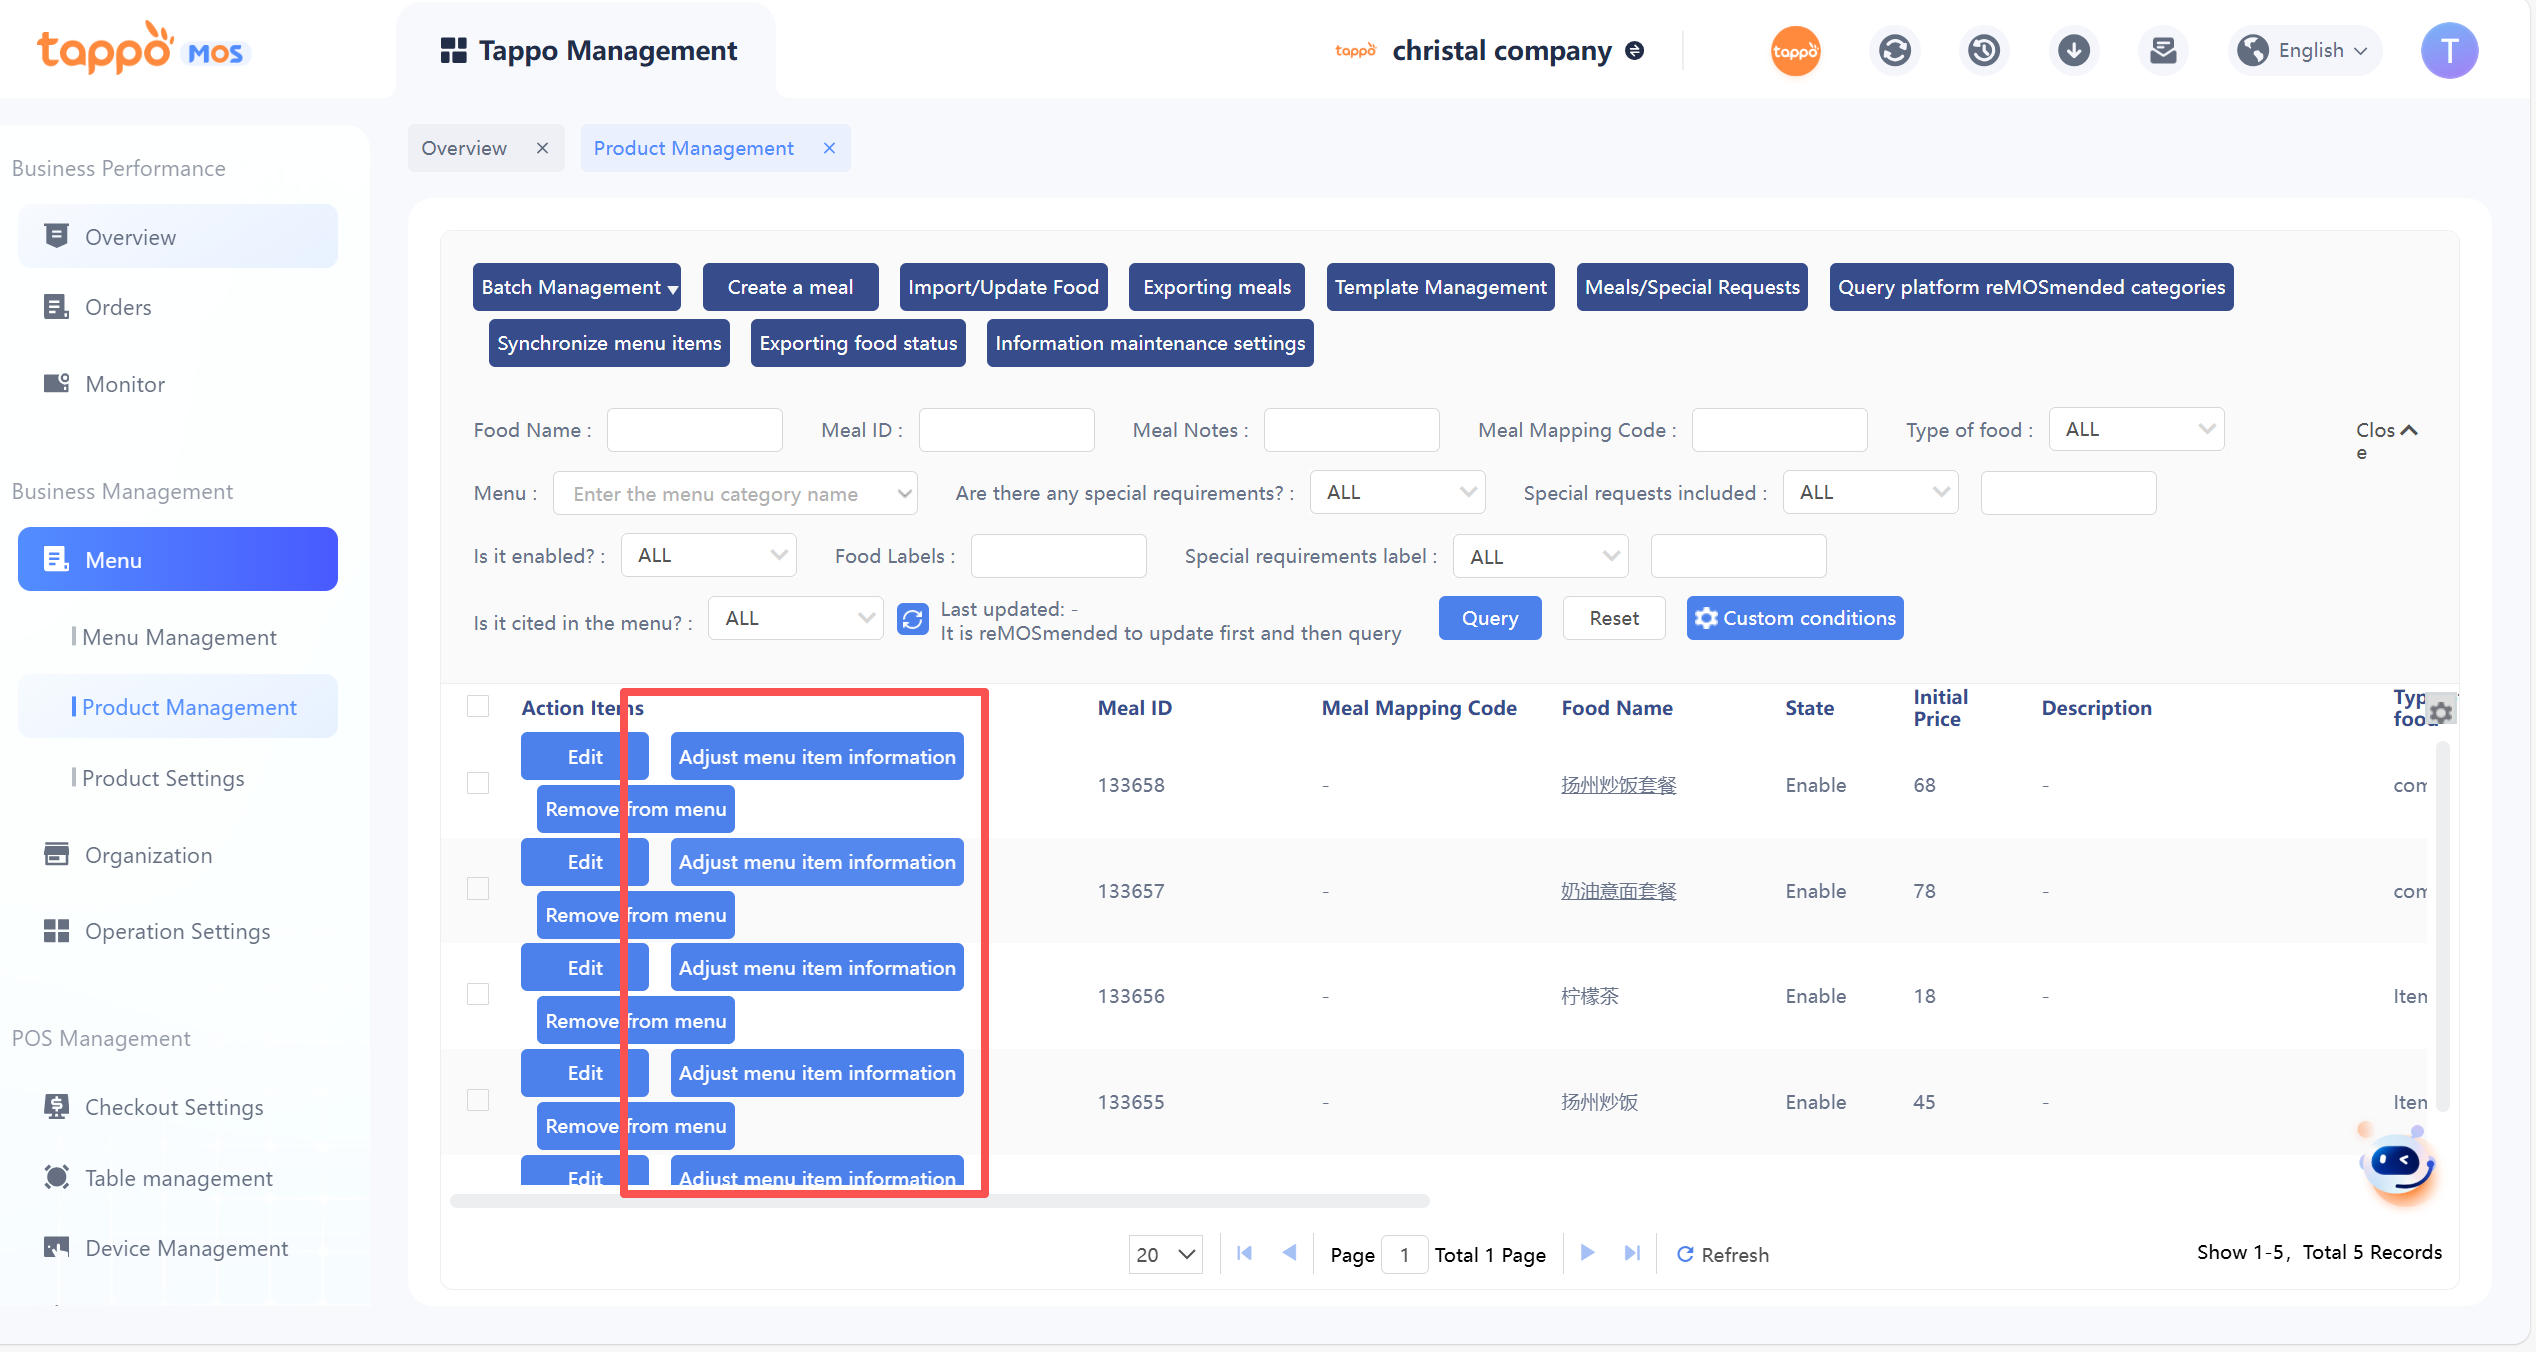
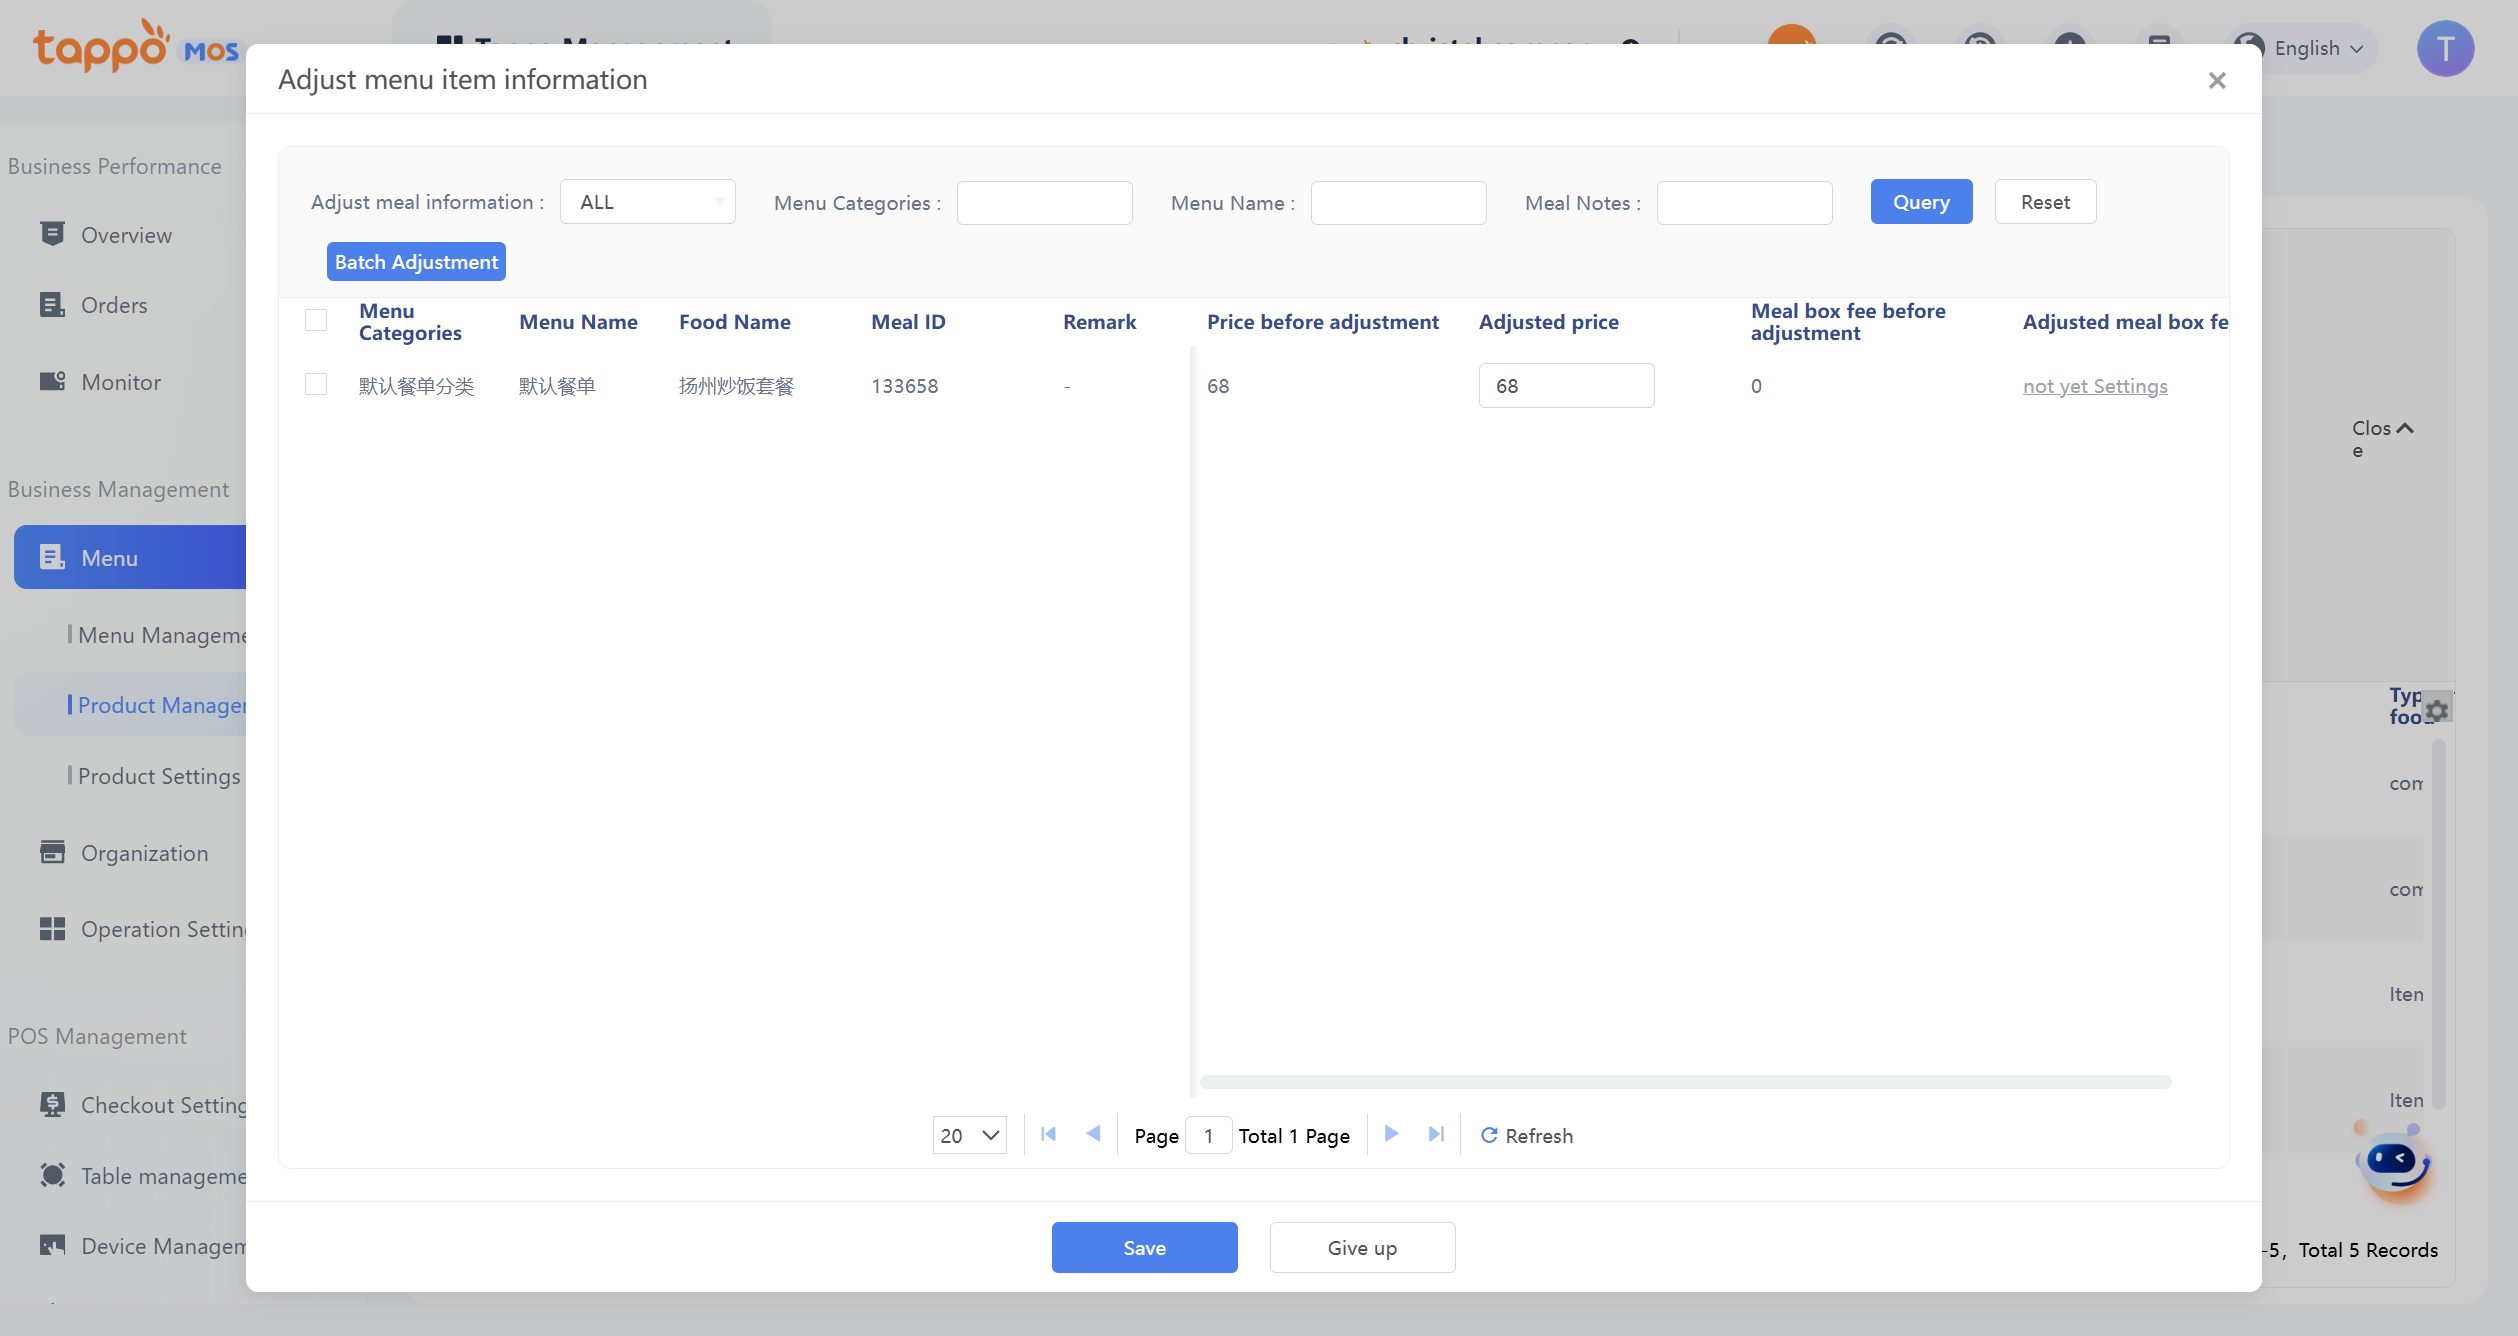
1. Select dishes and click Adjust Menu Dish Prices.
2. Select the corresponding menu to batch edit the packaging fees of dishes. The packaging fee for dishes in a specific menu can be set individually.
3. After modifying the menu prices, click the Save button and select automatic synchronization or manual synchronization.
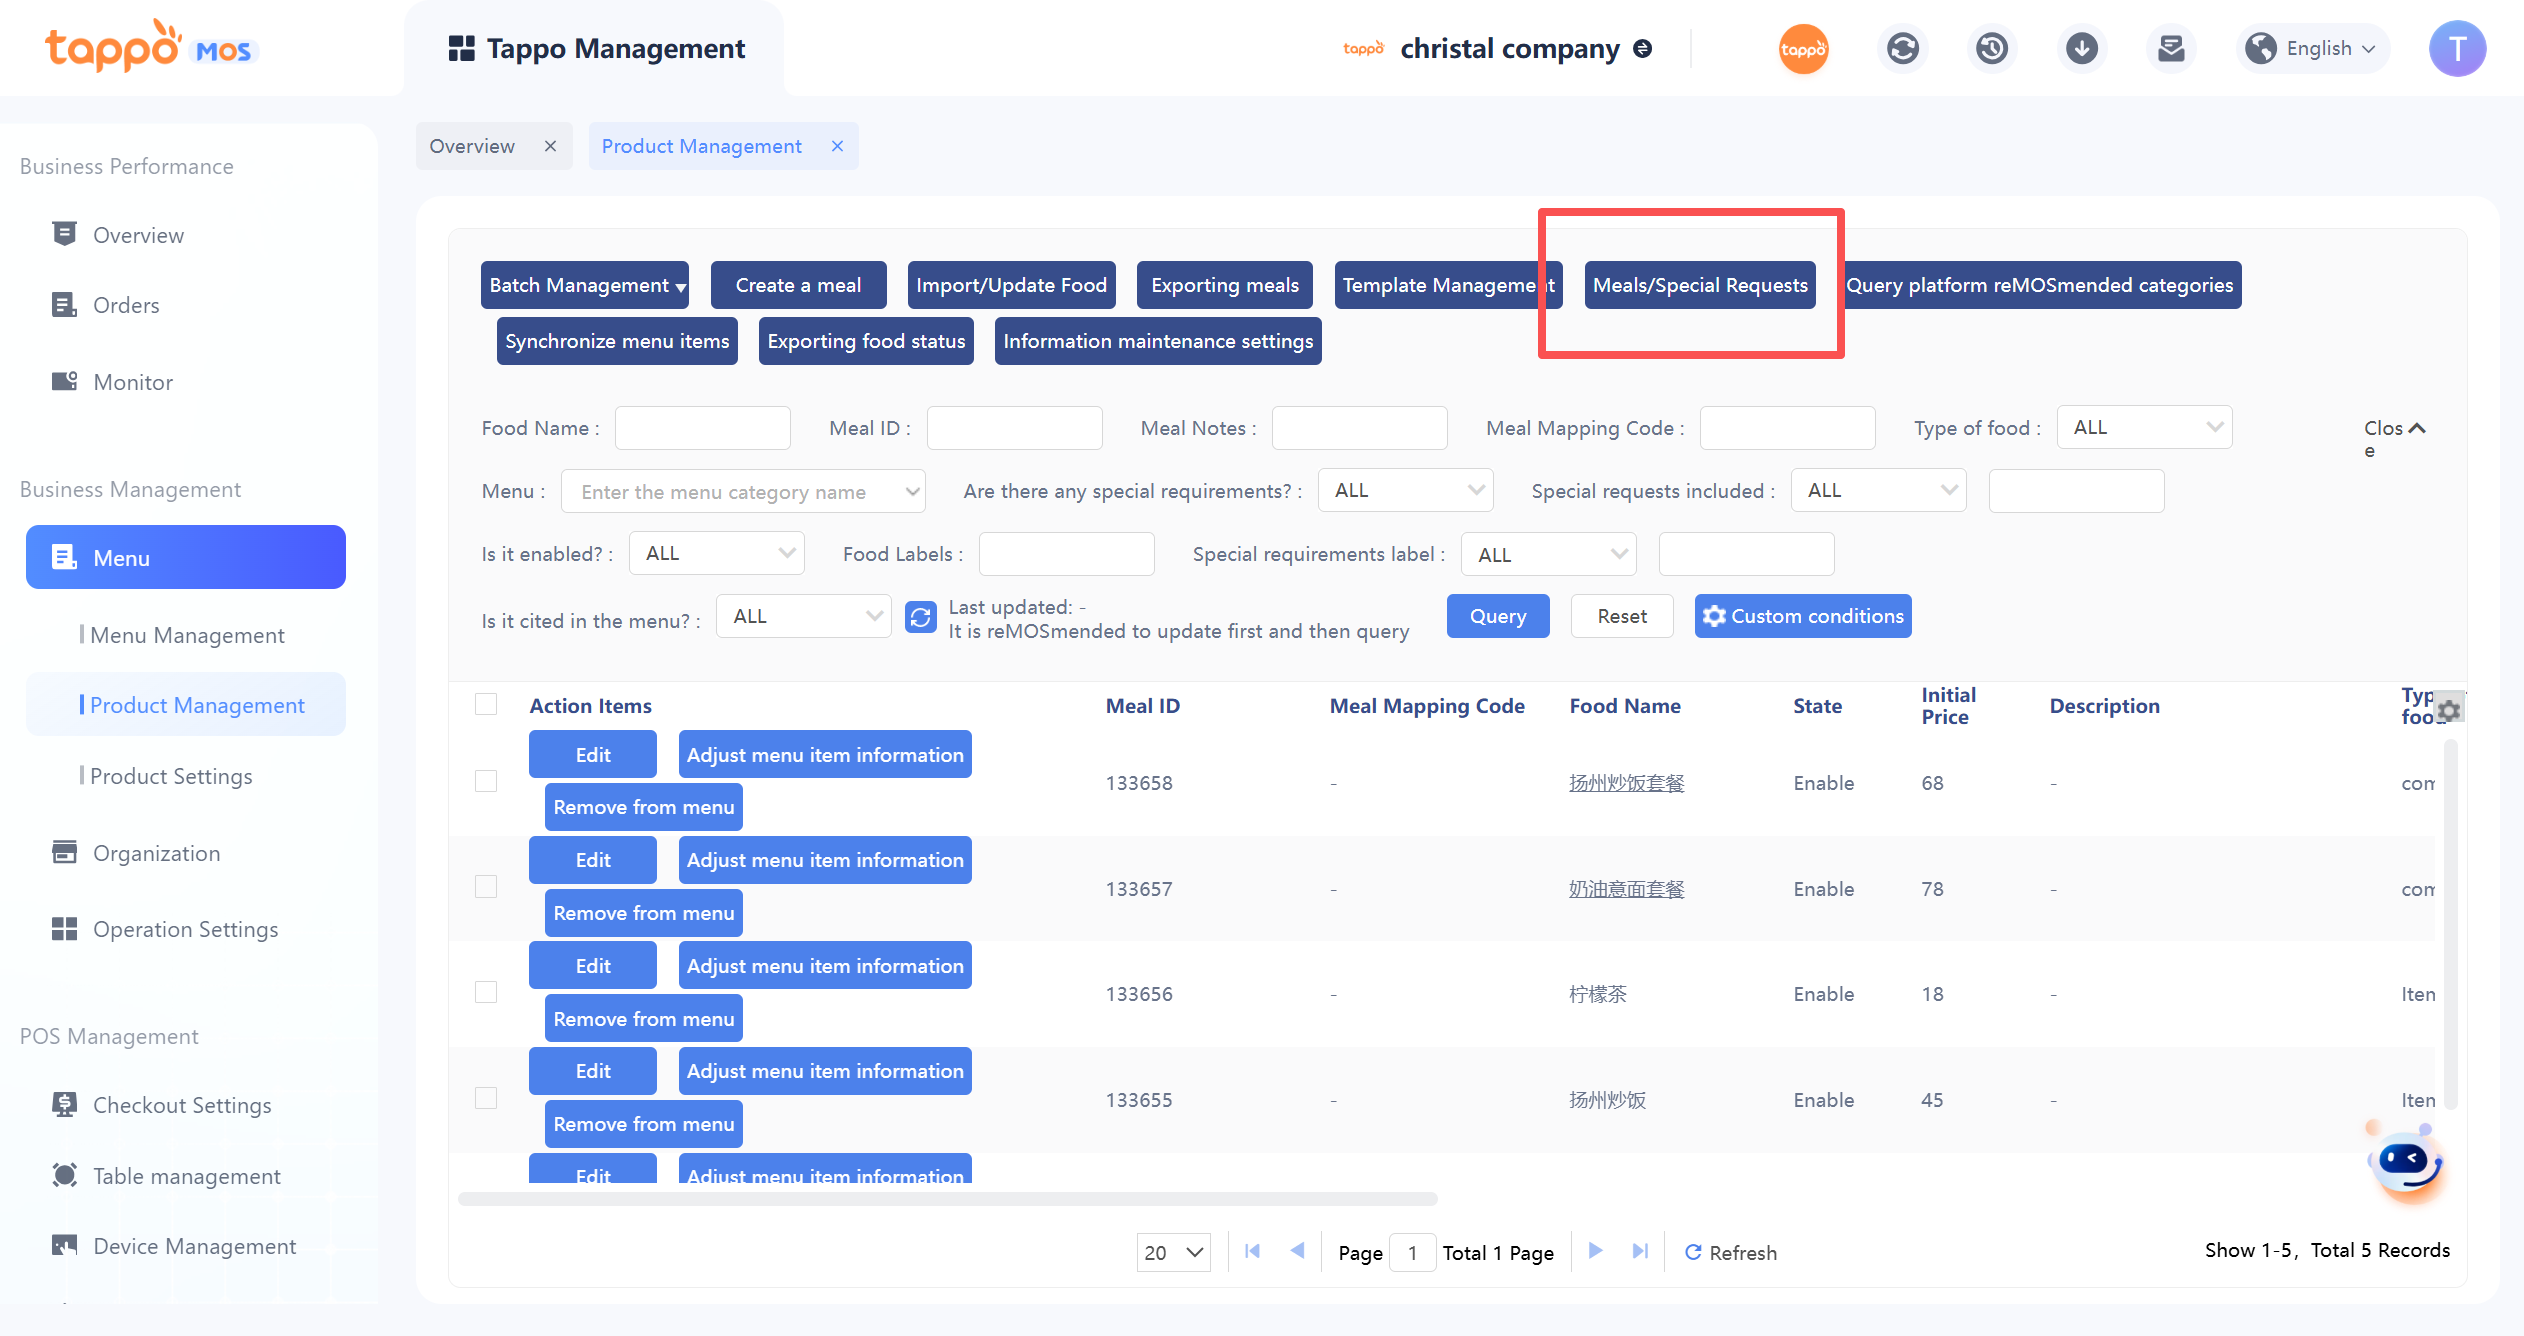
Meals/Special Requests
Stores support batch online/offline of dishes by channel. Changing the online/offline status of dishes will be automatically synchronized to food delivery platforms.
Purpose: Reduce menu maintenance costs. Within the same menu, different online/offline dish settings can be configured for stores under the menu category without creating multiple menus and re-entering specified content.
Example: When dishes A, B, and C are set in the same menu, Fangcun Store (Tappo POS channel) only sells dishes A and B, and Fangcun Store (H5 channel) only sells dishes A and C. You can take dish B offline for Fangcun Store’s Tappo POS channel and dish C offline for Fangcun Store’s H5 channel.
Operation Process:
1. Click Dish Online/Offline in the dish library. By default, you will enter the dish online/offline page of the store with the maximum store ID in the current brand. It displays the food delivery platforms connected to the brand. You can set online/offline of dishes by channel individually and schedule online/offline times.
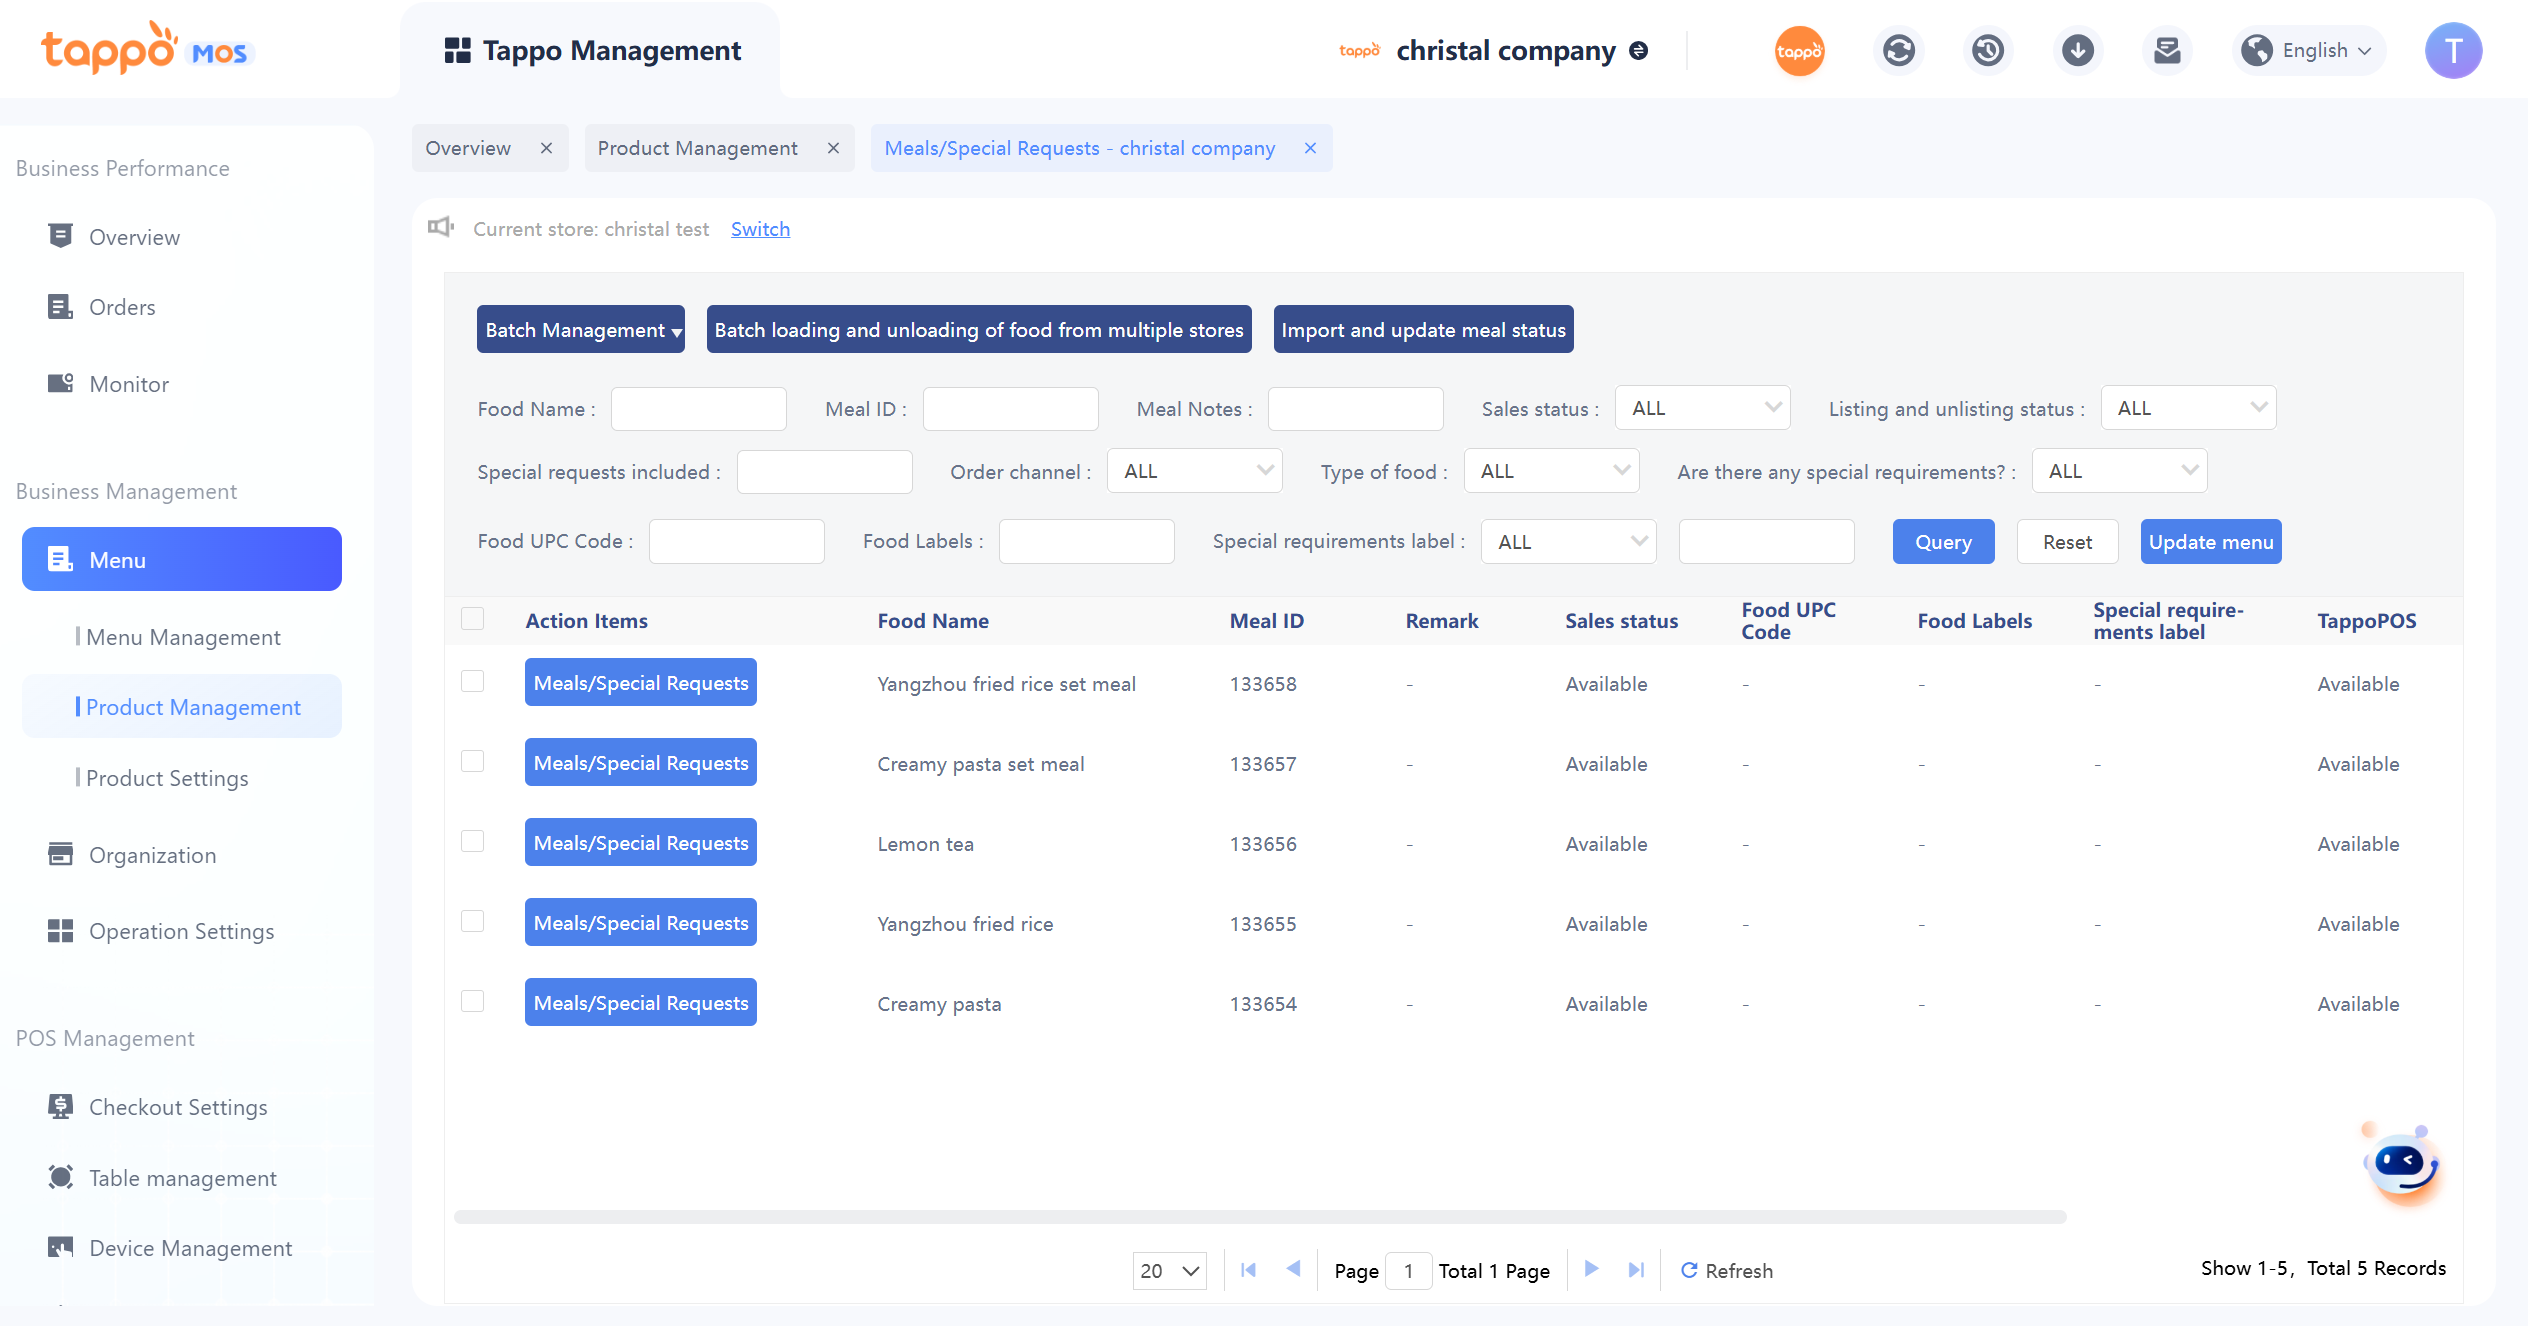
2. On the online/offline page, you can perform online/offline operations for dishes in the current store. Select multiple dishes, click Batch Management, and batch online/offline dishes across multiple channels. You can set the scheduled online/offline time, and the system will automatically online/offline according to the set time.
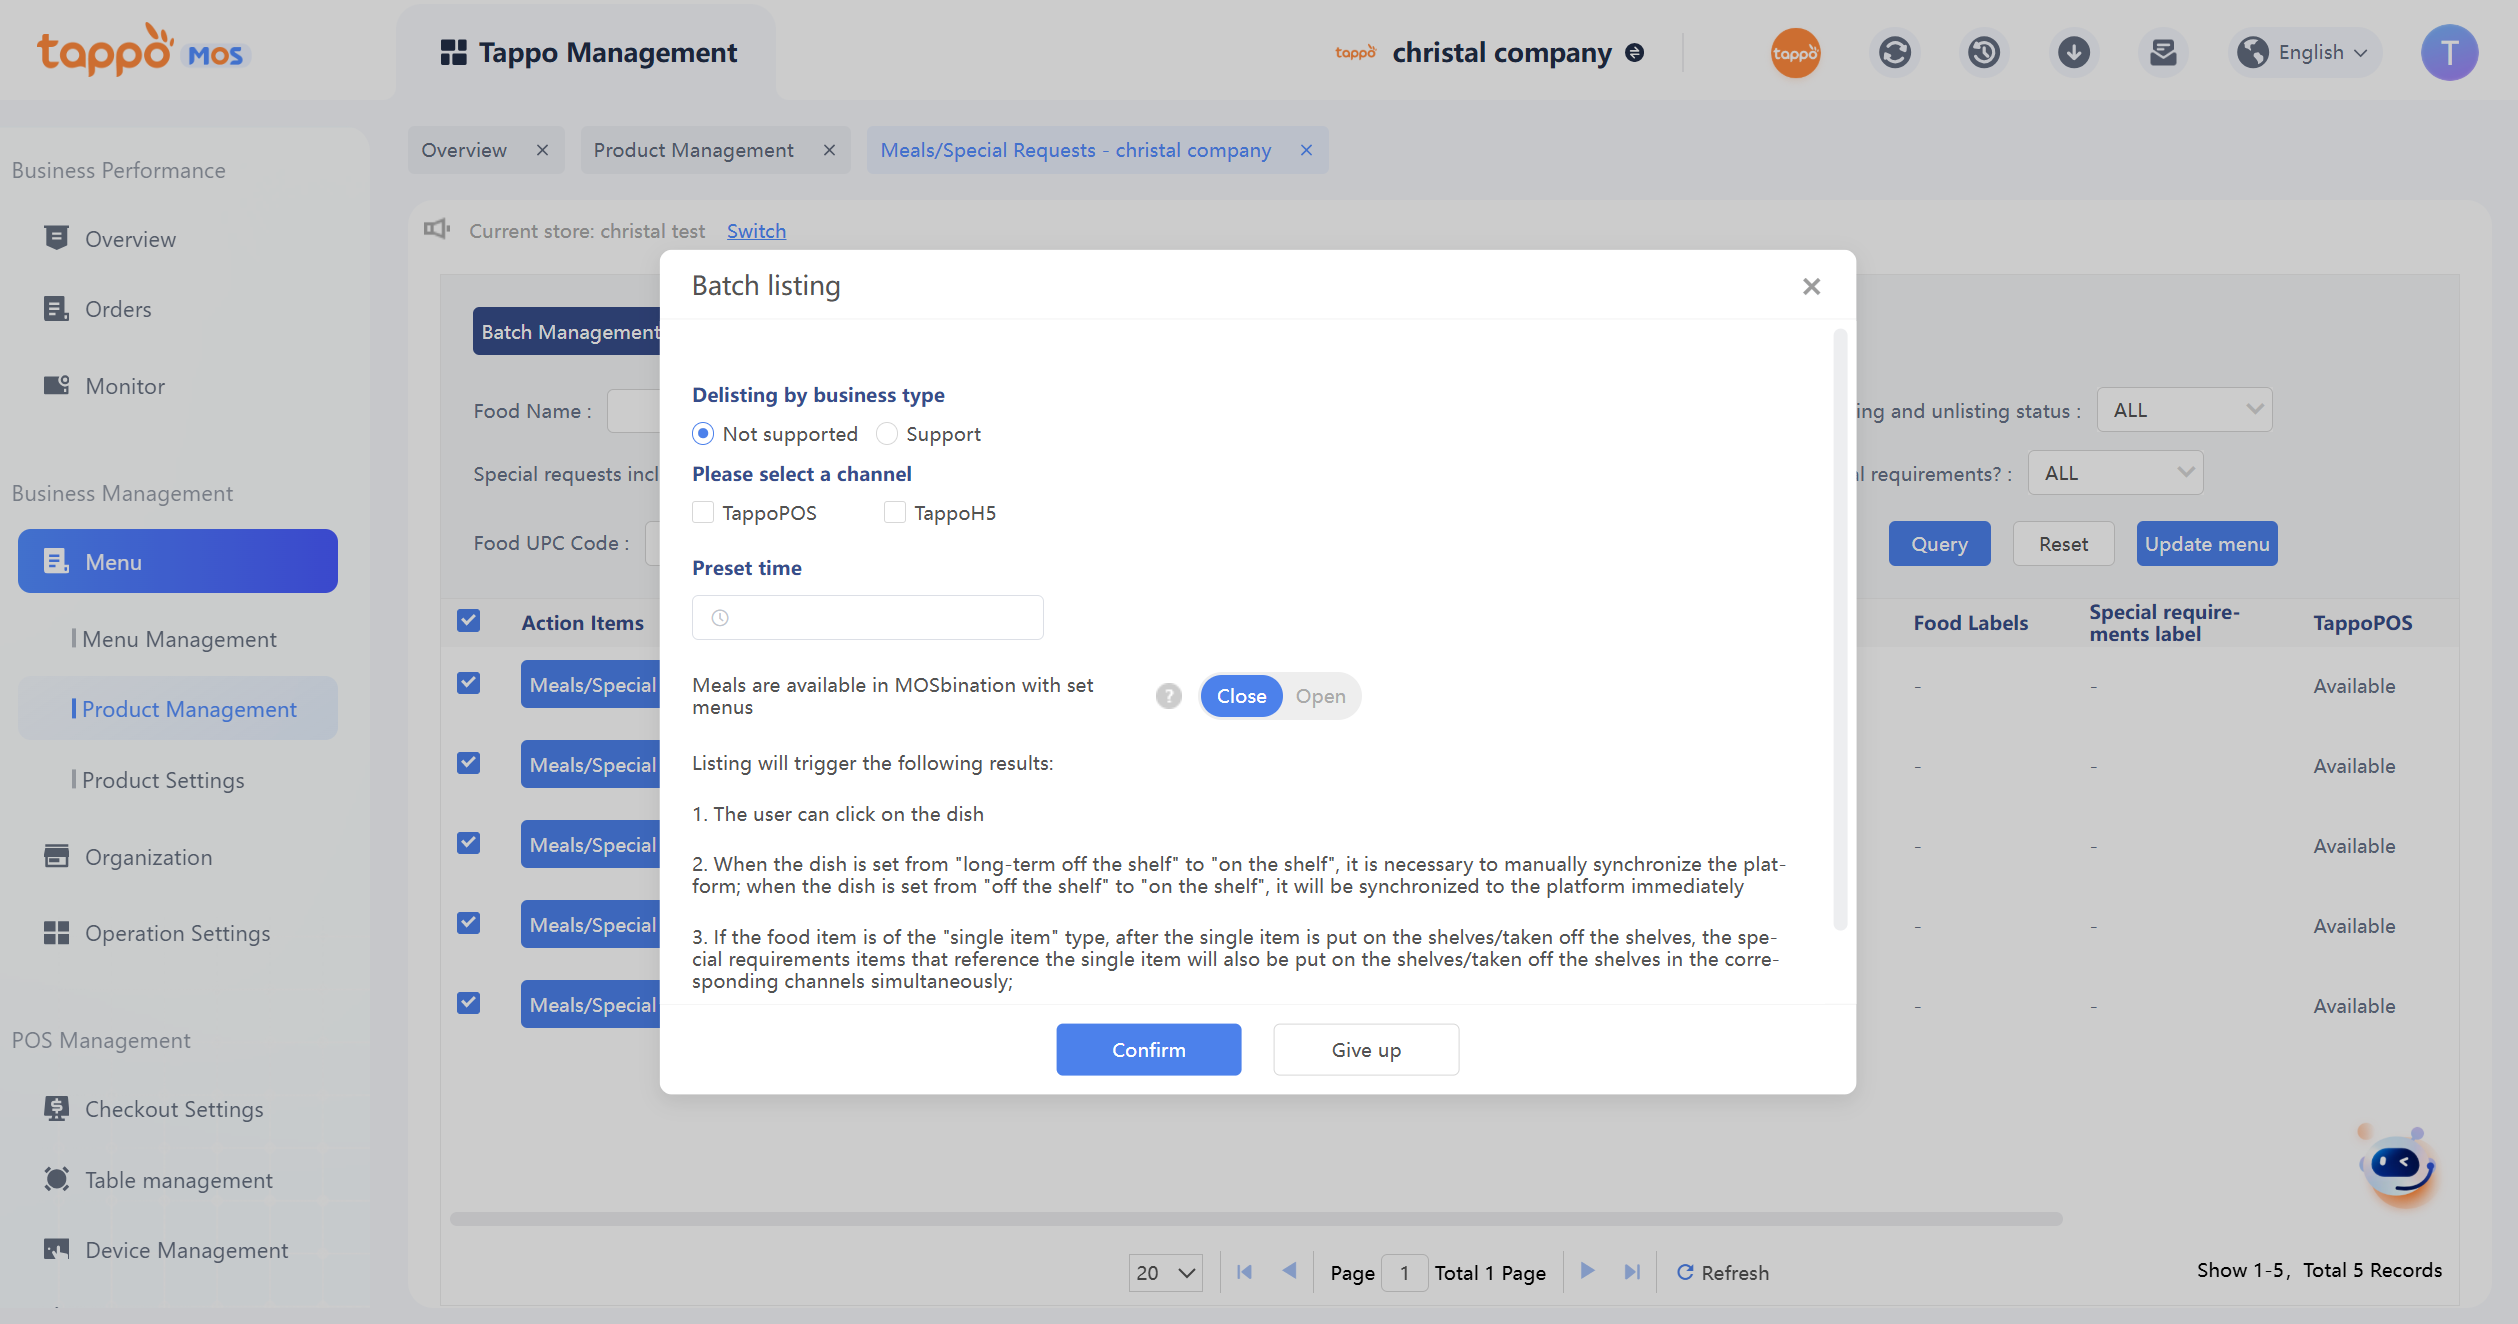
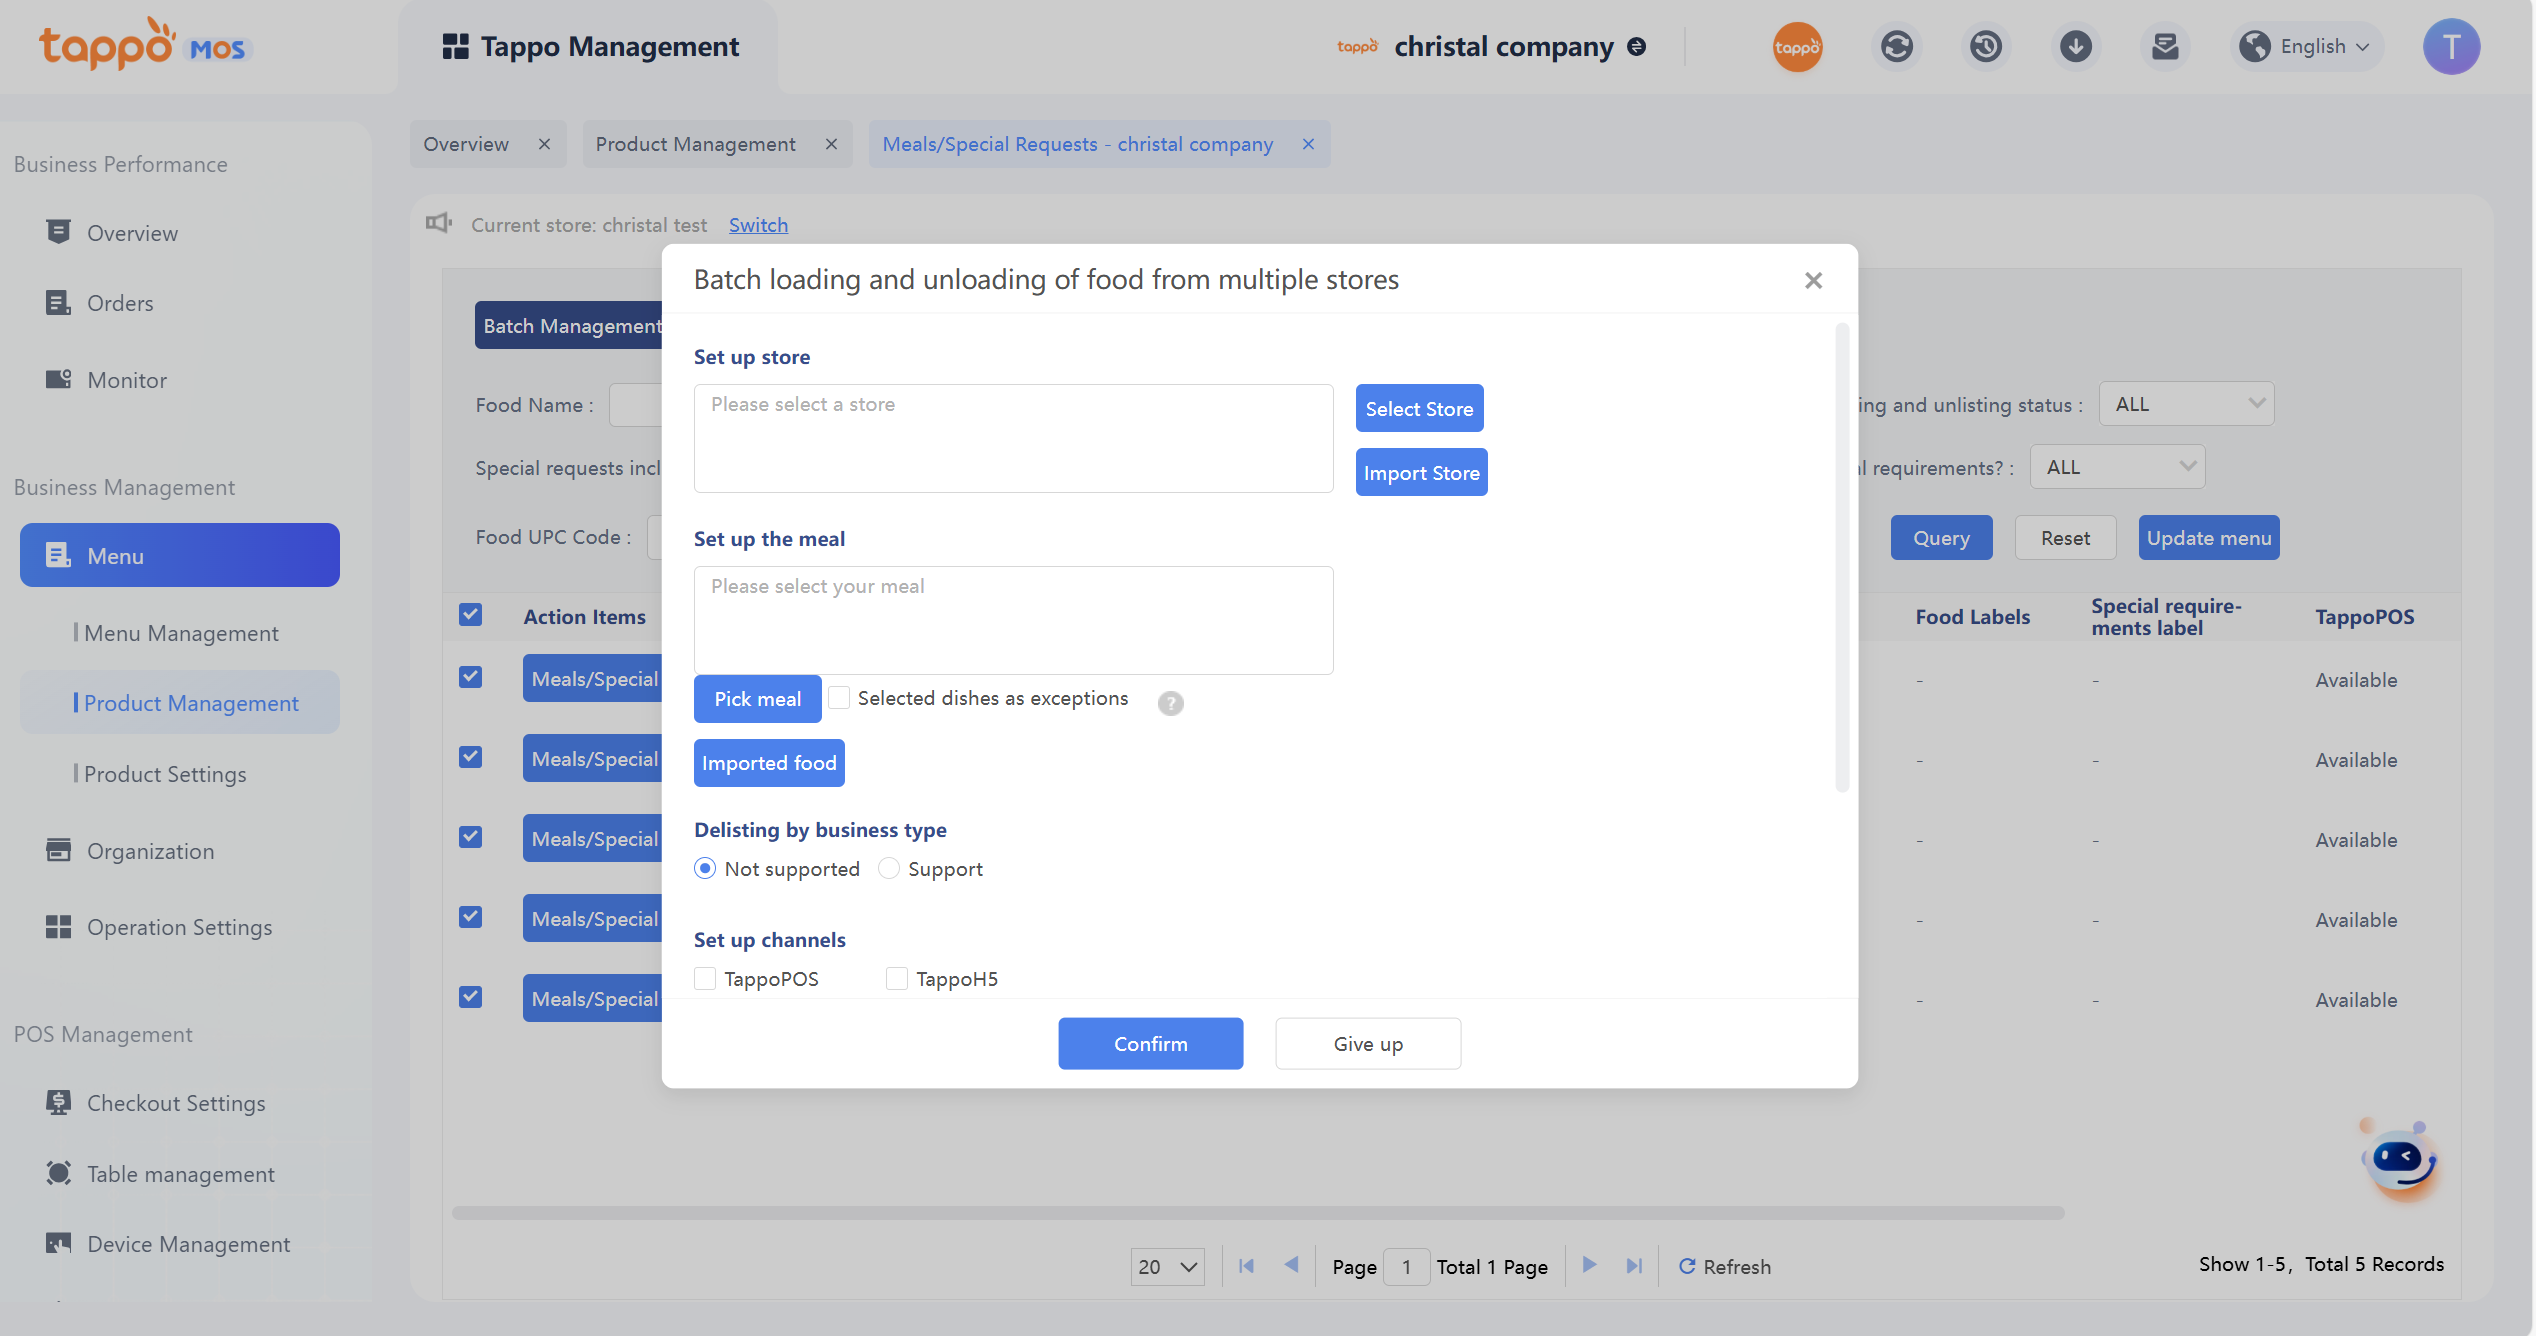
3. You can directly click Batch Online/Offline Dishes for Multiple Stores to enter batch online/offline of dishes for multiple stores. You can set all stores of the current brand (including inactive stores) to batch online/offline dishes by channel, as well as the online/offline status and scheduled online/offline time. The system will automatically online/offline.
Batch Out of Stock/Available for Sale
Set the out-of-stock/available-for-sale status of dishes in multiple stores.
Operation Process:
1. Select one or more dishes to be set in batch, click [Batch Management] – [Batch Out of Stock/Available for Sale].
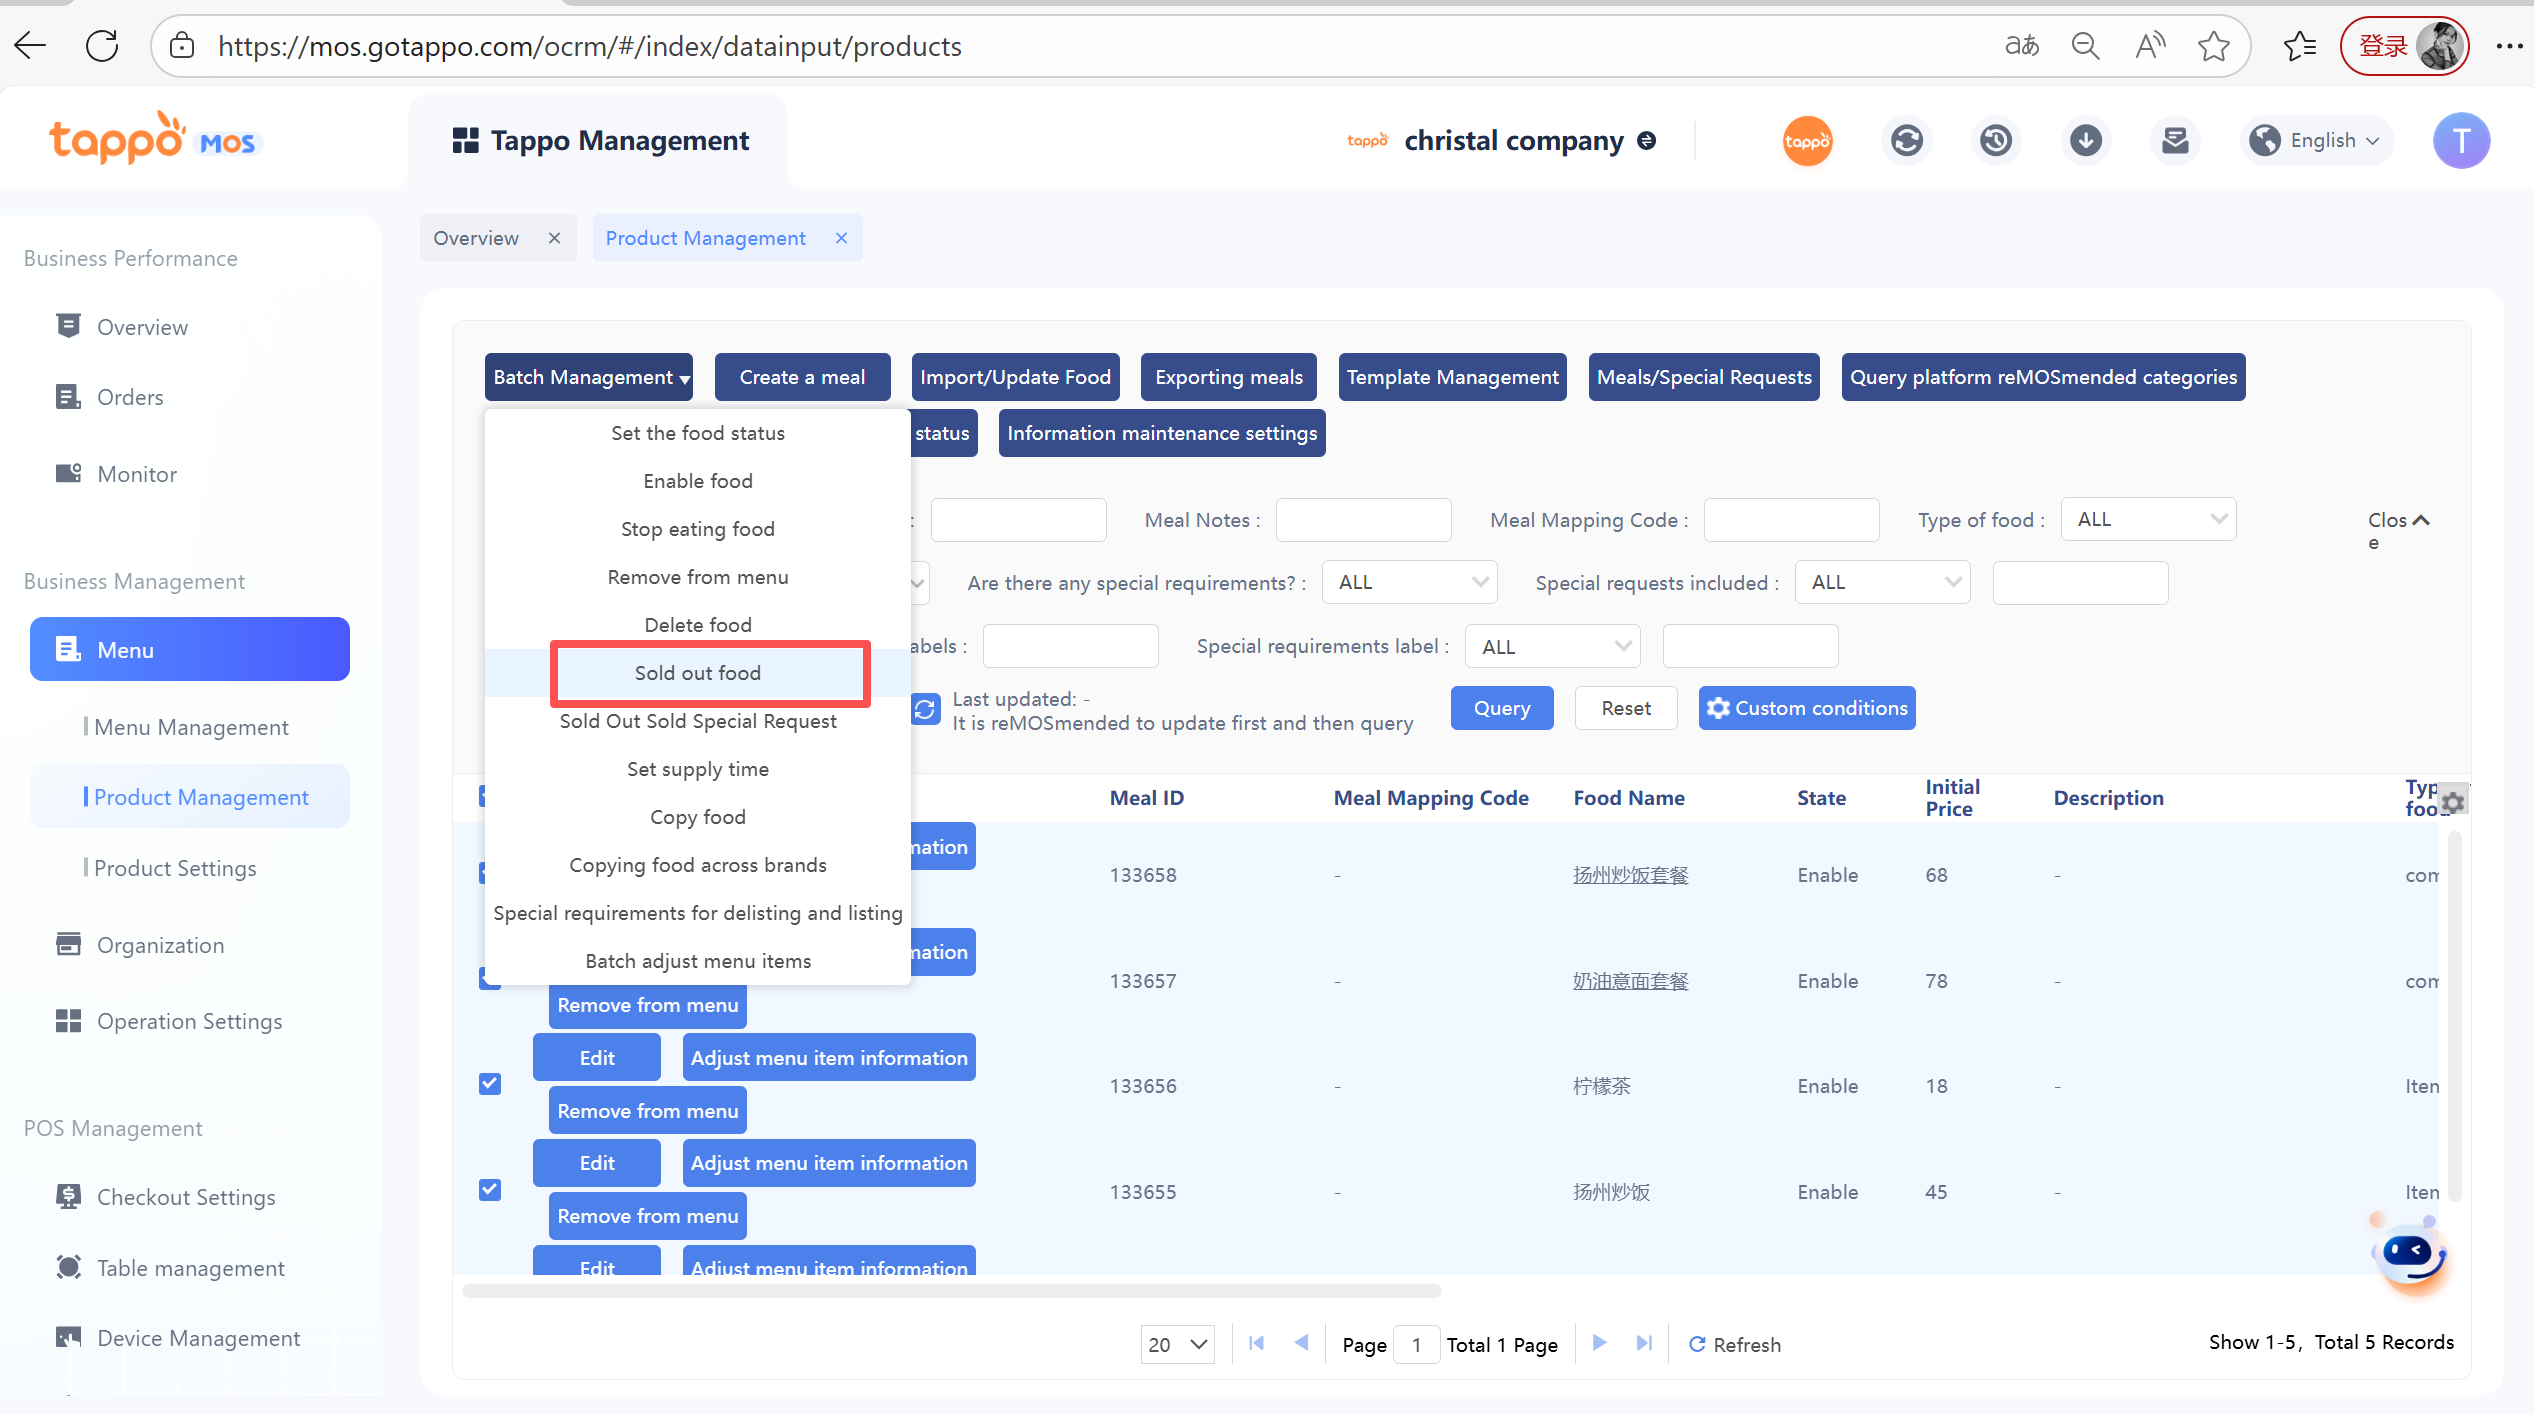
2. Select the effective stores and the dish status to be set.
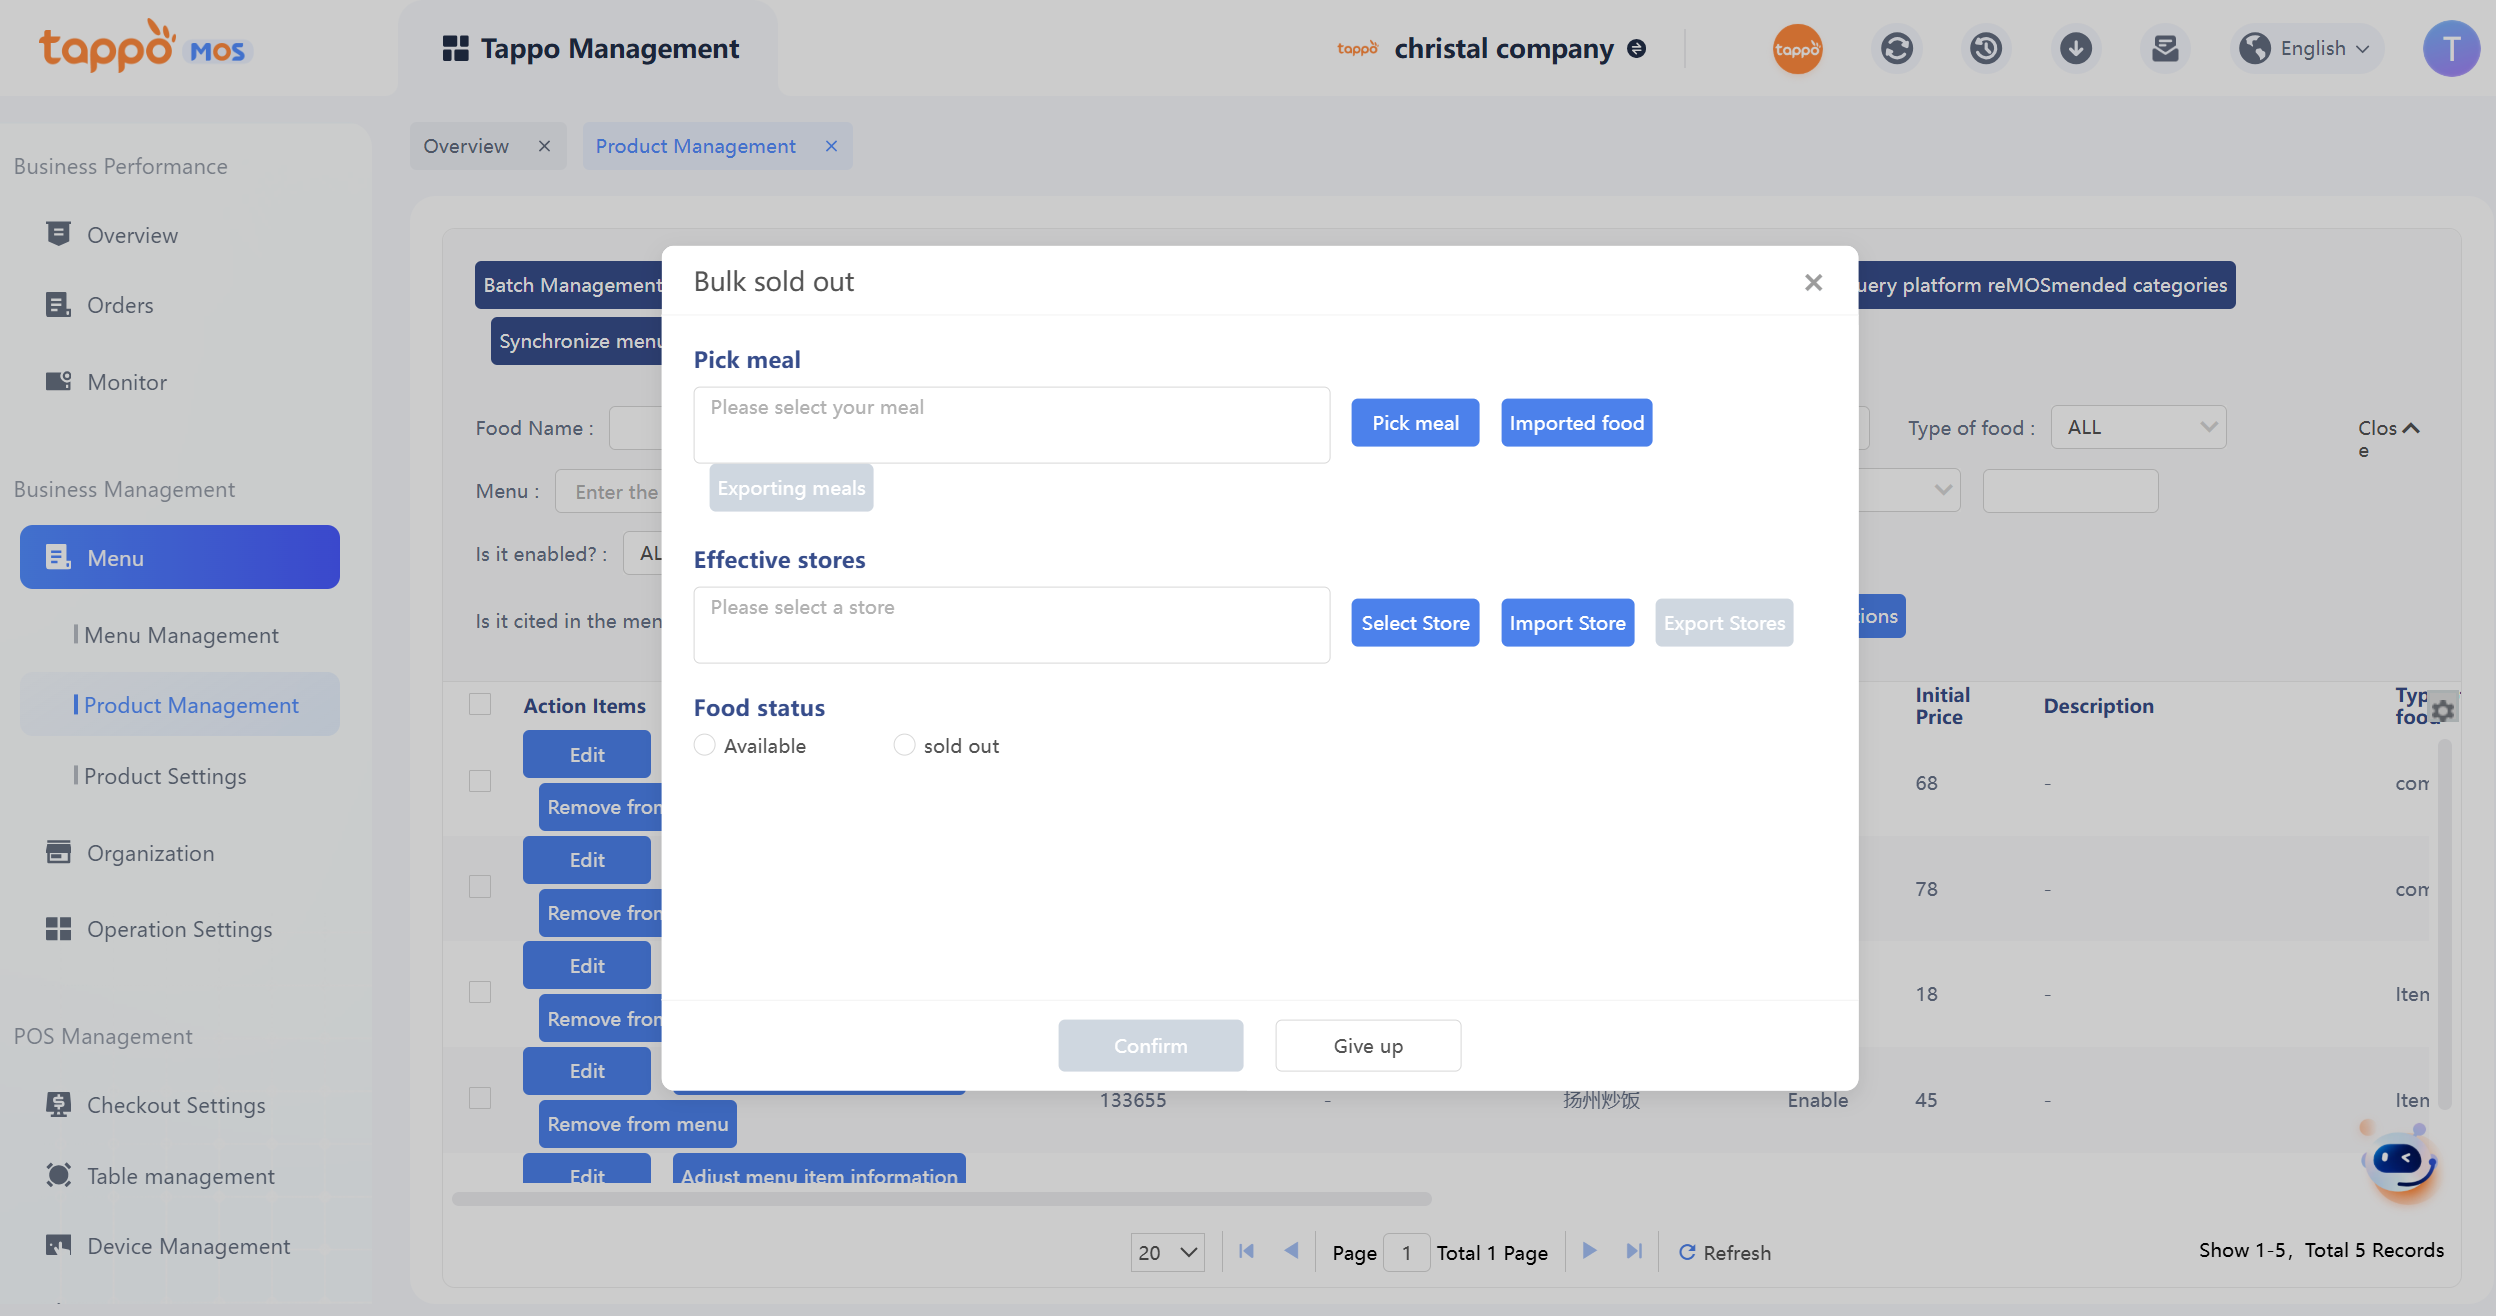
3. Click Confirm to save and automatically synchronize to food delivery platforms.
Batch Copy Foods
Batch copies of dishes under the brand are supported, with a maximum of 20 dishes.
Operation Process:
1. Select one or more dishes to be set in batch, click [Batch Management] – [Batch Copy Dishes].
2. Set the number of copied dishes.
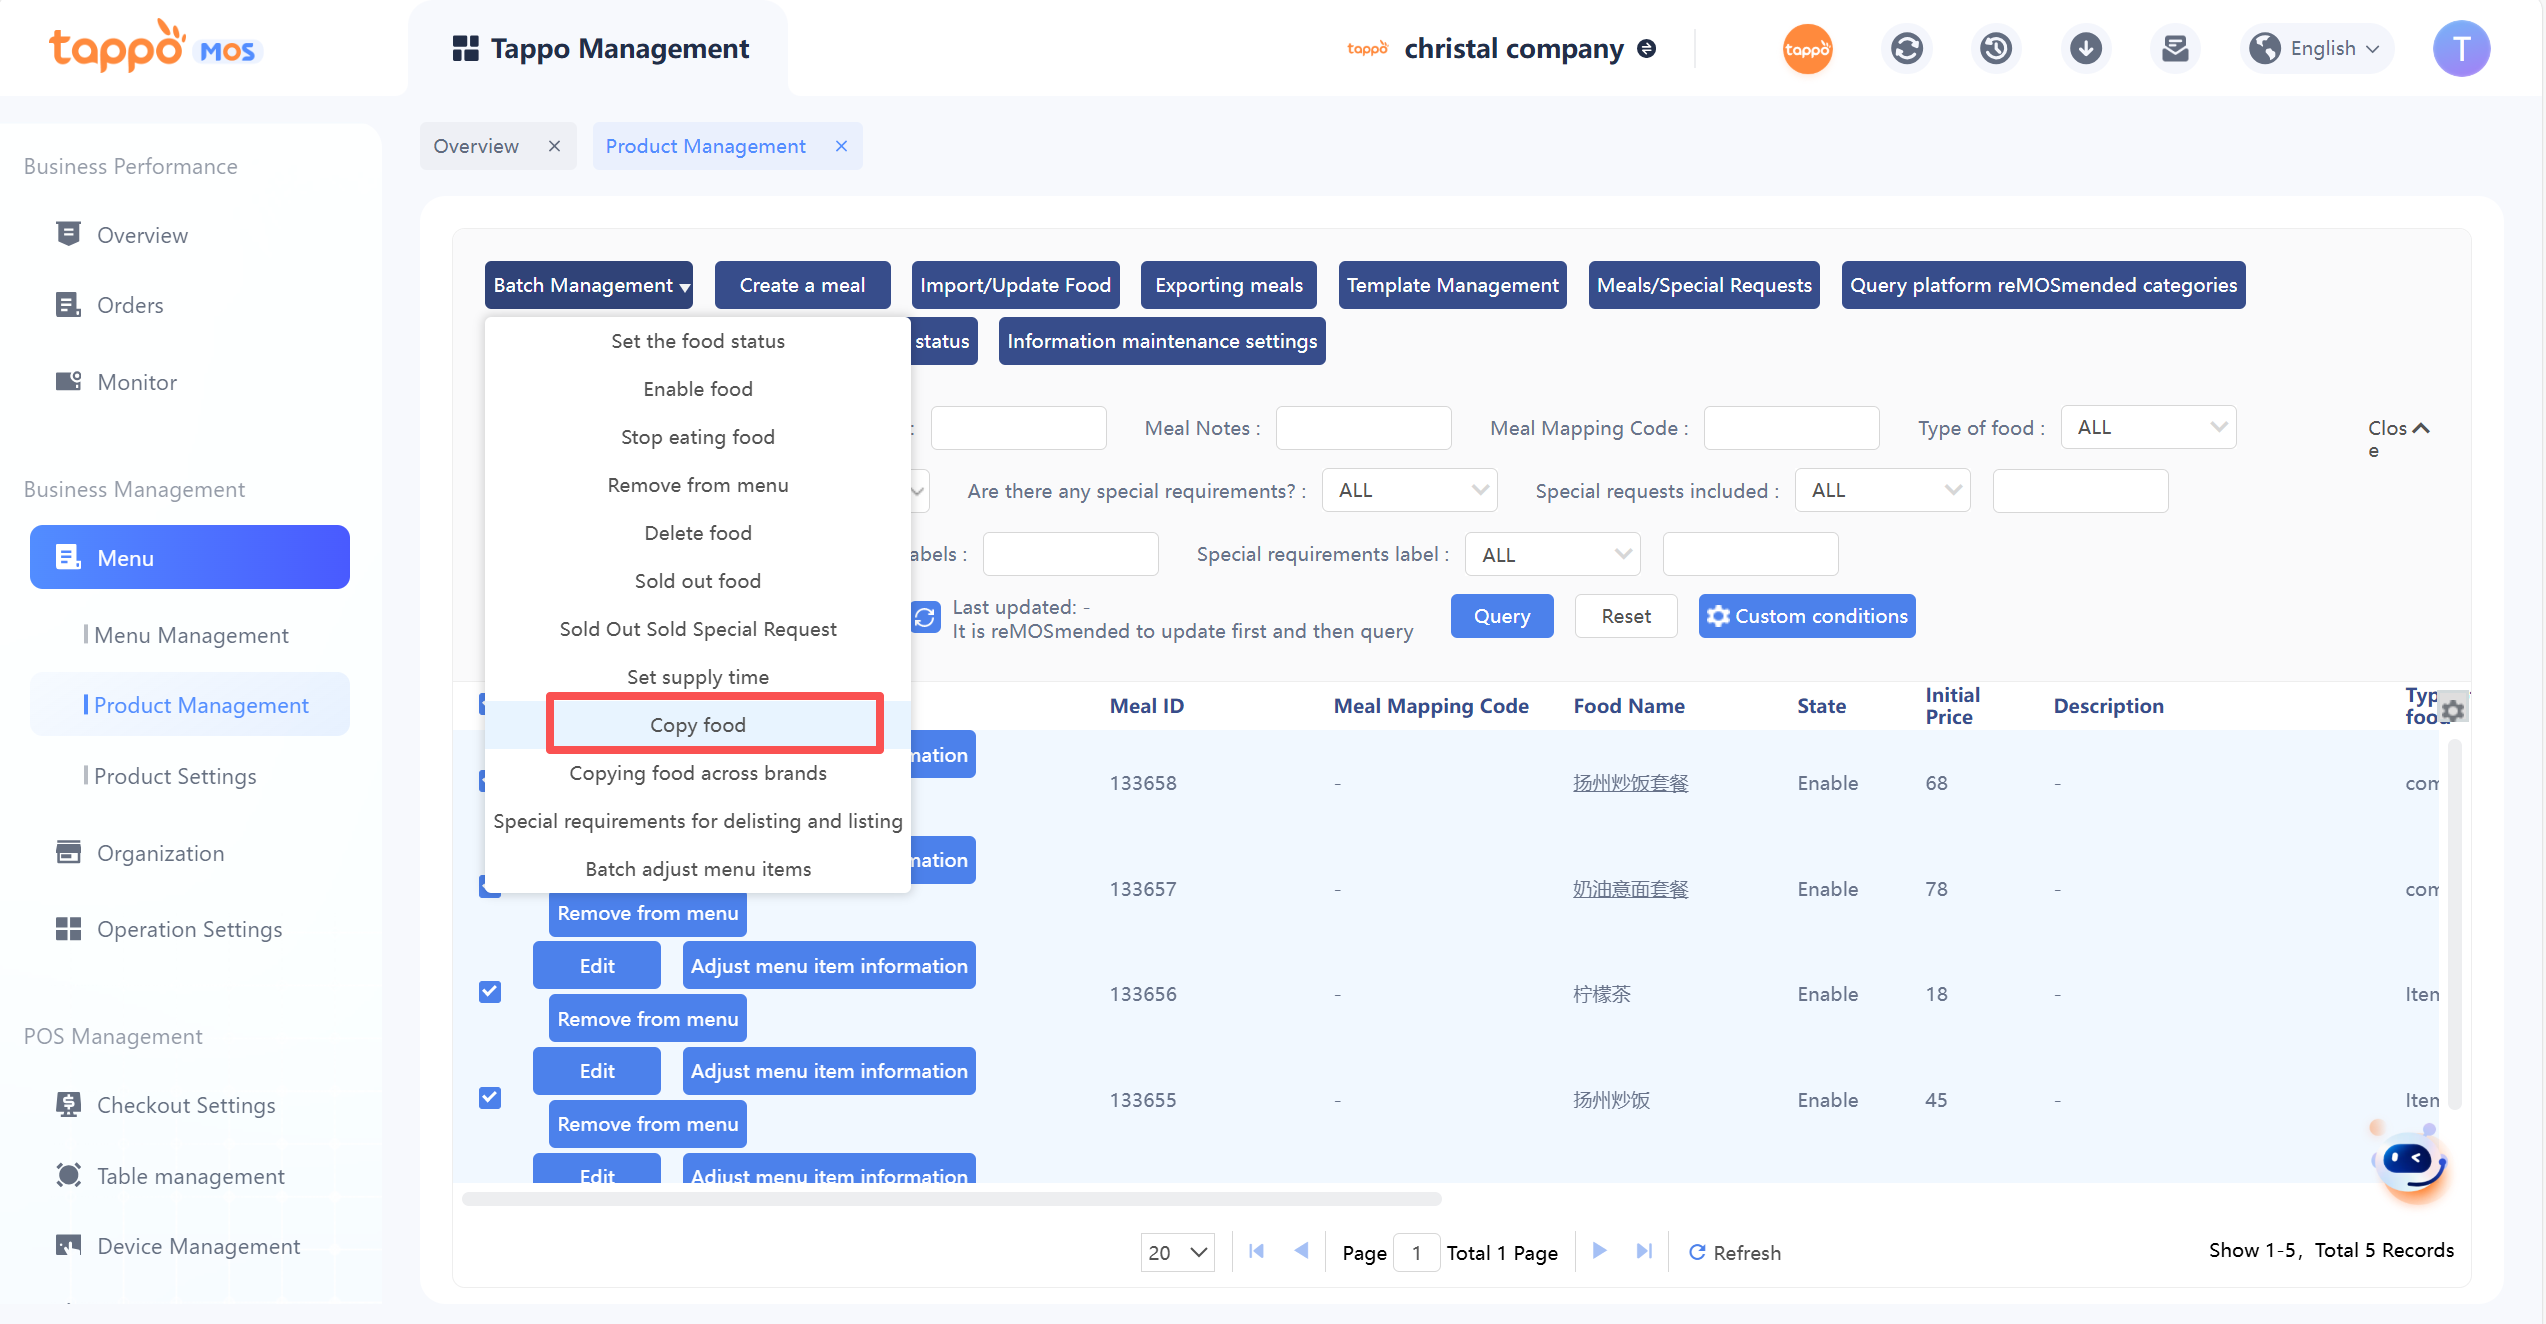
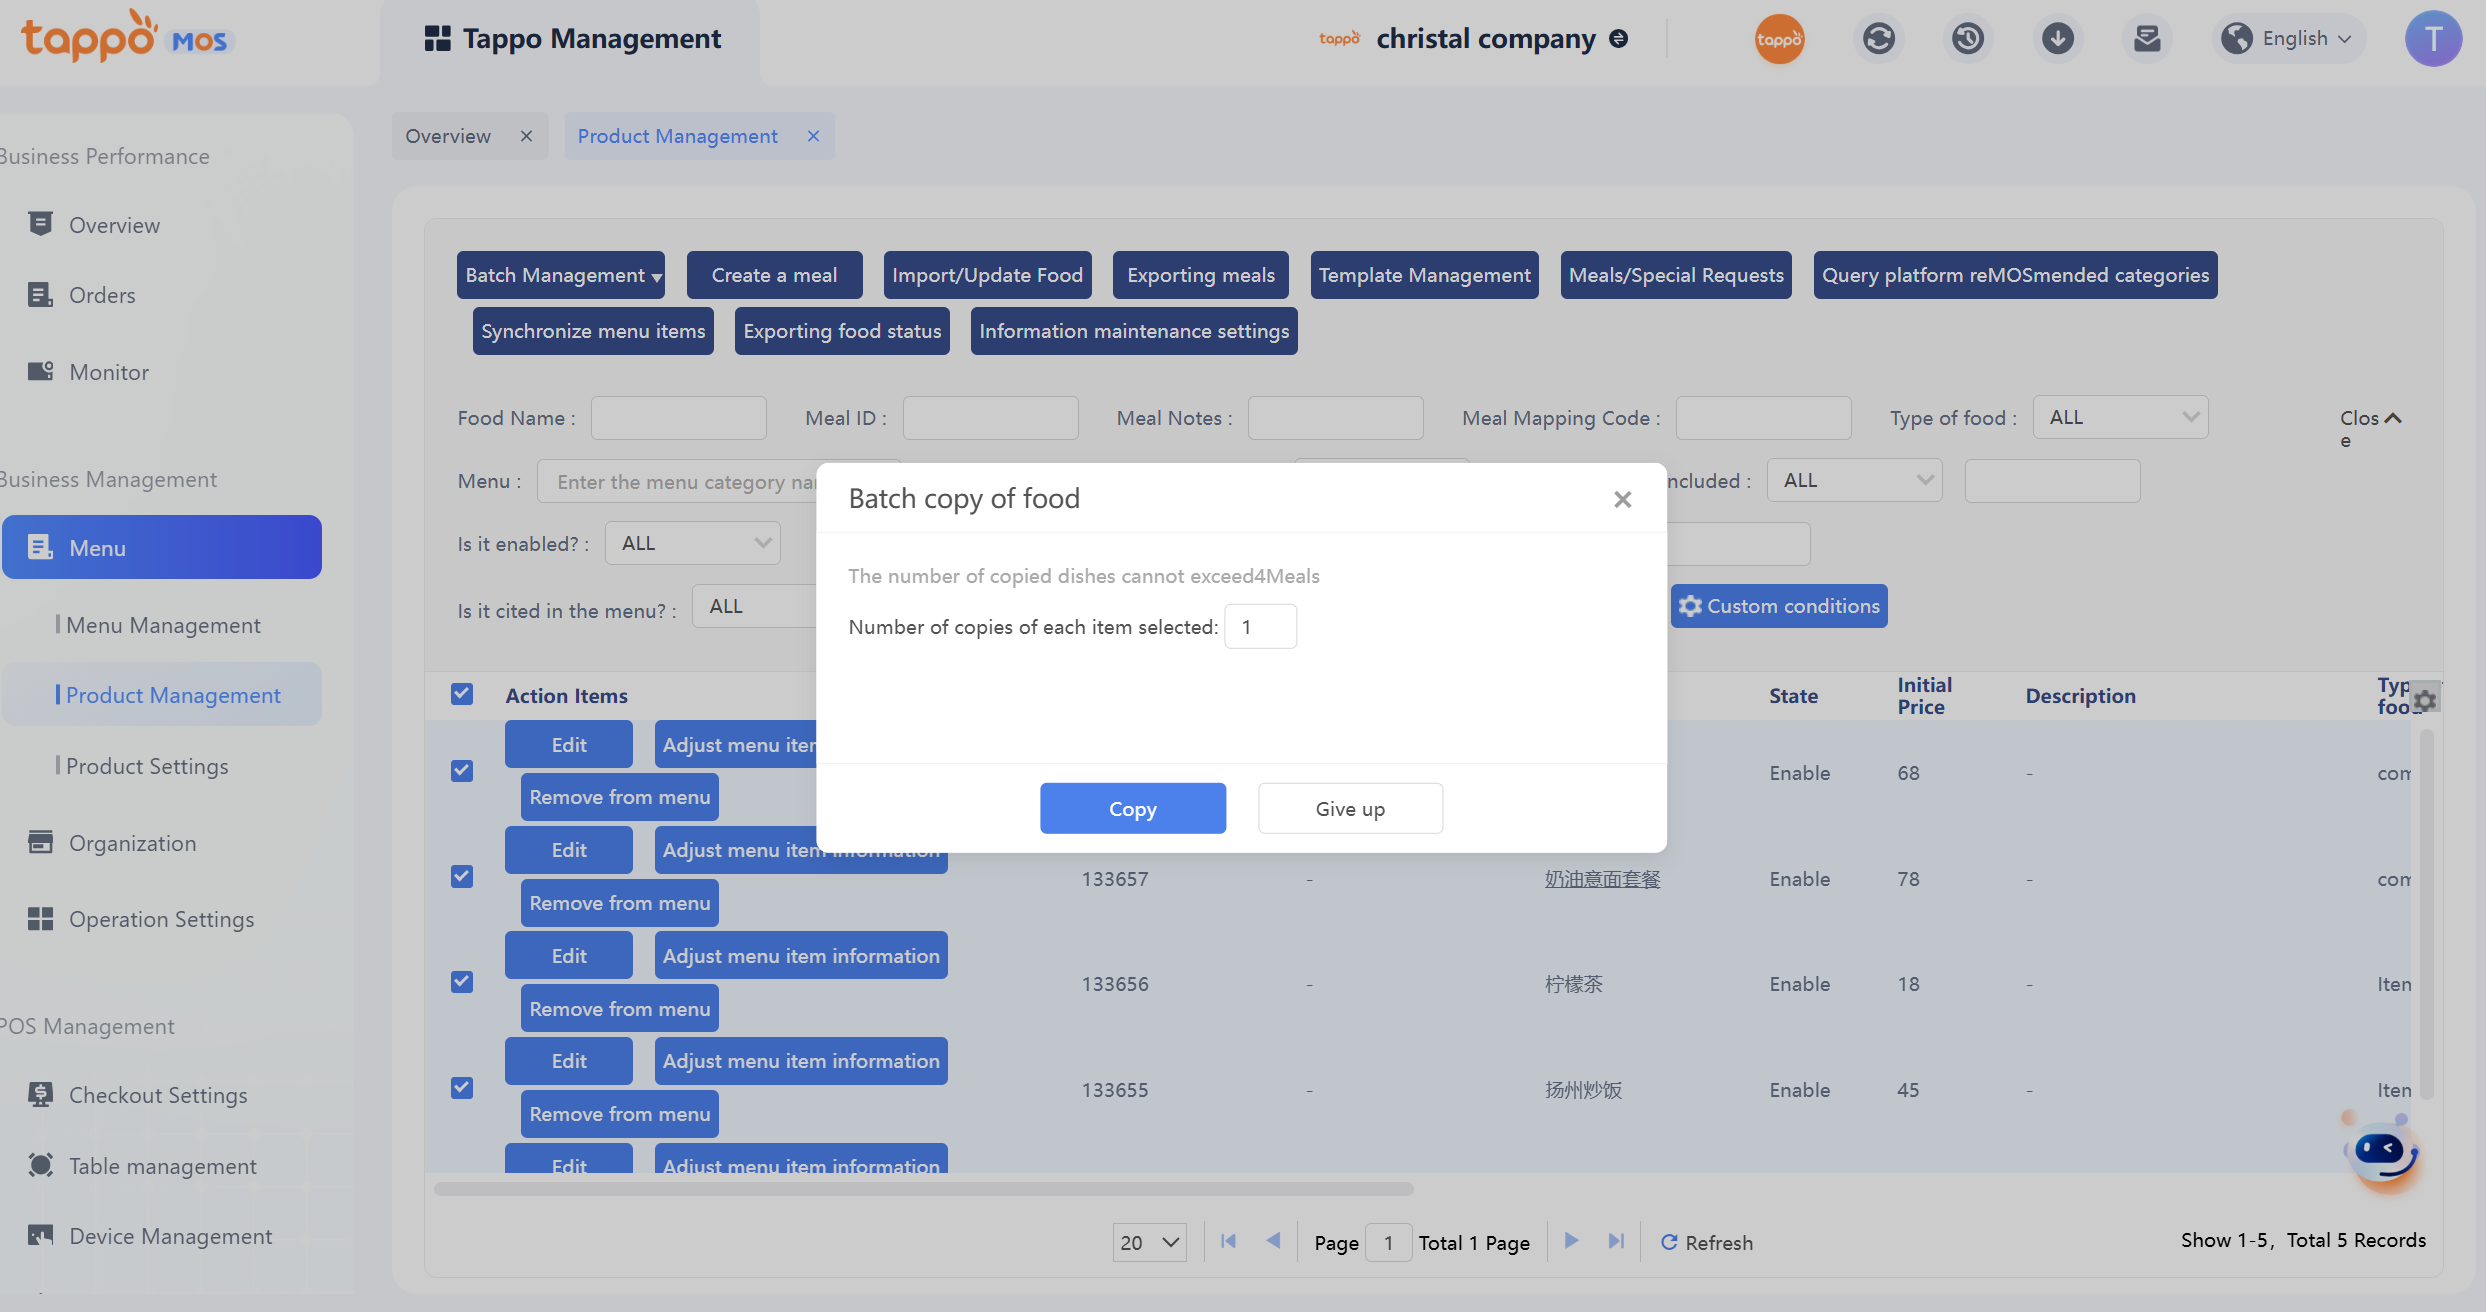
3. Click [Copy] to complete the copy.
Batch Set Supply Time
Batch setting of supply time for multiple dishes is supported.
Operation Process:
1. Select one or more dishes to be set in batch, click [Batch Management] – [Batch Set Supply Time].
2. Select Follow Business Hours or Timed Supply.

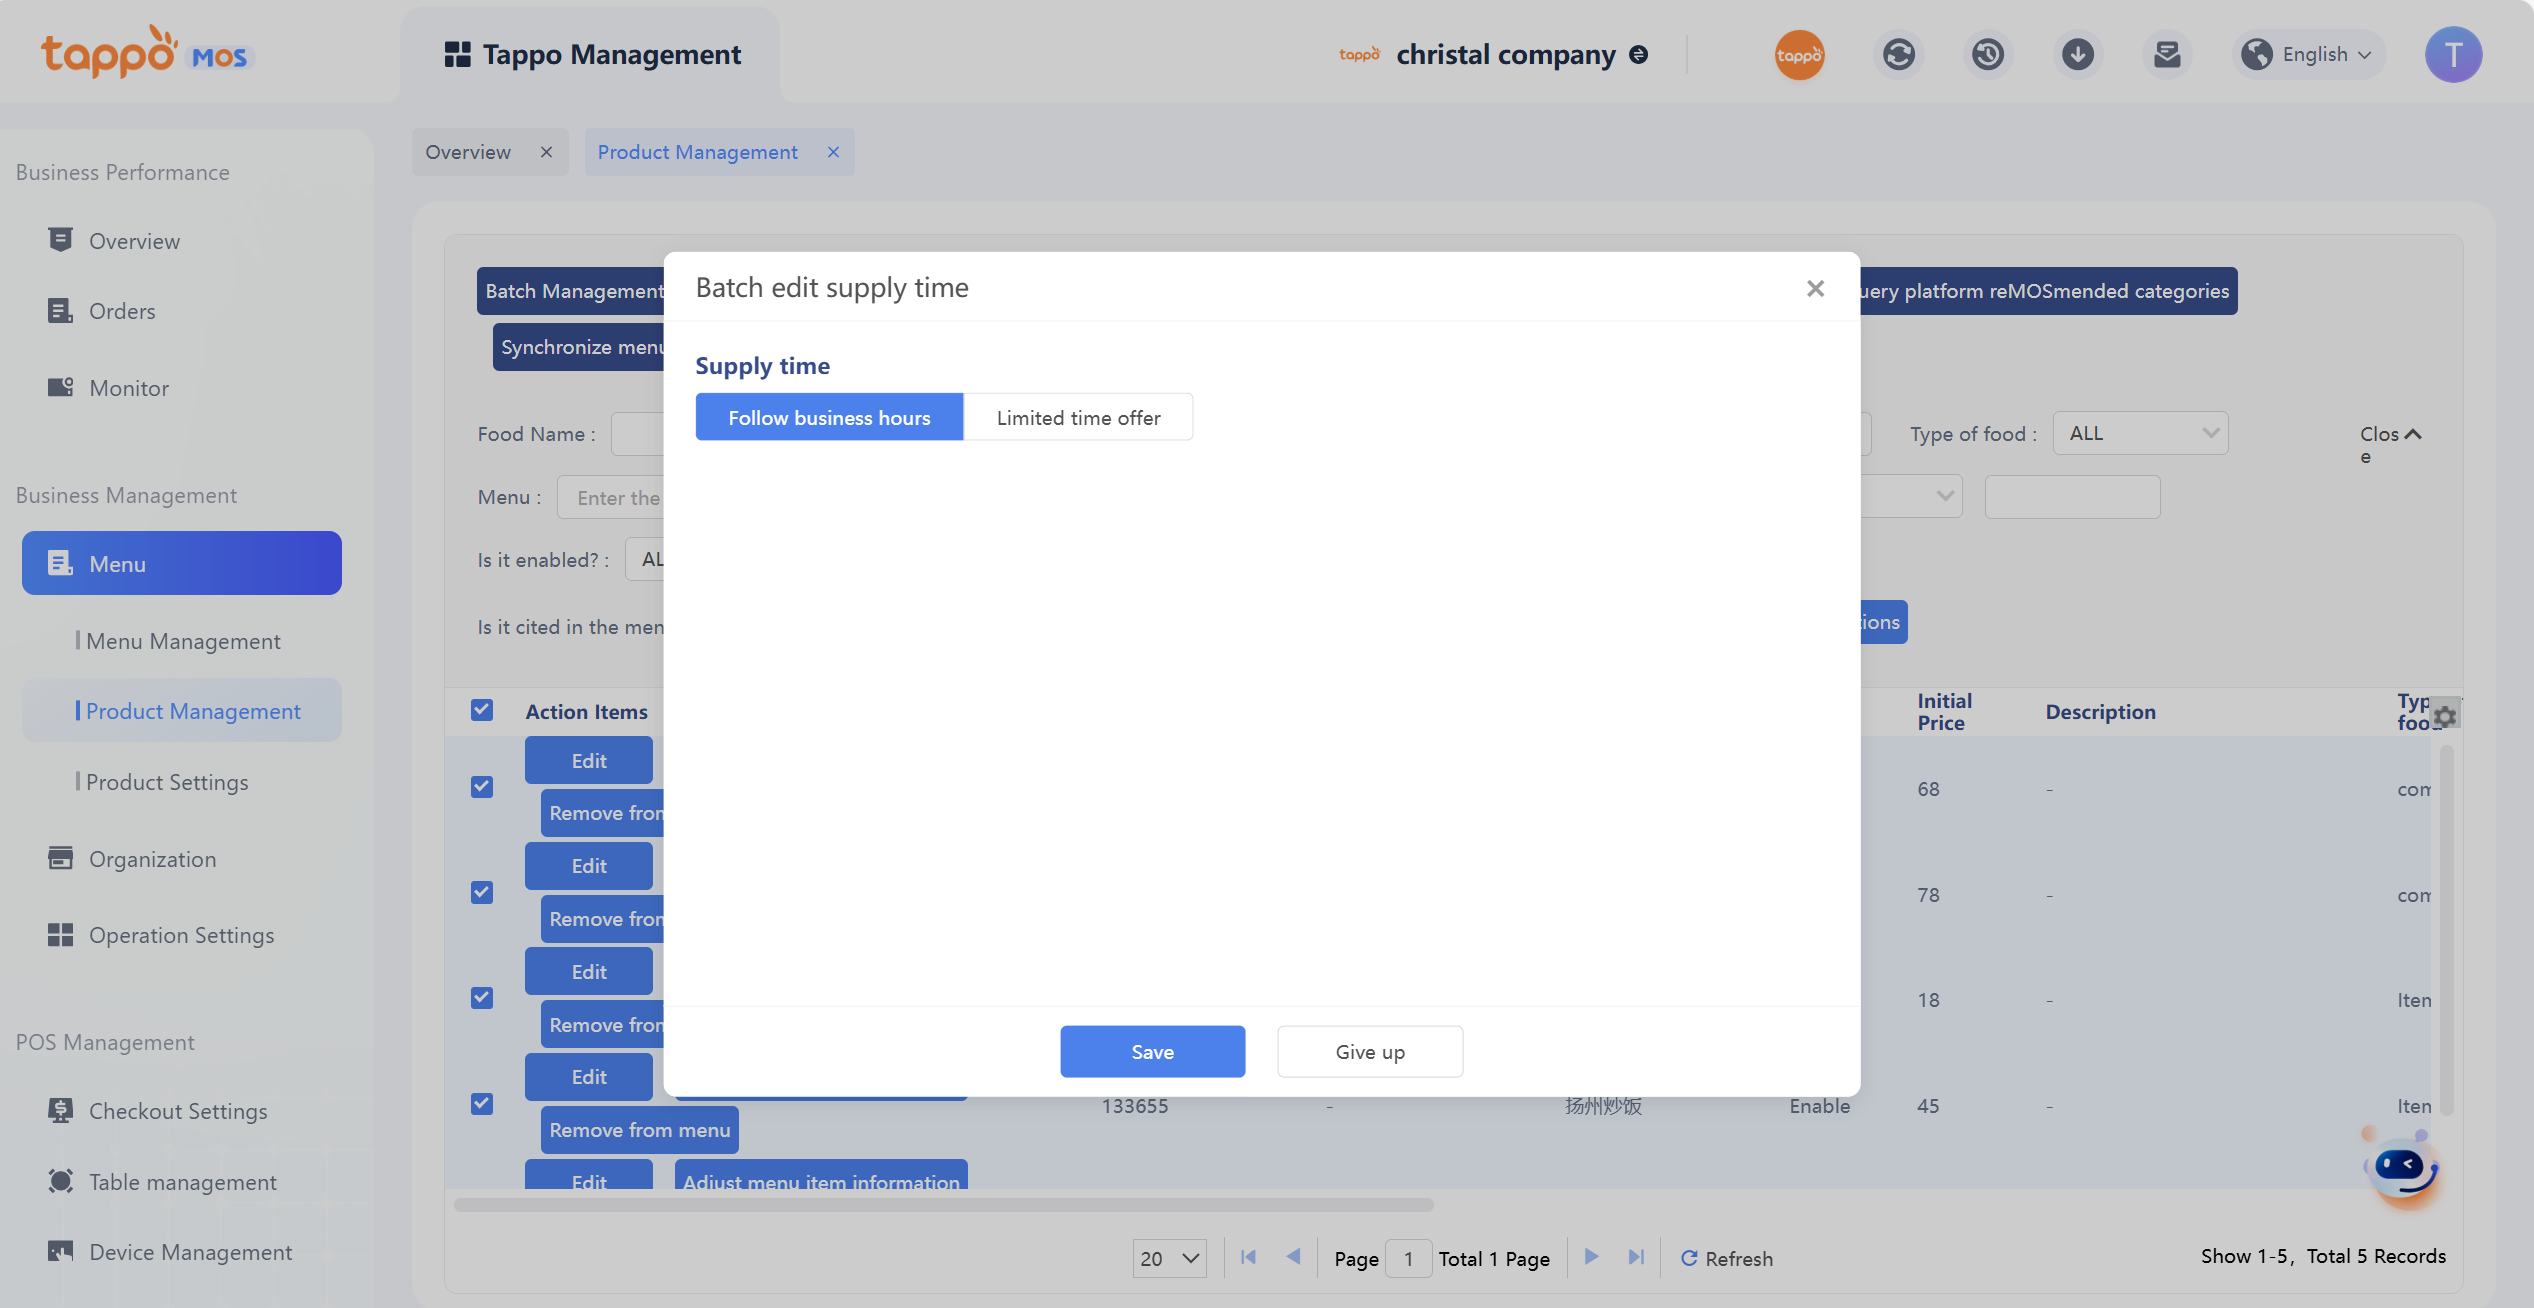
3. If Timed Supply is selected, fill in the corresponding supply time.

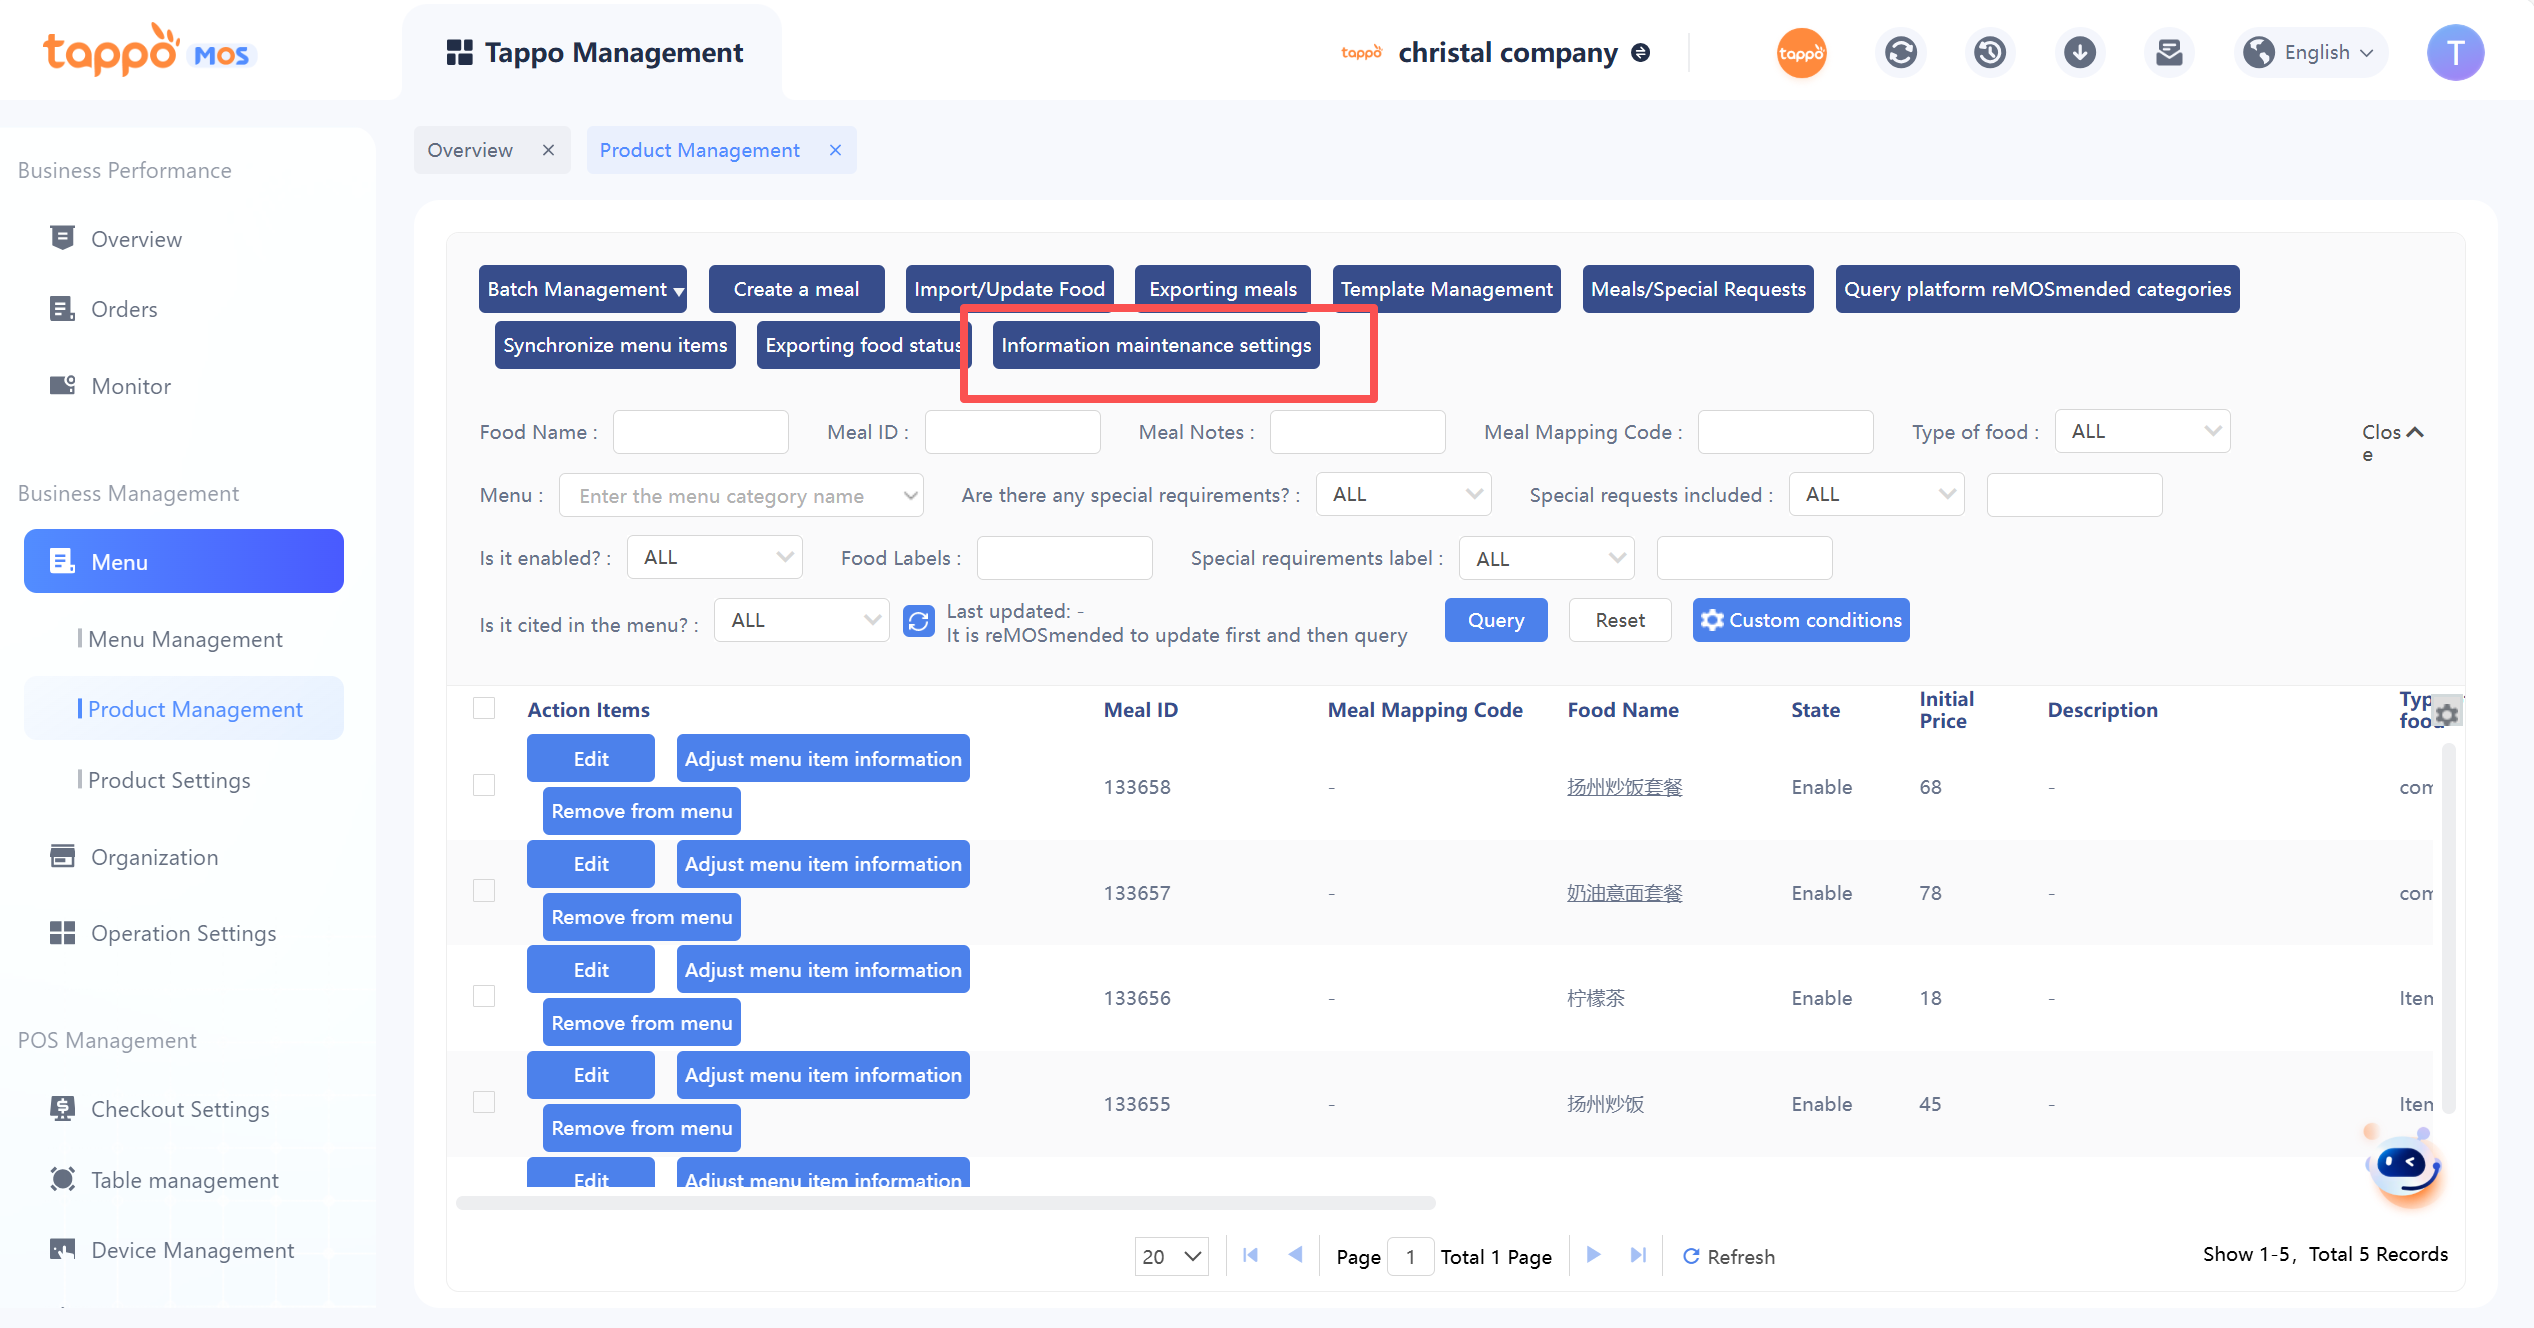
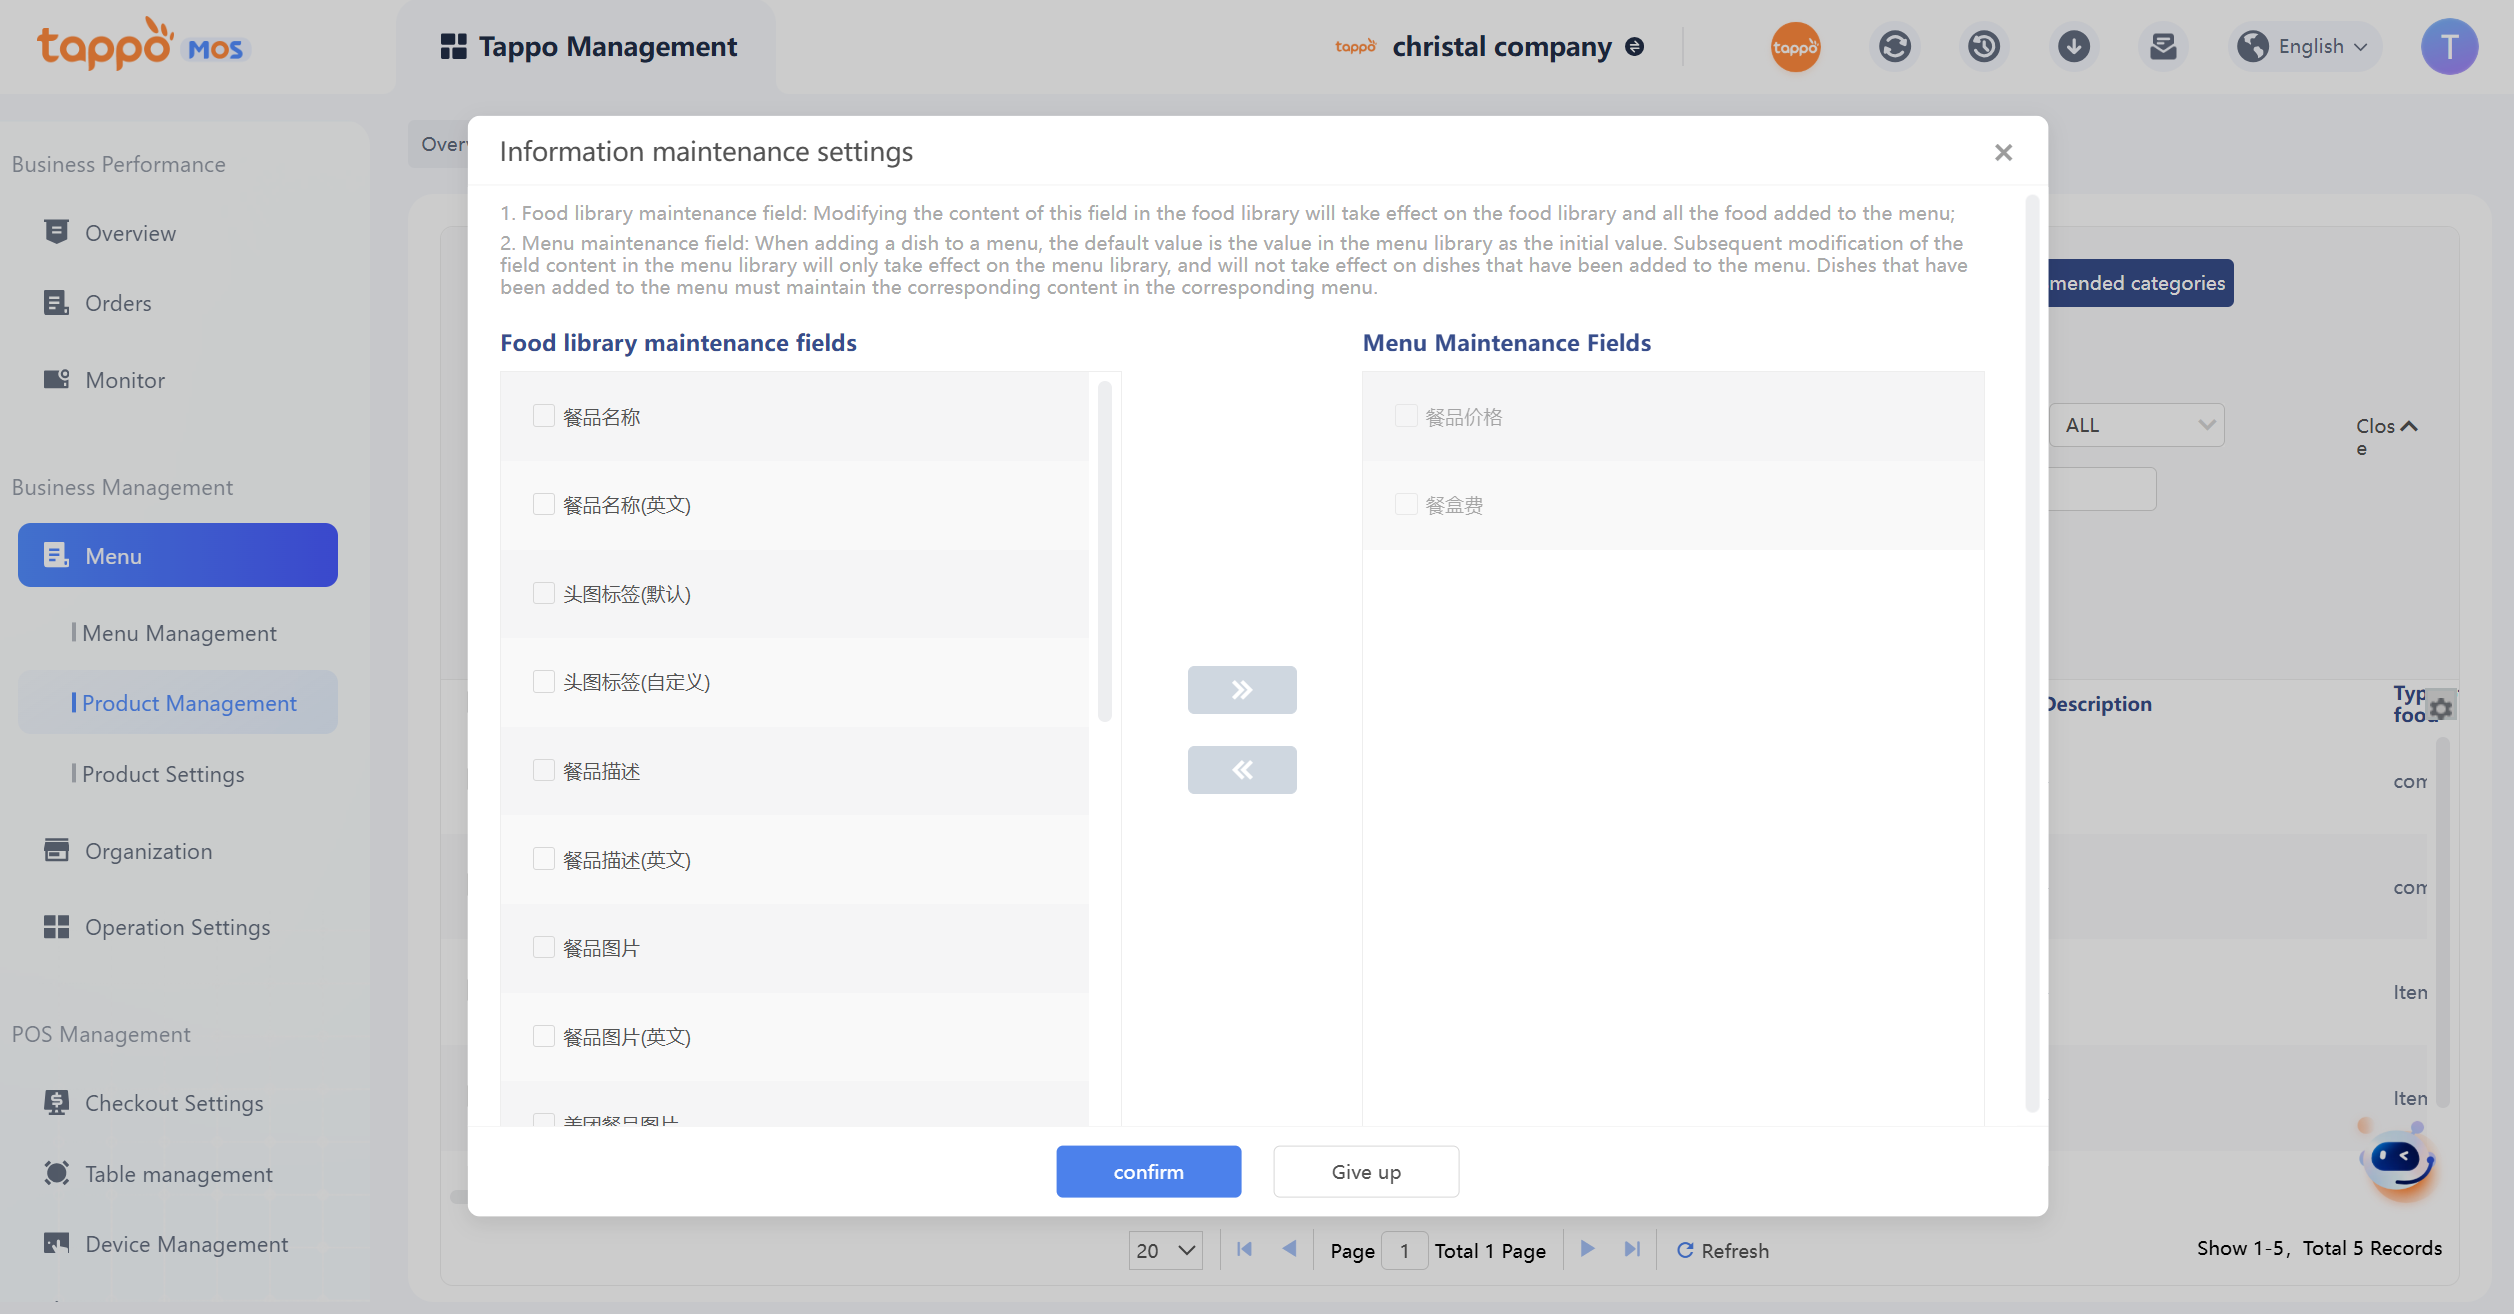
Information Maintenance Settings