- Home
- Guides
- TAPPO Management
- Store Management
Store Management
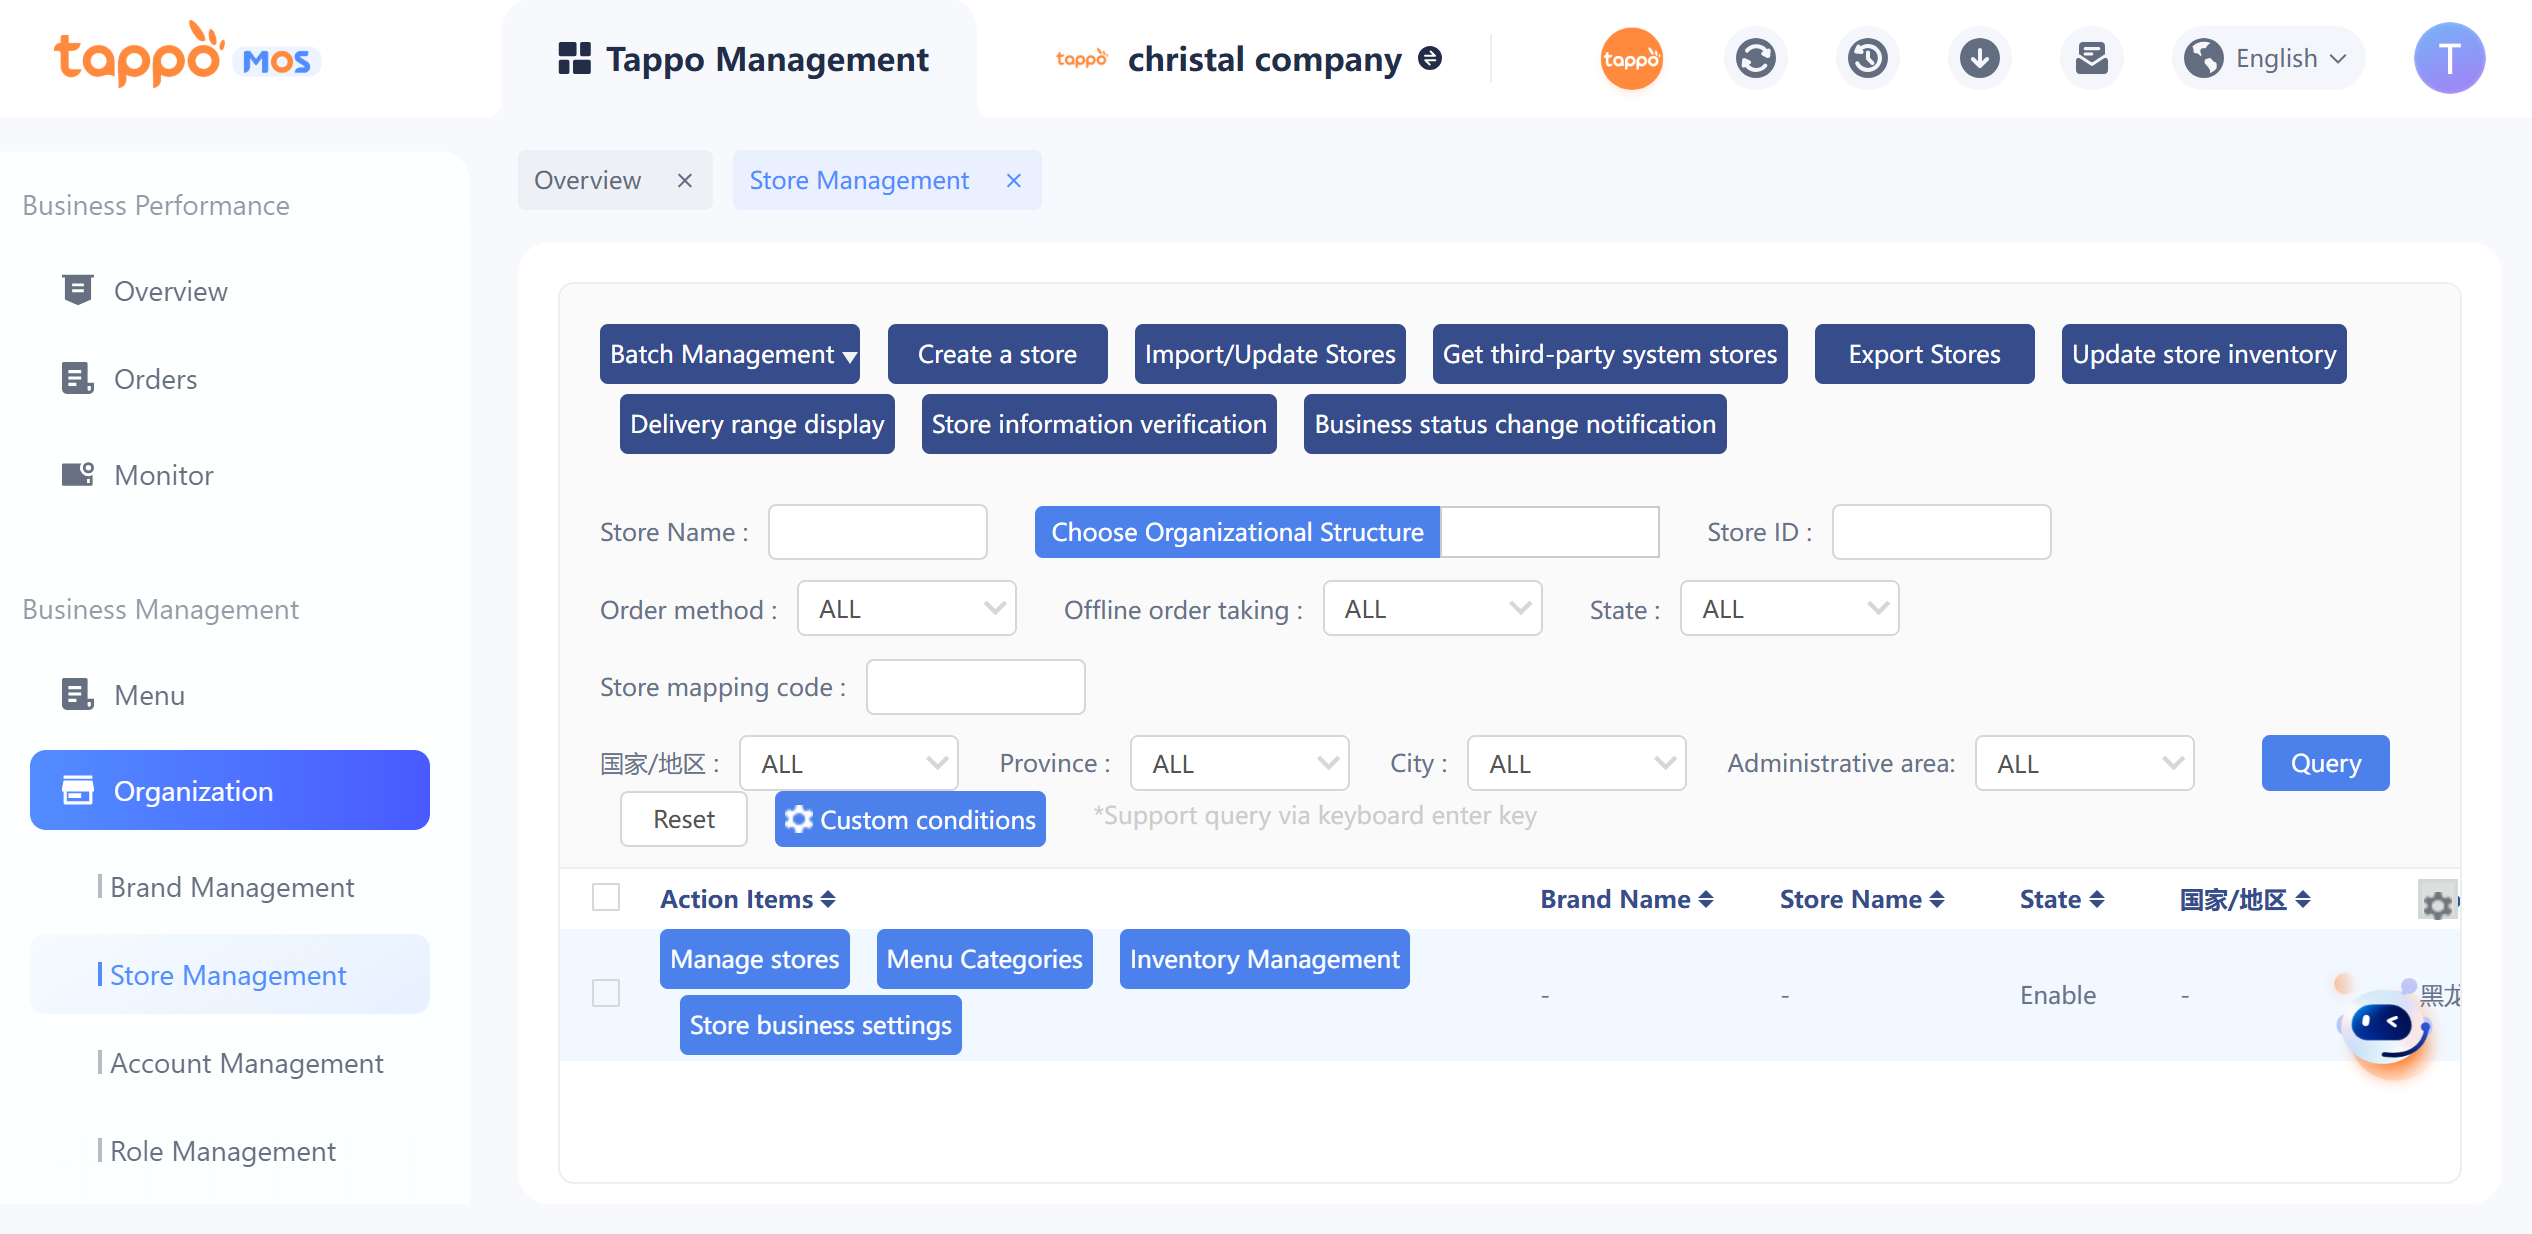
Displays all stores under the brand. Operations such as editing store information, viewing menus, and inventory management can be performed.
Create Store
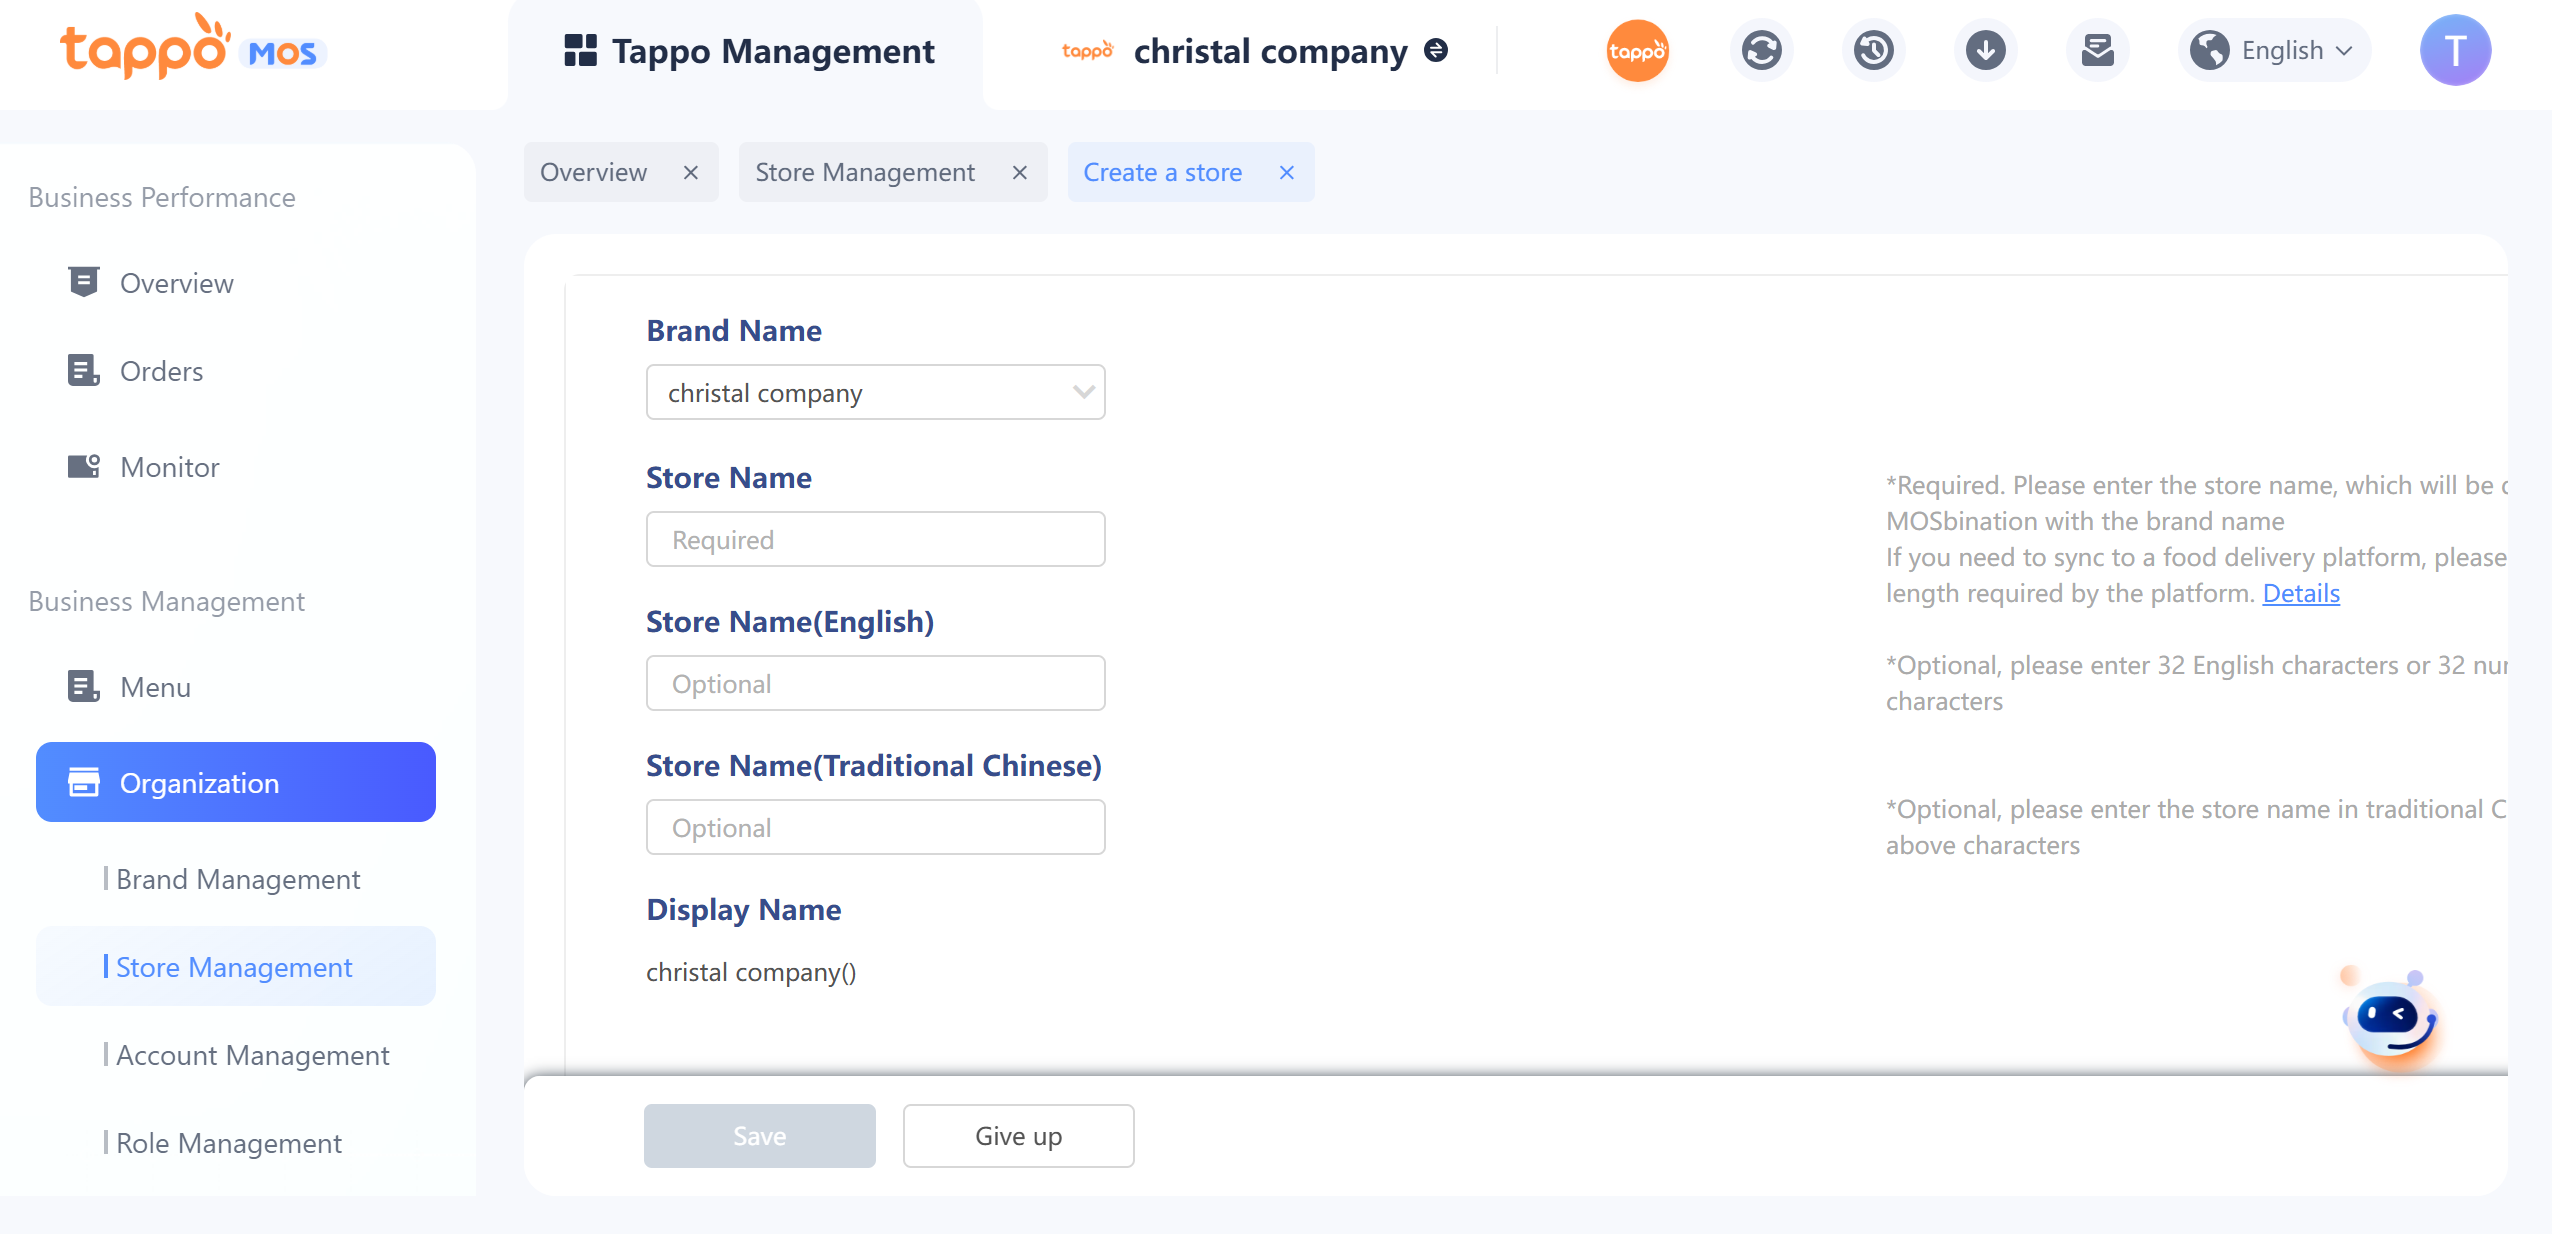
Click [Create Store] in the store list to open the store creation page.
1. Brand Name: Select the brand to which the store belongs.
2. Store Name: Enter the store name. The store name will be displayed to customers in combination with the brand name (example: XXX Brand (XXX Store)) on self-operated channels and connected food delivery platforms. After connecting to food delivery platforms, if edited for the second time, Baidu Platform will trigger a review due to the change of store name. The store will be offline during the review and will be online only after the third-party review is completed and approved. After modification, you need to enter Third-Party Management – Food Delivery Platform Synchronization Management to synchronize store information and update the store name to the connected food delivery platforms.
3. Province, City, Administrative Region: Select the city and region where the current store is located.
4. Address: Enter the store address and click to confirm the address to locate the store’s coordinates. Customers can match stores and view the store’s location based on the entered store location on self-operated channels and connected food delivery platforms. After connecting to food delivery platforms, if edited for the second time, Baidu Platform will trigger a review due to the change of store name. The store will be offline during the review and will be online only after the third-party review is completed and approved. It supports determining the store address by entering latitude and longitude. If modifying the store’s latitude and longitude is inconsistent with moving the icon, a prompt will appear asking whether to modify.
5. Phone: Store phone number, displayed on self-operated channels. Multiple phone numbers can be entered.
6. Customer Service Phone: Displayed on food delivery platforms; if left blank, the customer service phone number in the brand information will be read during synchronization.
7. Email: If there are multiple emails, separate them with commas (,).
8. Store Announcement: Displayed on self-operated channels and connected food delivery platforms. If left blank, the brand announcement in the brand information will be read during synchronization.
9. Business Settings: If the store’s business settings are inconsistent with the brand’s, a single store can be configured separately. The operation of store business settings is the same as that of brand settings.
10. Store Tags: Tags for identifying the store can be filled in, supporting up to three custom tags. After filling in, this field can be set to be displayed in the store list. After filling in this field, it will be used for report statistics.
11. Timed Synchronization of Range to Food Delivery Platforms: If supported, the system will regularly synchronize the range data only for the current time to the food delivery platform every 5 minutes according to the store’s delivery time range.
After creating the store, it is inactive by default.
Set Store Tappo POS Account
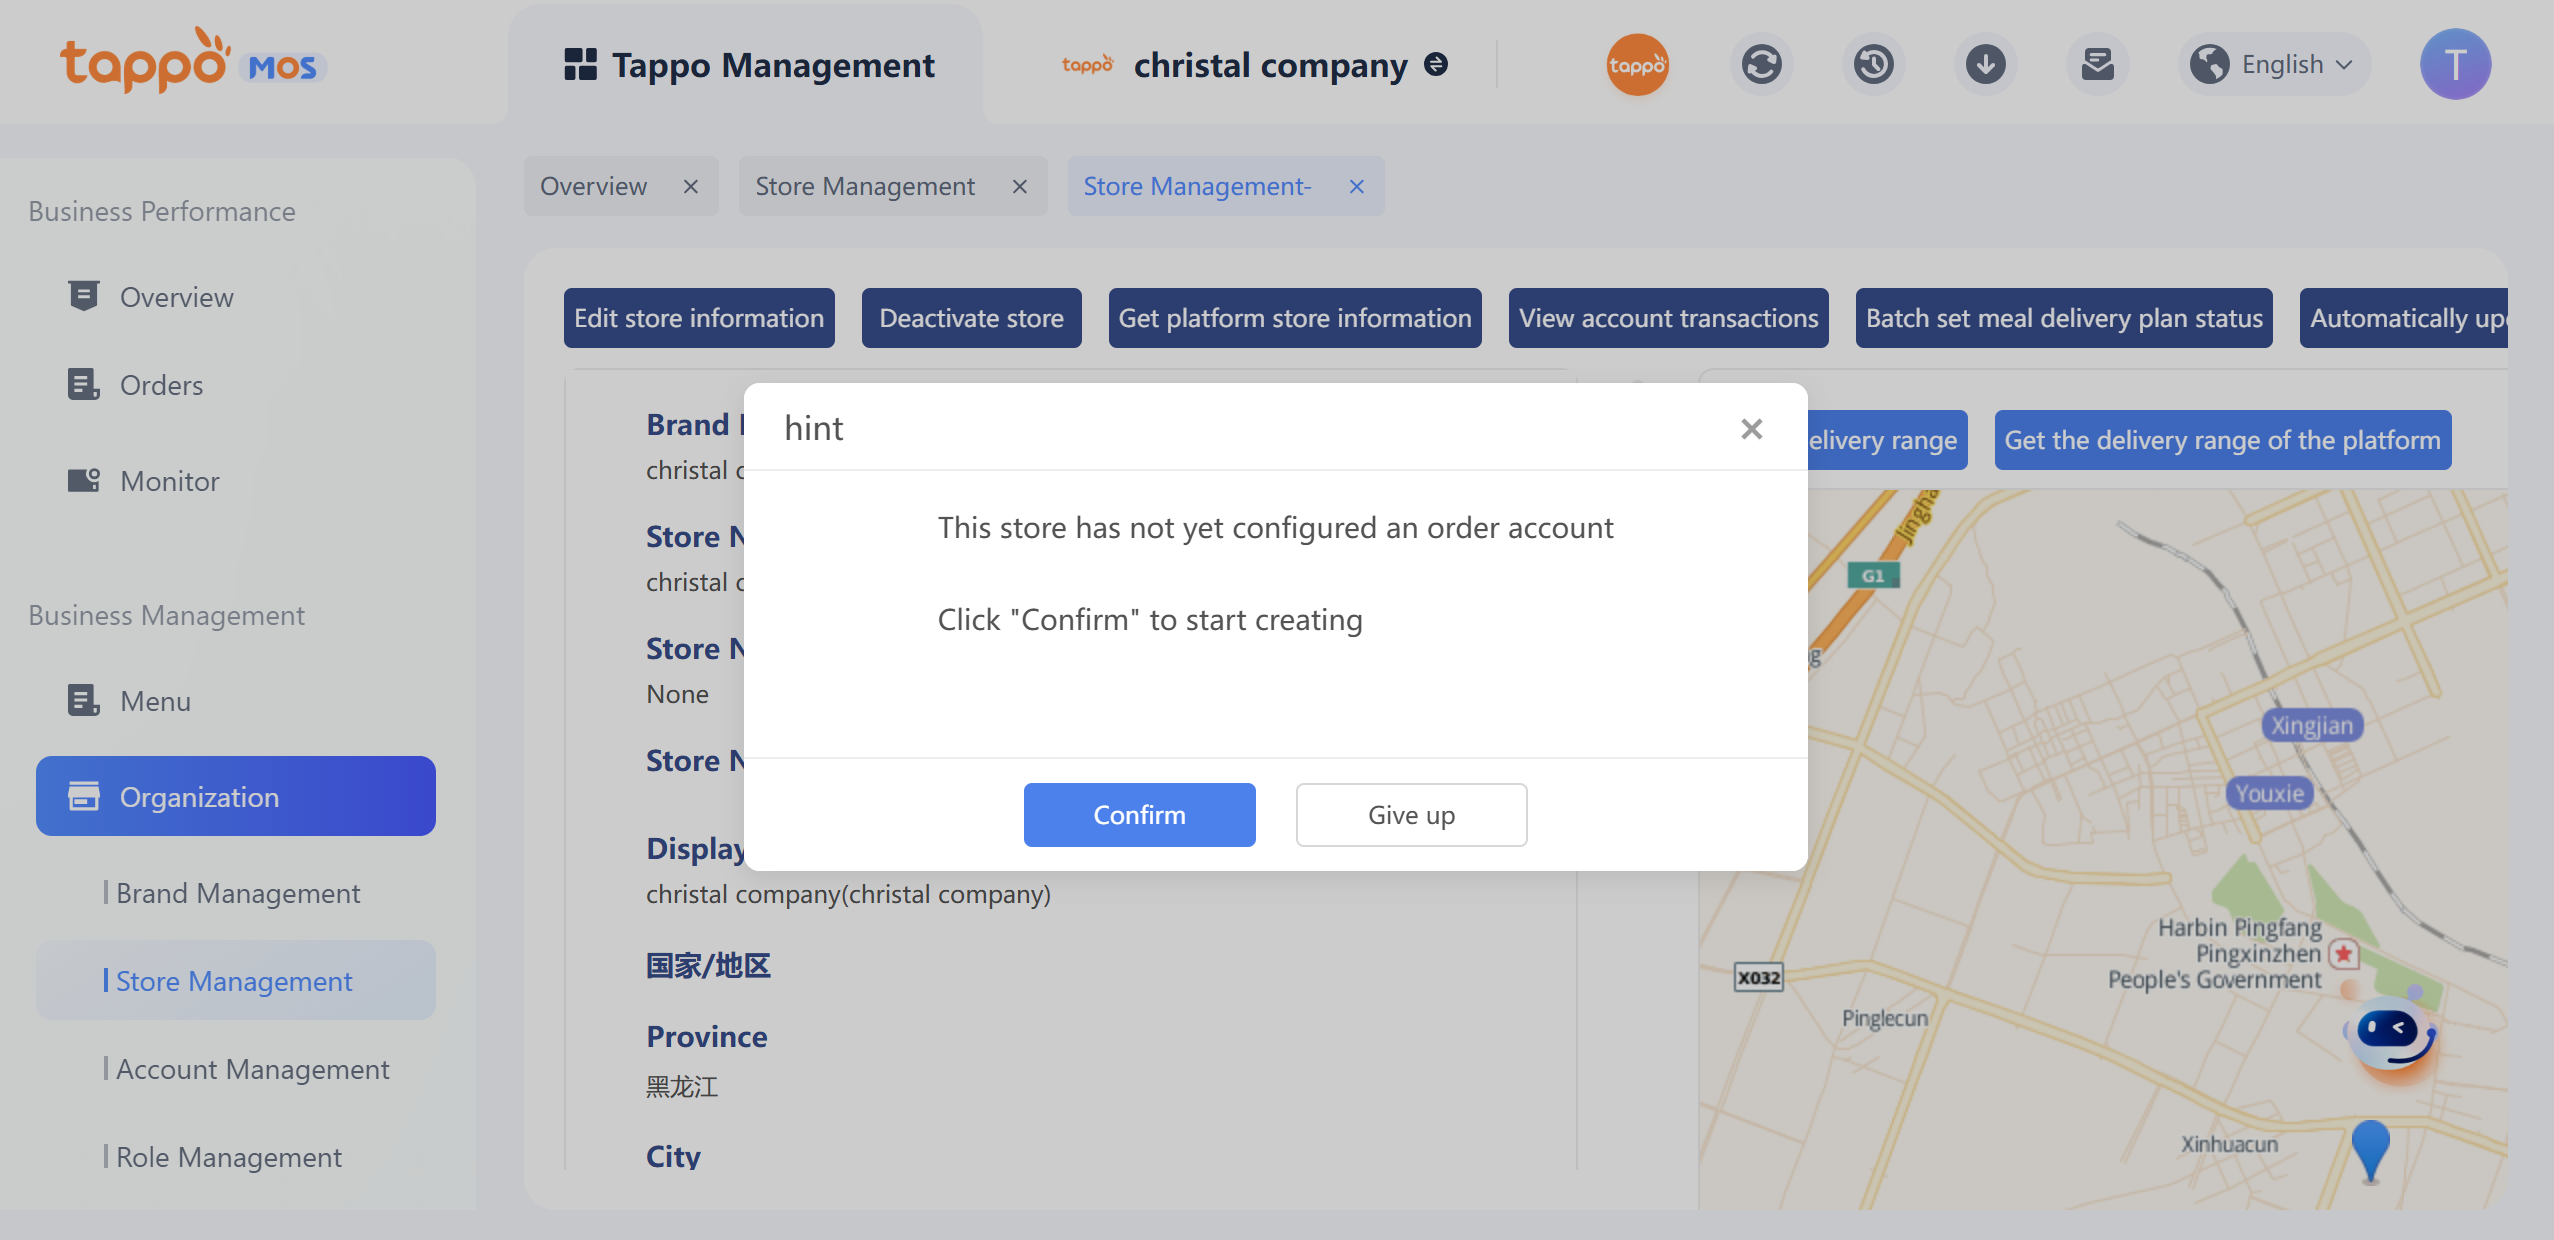
Click [Manage Store] in the store list to enter the store viewing page. If the store is set to accept orders via Tappo POS and no order acceptance account is set, the system will prompt to create a Tappo POS order acceptance account. Click Confirm to jump to the creation window.
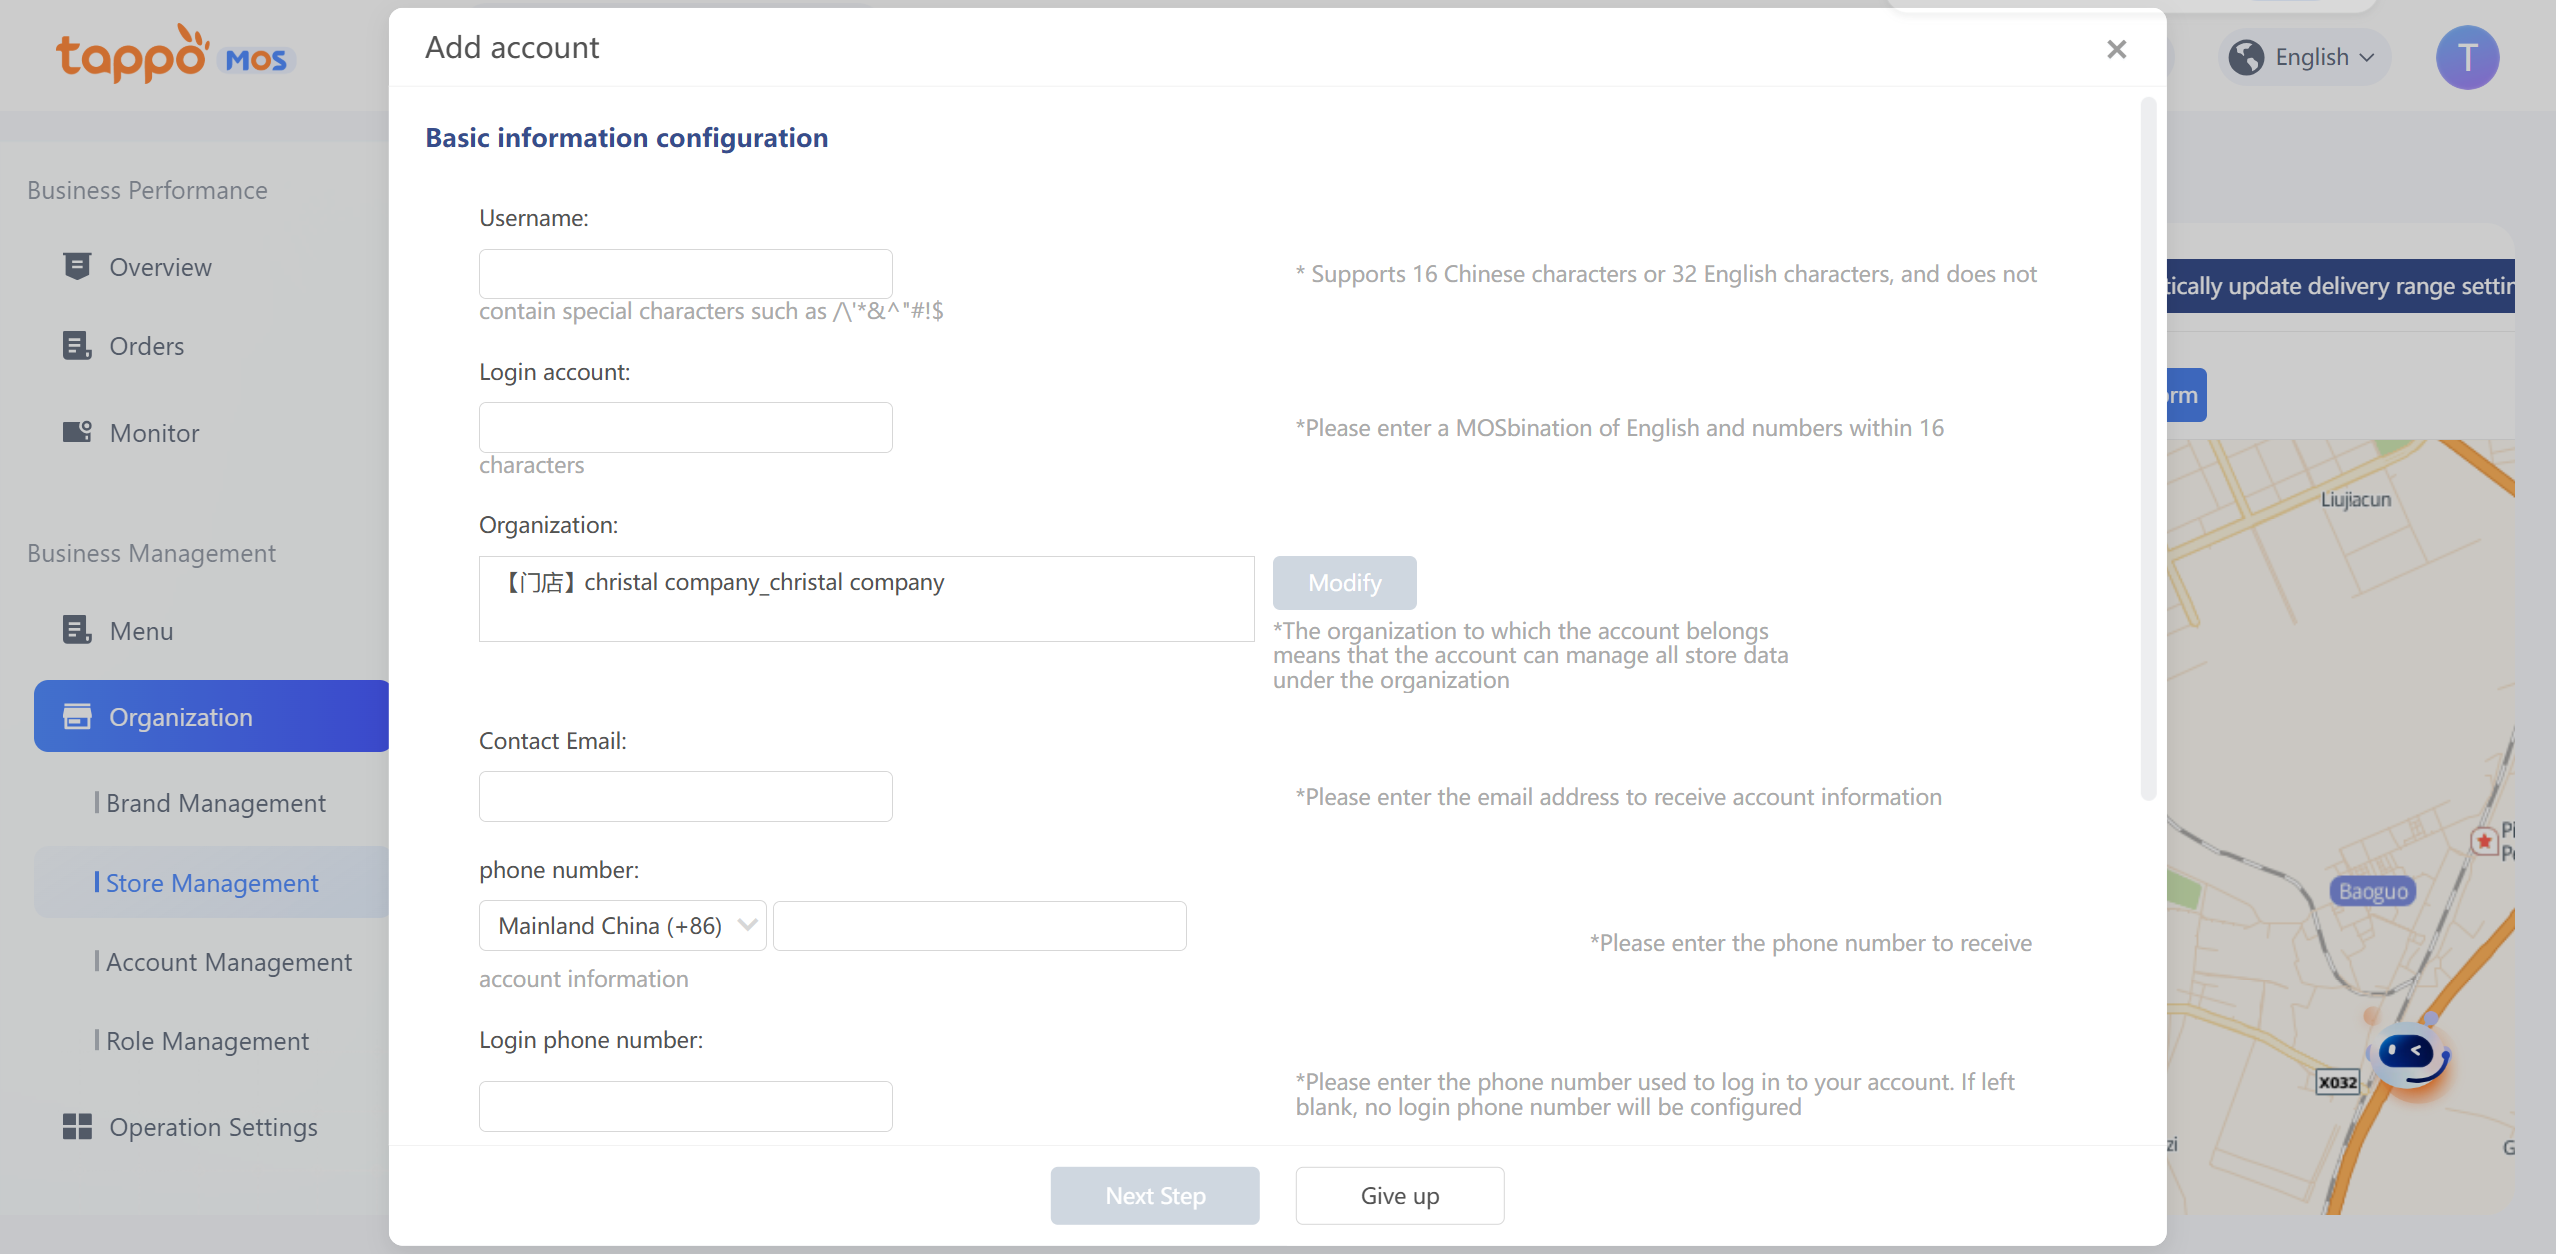
Operation Steps:
• Enter username and login account.
• The affiliated organization is defaulted to the store’s organization and cannot be modified.
• Enter the contact email; the account password will be sent to this email.
• Tappo POS Support: By default, it is selected to have Tappo POS order acceptance function. This account can also log in to Tappo POS.
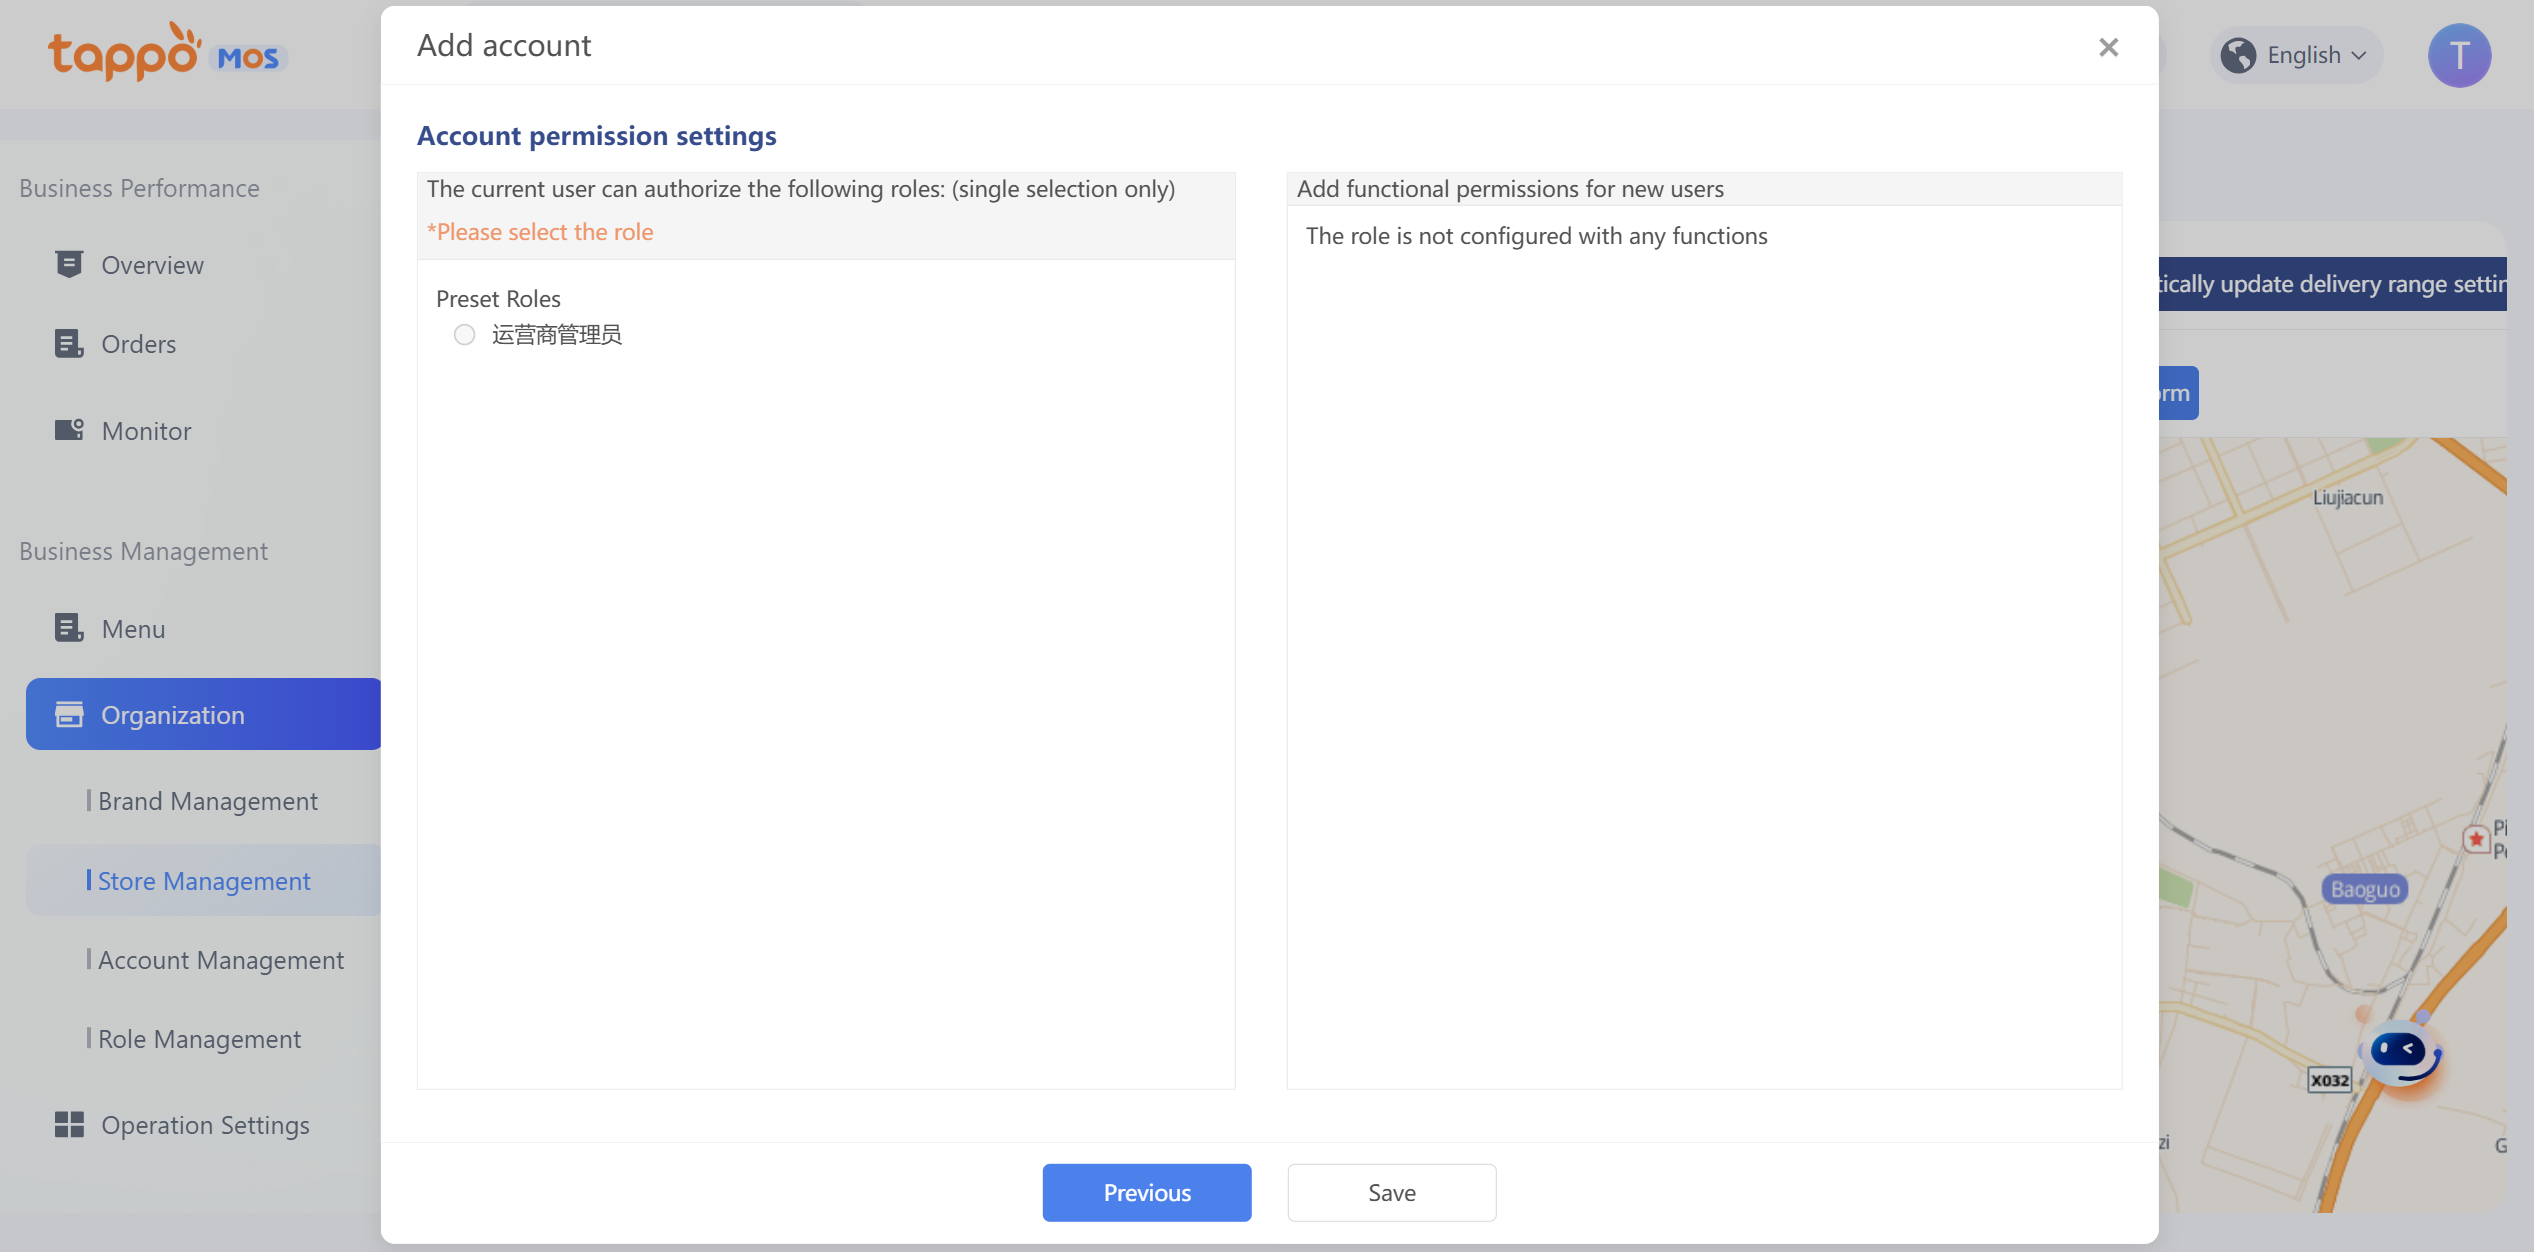
• Set Account Permissions: Defaulted to the system default role “Store Administrator” or select a custom role.
• Click Save to complete the creation of the Tappo POS order acceptance account. This account can log in to the MOS terminal.
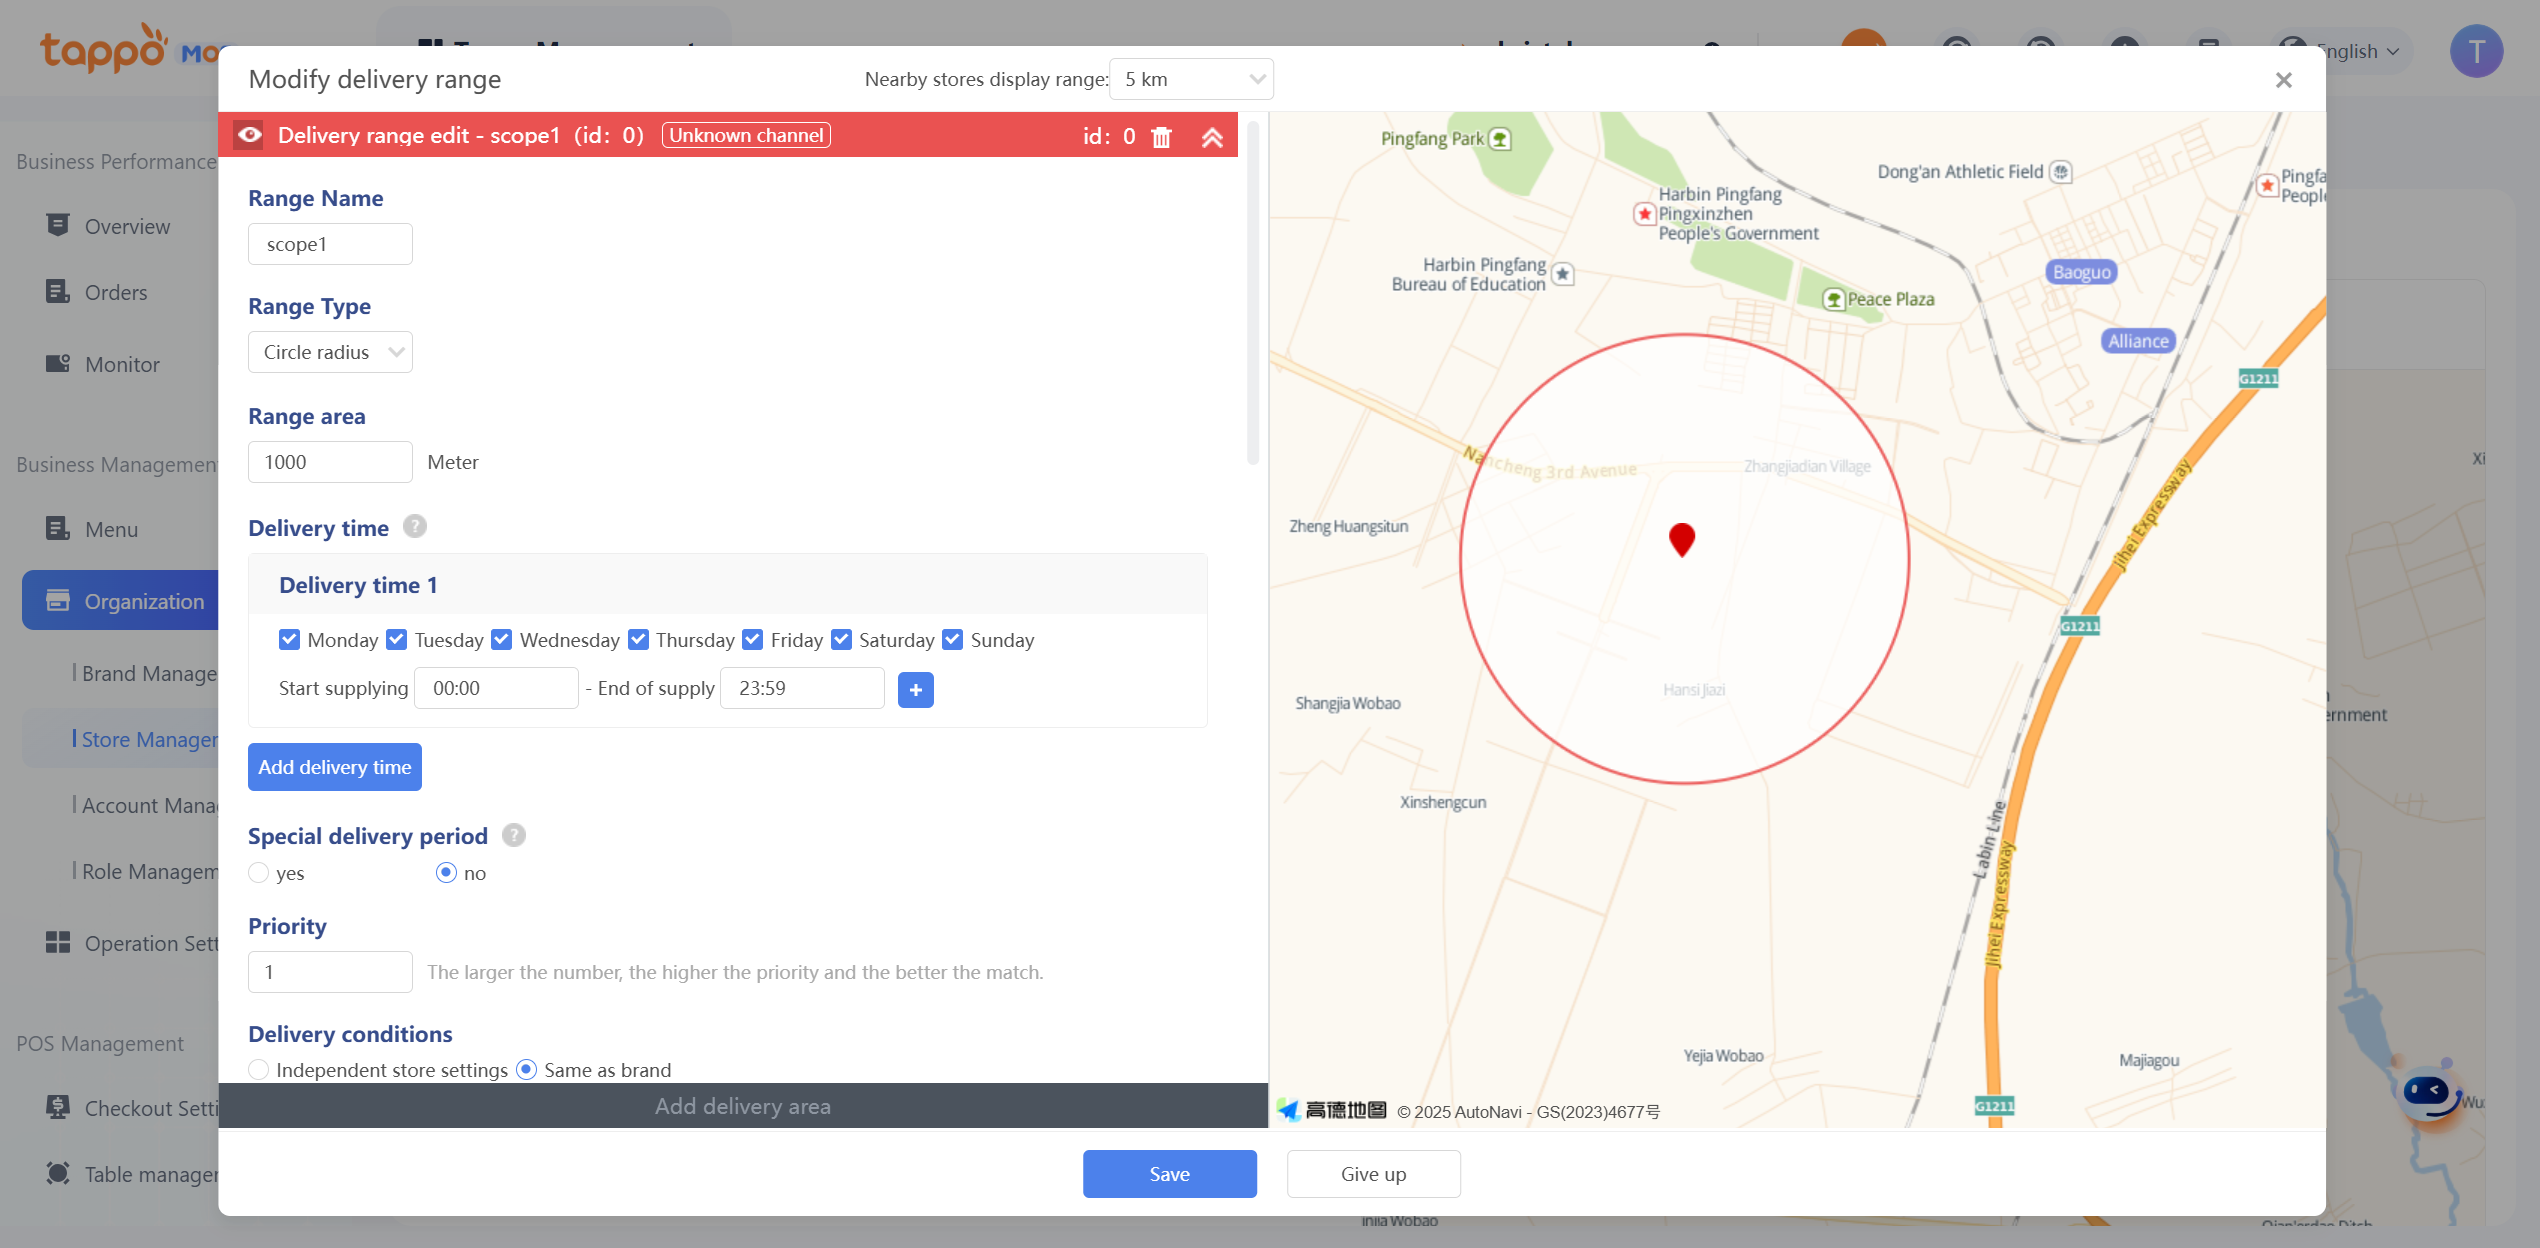
Edit Delivery Range
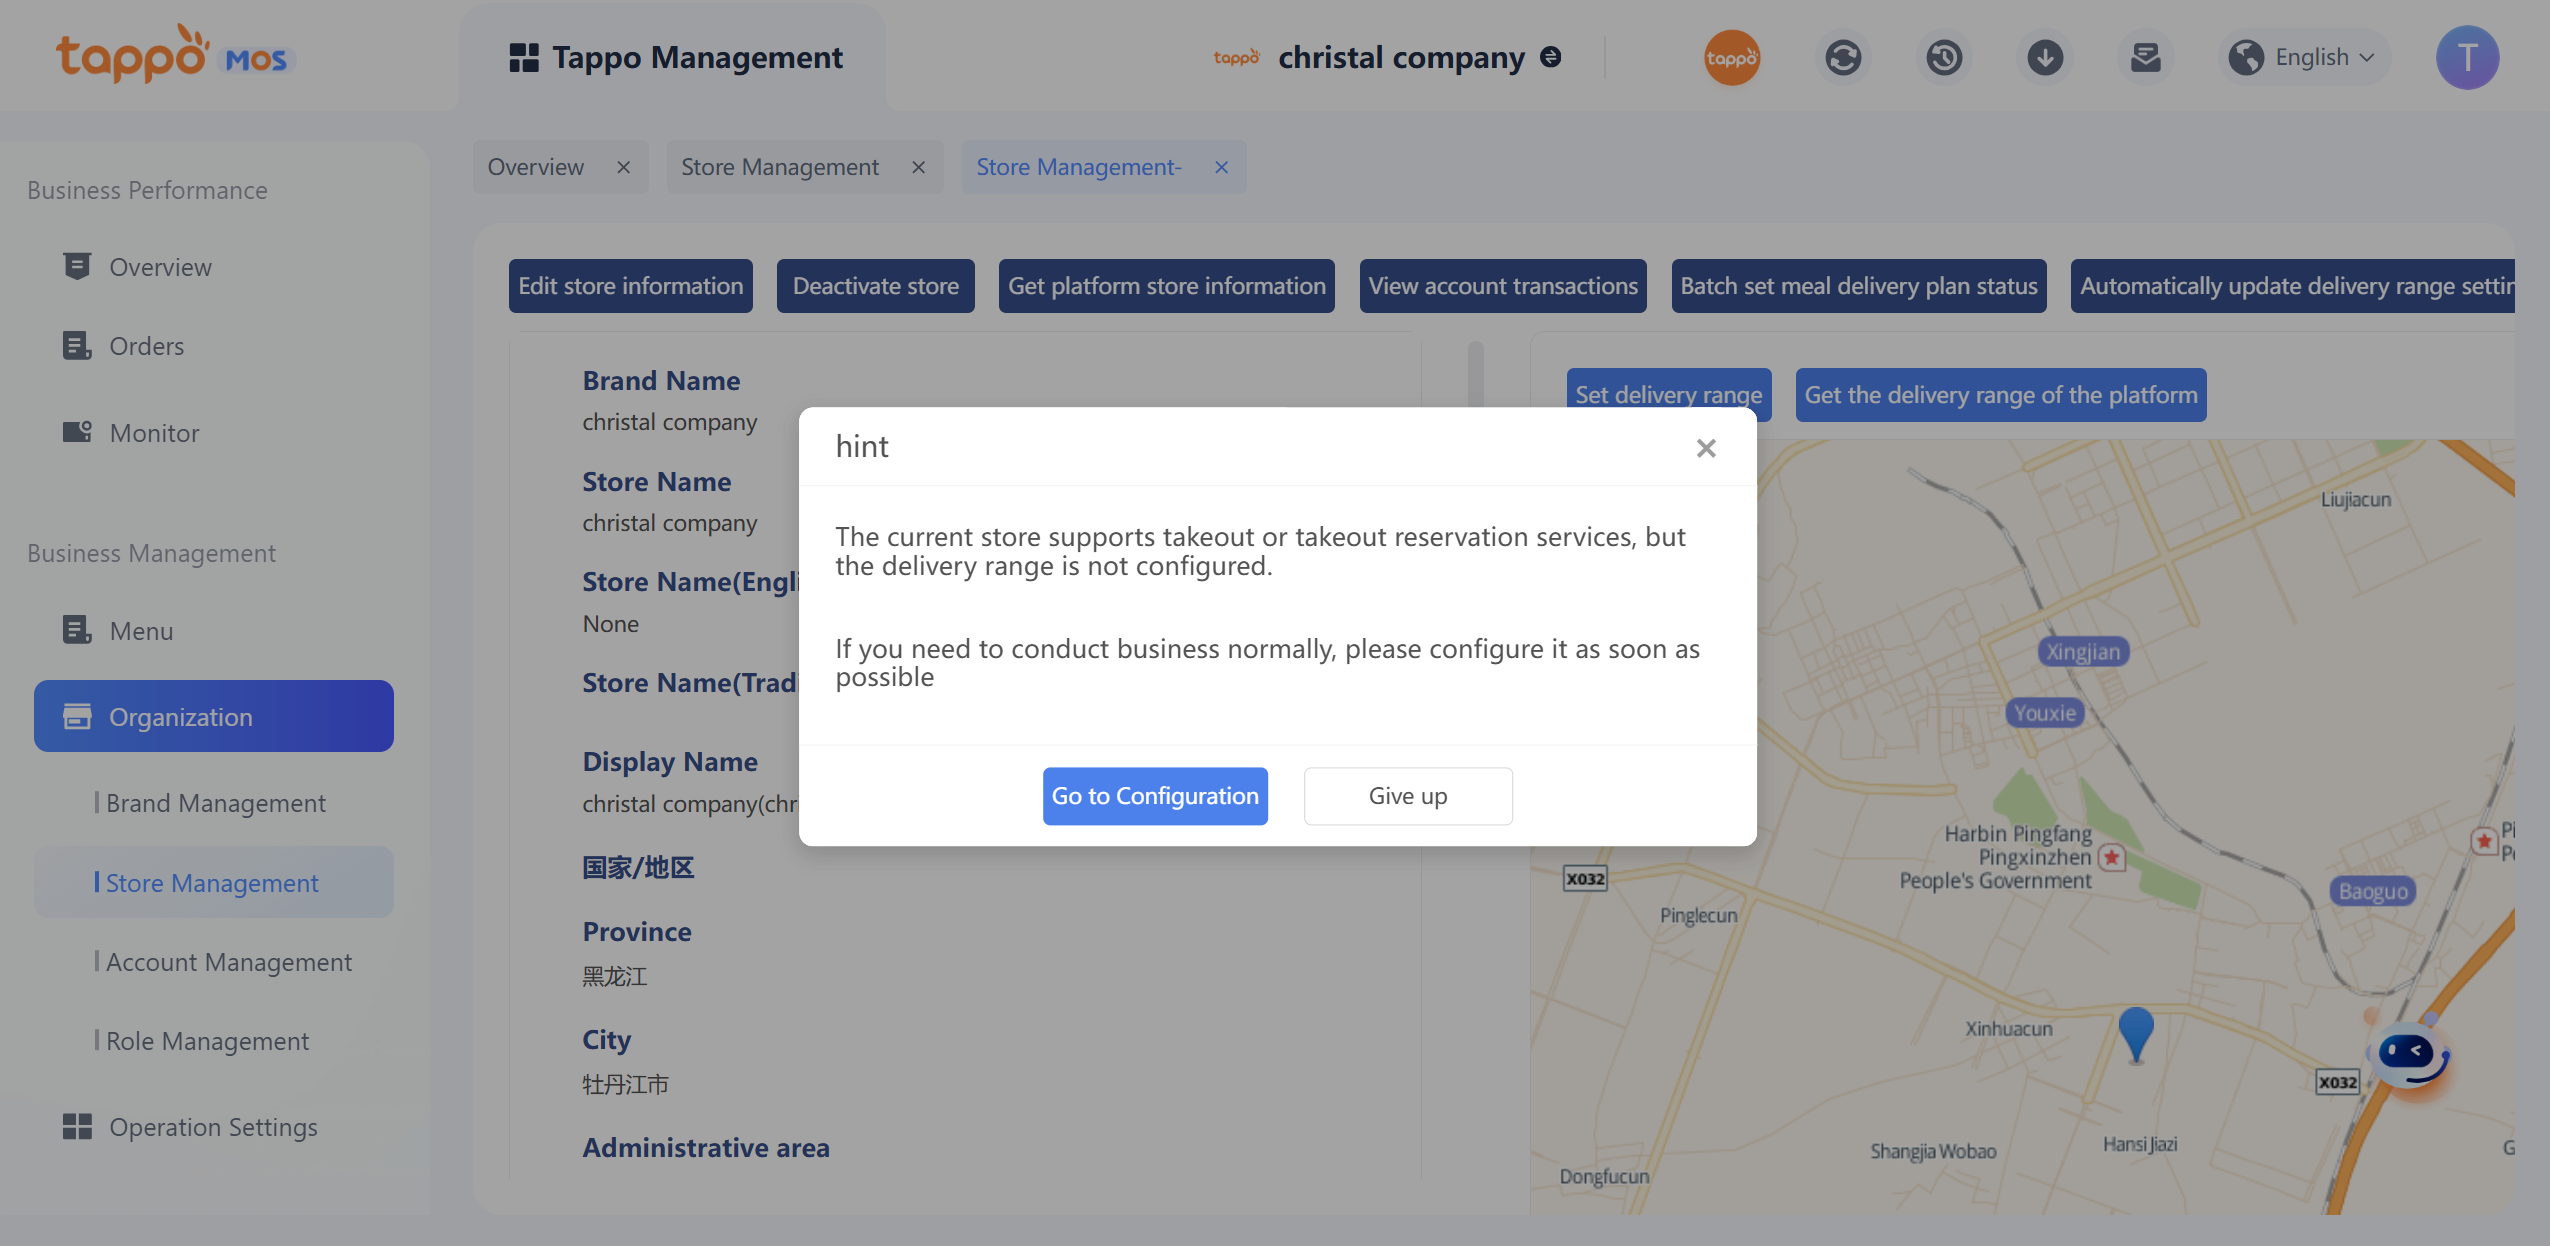
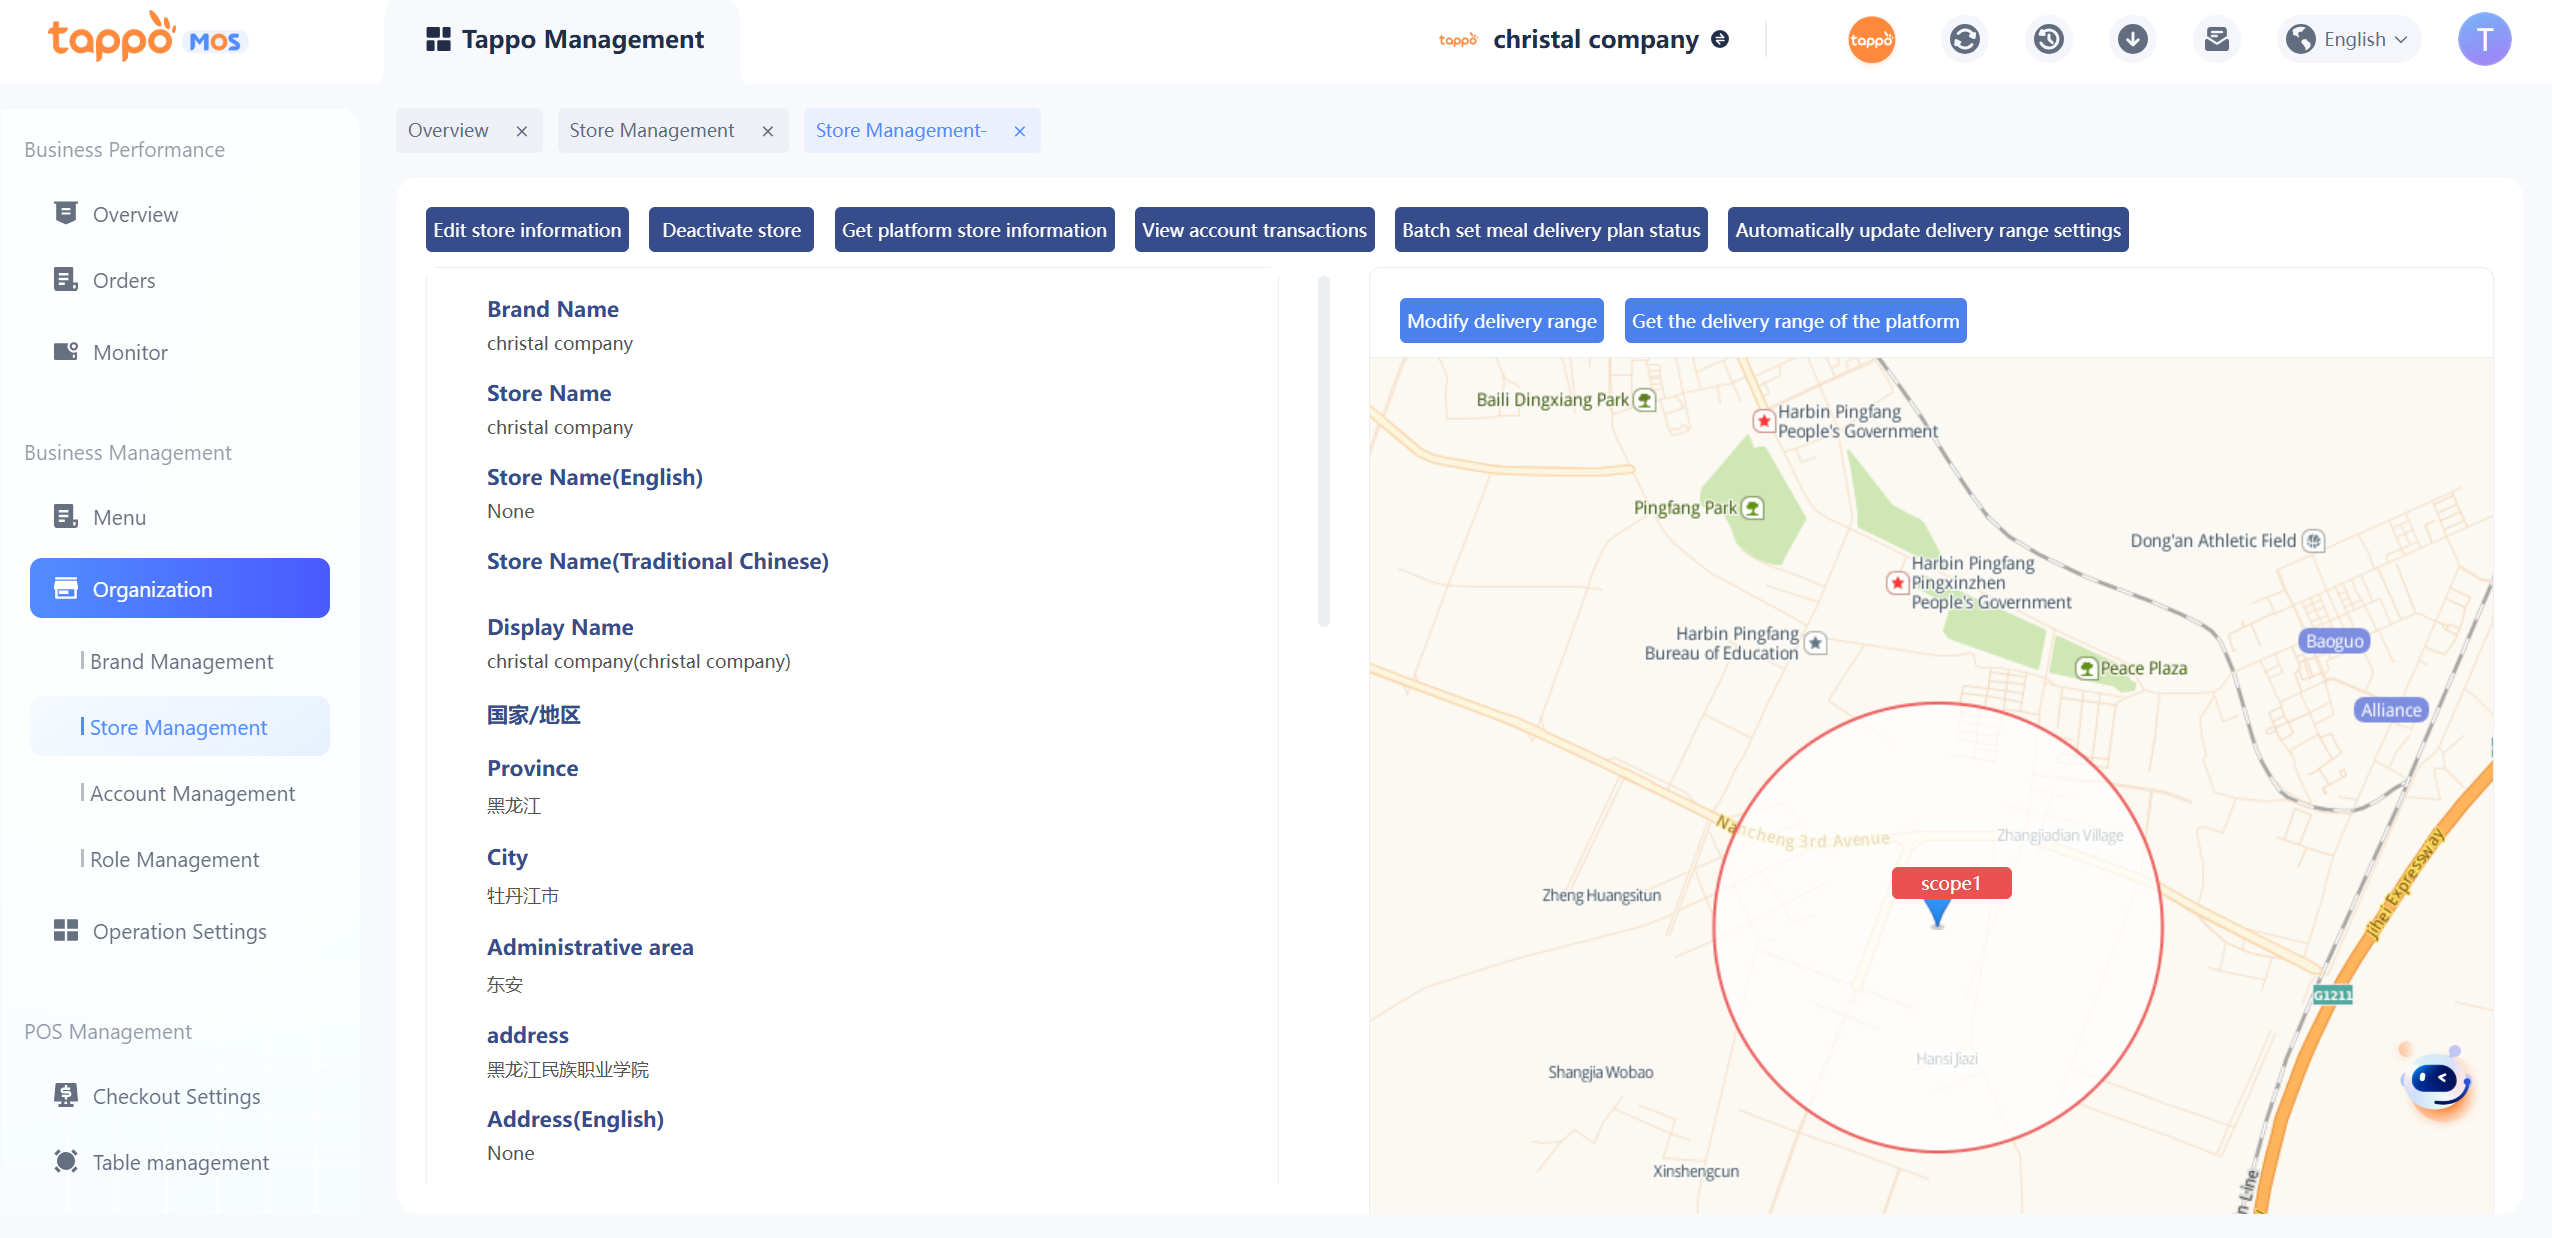
When the store’s business type supports “Takeaway” or “Scheduled Takeaway”, a prompt to create a delivery range will appear when entering the store management page. If the delivery range has been configured, you can view and edit it through the right side of the store management page.

Operation Steps:
• Enter Range Name: The system will have a default range name, which can be edited and modified.
• Select Range Type: Can select Custom/Circular Radius/Whole City Delivery.
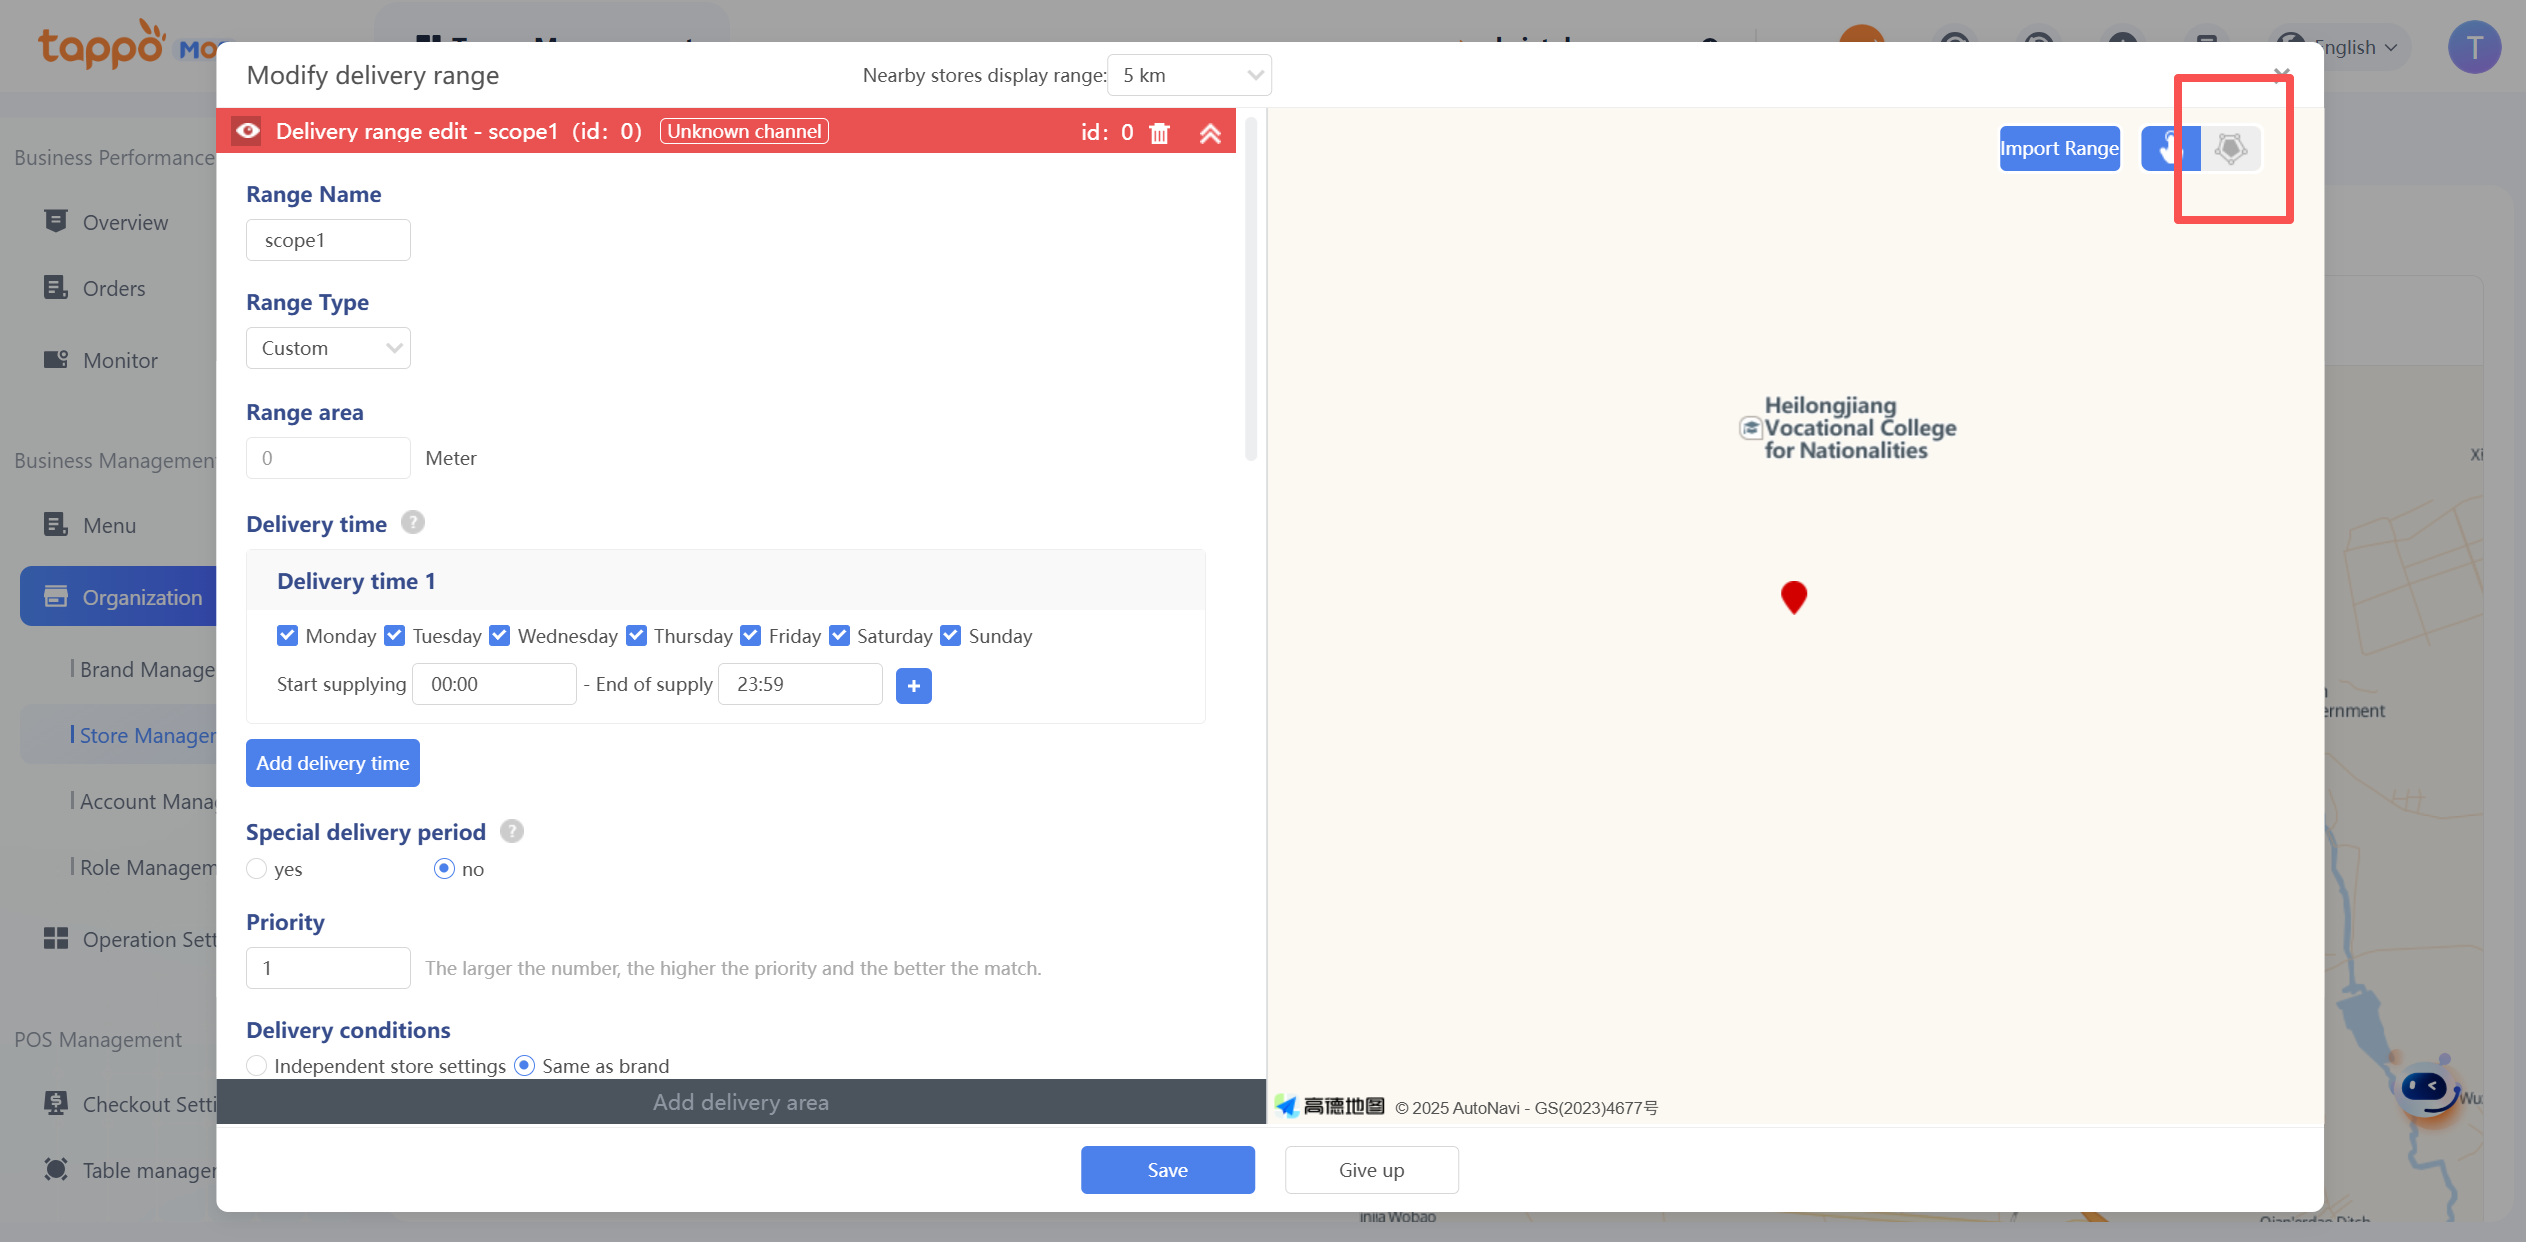
Custom Range: Click the icon in the upper right corner of the map to draw a closed range on the map. Double-click to complete the drawing, as shown in the figure below.

Circular Radius: Enter the range radius, and the system will automatically draw a circular range with the store as the center, as shown in the figure below.
Different delivery ranges are marked with different colors.
• Delivery Time: Set the delivery time for this range. Different ranges can be set with different delivery times, supporting multiple time periods.
• Priority: Used for the priority display of delivery fees when the self-operated channel is not positioned.
• Minimum Order Condition, Delivery Fee: Defaulted to be consistent with the brand, can be set independently.
Click Save, and the store’s delivery range will take effect immediately on self-operated channels. The range information can be viewed on the store management page, as shown in the figure below. If you need to synchronize it to food delivery platforms, go to Third-Party Management – Food Delivery Platform Synchronization Management to synchronize the store’s delivery range.
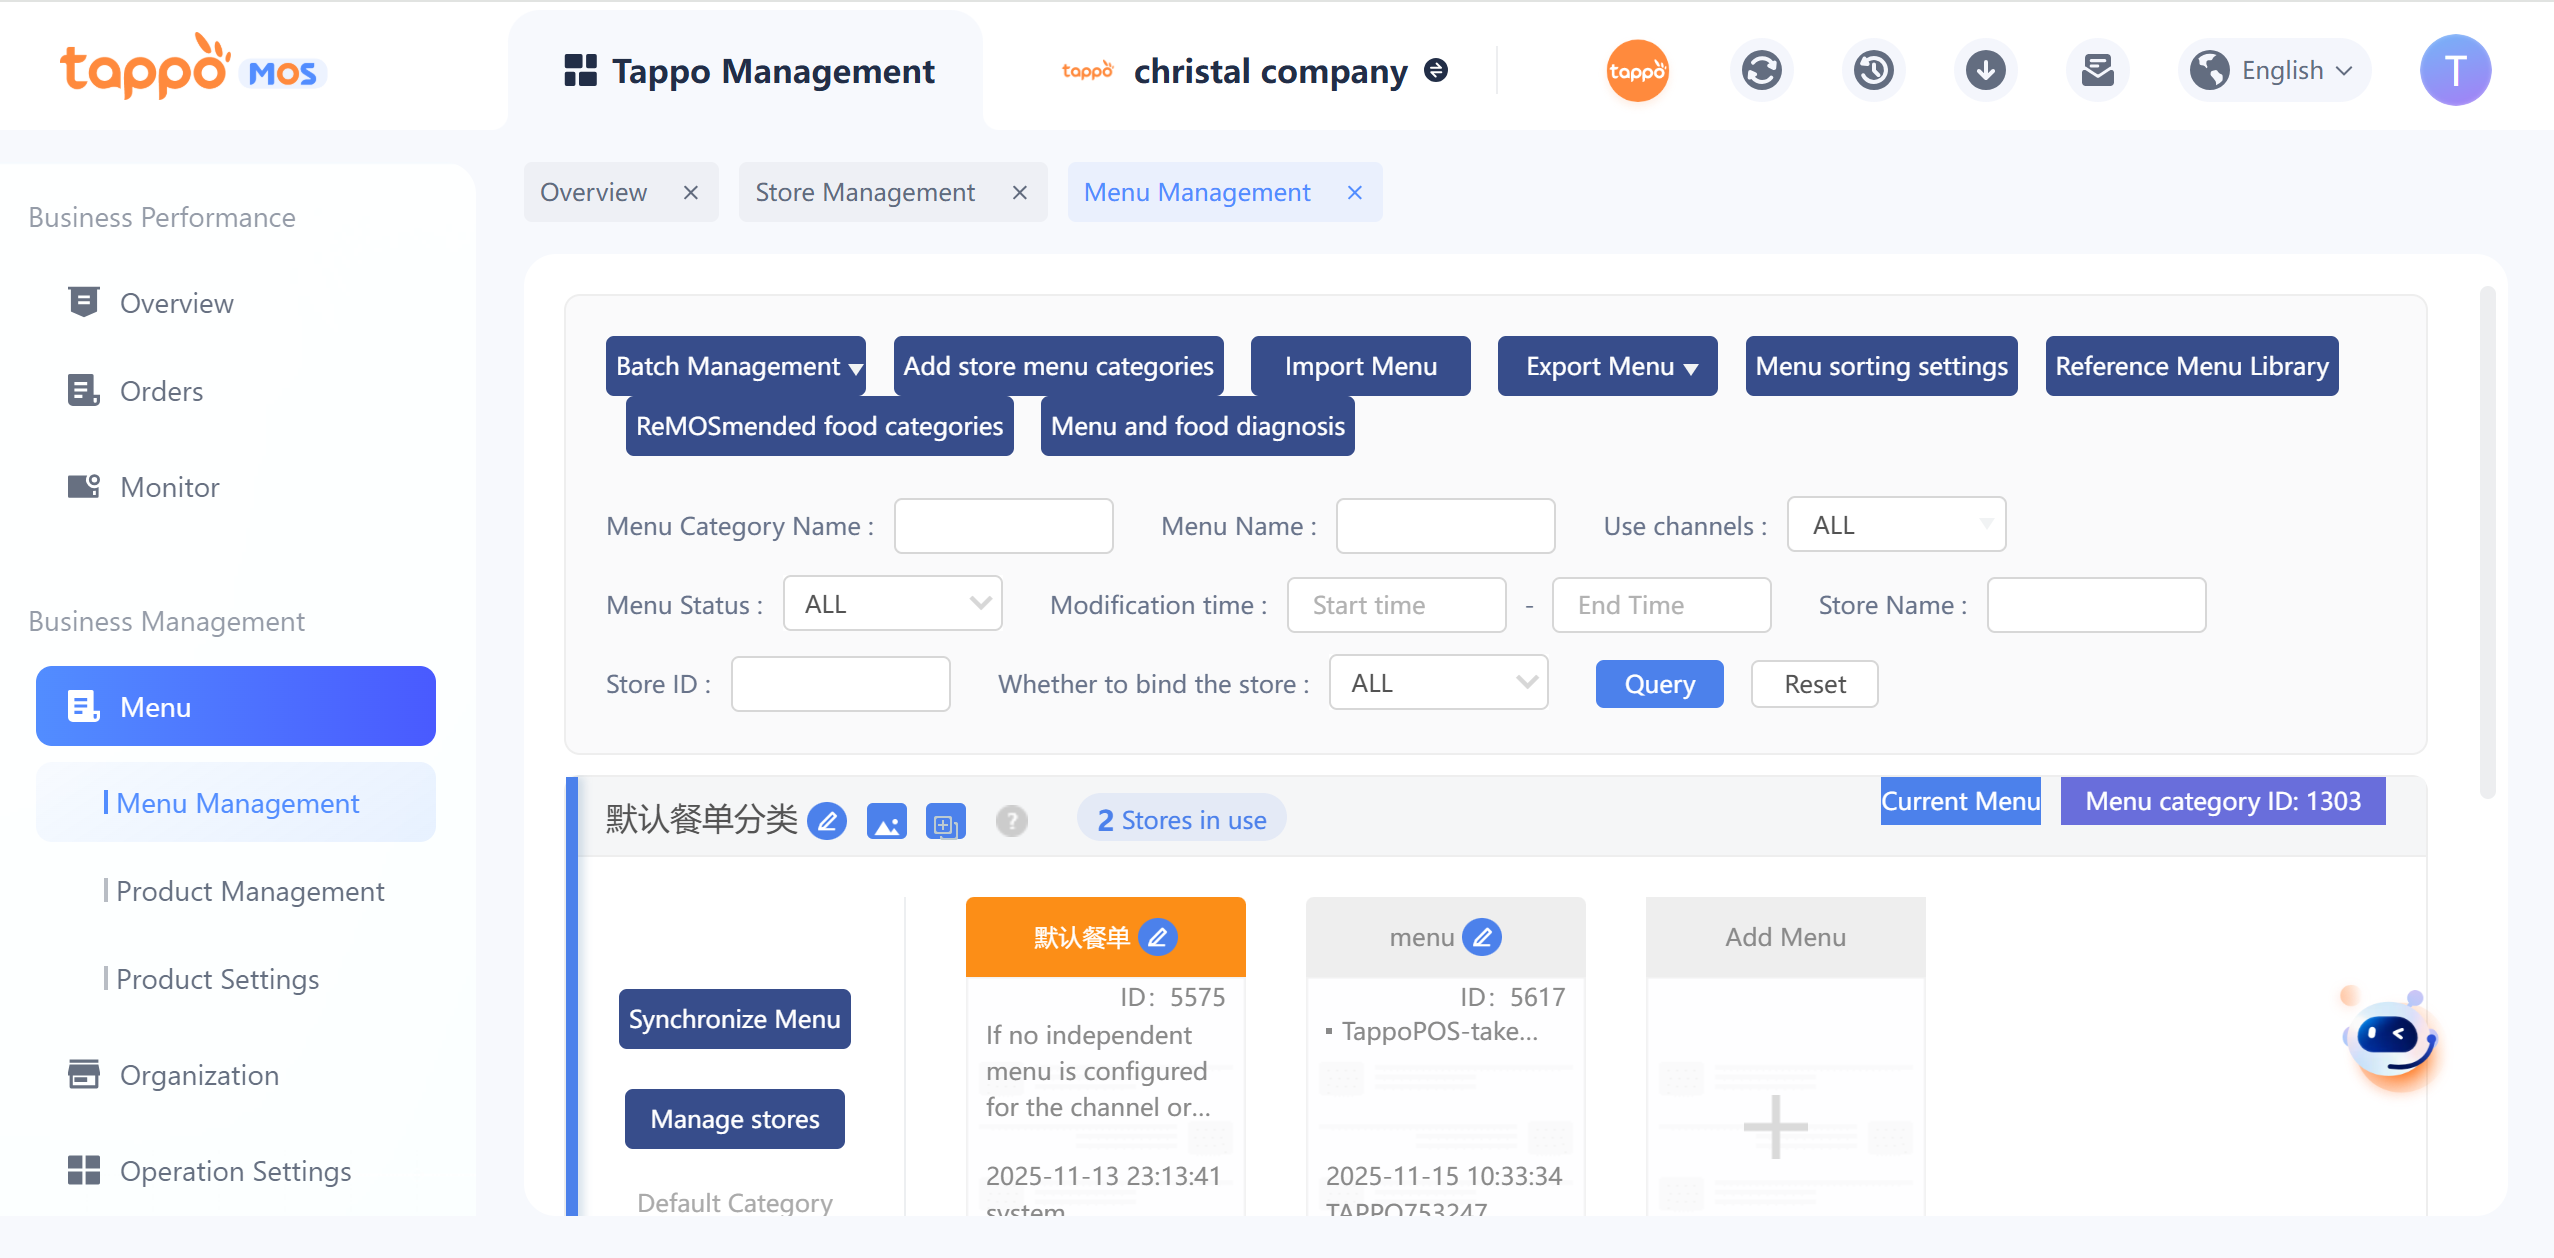
View Store Menu Category
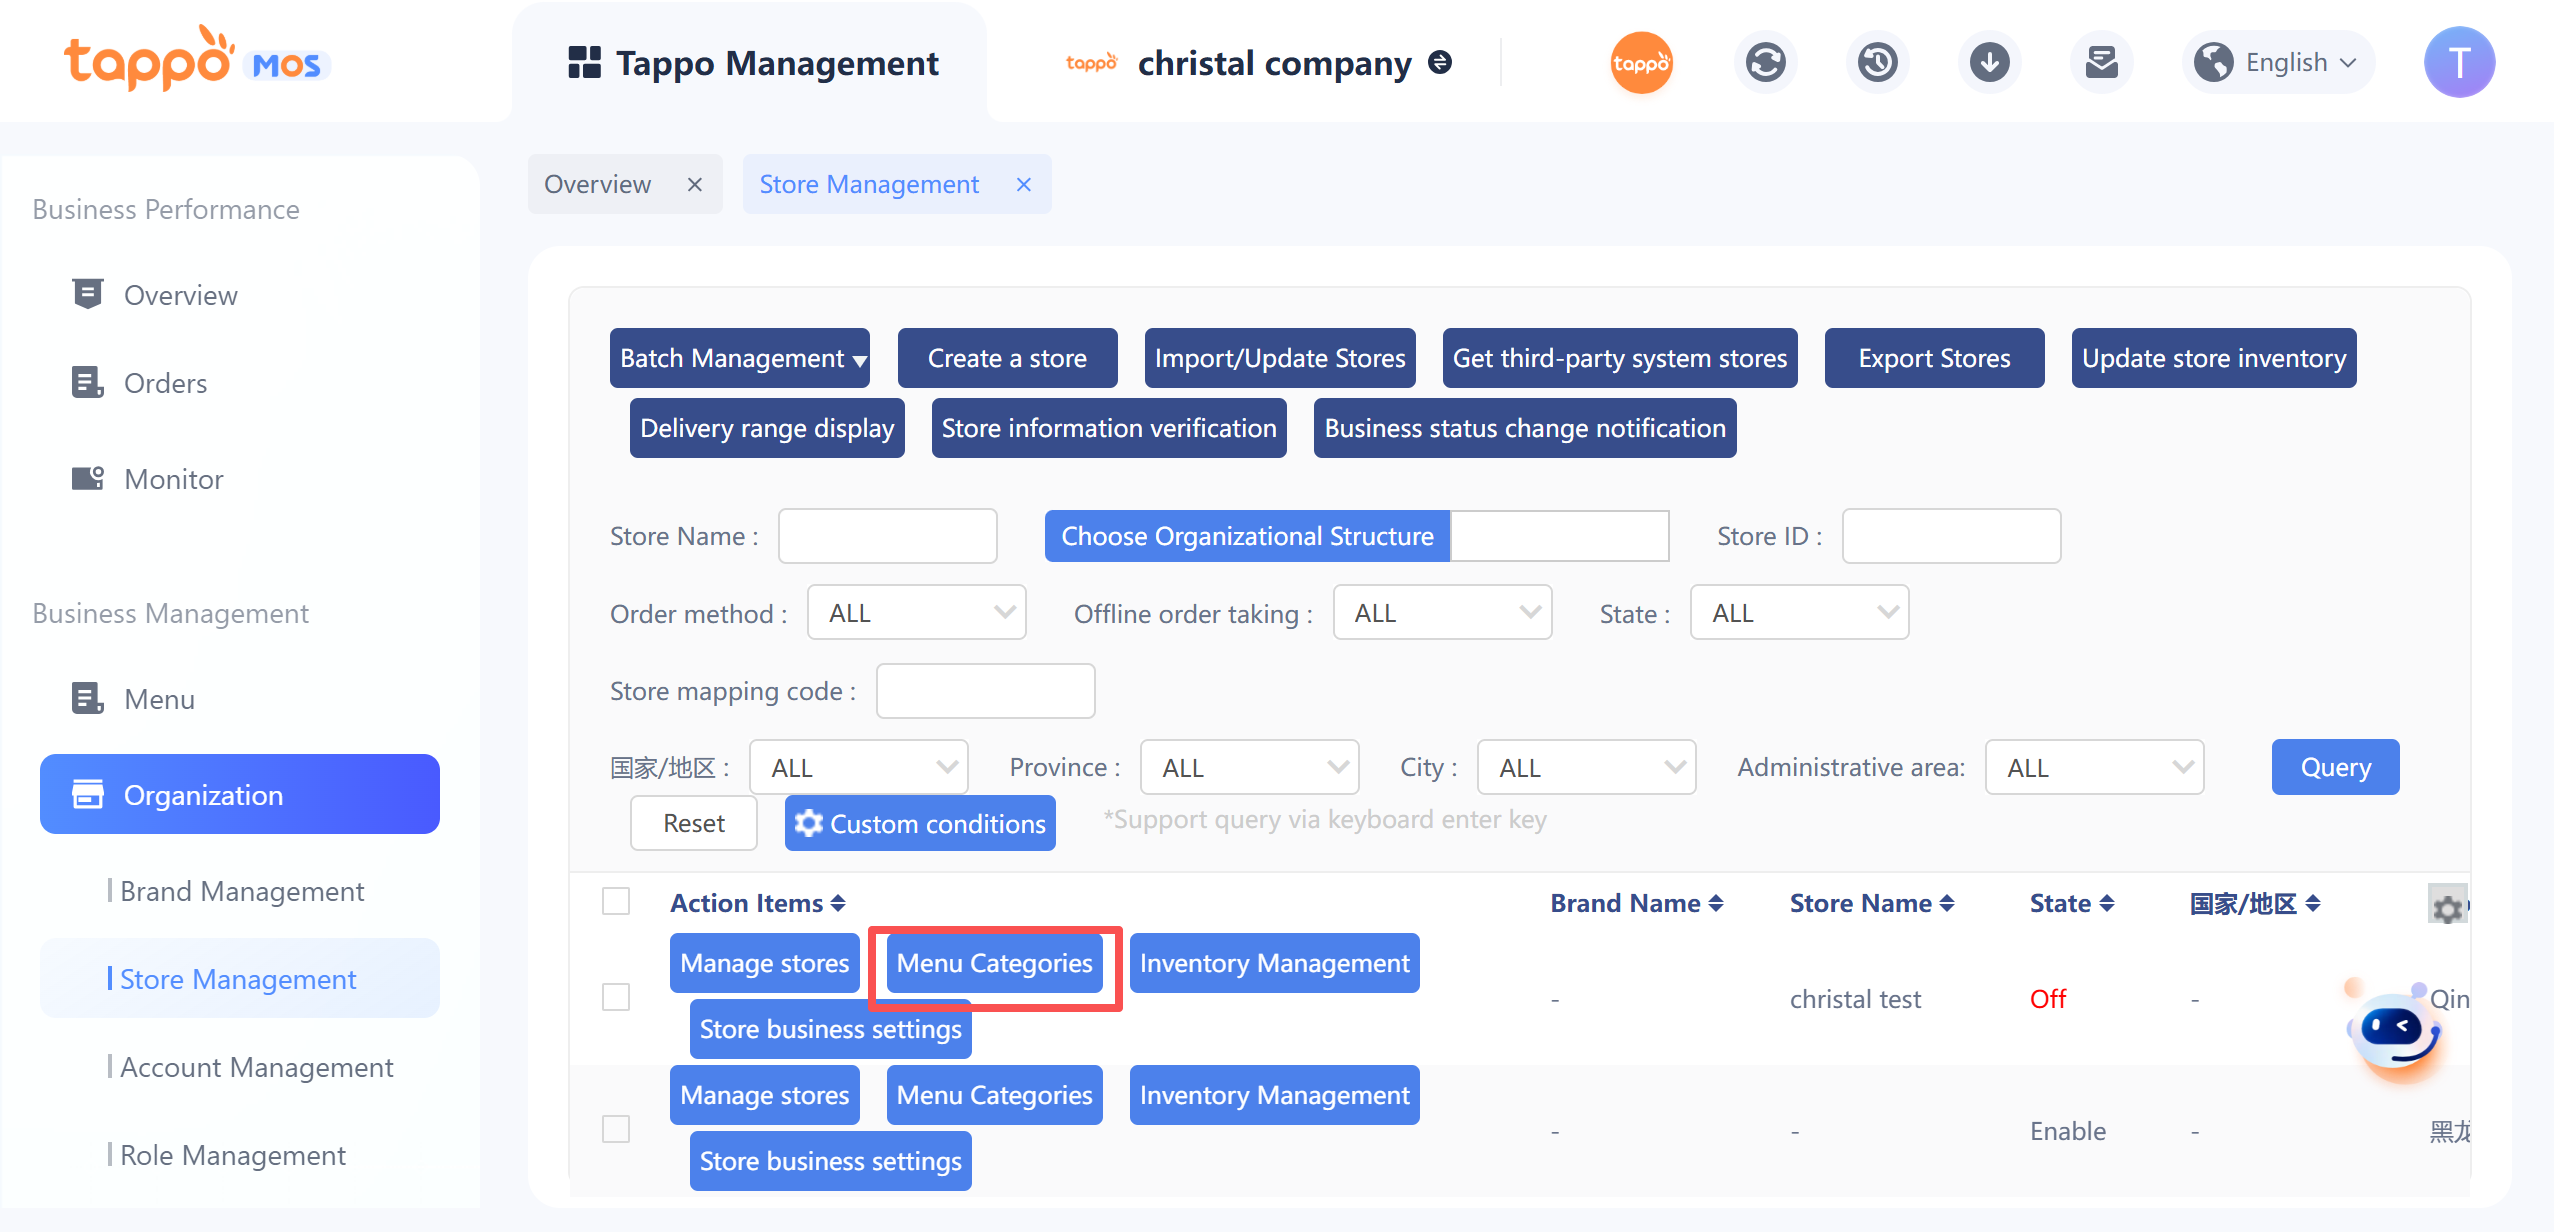
On the store list page, click the [Menu Category] button of the store to open the menu list. The first selected item is the menu category to which the store belongs, as shown in the figure below.