The POS binding process requires the device to be connected to the internet to complete.
1.1 Enter Device Code to Bind Device
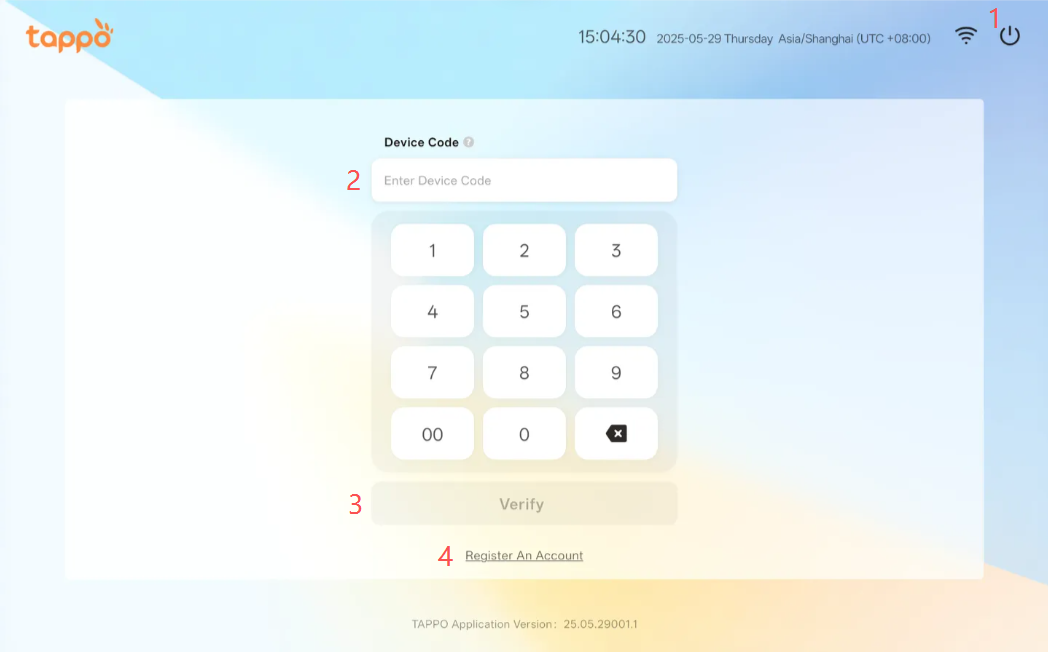
After downloading and installing, launch Tappo POS and enter the setup guide page.
1. Shut Down
Close the Tappo POS application.
2. Device Code
Create a device code in the POS Management -> Device Management function of MOS (Merchant Management Backend). One device code is only for the installation of one POS device, and the device code is bound to brand and store information.
3. Verify Device Code
After entering the [Device Code], click [Verify Device Code] to check if the device code is valid. If valid, you can view the bound brand and store information.
4. Register Account
If you do not have a Tappo POS account or device code, click [Register Account] to create a new Tappo POS account and obtain the POS device code. See details in Section II: New User Registration.
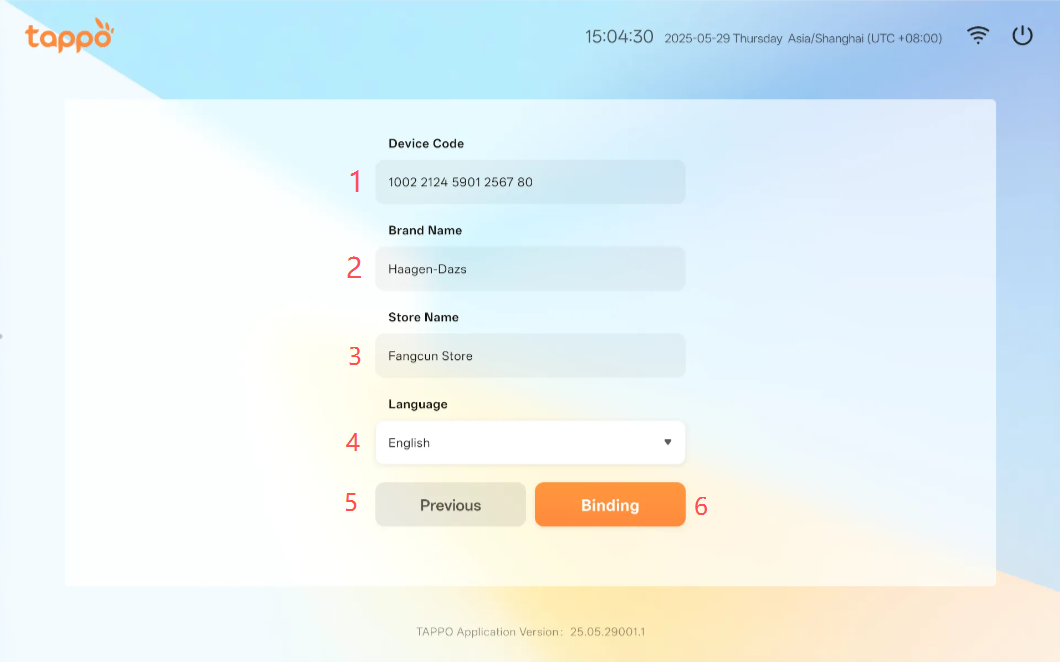
1.2 Verify Device Code & Bind
1. Device Code
2. Belonging Brand
3. Belonging Store
4. Language
The app language is automatically obtained from the hardware system by default, and can be manually switched and modified.
5. Previous Step
If the brand or store information is incorrect, click [Previous Step] to return and modify the device code before re-verifying.
6. Bind
If the brand and store information is correct, click [Bind] to bind the POS with the brand and store information. After binding, basic data loading will start and the activation process will begin.