Printer Management
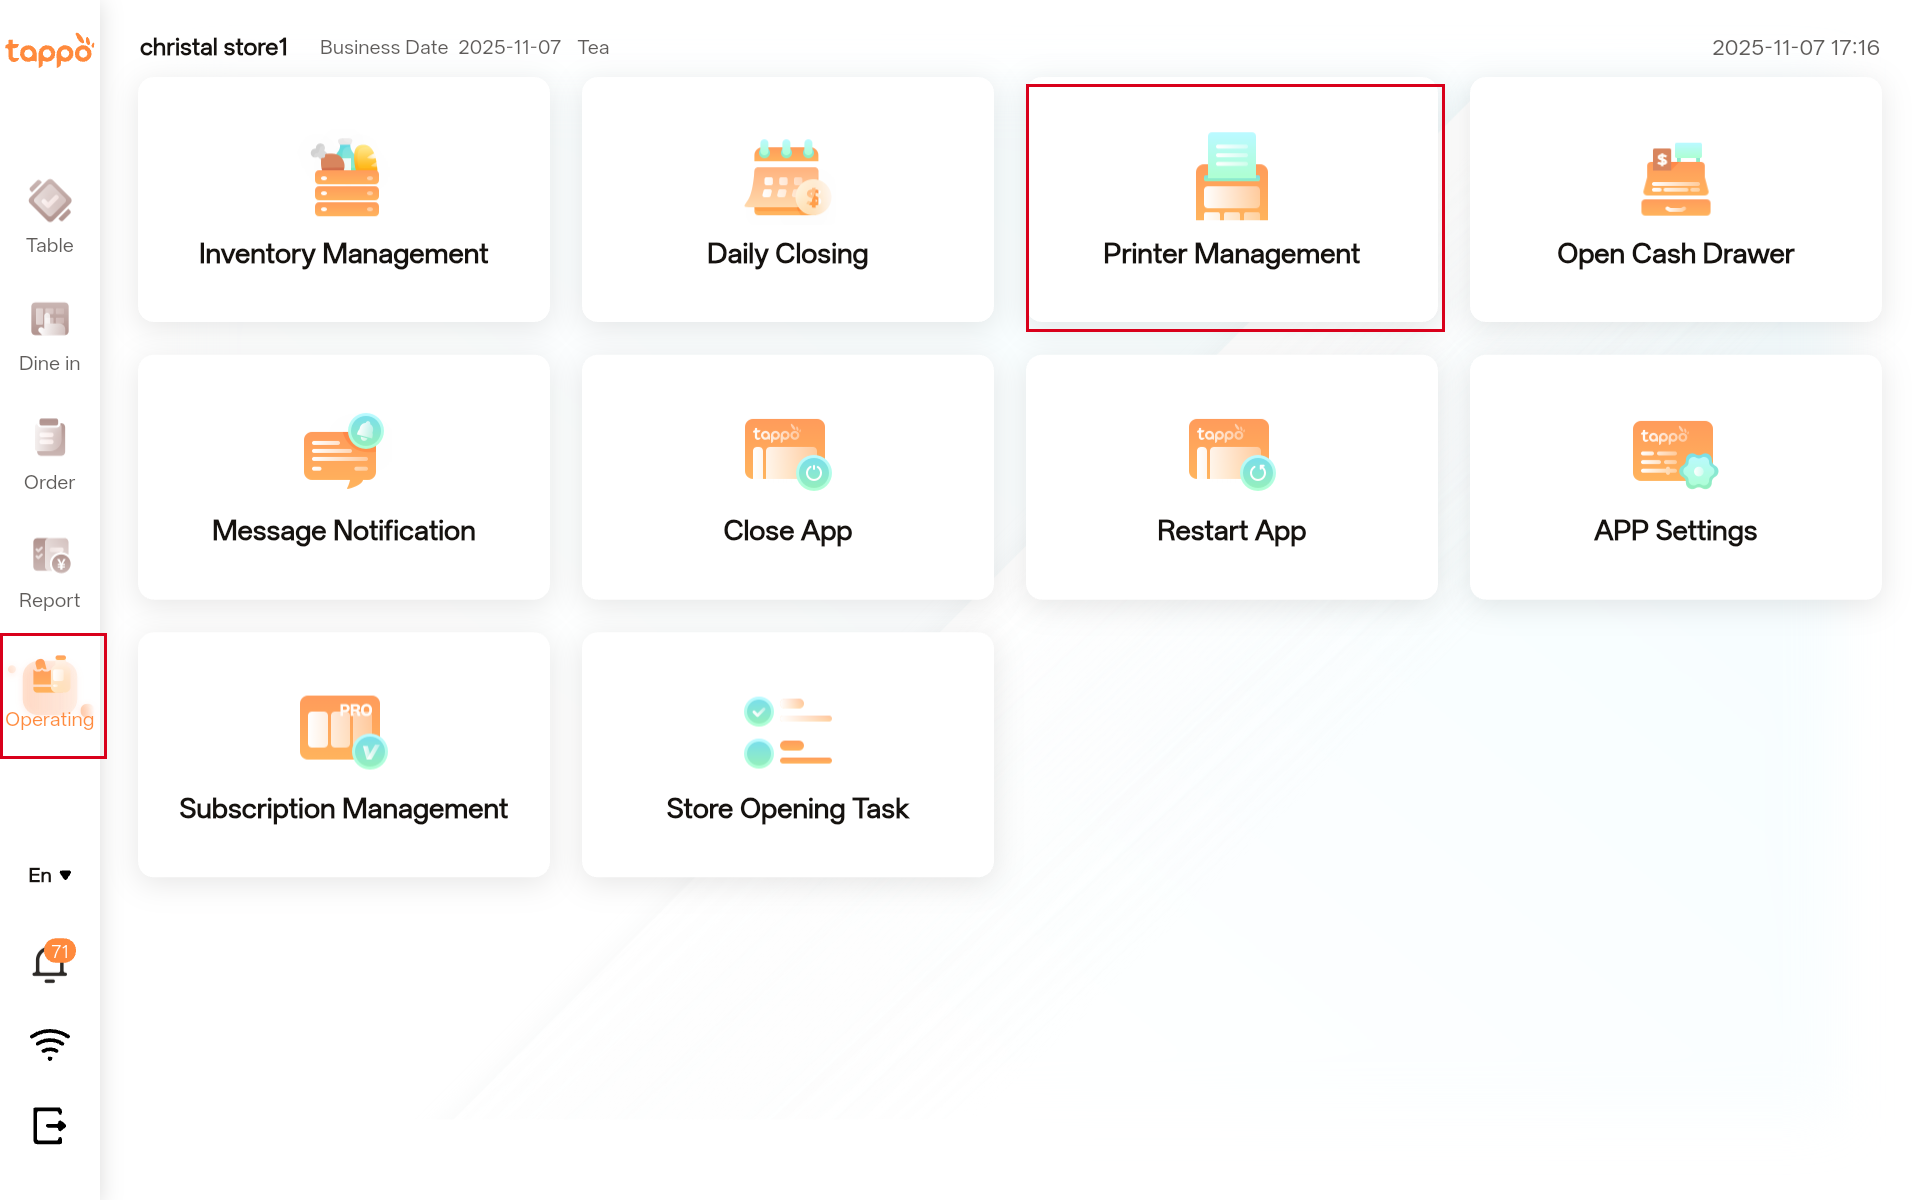
3.1 Path: Operating -> Printer Management
3.2 Basic Settings

| Configuration Item | Description |
|---|---|
|
Printer List |
When the store has multiple printers, click to switch between different printers in the list. |
|
Add Printer |
Click [Add Printer] to manually add multiple printers for the store. |
|
Printer Name |
The printer name can be modified manually. |
|
Printer Notes |
Remarks can be added to the printer. |
|
Printer Type |
The receipt printer is selected by default. |
|
Connection Mode |
Supports: Ethernet Connection, Bluetooth Connection, Falcon2 Printer Connection. See detailed operations below. |
|
Default Printer |
After setting it as the default printer, reports and QR codes will be printed from this printer. |
3.3 Printer Connection Methods
3.3.1 Ethernet Connection
1.Click Add Connection

Select Ethernet Connection and click [Add Connection].
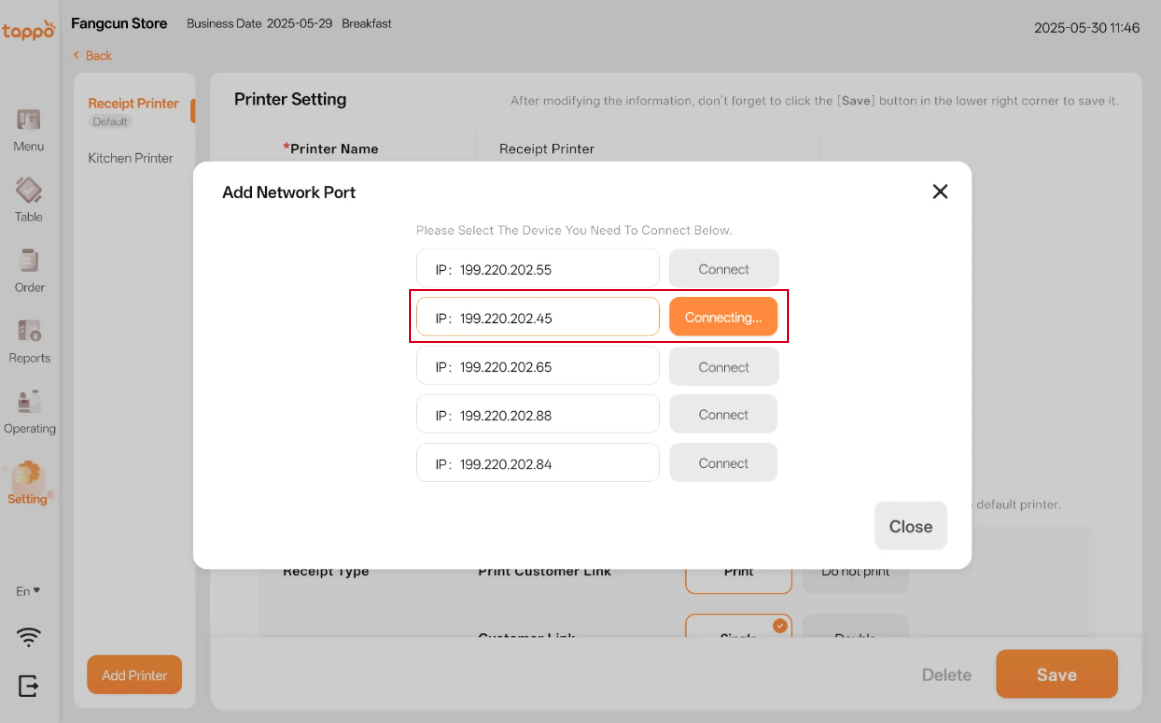
In the pop-up window, select the printer to connect to, click [Connect], and wait for the system to attempt to connect to the printer.
2. Manual IP Address Entry
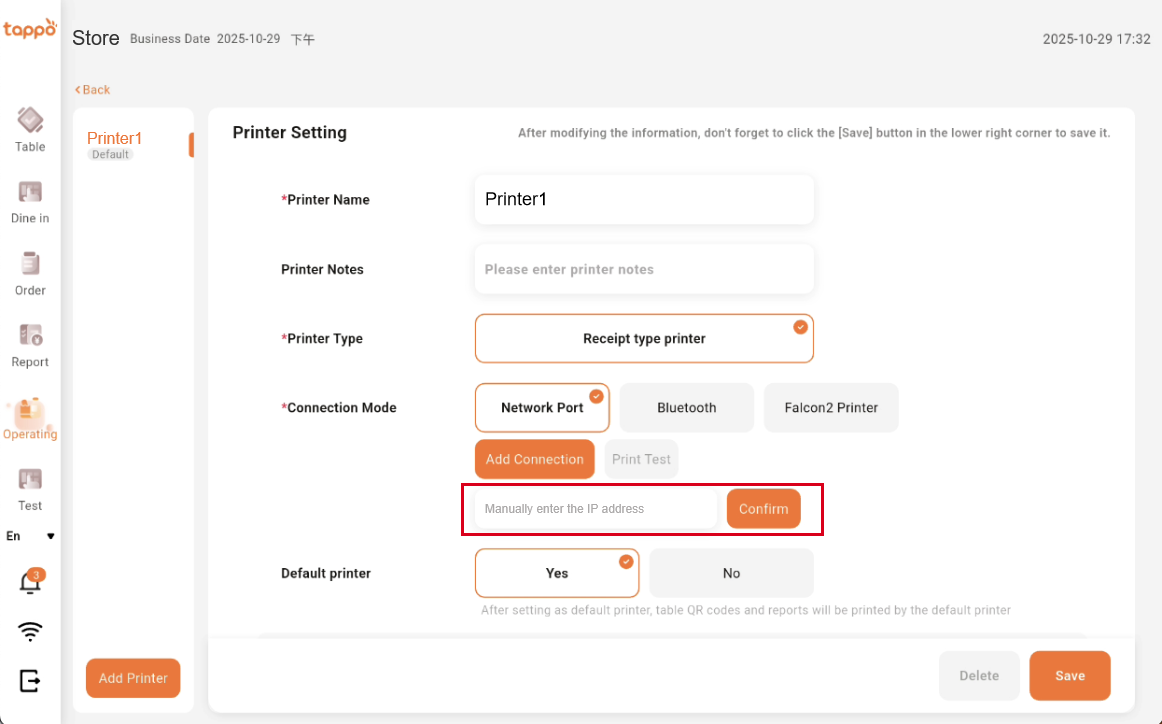
You can also choose to manually enter the known printer IP address. After entering, click [Confirm].
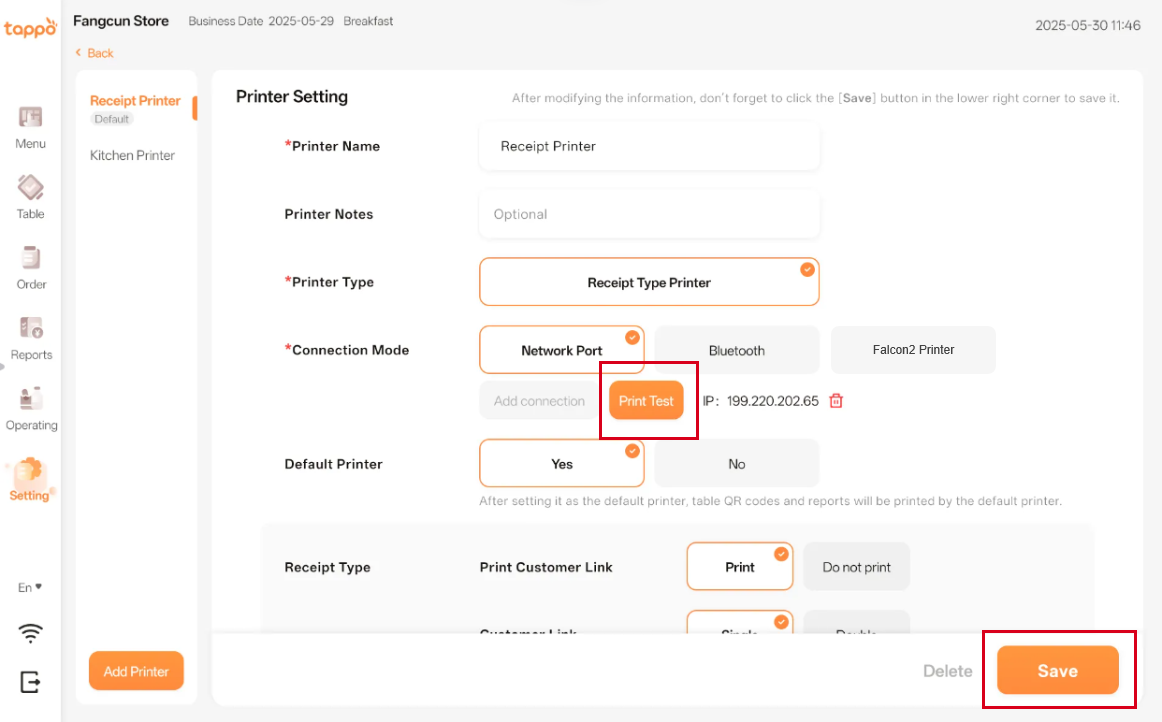
Print Test: After adding the connection, click [Print Test] to confirm if the correct printer is connected. If printing fails, delete the connected Ethernet port and try another one.
3.3.2 Bluetooth Connection

Select Bluetooth Connection and click [Add Bluetooth Device].

In the pop-up window, select the Bluetooth printer device to connect to, click [Connect], and wait for the system to attempt to connect to the printer.
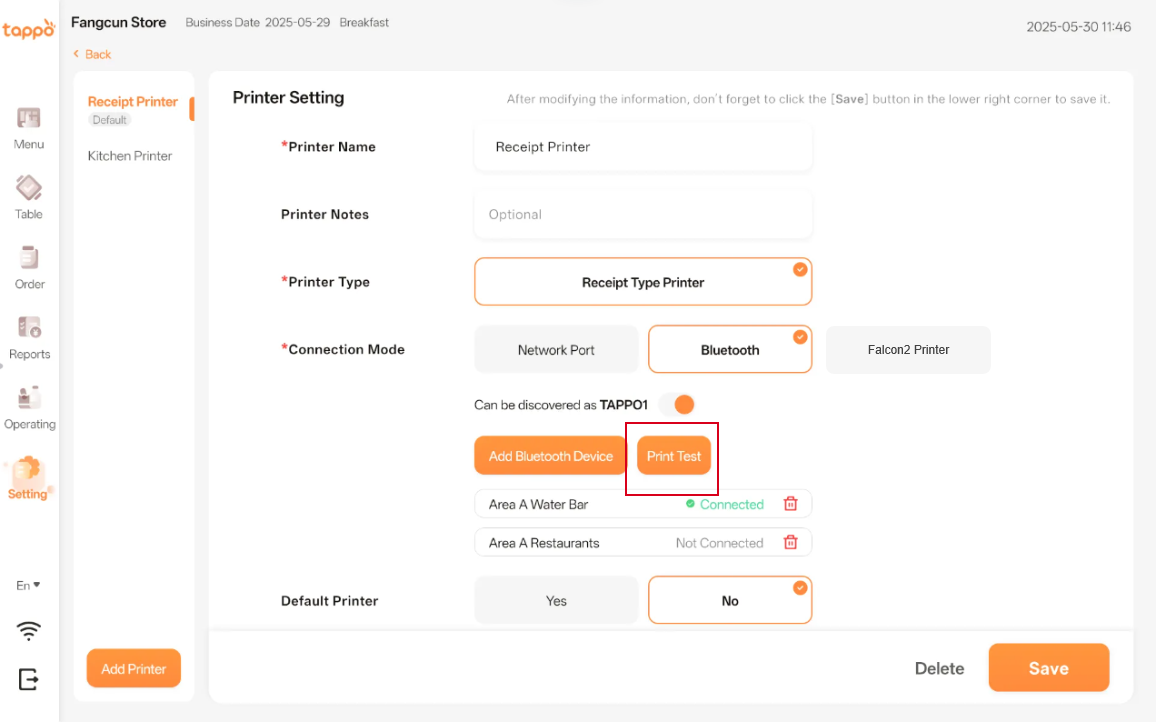
Print Test: After completing the connection, click [Print Test] to confirm if the correct printer is connected. If printing fails, delete the connected Bluetooth device and try another one.
3.3.3 Falcon2 Printer Connection
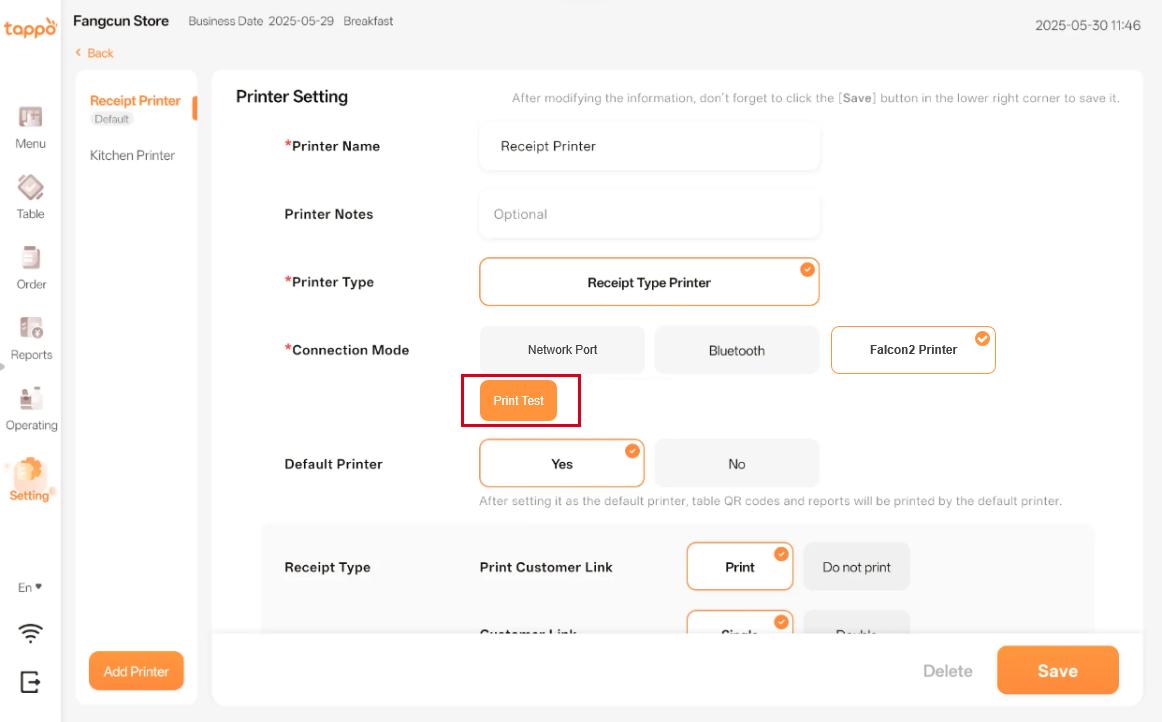
This connection method is applicable if you have purchased Falcon-related base products. If not, select another printer connection method. Select the Falcon2 Printer option and click [Print Test]. If printing fails, check if the Falcon device is placed on the printer base.
3.4 Other Printer Configurations
| Configuration Item | Description |
|---|---|
|
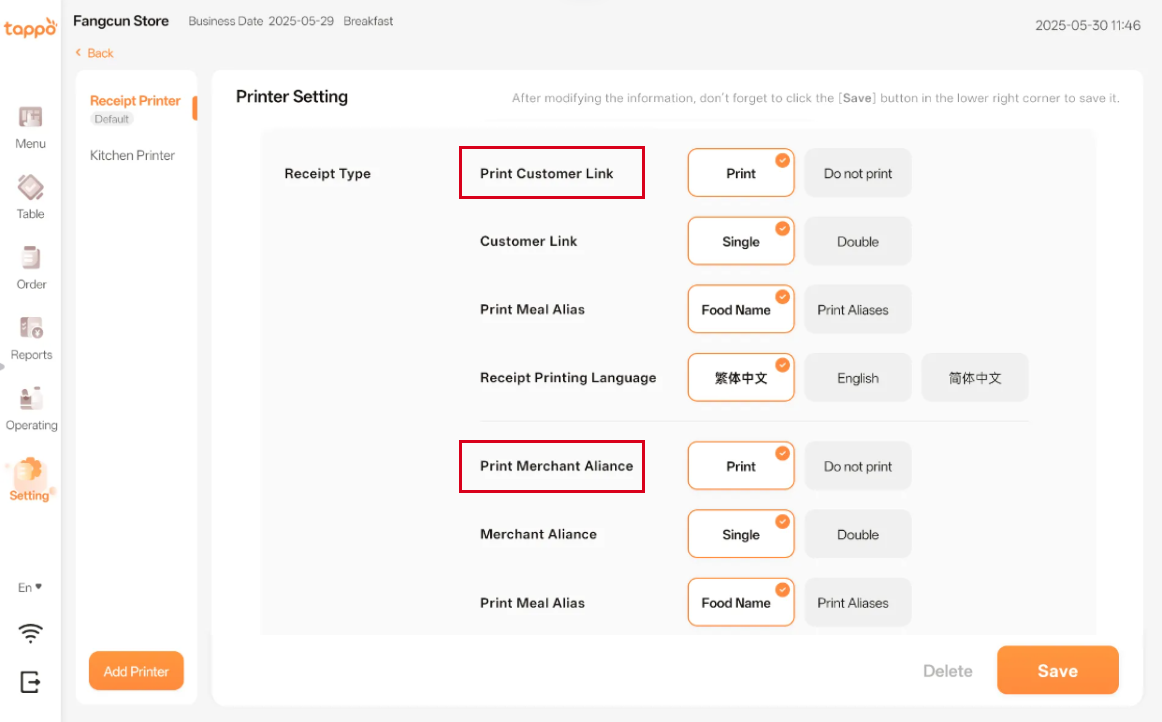
Print Customer Link |
You can choose whether the printer prints the customer copy, set the customer copy to single or double copies, set the printer to print dish names or aliases for the customer copy, and select the customer copy printing language. |
|
Print Merchant Link |
You can choose whether the printer prints the merchant copy, set the merchant copy to single or double copies, set the printer to print dish names or aliases for the merchant copy, and select the merchant copy printing language. |
| Configuration Item | Description |
|---|---|
|
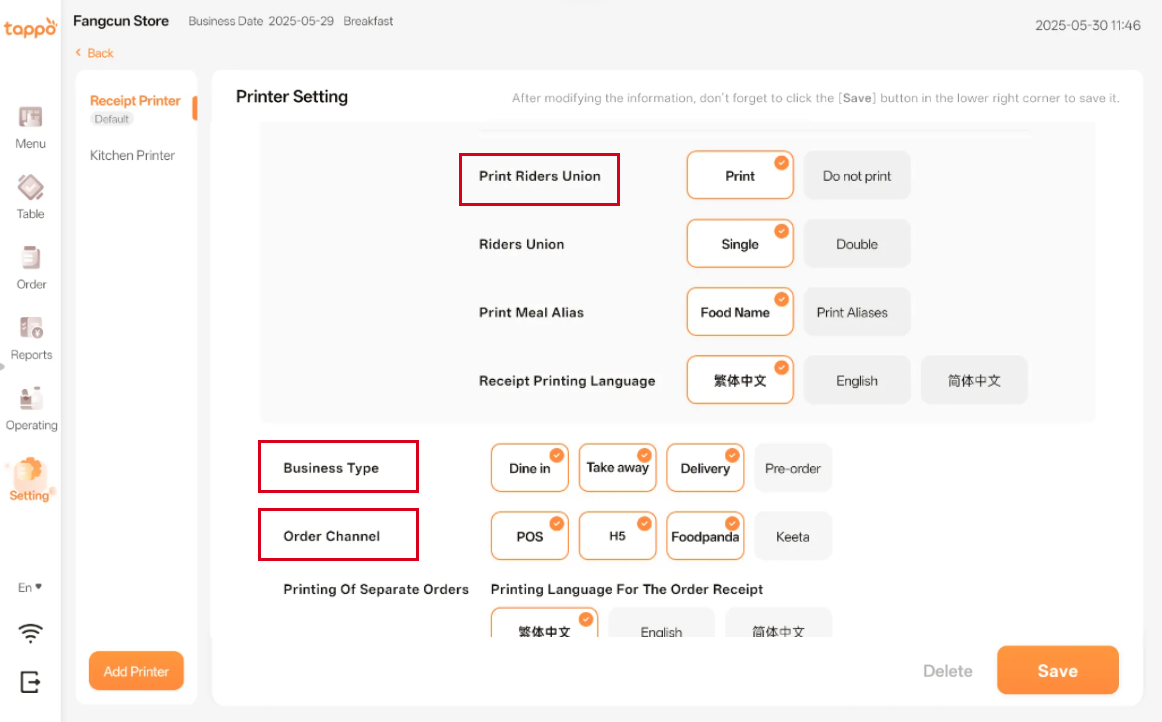
Print Rider Link |
You can choose whether the printer prints the rider copy, set the rider copy to single or double copies, set the printer to print dish names or aliases for the rider copy, and select the rider copy printing language. This configuration item takes effect for platform food delivery orders that have been connected. |
|
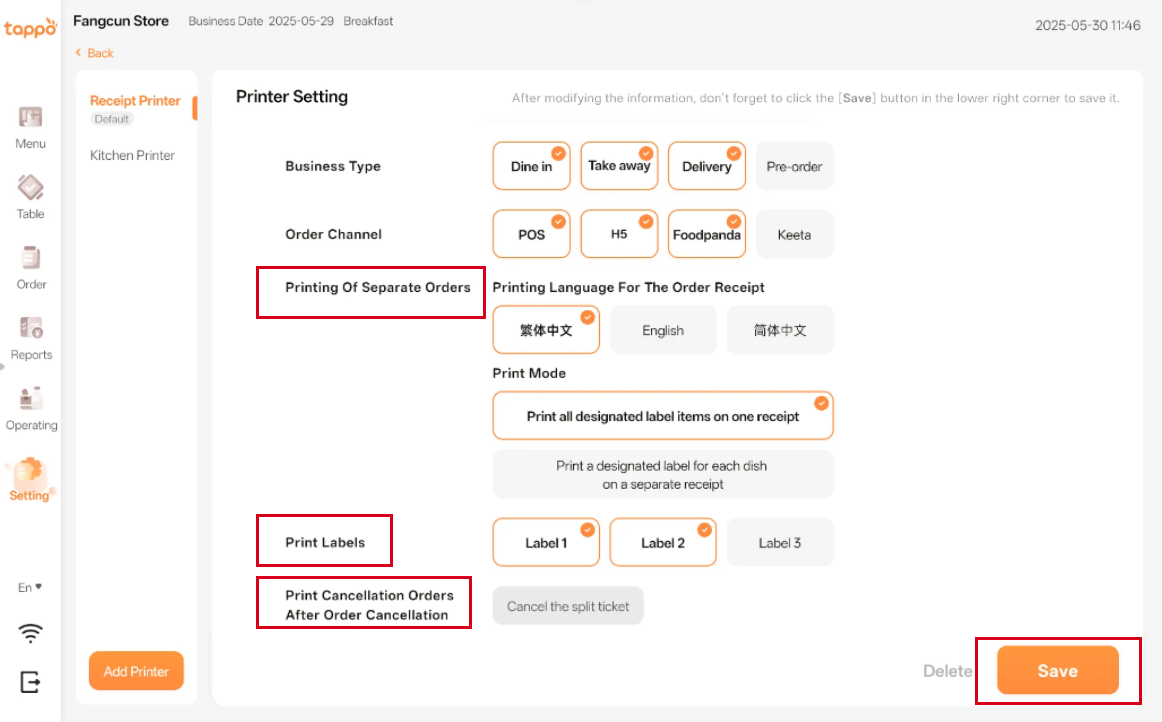
Business Type |
You can configure the business types that the printer needs to print. Unconfigured business types will not be printed by this printer. |
|
Order Channel |
You can configure the order channels that the printer needs to print. Unconfigured channels will not be printed by this printer. |
| Configuration Item | Description |
|---|---|
|
Printing Of Separate Orders |
Supports configuring the kitchen split receipt printing language and printing type (supports printing all dishes with specified labels on one receipt or one type of dish with specified labels on one split receipt). |
|
Print Labels |
When the store has multiple kitchen food preparation positions, different printers can be configured for different positions. When there are multiple kitchen printers, split labels can be configured for different dishes. Split labels should be configured in the Merchant Side -> Print Template -> Split Labels function of MOS(商家管理後台). |
|
Print Cancellation Orders After Order Cancellation |
You can configure whether to print the canceled split receipt after order cancellation. |
|
Save |
After adjusting the printer configuration, click the [Save] button to save the settings. |