- Home
- Help Guides
- TAPPO Management
- Print Templates
Print Templates
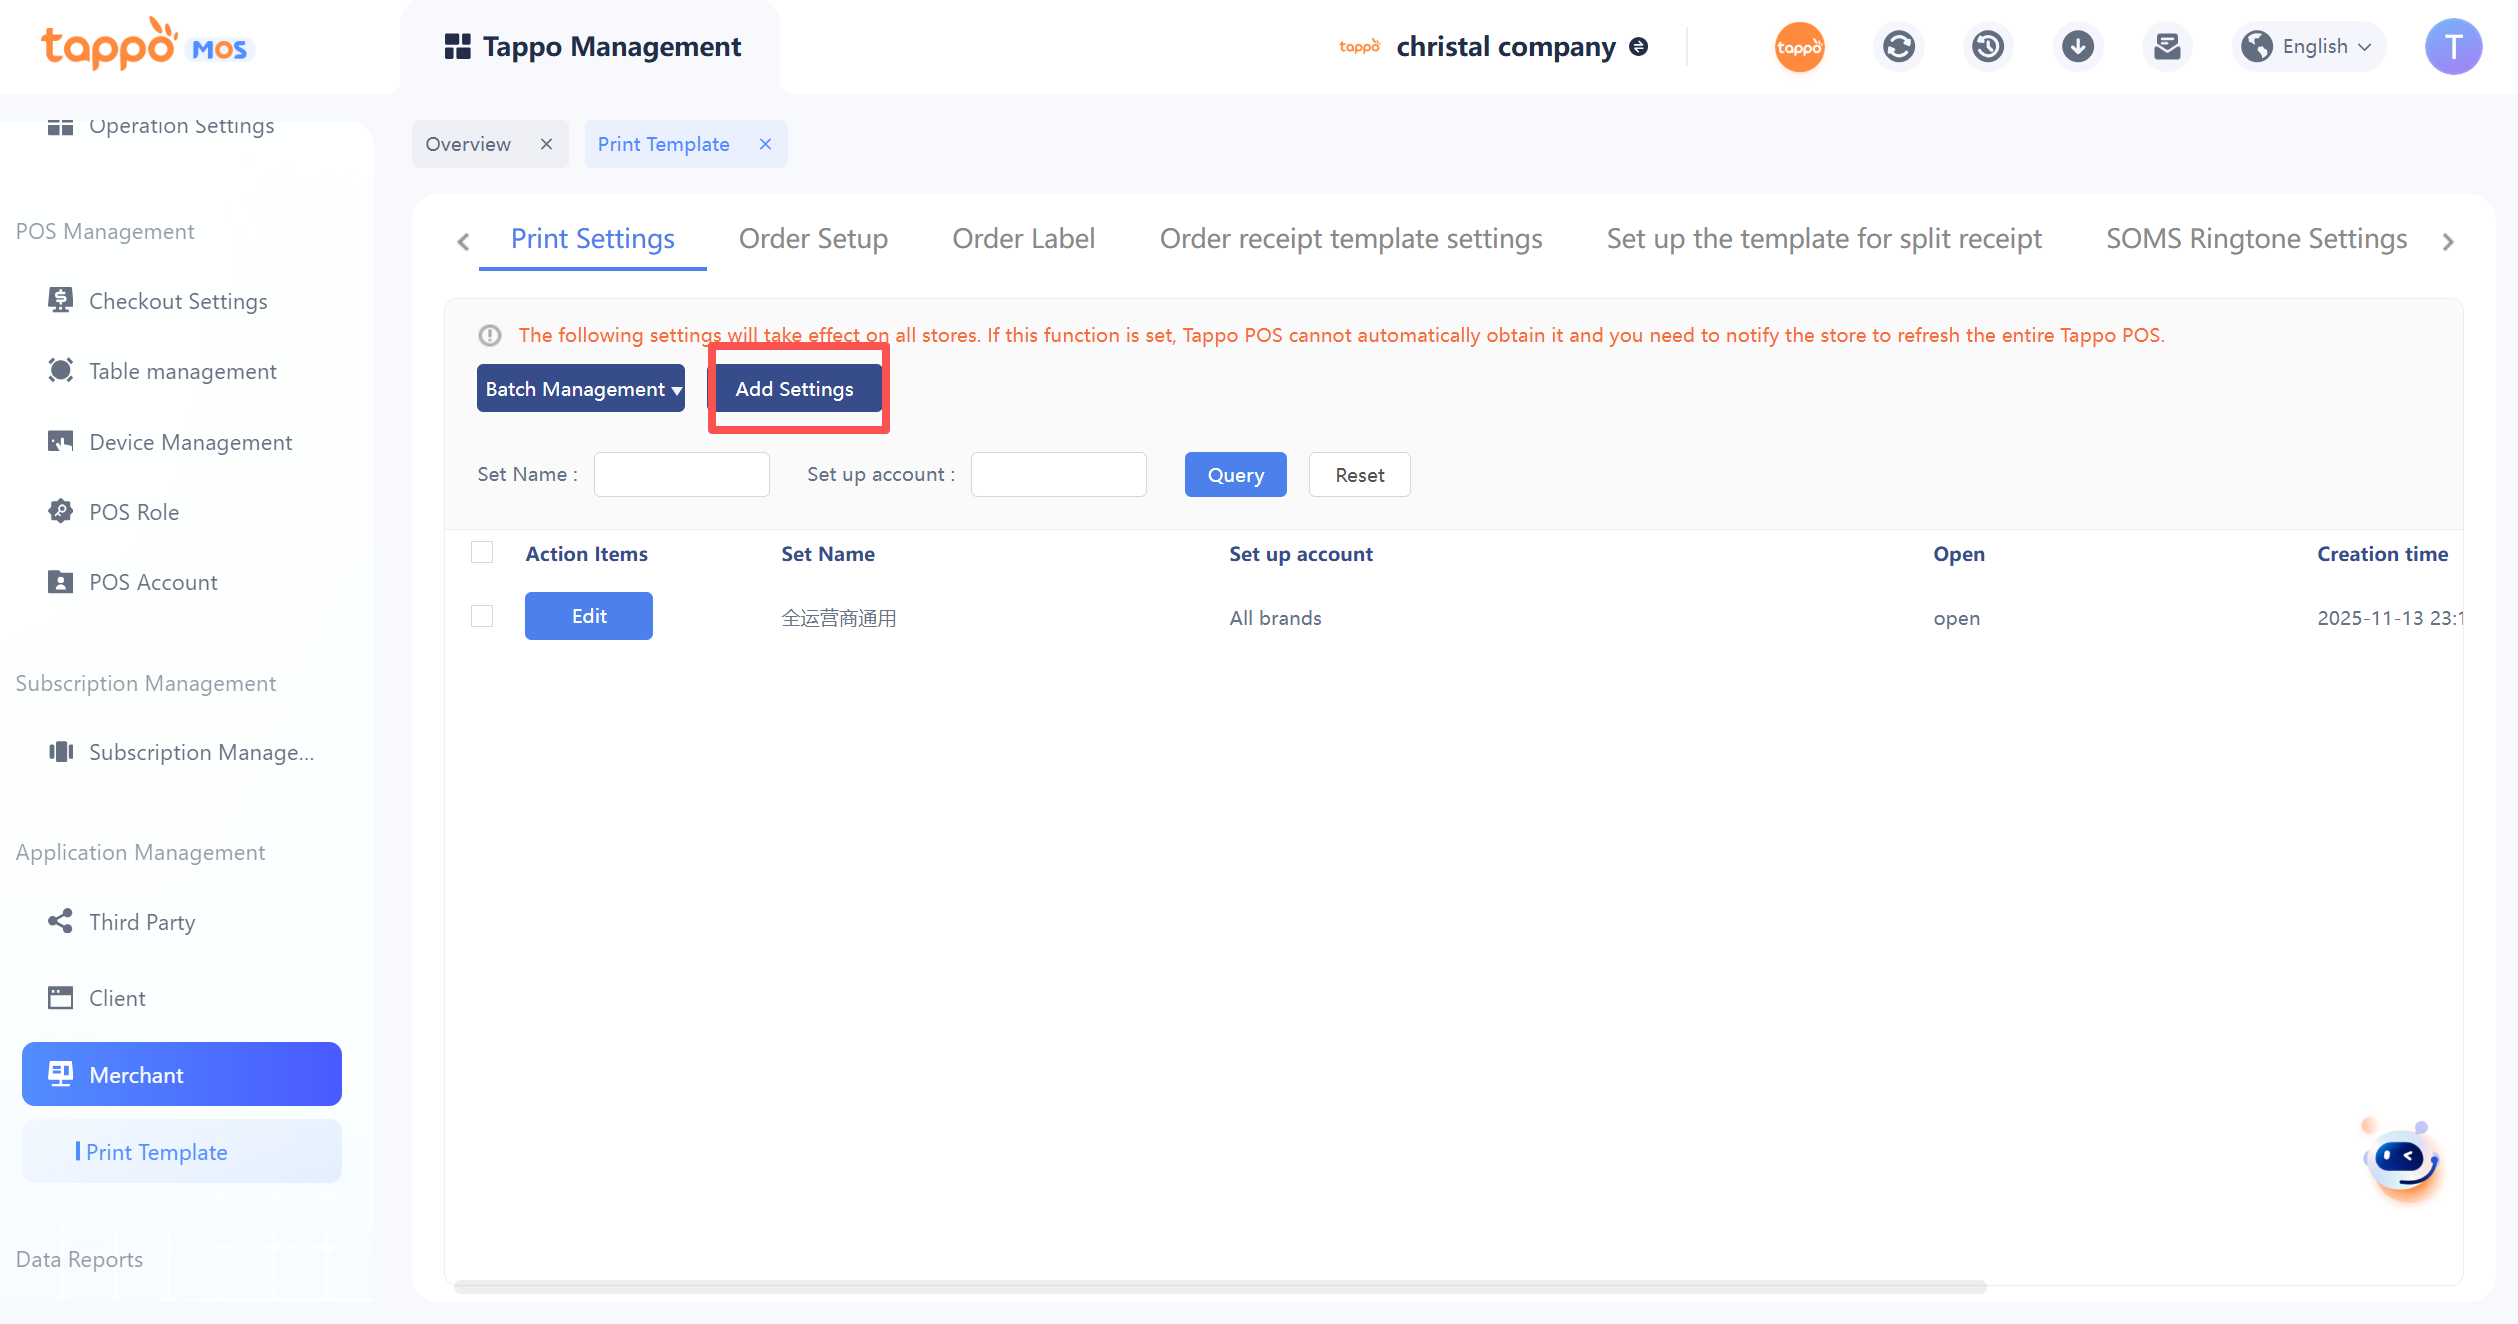
Control the merchant-side print settings for operators, brands, and Tappo POS accounts. If the brand does not support merchant-side settings, Tappo POS accounts under the brand cannot set printing.
Function Description:
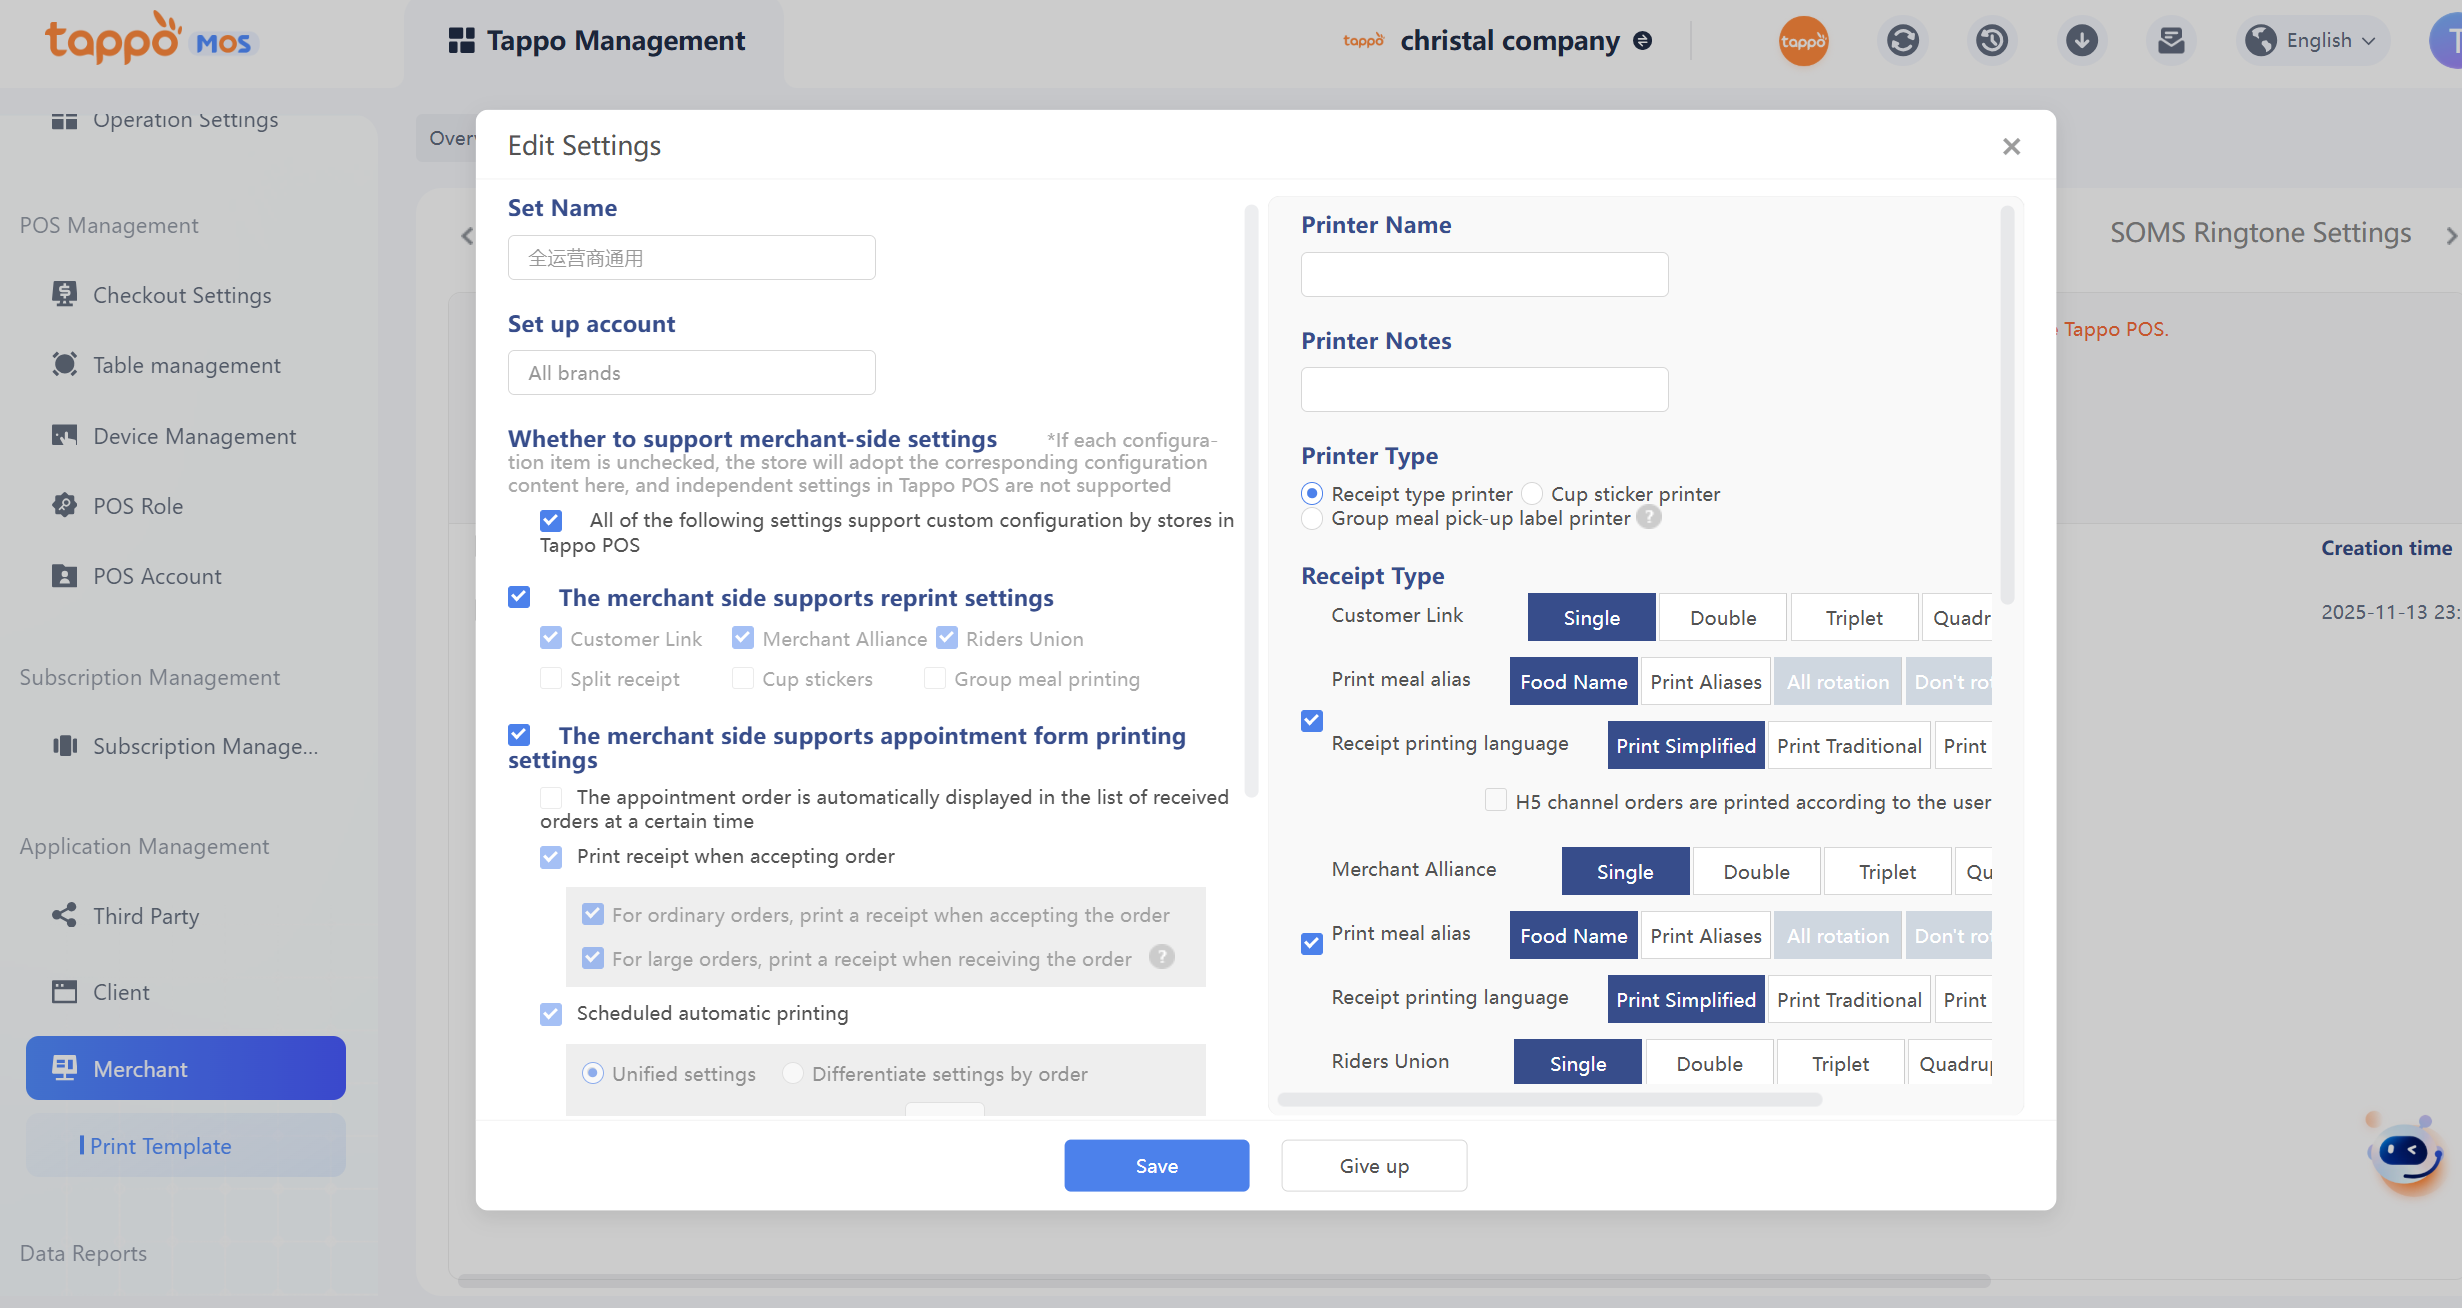
1. Whether All Configurations Support Merchant-Side Settings – Default is “Support”, optional “Not Support” and “Support”. If not supported, all settings do not support merchant-side settings. It also supports setting whether each setting item supports merchant-side settings. According to the account configuration set, the Tappo POS terminal cannot customize print settings.
2. Re-print – By default, all copies are re-printed together. Multiple selections are allowed (Customer Copy, Merchant Copy, Rider Copy, Split Receipt, Cup Sticker Receipt). Note: If the Merchant Copy; Rider Copy is set not to print above, even if the Merchant Copy and Rider Copy are selected for re-printing, they will not be printed.
3. Scheduled Order Print Settings: Used to set the scheduled printing of receipts for scheduled orders.
4. Printer Name: Optional, generally used to fill in the IP address for network printers. For USB or Bluetooth, it still needs to be set on the BOMS terminal.
5. Printer Type: Used to distinguish different printers for printing.
6. Customer Copy Print Settings – By default, set to print. Optional whether to print (Print, Do Not Print) and number of copies (Single Copy, Double Copies, Triple Copies, Quadruple Copies).
7. Print Dish Alias: Default is the menu name. To print the dish alias, you need to set the dish alias in the dish settings.
8. Merchant Copy Print Settings – By default, set to print. Optional whether to print (Print, Do Not Print) and number of copies (Single Copy, Double Copies, Triple Copies, Quadruple Copies).
9. Print Dish Alias: Default is the menu name. To print the dish alias, you need to set the dish alias in the dish settings.
10. Rider Copy Print Settings – By default, set to print. Optional whether to print (Print, Do Not Print) and number of copies (Single Copy, Double Copies, Triple Copies, Quadruple Copies).
11. Print Dish Alias: Default is the menu name. To print the dish alias, you need to set the dish alias in the dish settings.
12. Reminder Receipt Type Settings: Supports setting reminder receipts for all notification types. If not checked, the printer will not print.
13. Business Type: Used to distinguish the business type of orders printed by the configured printer.
14. Order Channel: Used to distinguish the order channel printed by the configured printer. Unconfigured channels will not be printed by this printer.
15. Split Tags: Used to distinguish two modes of split printing and printed tags.
Order Setup
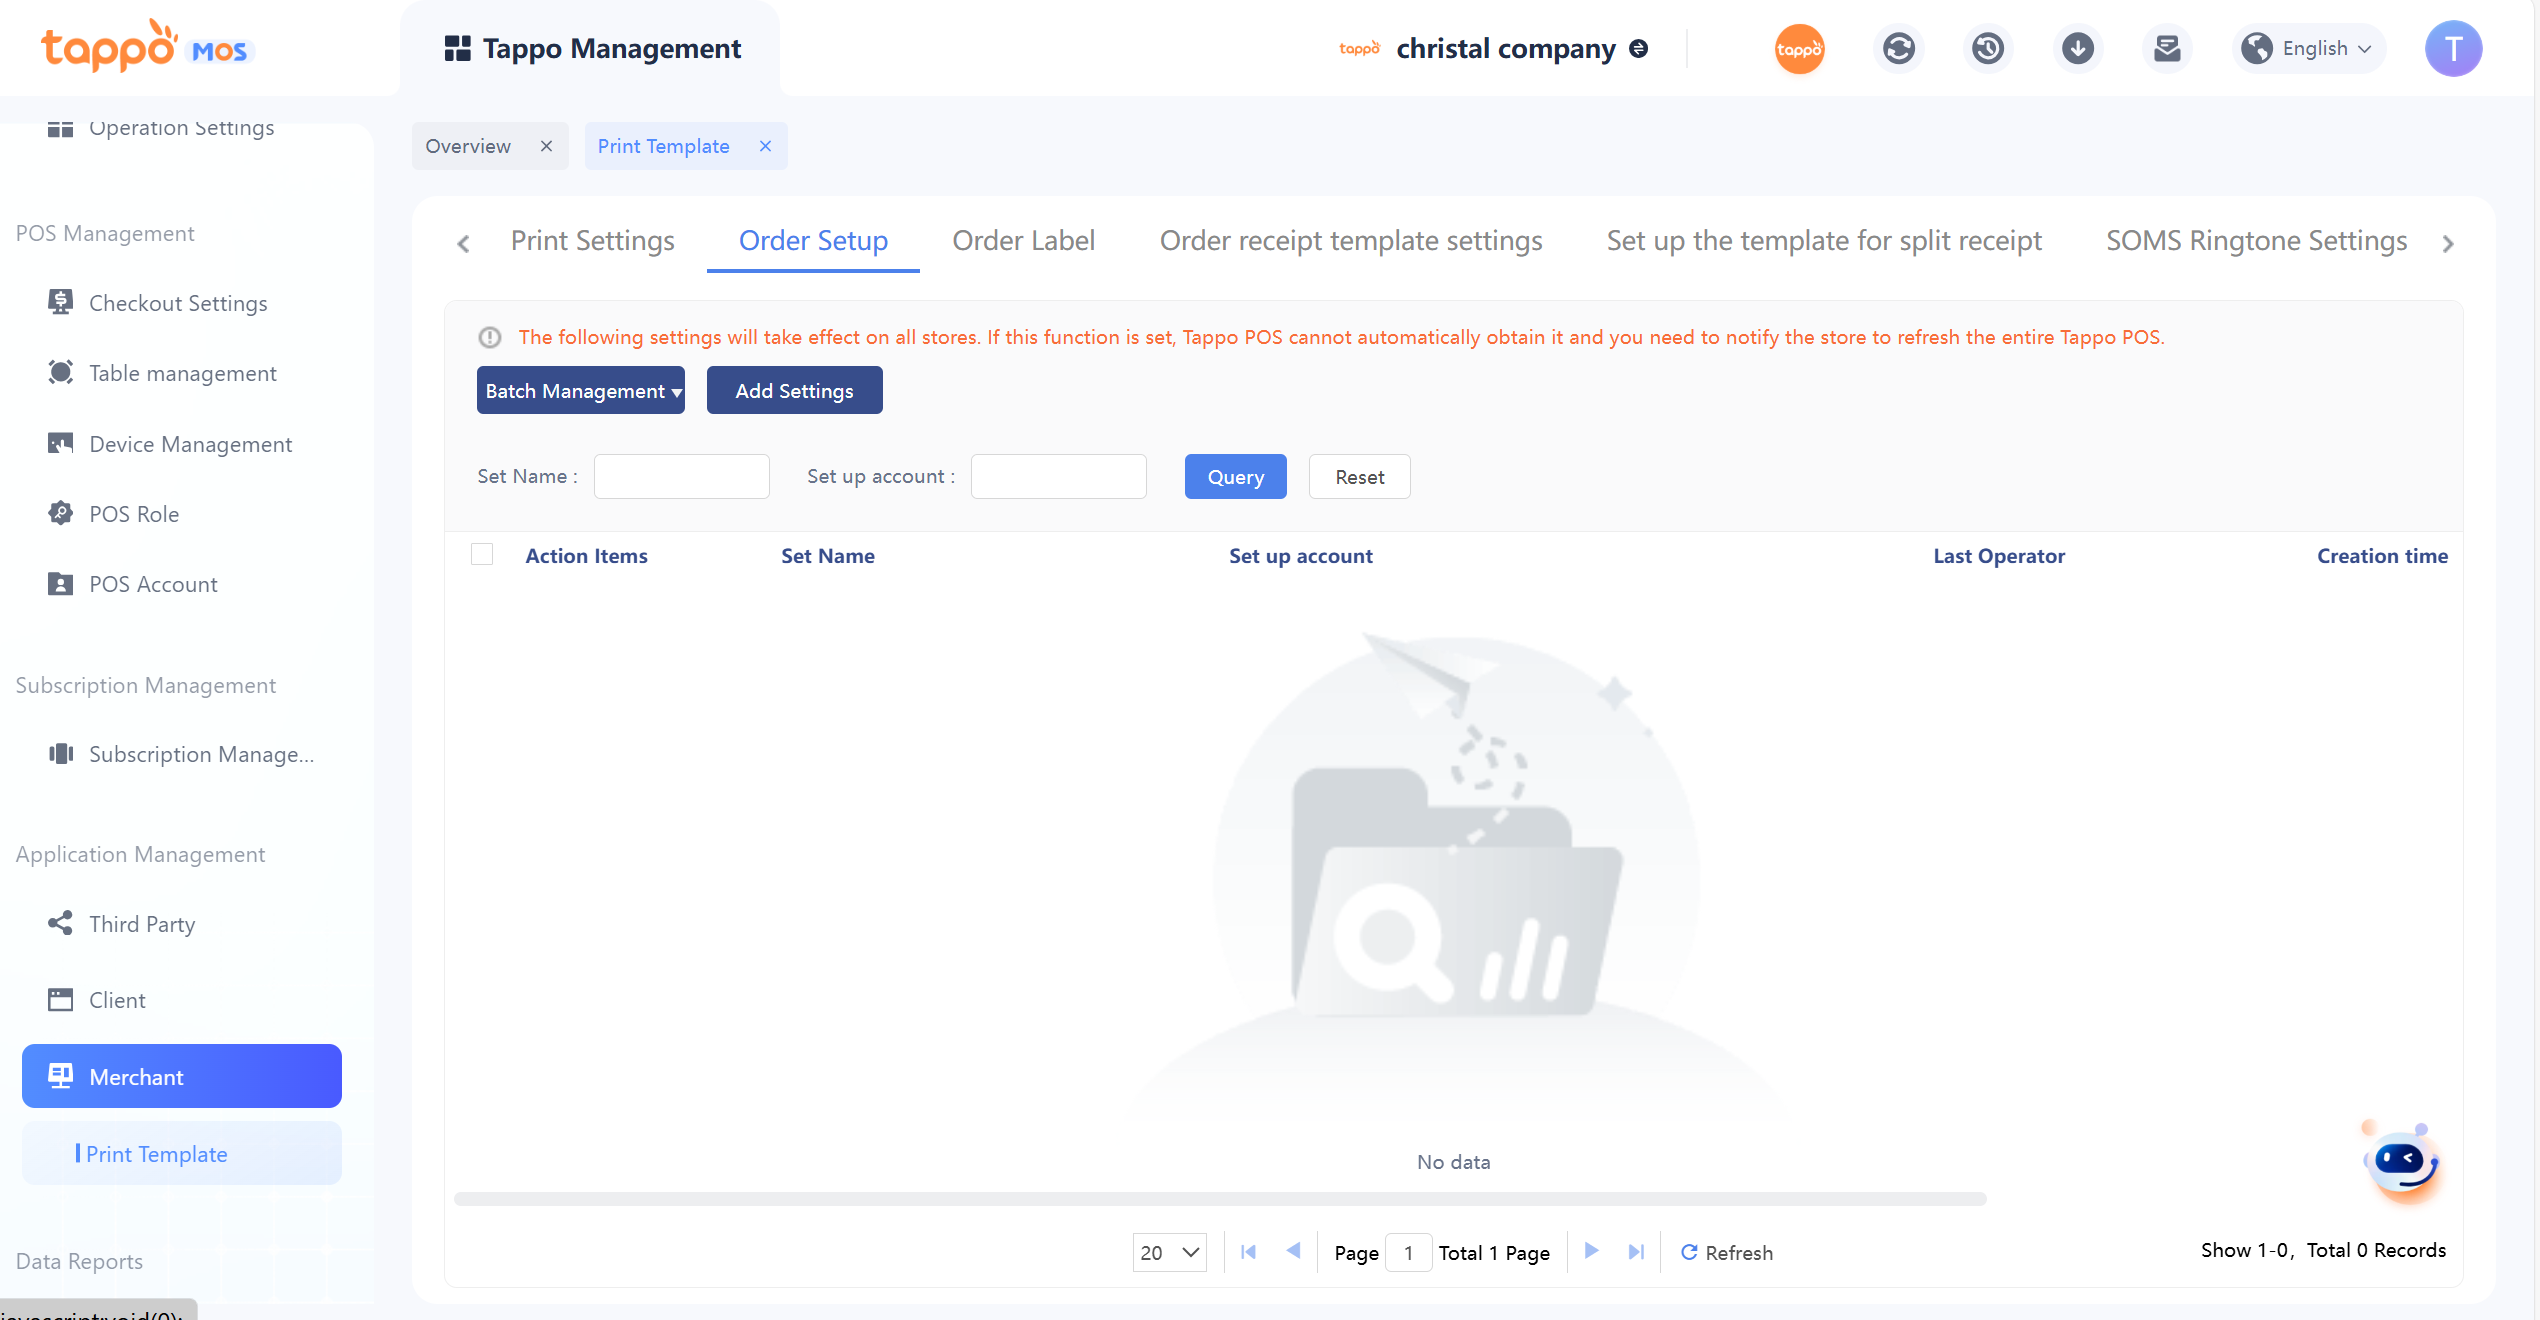
Main Purpose: Used by merchants to uniformly manage order settings in Tappo POS. It can set all brands and specified accounts for differentiated management.
Click [Add Setting] to select the specified brand and specified account.
1. Set Whether the Merchant Side Supports Order Completion Reminder Settings: Used to set whether secondary confirmation is required for order completion settings on the BOMS side.
Order Label
Main Purpose: When merchants need to print different dishes in different production areas separately, they can first set the split tag name and configure the corresponding dishes. After setting, different split tags can be set for different printers in Tappo POS – Printer Management. To achieve printing different dishes in different places according to actual needs.
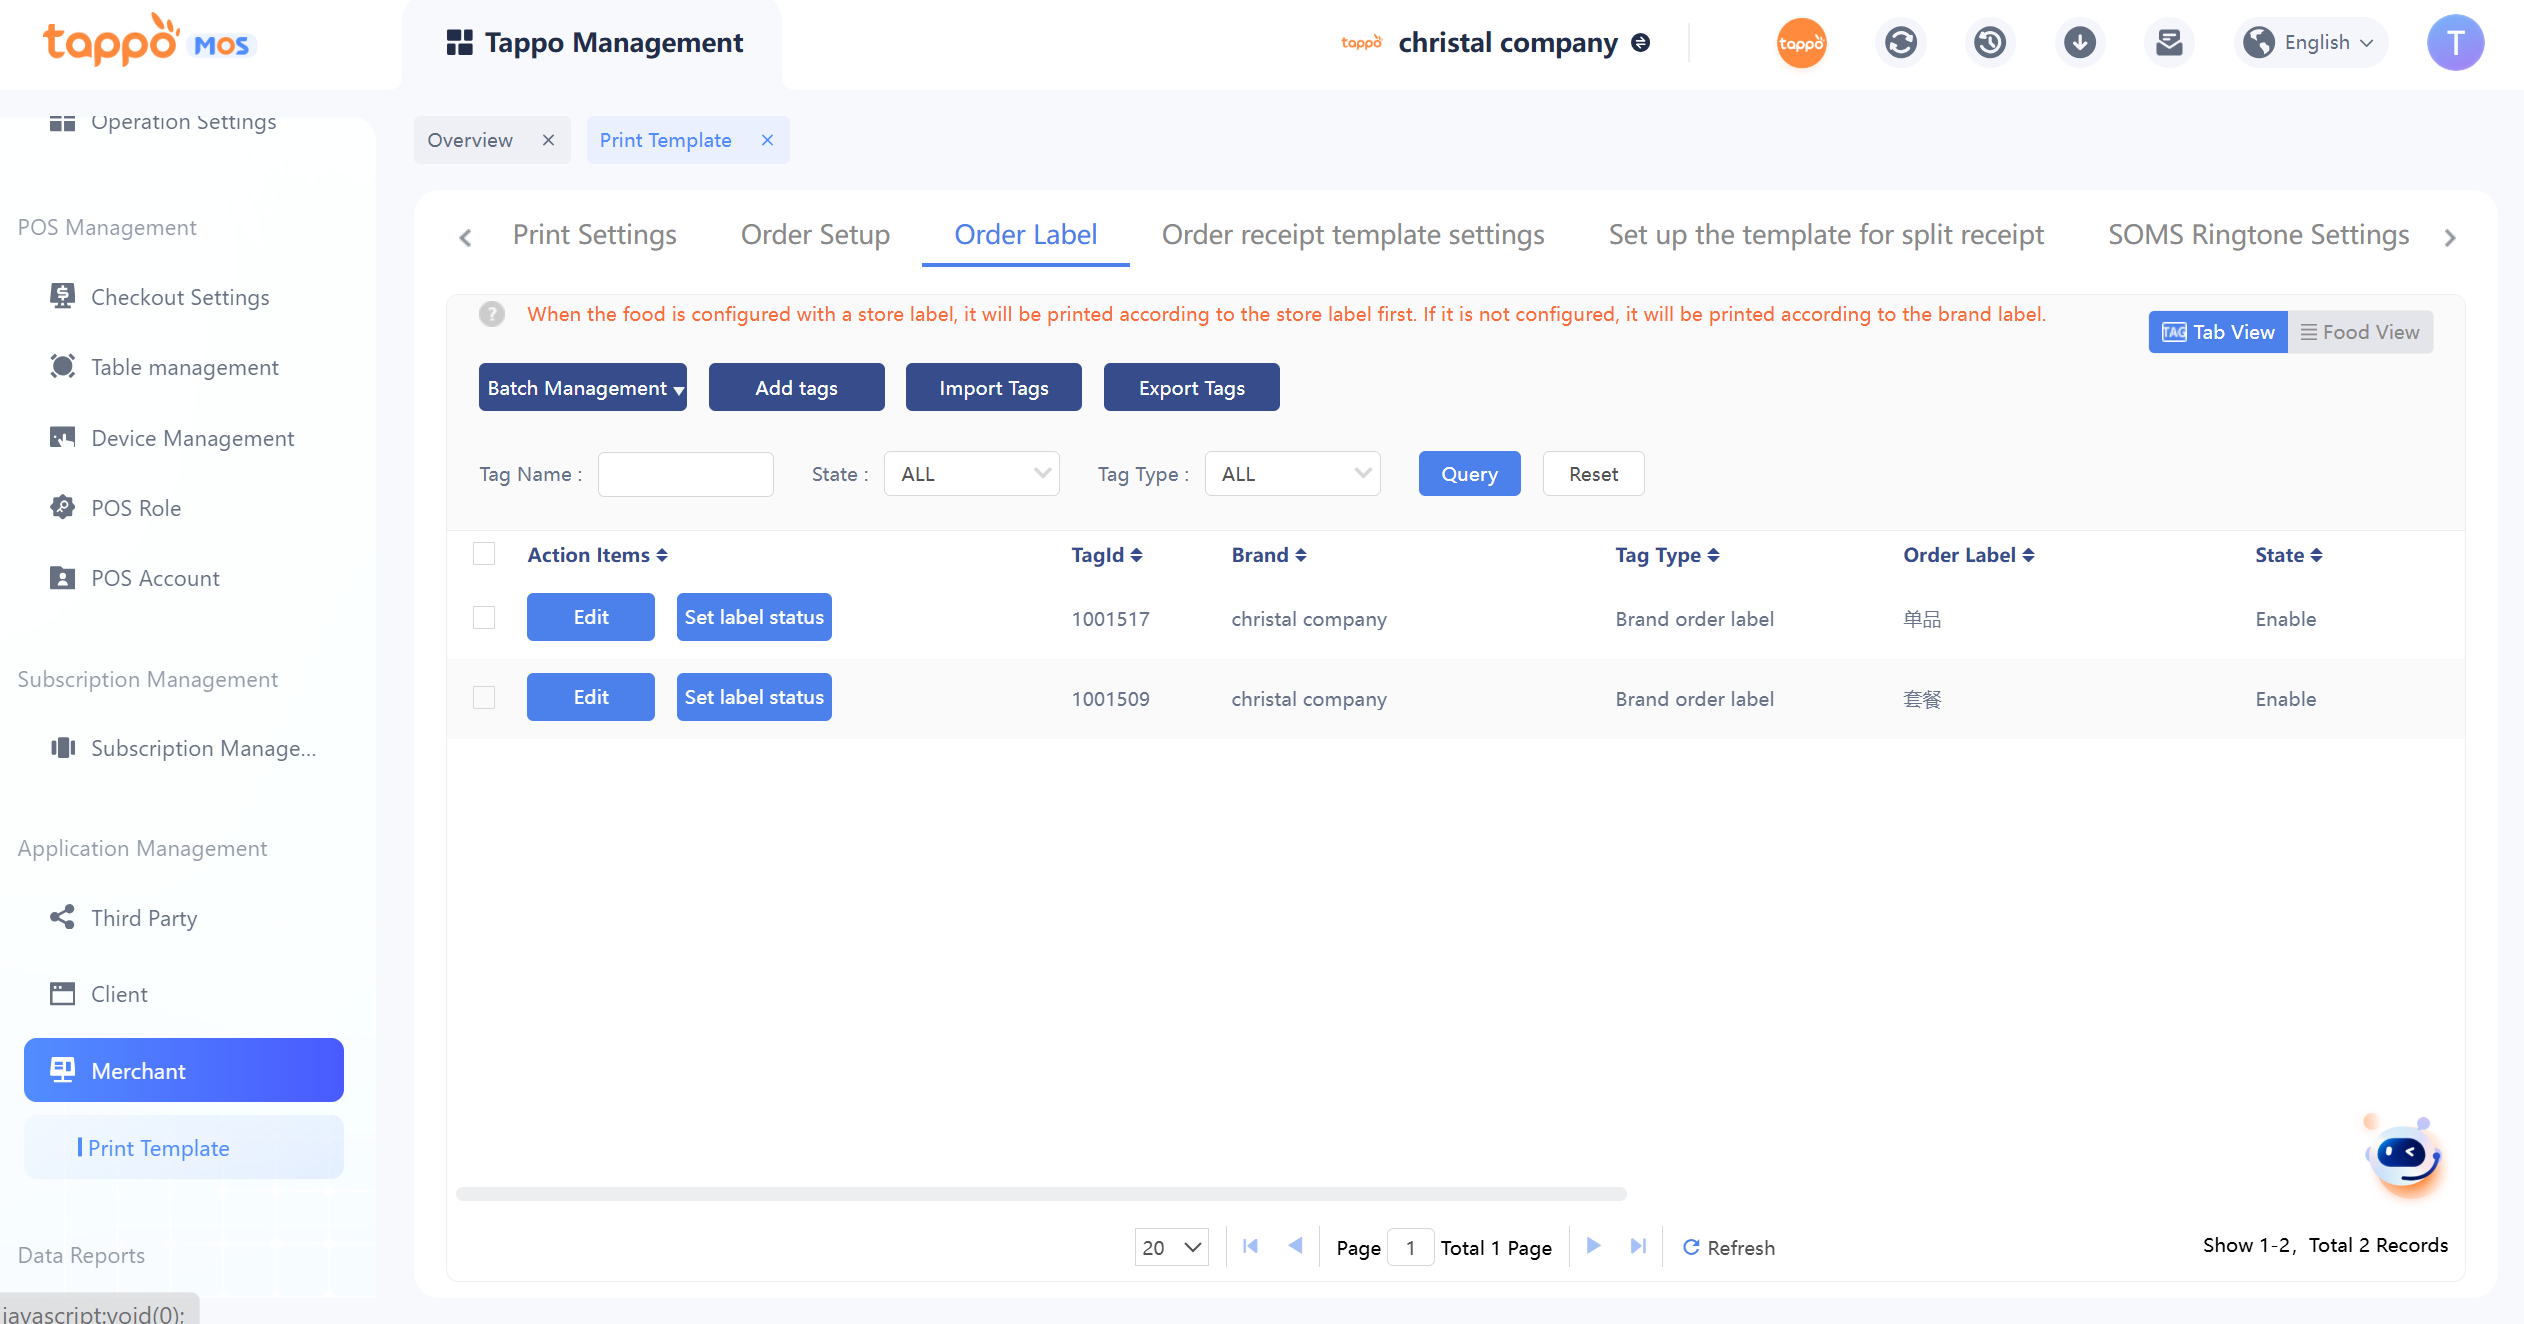
1. Batch Management – Only used for batch deactivation or activation. After deactivation, the split tag configuration will not take effect in printing.
2. Set Tag Status – Used to deactivate or activate a single tag record. After deactivation, the split tag configuration will not take effect in printing.
3. Add/Edit Tag – Click [Add Tag] or [Edit] to add or edit.
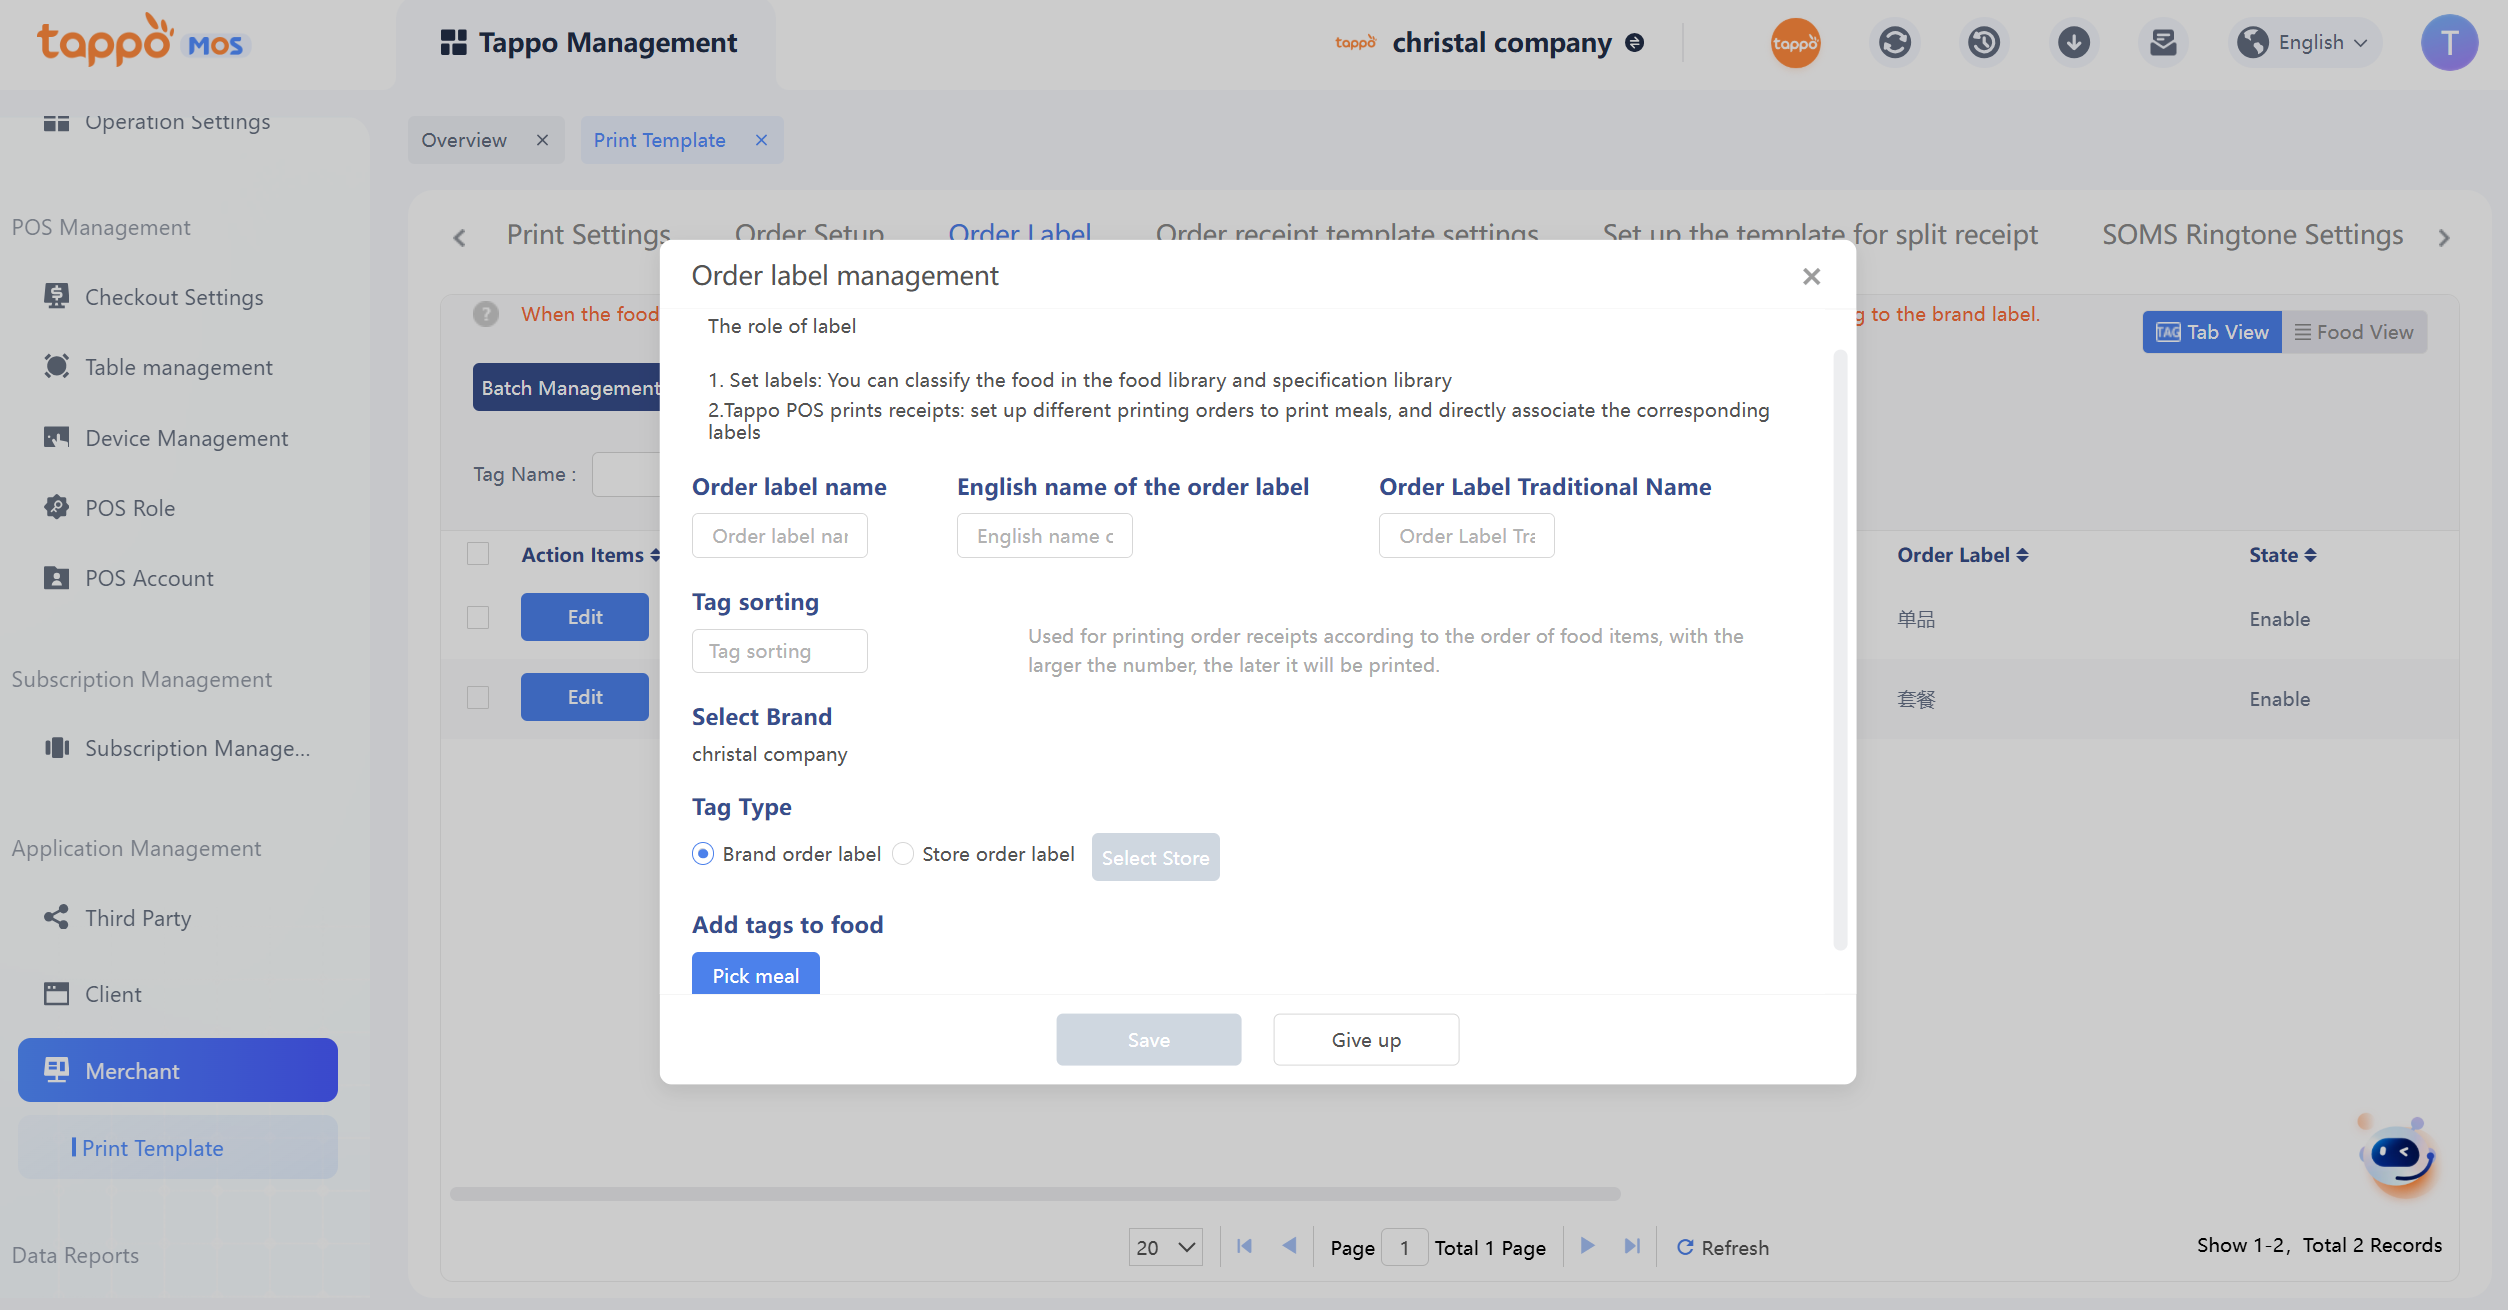
4. Split Tag Name – Required. Since it needs to be configured in Tappo POS after configuration here, it is recommended to enter an easily distinguishable name, such as: Beverage Station, Stir-Fry, Cold Processing, etc. The name can be modified when editing.
5. Select Brand – Required. The brand is single-choice. If there are multiple brands under the operator, split tags need to be added separately for each brand to facilitate clear maintenance in the future. The brand cannot be modified when editing.
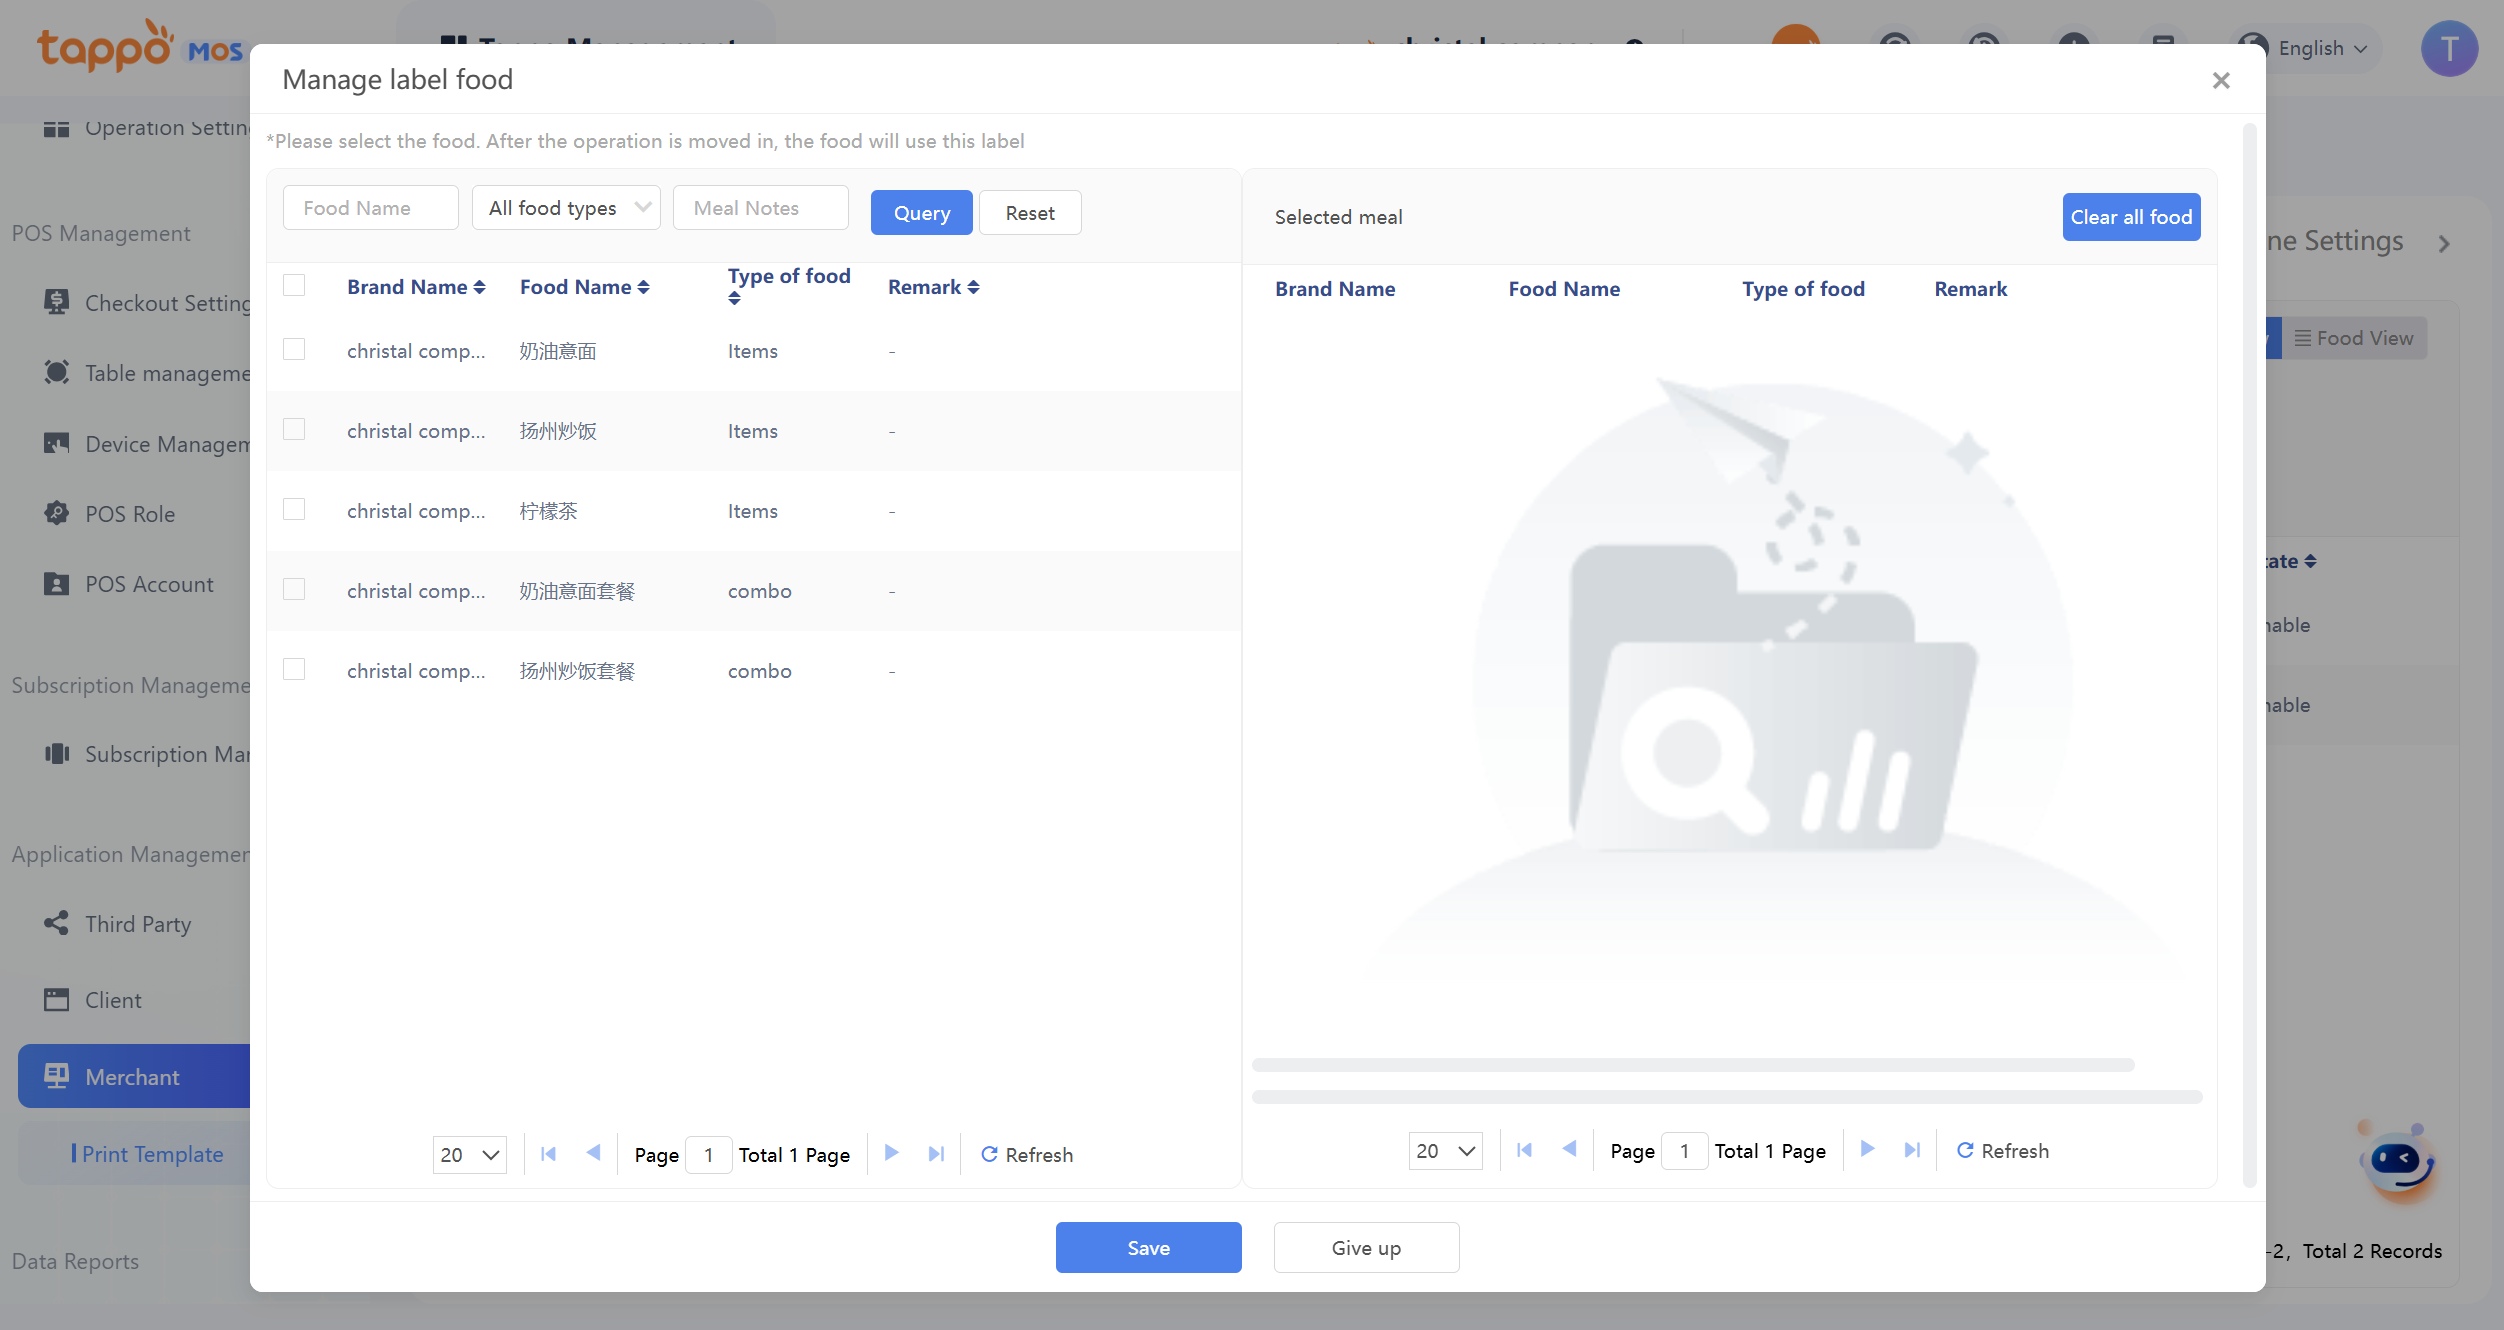
6. Select Dishes – Click [Add Dishes] to enter the dish binding page. Only single dishes are displayed. According to actual needs, you can select all dishes on the current page through fuzzy search; or select individual dishes. After selecting on the left, the selected dishes will be displayed on the right, indicating that the dishes have been added under this split tag. After confirmation, click “Save” to return to the add tag management page, and click Save again to complete the addition. Dishes can be modified when editing.
Order Receipt Template Settings
Main Purpose: When merchants are not satisfied with the default receipt template under a brand, they can add a receipt template for custom settings.
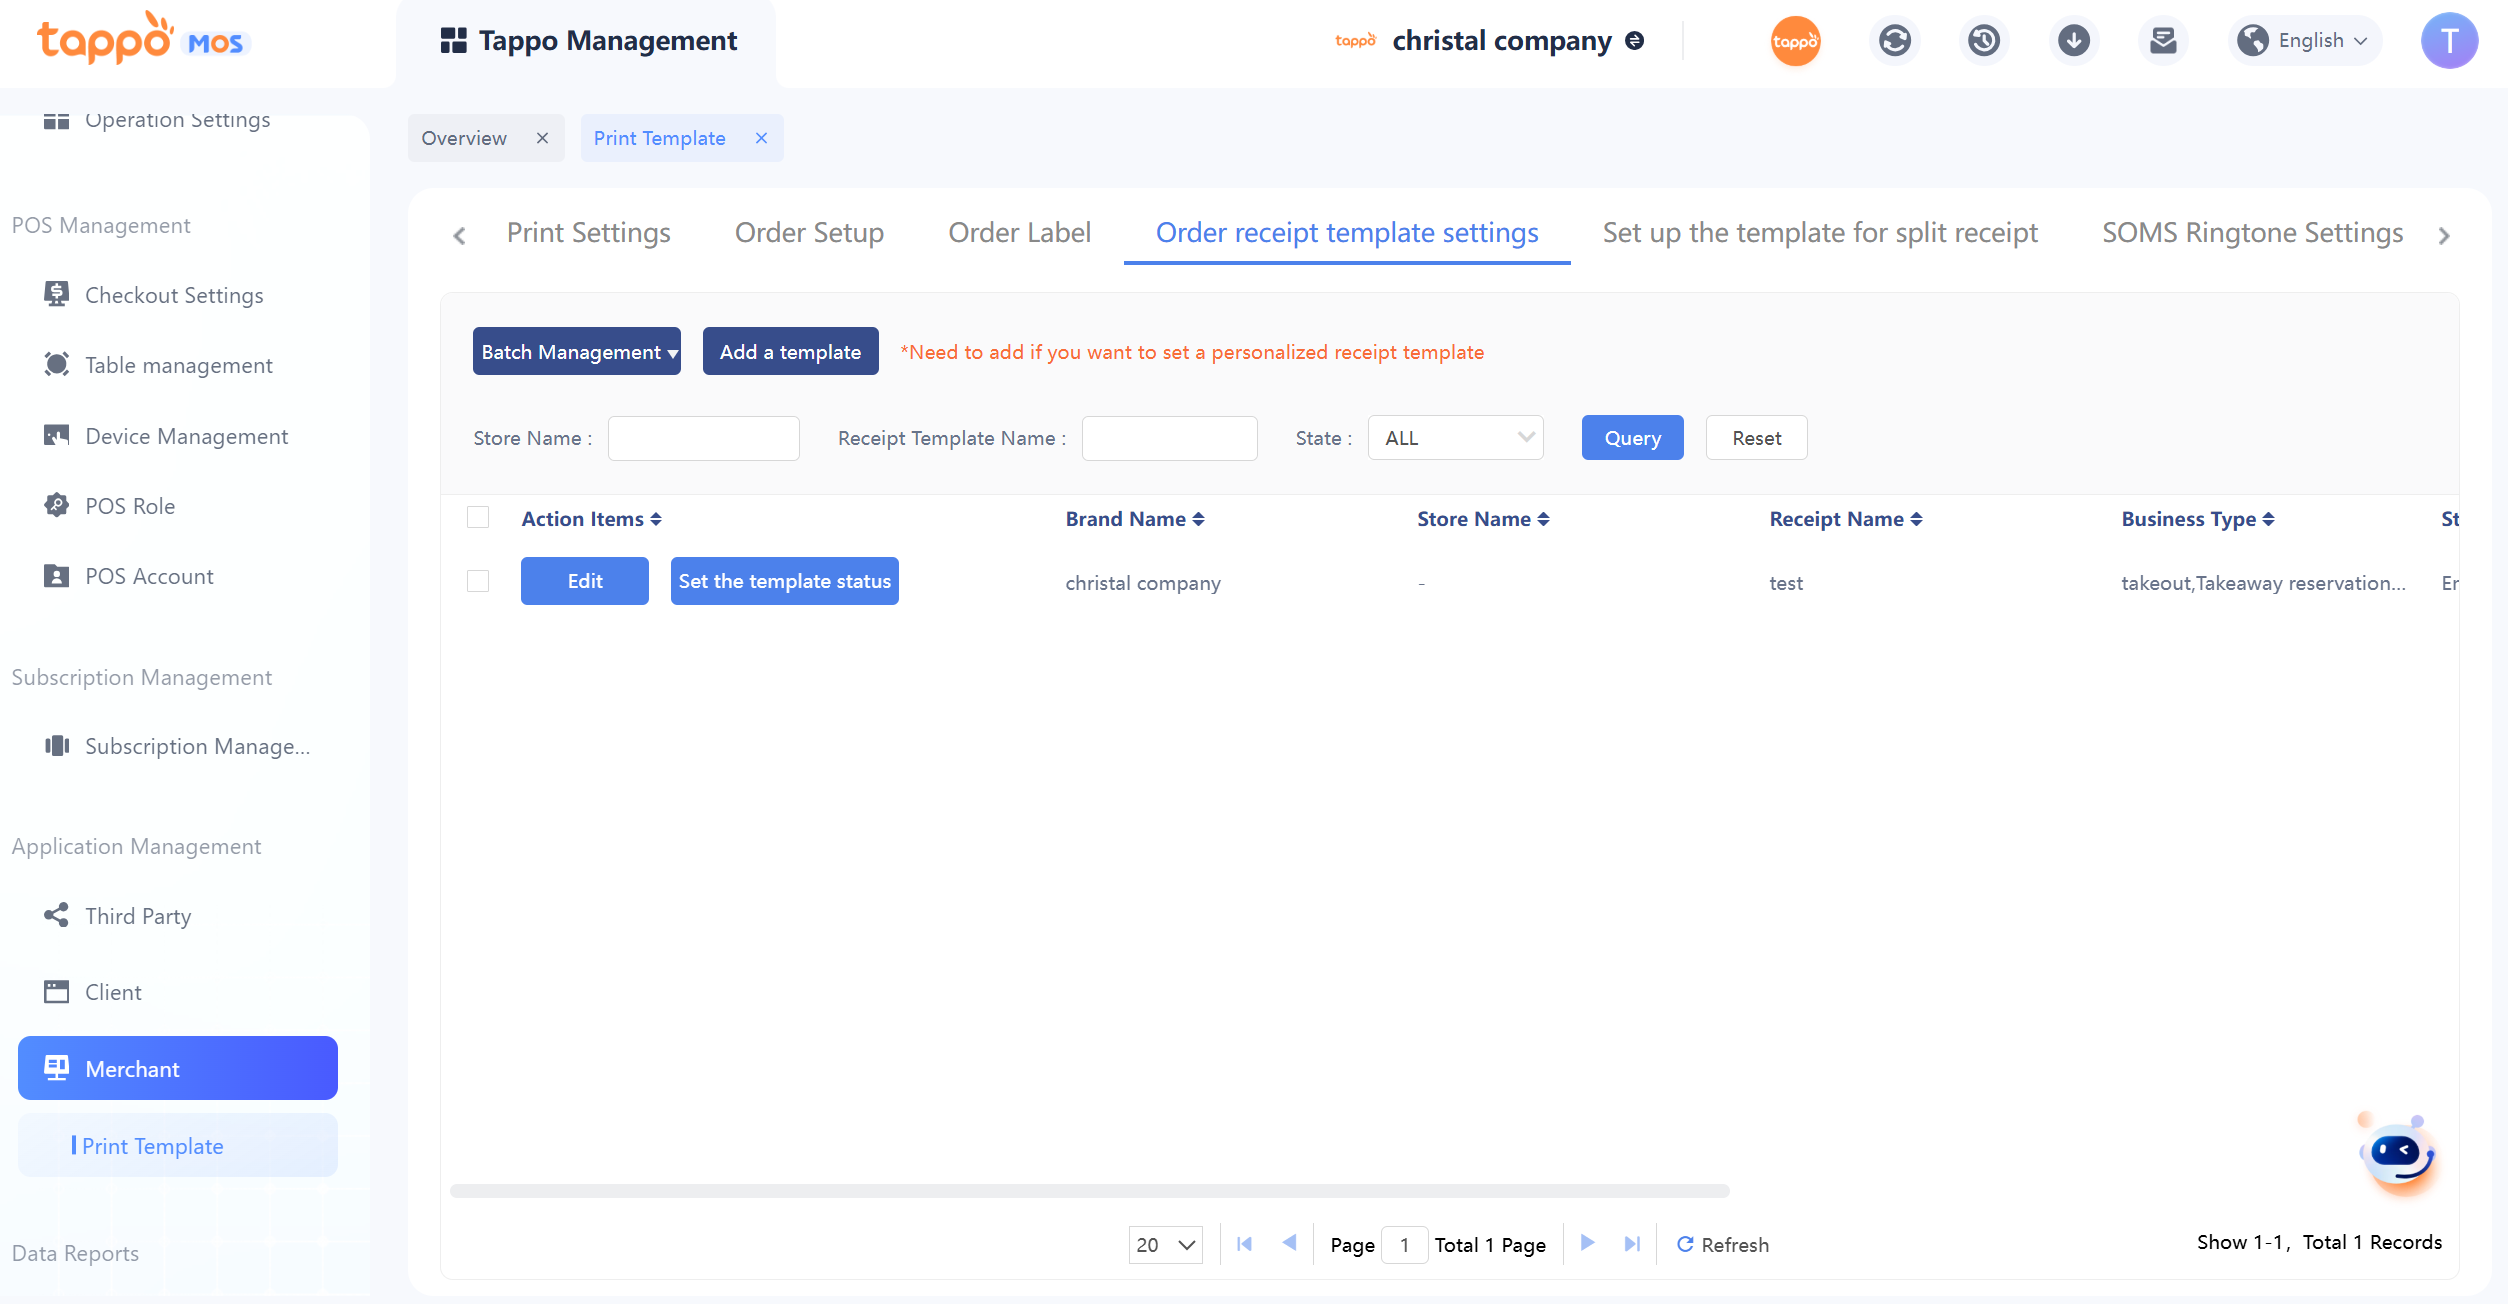
1. Batch Management – Only used for batch deactivation or activation. After deactivation, the receipt template will not take effect, and the print template will be used.
2. Set Tag Status – Used to deactivate or activate a single template record. After deactivation, the receipt template will not take effect, and the print template will be used.
3. Add/Edit Tag – Click [Add Template] or [Edit] to add or edit. When editing, directly edit the receipt template. Receipt Template Name – Required, customize the name as needed.
4. Multiple Store Selection. If the brand’s stores need the same template, leave it blank. If different, add them separately.
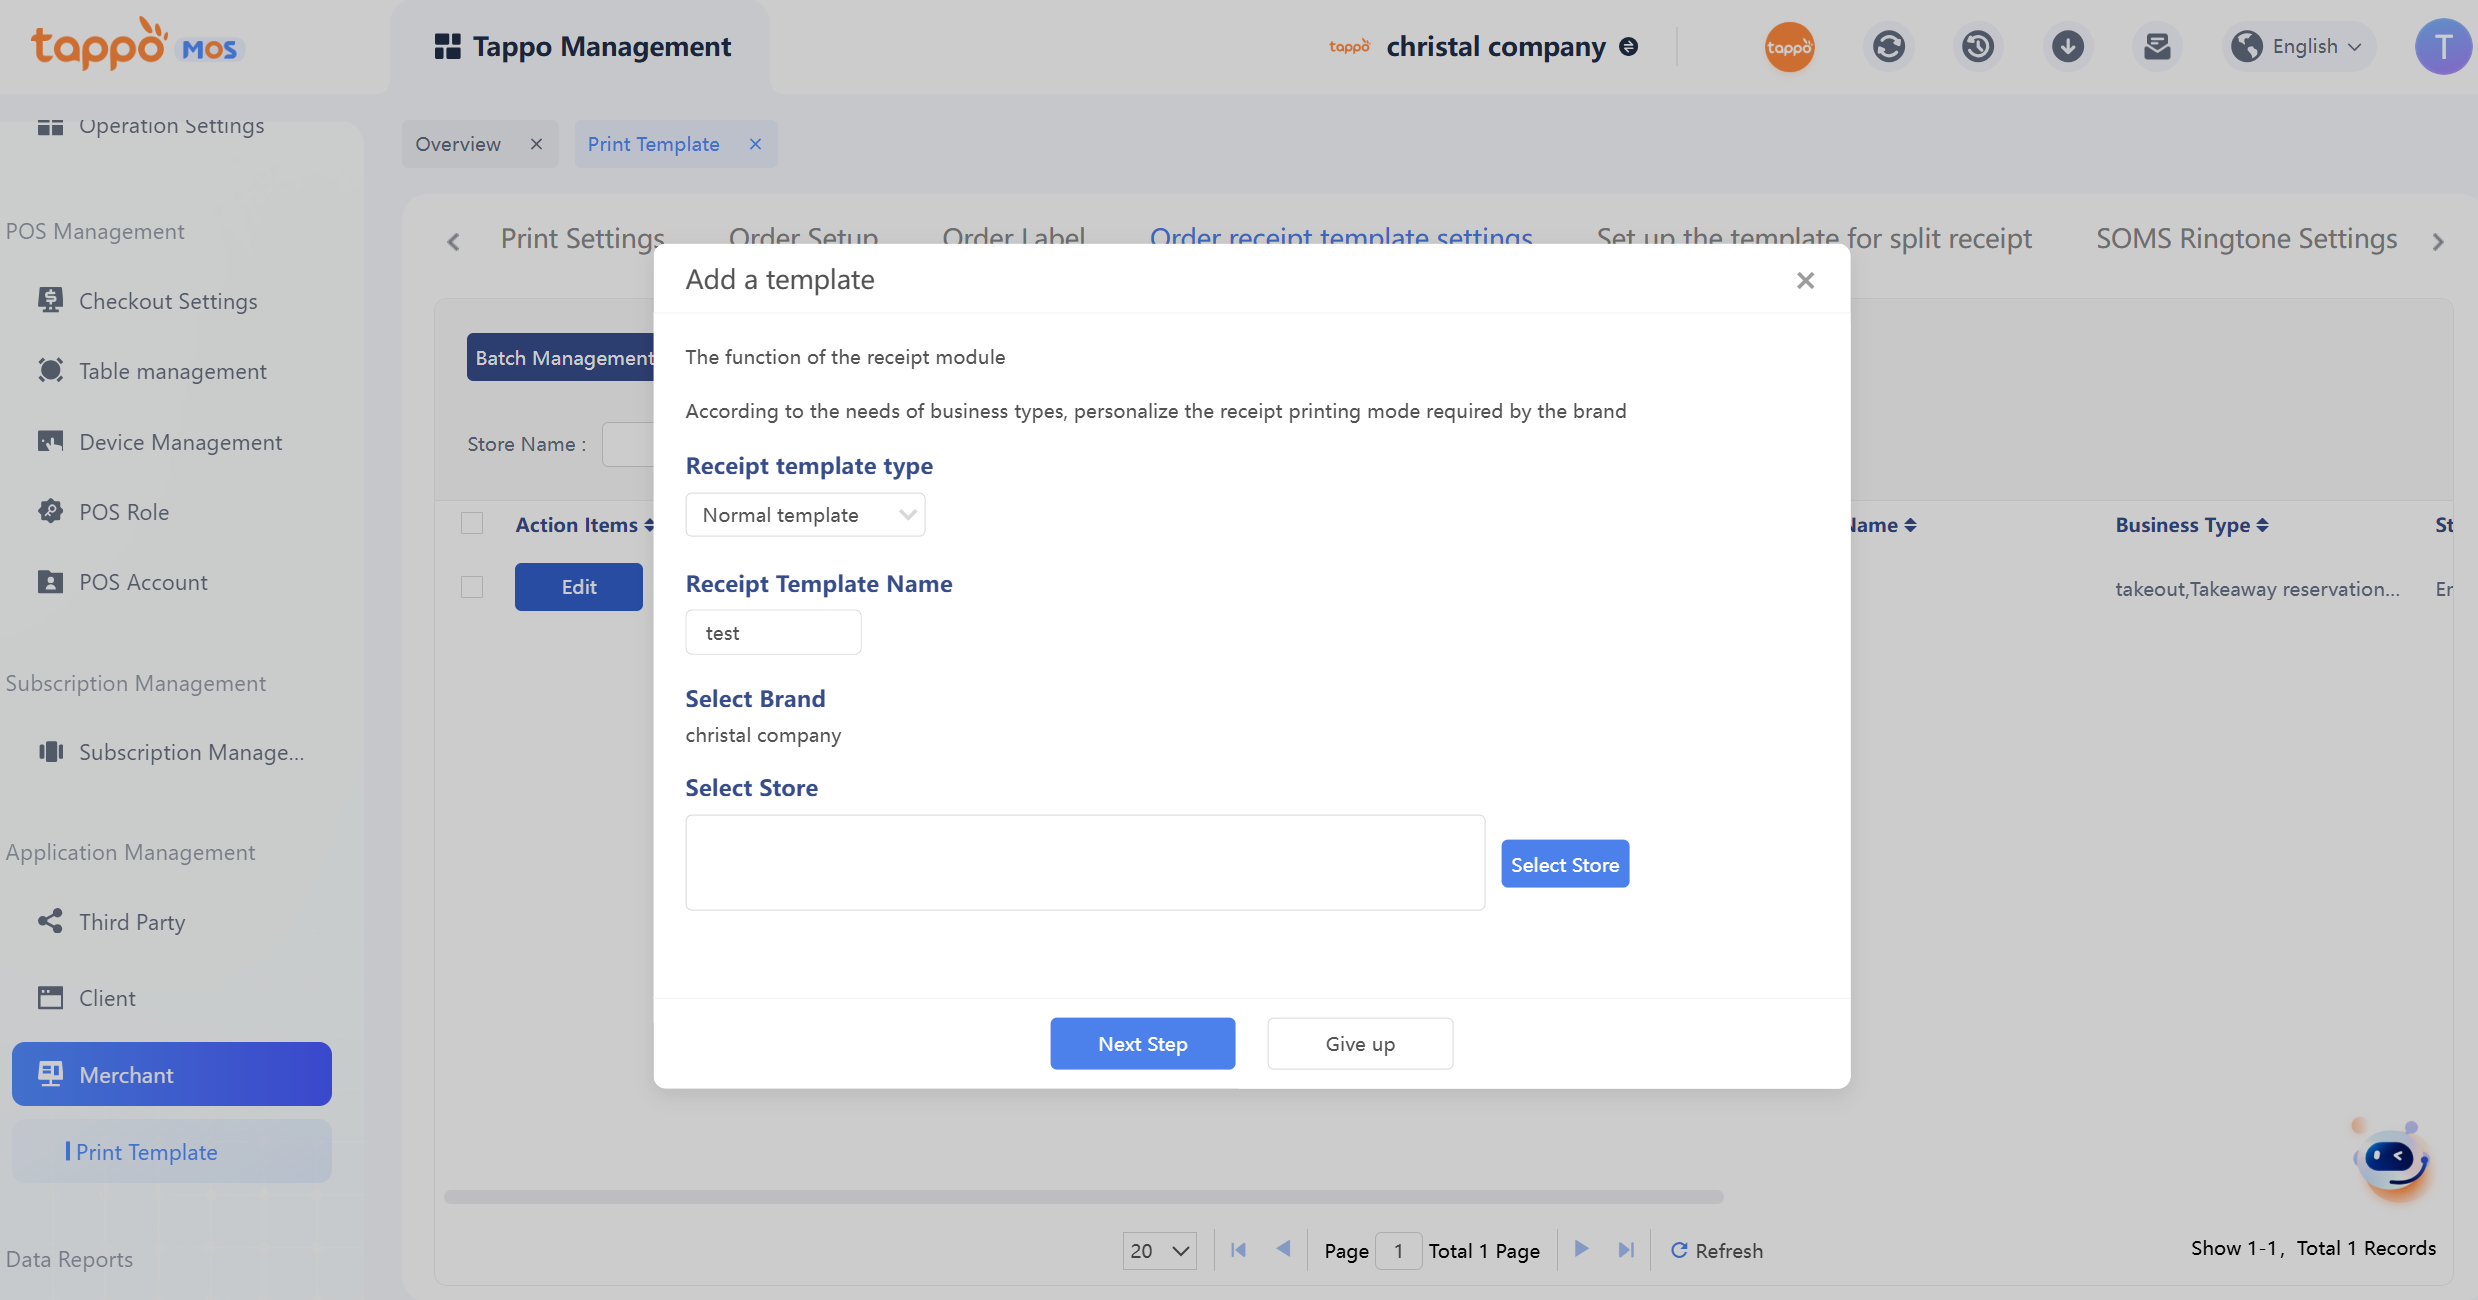
Enter Receipt Template – Receipt Template Business Type. Regardless of whether the merchant has takeaway, dine-in, or takeaway pickup business, they are provided by default when creating. If the merchant does not have the corresponding business type, it can be ignored and will not affect normal use.
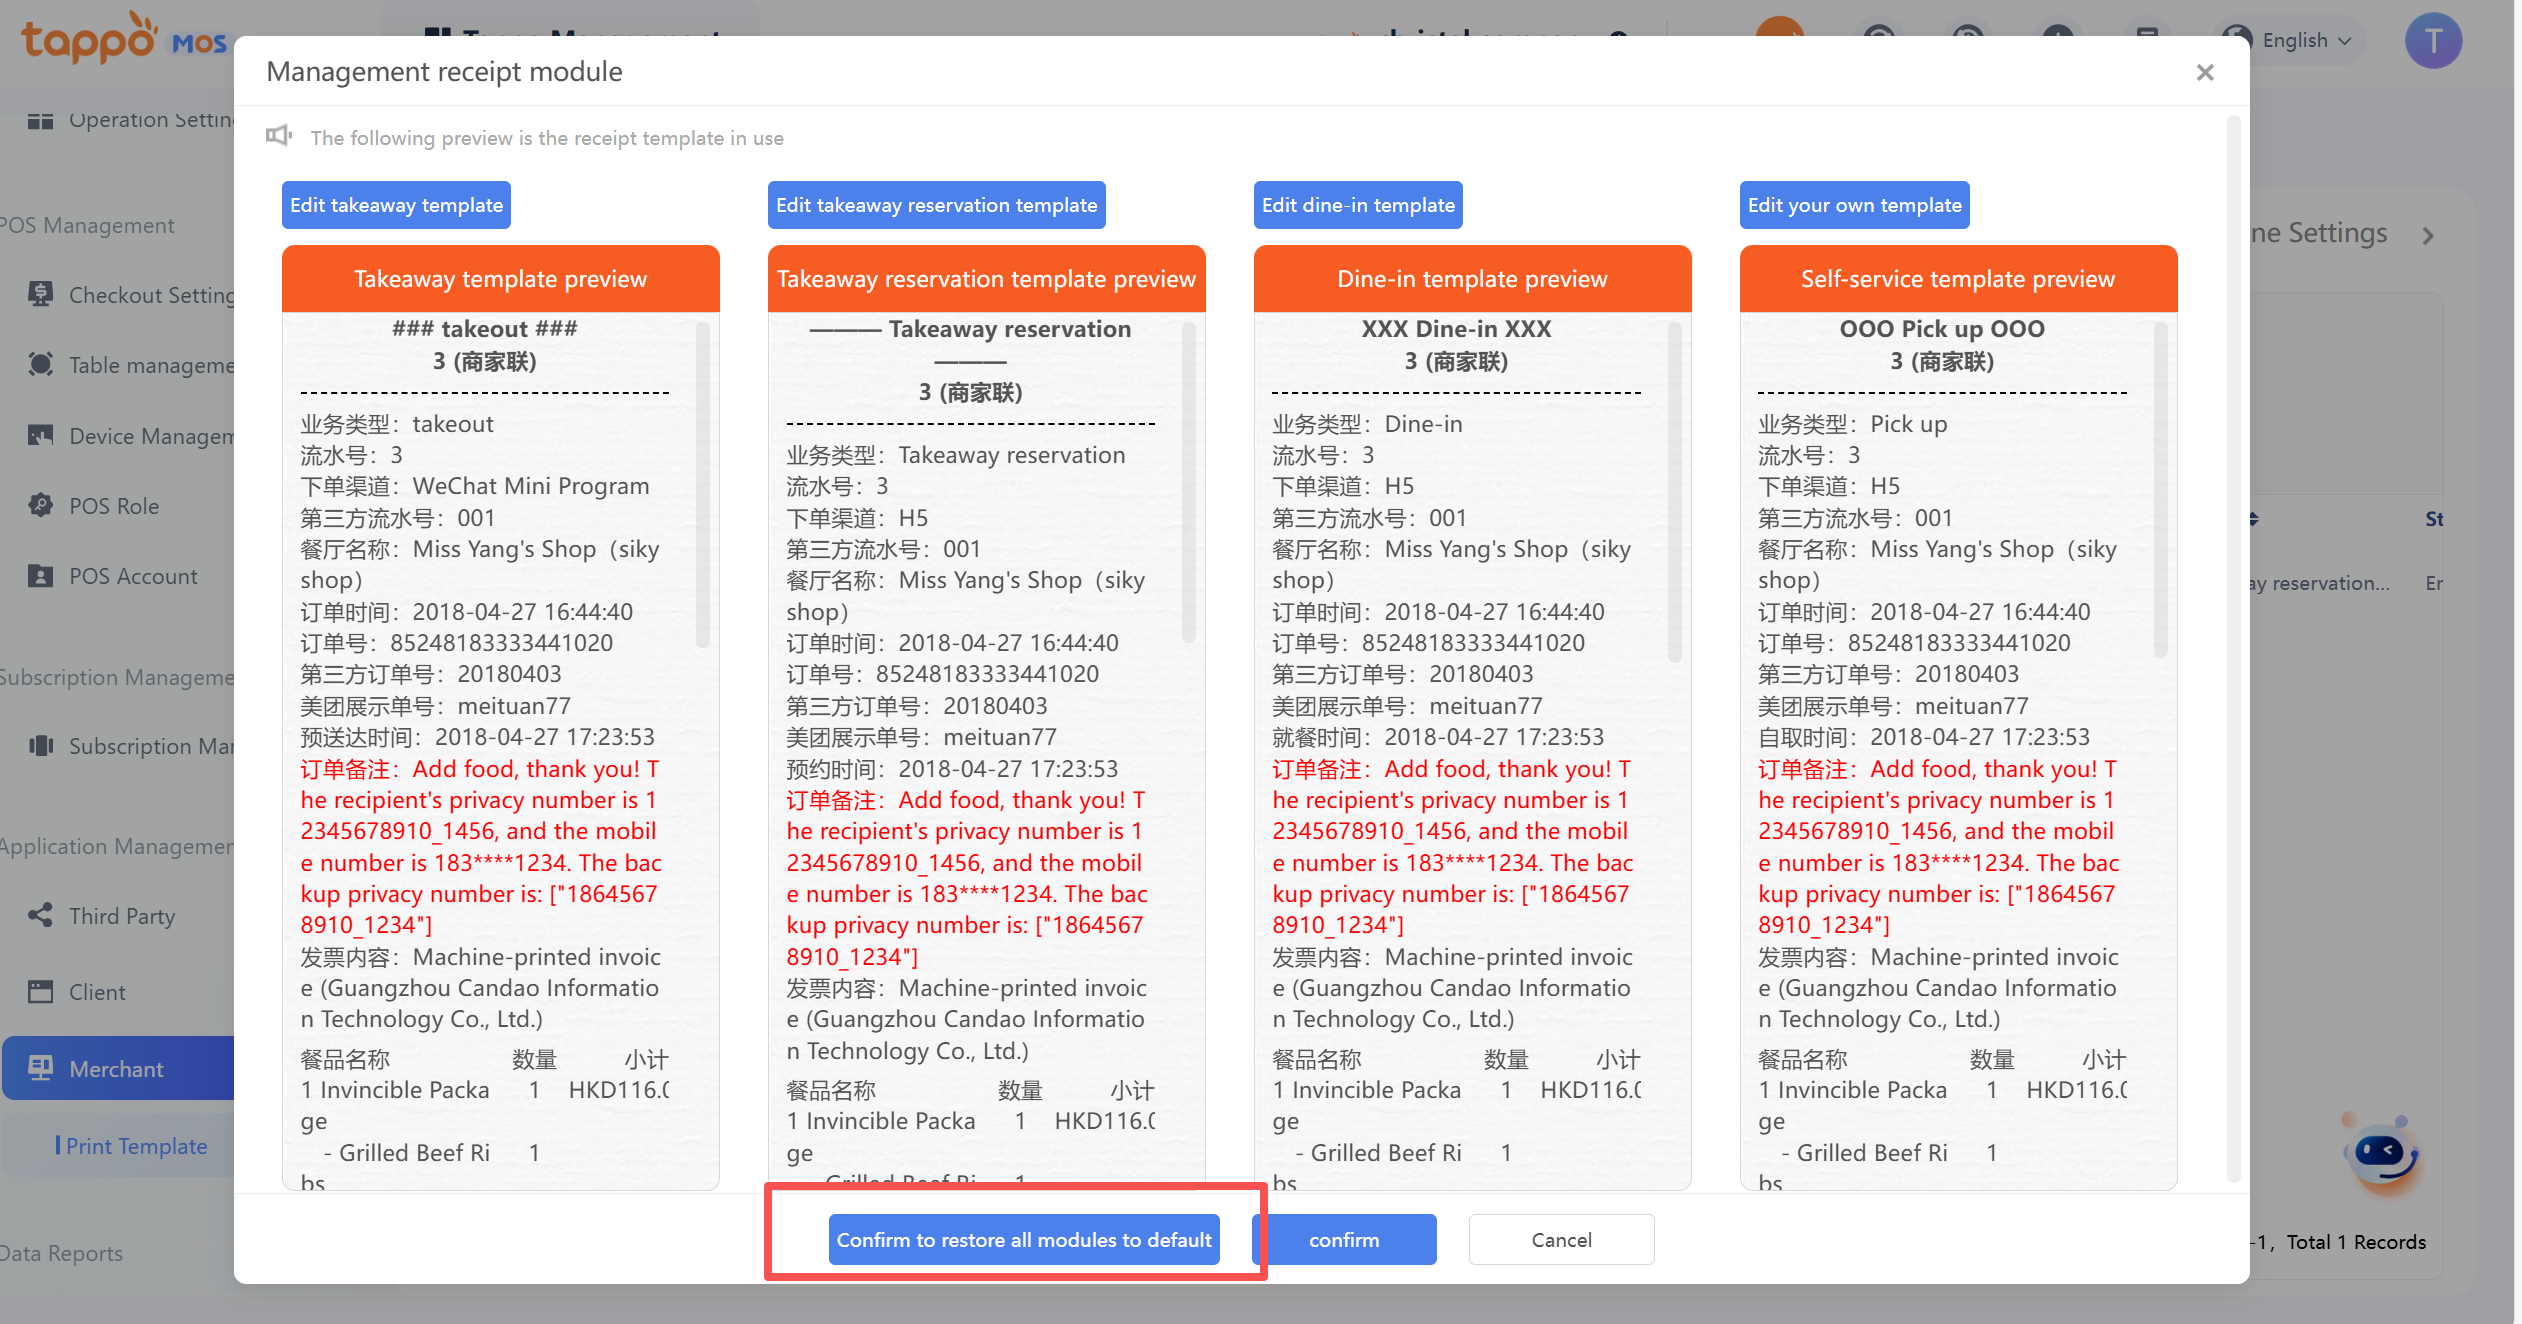
After clicking [Confirm to Restore All to Default Templates], a secondary confirmation page will appear. After confirmation, all receipt templates will be restored to the default templates. Cancel means abandoning the restoration and retaining the custom templates.
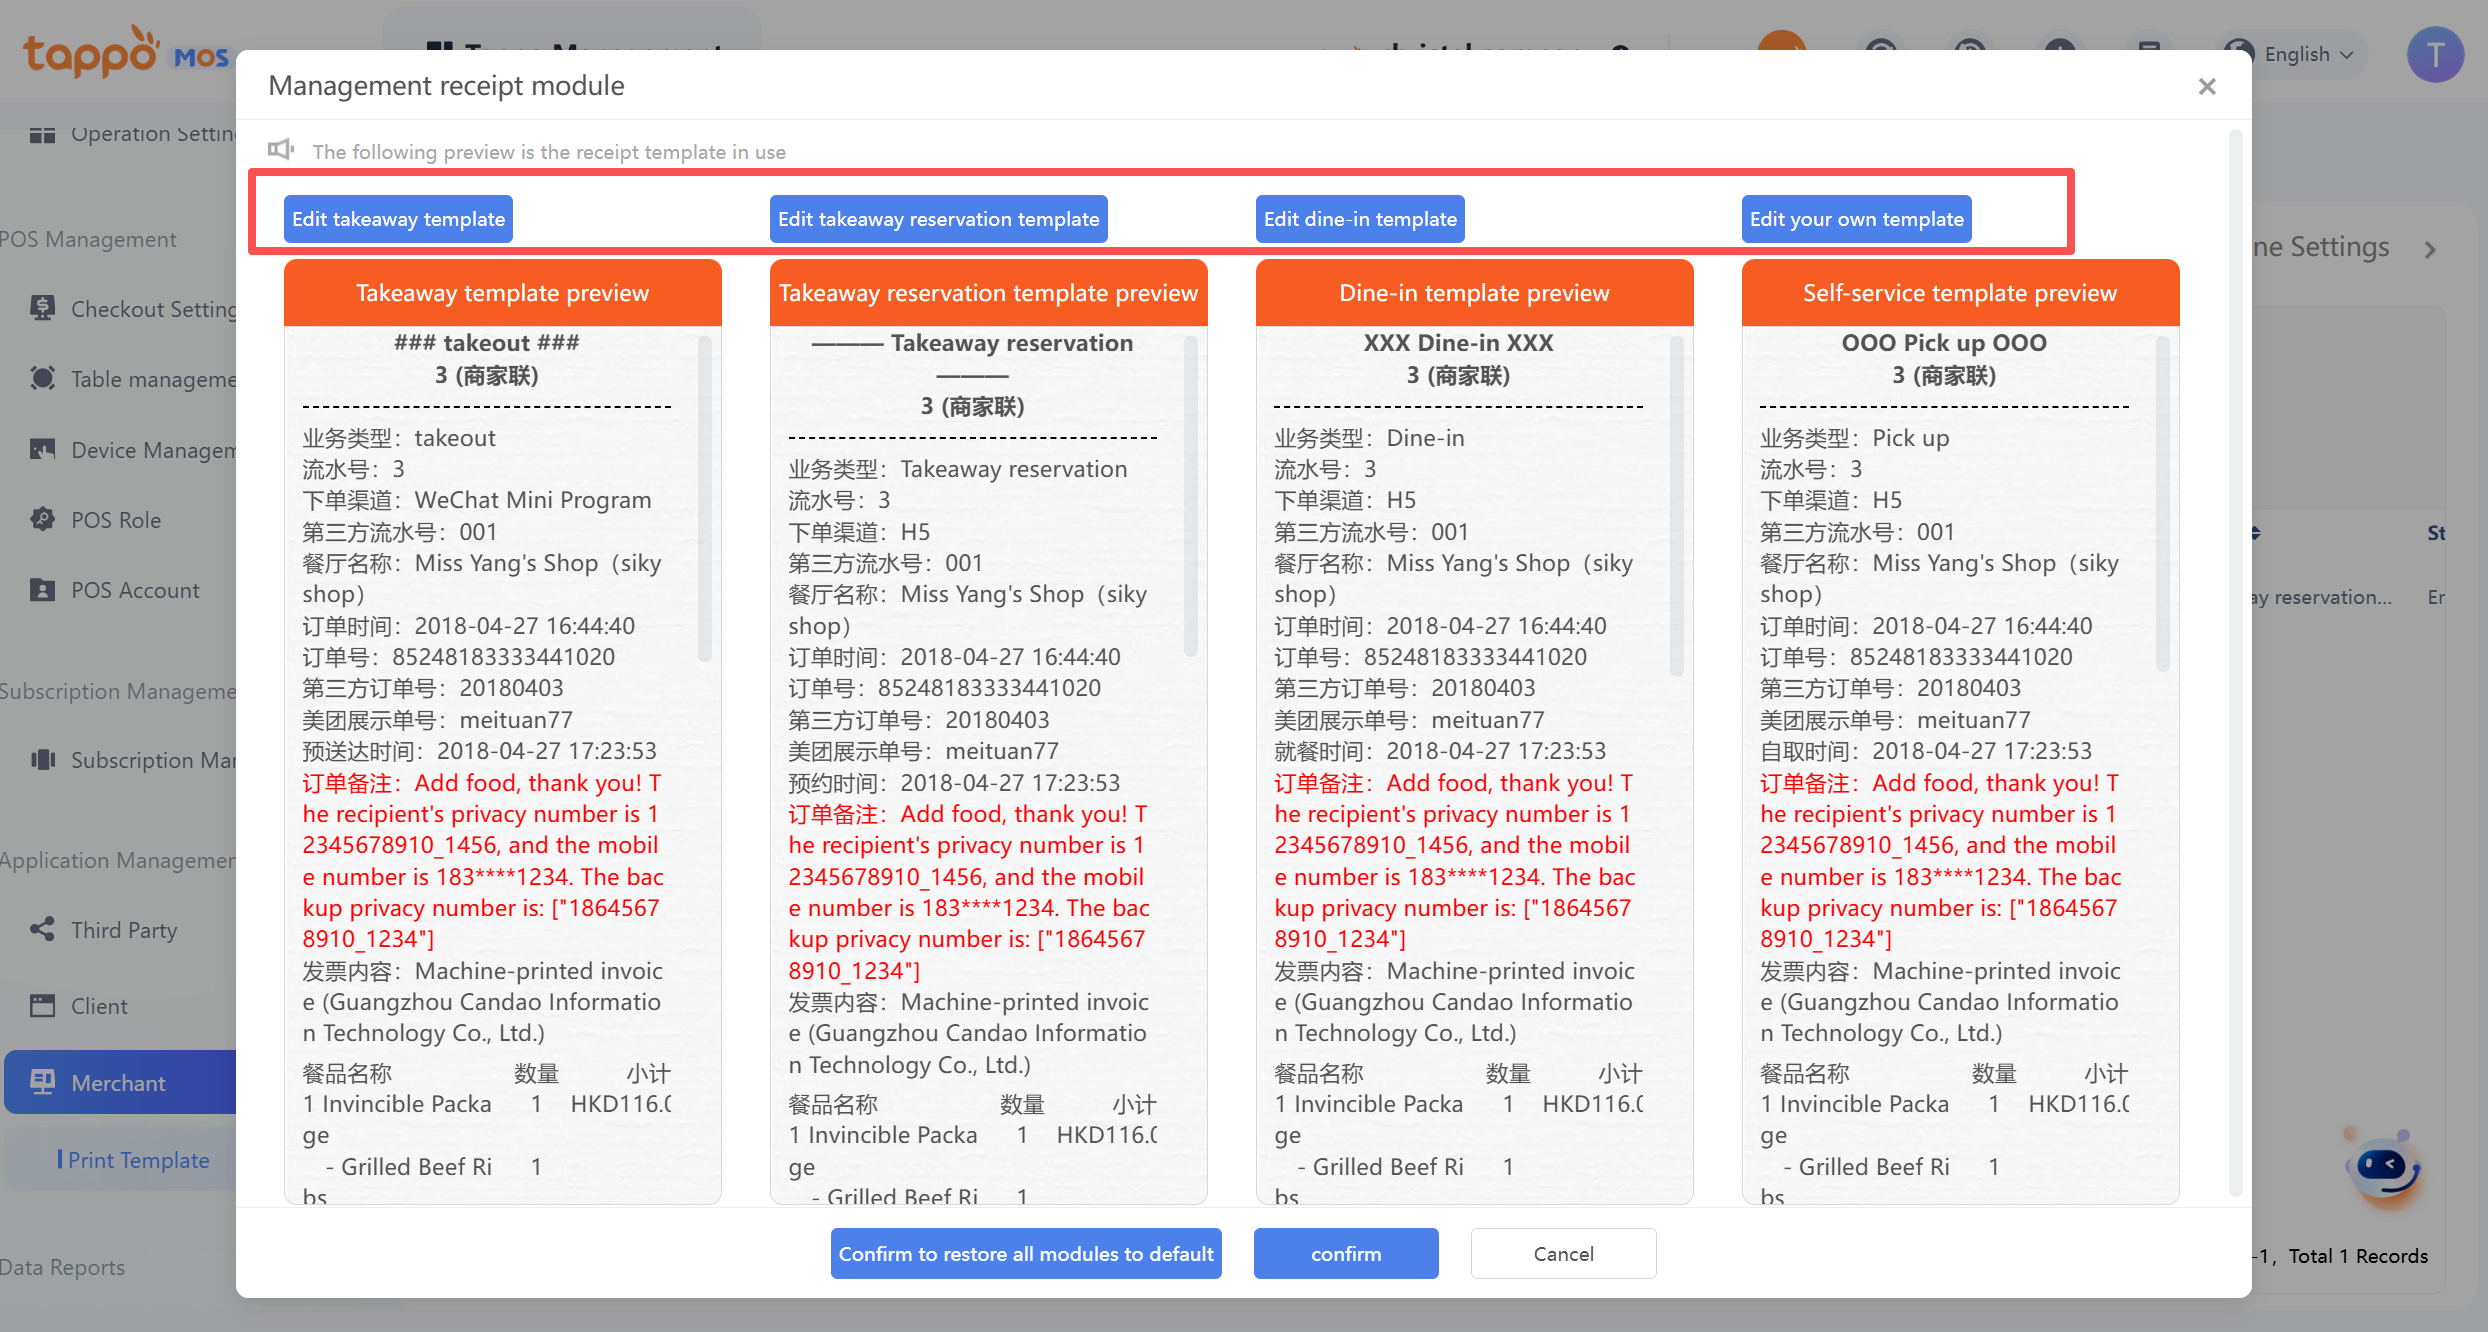
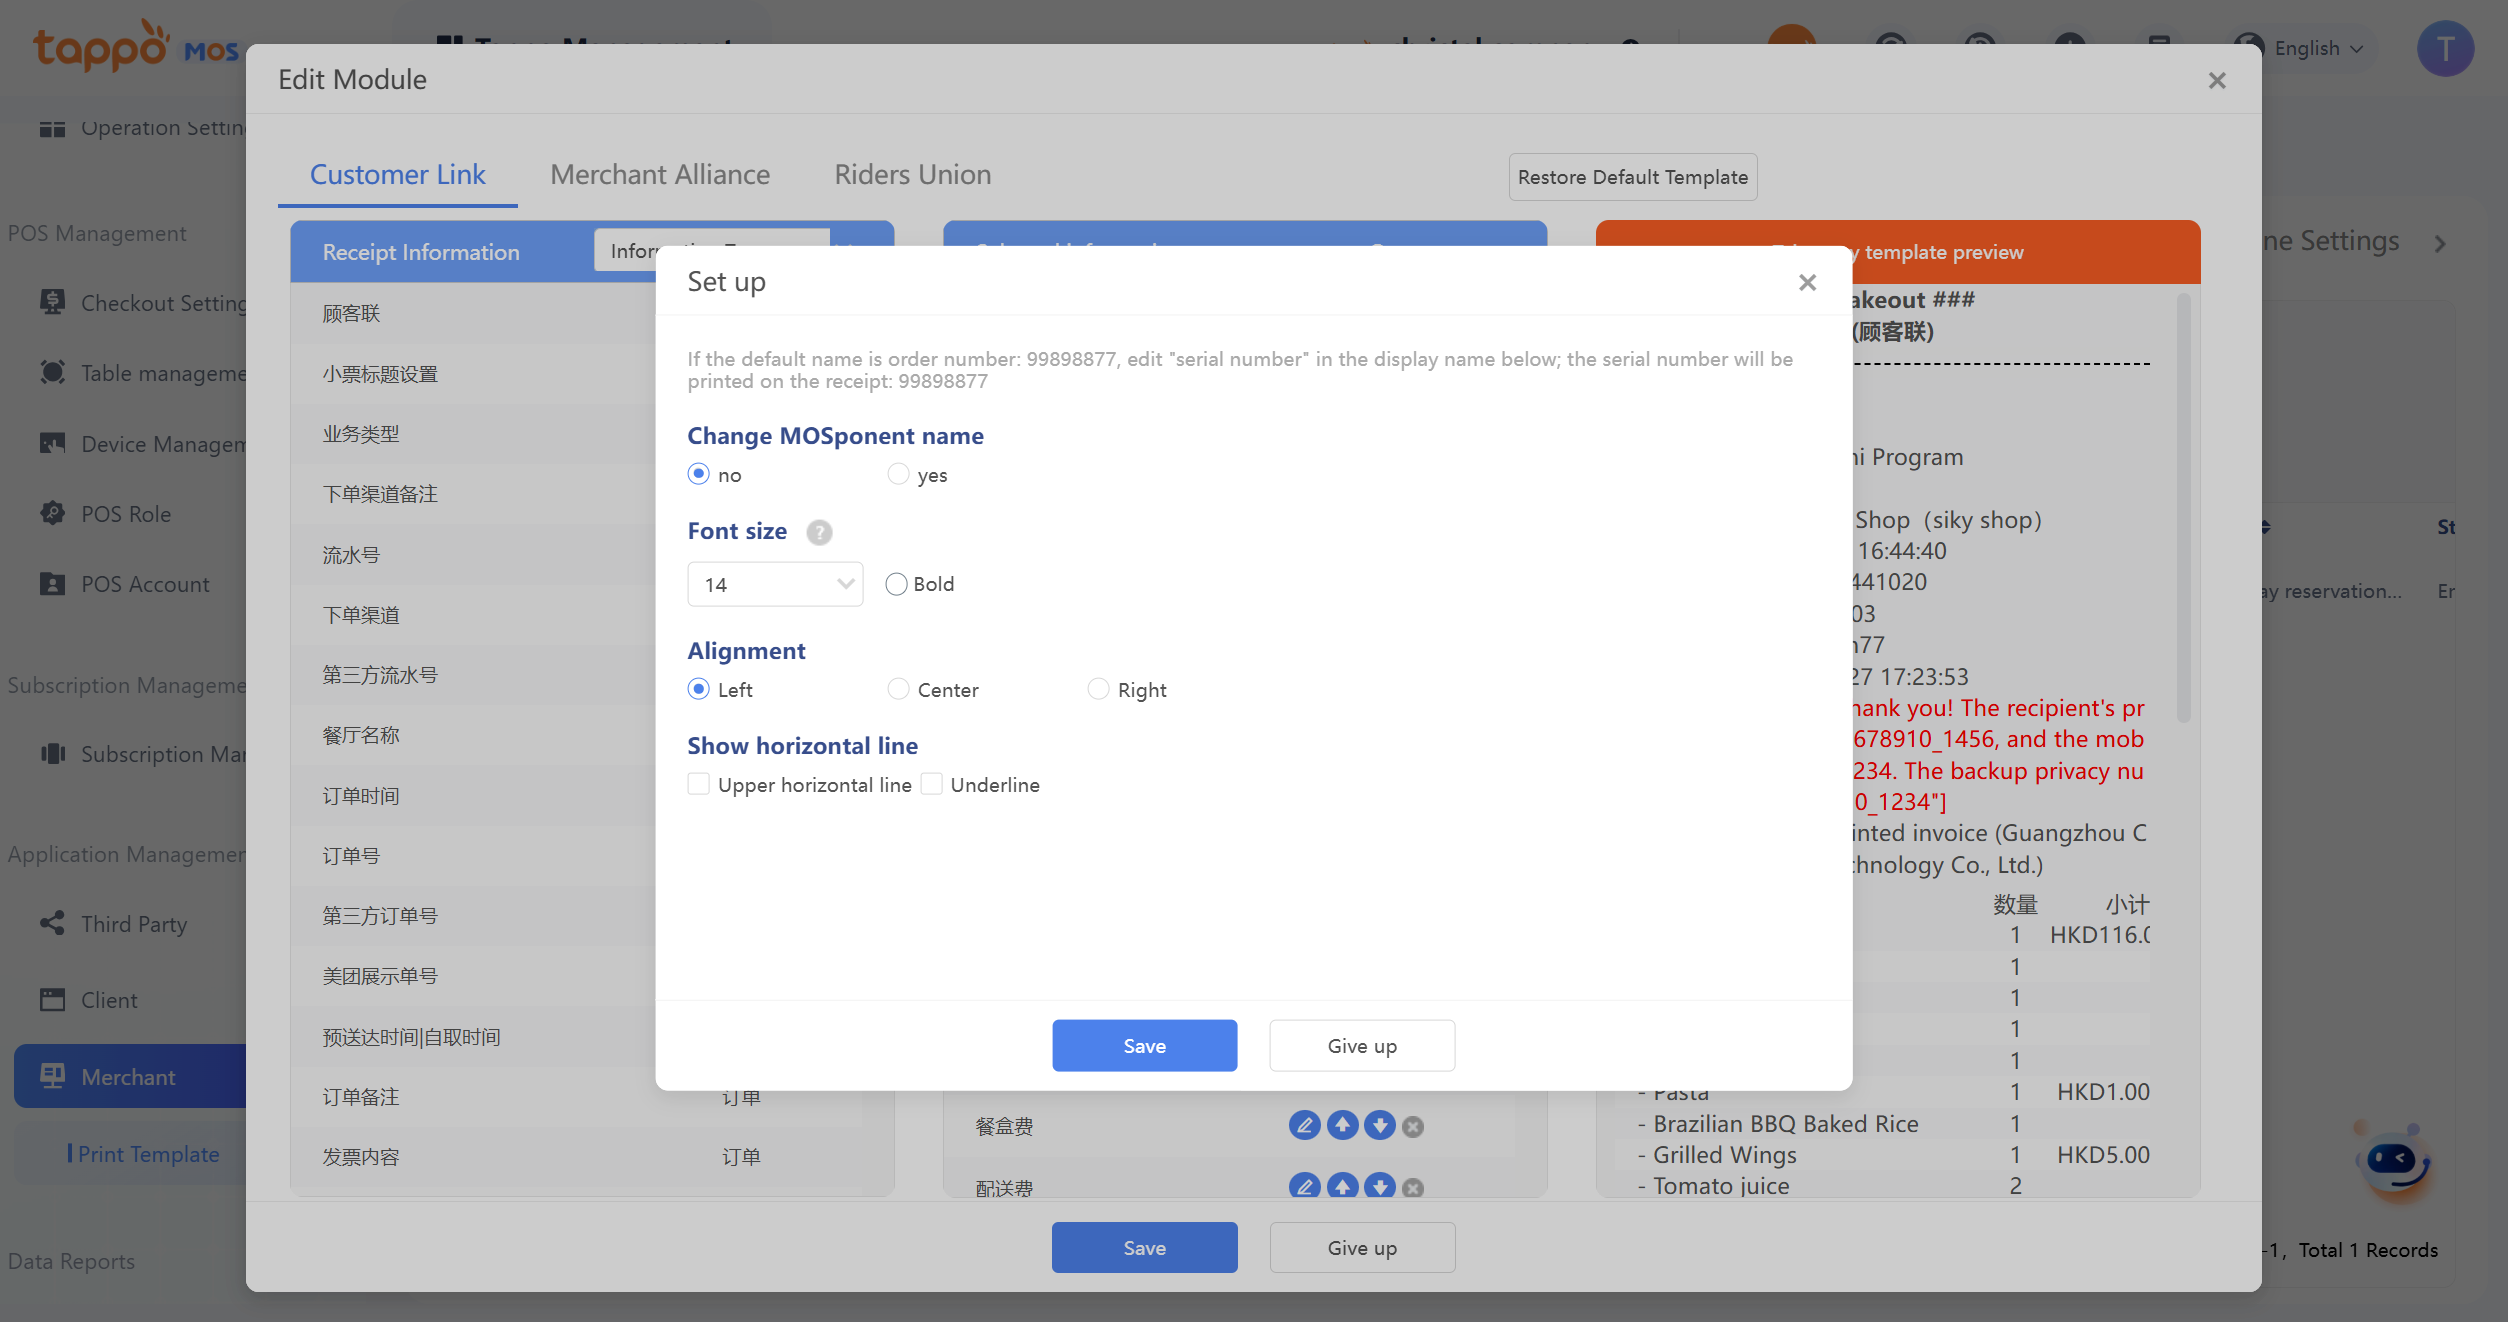
Edit Module – After clicking the template of the corresponding business type, enter the custom receipt template.Below the
Edit Module – You can select different copies for separate custom settings (Customer Copy, Merchant Copy, Rider Copy).
After selecting the corresponding copy data, three groups of component information will be displayed (Receipt Information, Selected Information, Template Preview).
Receipt Information – Can be selected according to actual needs. After clicking the corresponding component name, it will be displayed at the bottom of the Selected Information, indicating that the component has been added successfully.
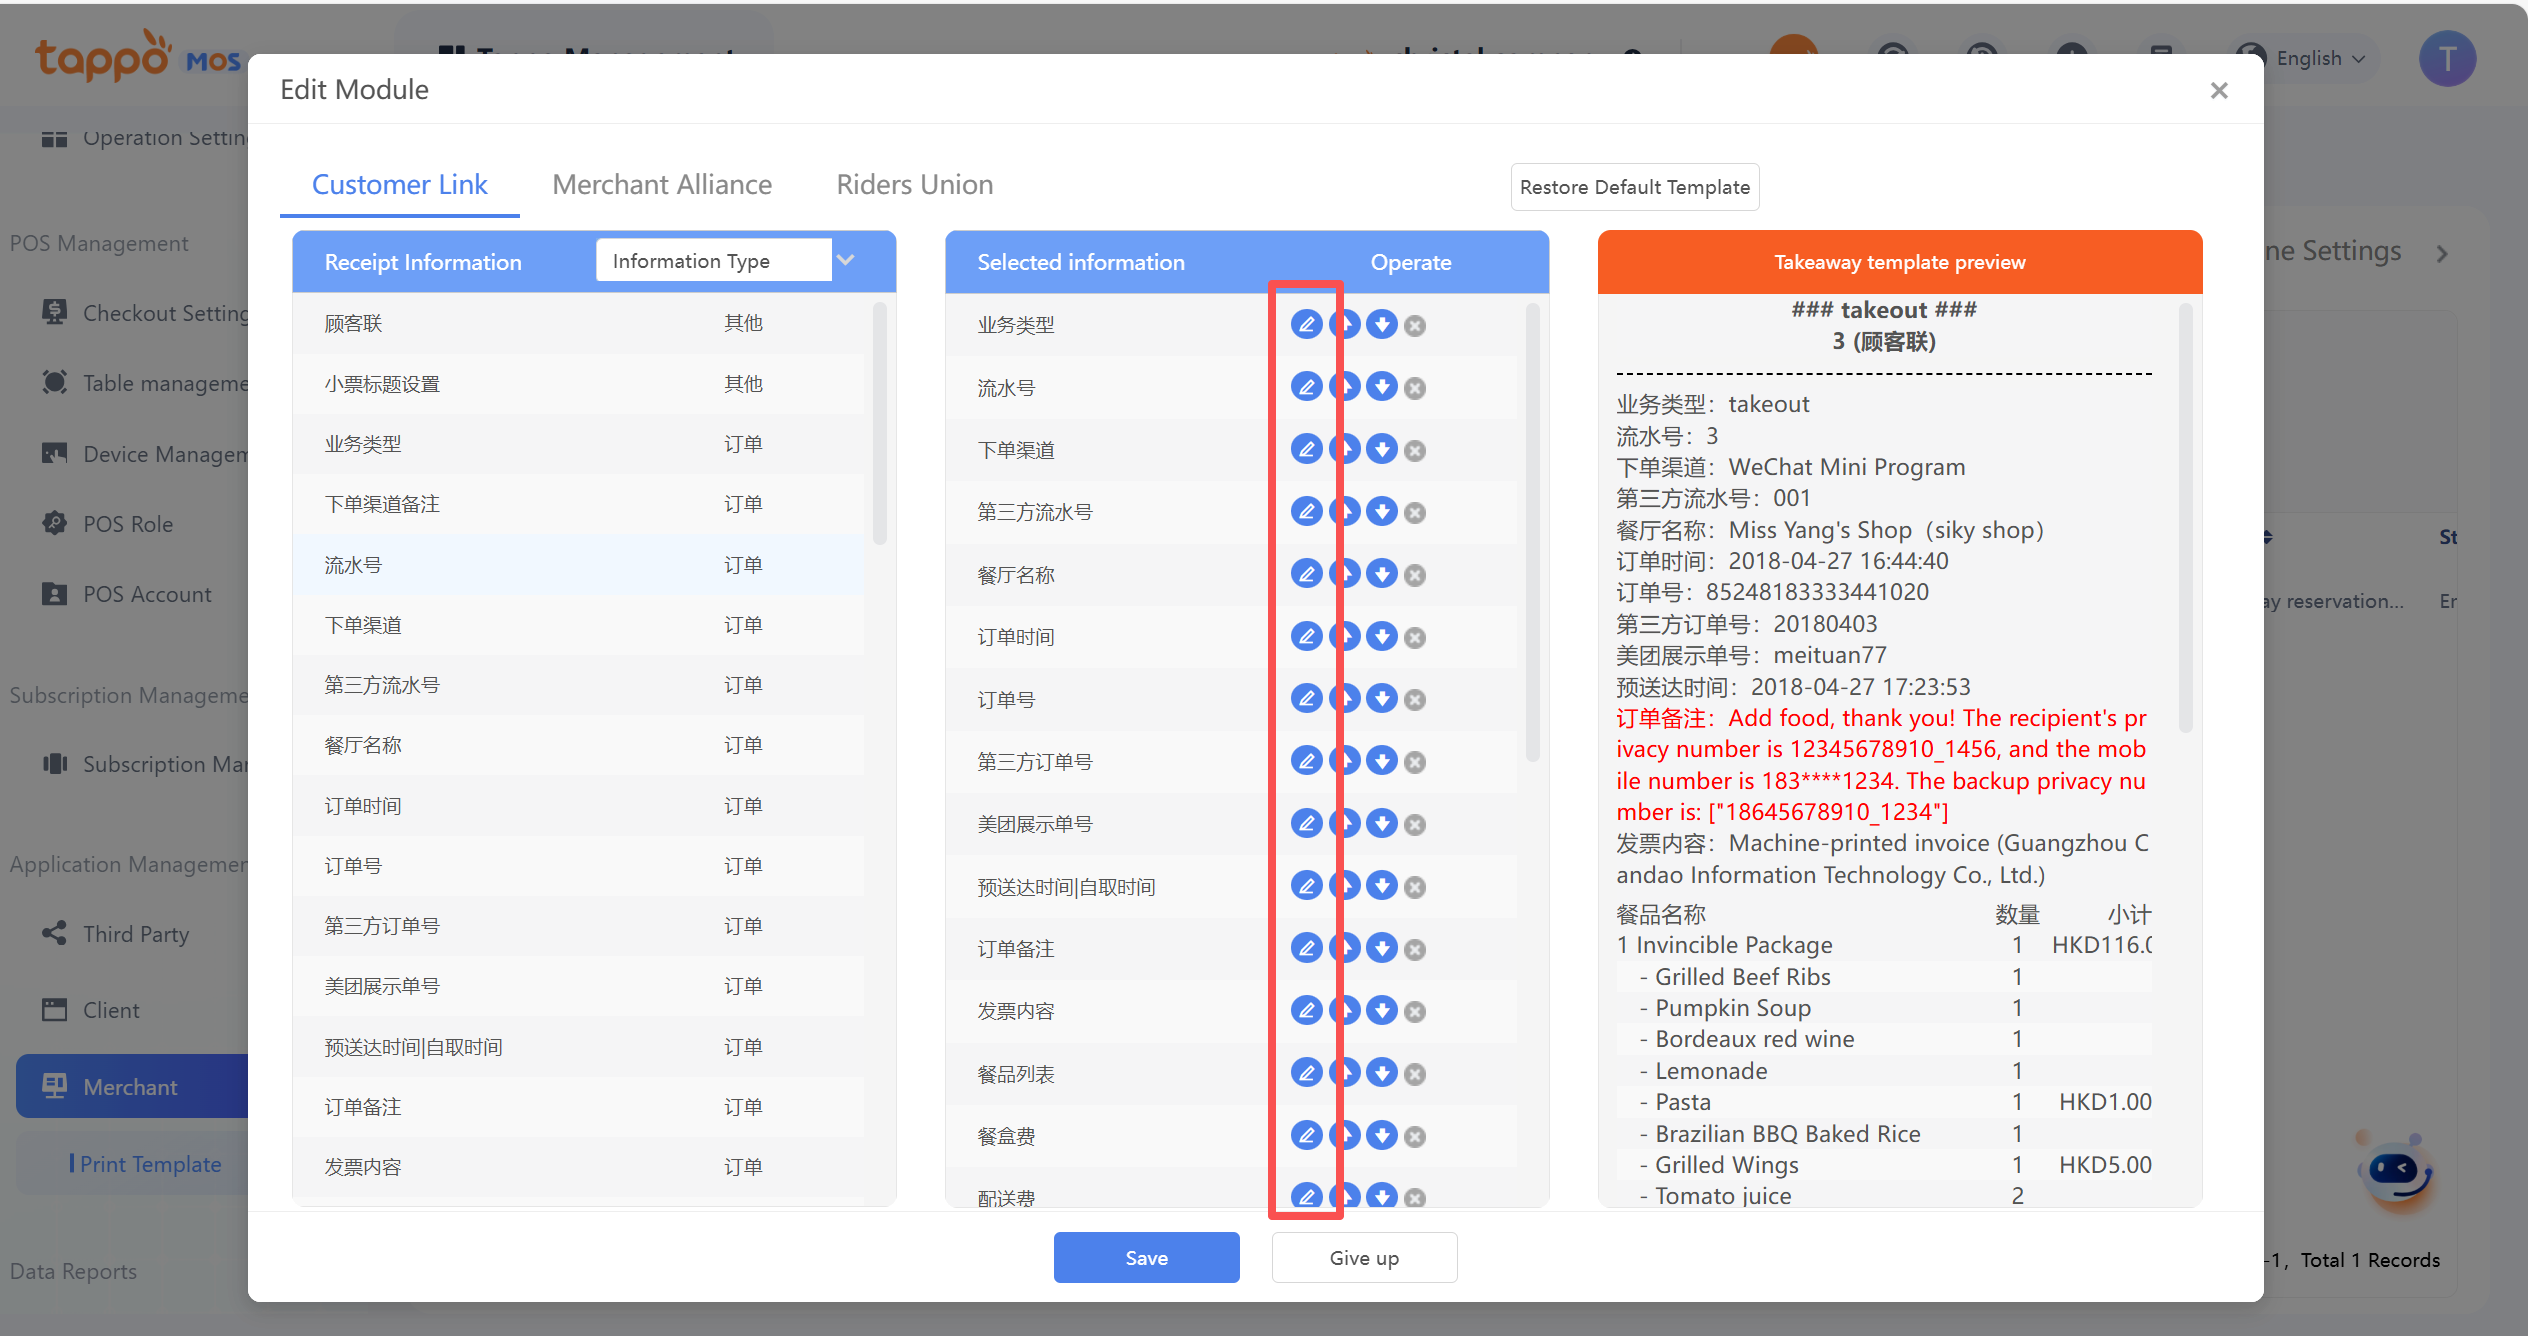
Selected Information – Indicates that the components to be printed have been added to the template, and then can be edited according to actual conditions.
[Edit] means editing the selected component, and saving after modification. Different components have different configurable items. For example, order number, third-party order number, QR code, and borne amount can be configured with different types for printing.
[↑] [↓] means moving the current component position. Each click moves up or down from the original position. After editing, you can view the effect in the module preview.
Saving the Edited Receipt Template – Click to save the current custom settings of the current copy of the current business type successfully. After successful saving, you will return to the receipt template list page. If you need to continue editing other business types or other copies, click Edit to continue. Cancel – Means abandoning this operation.
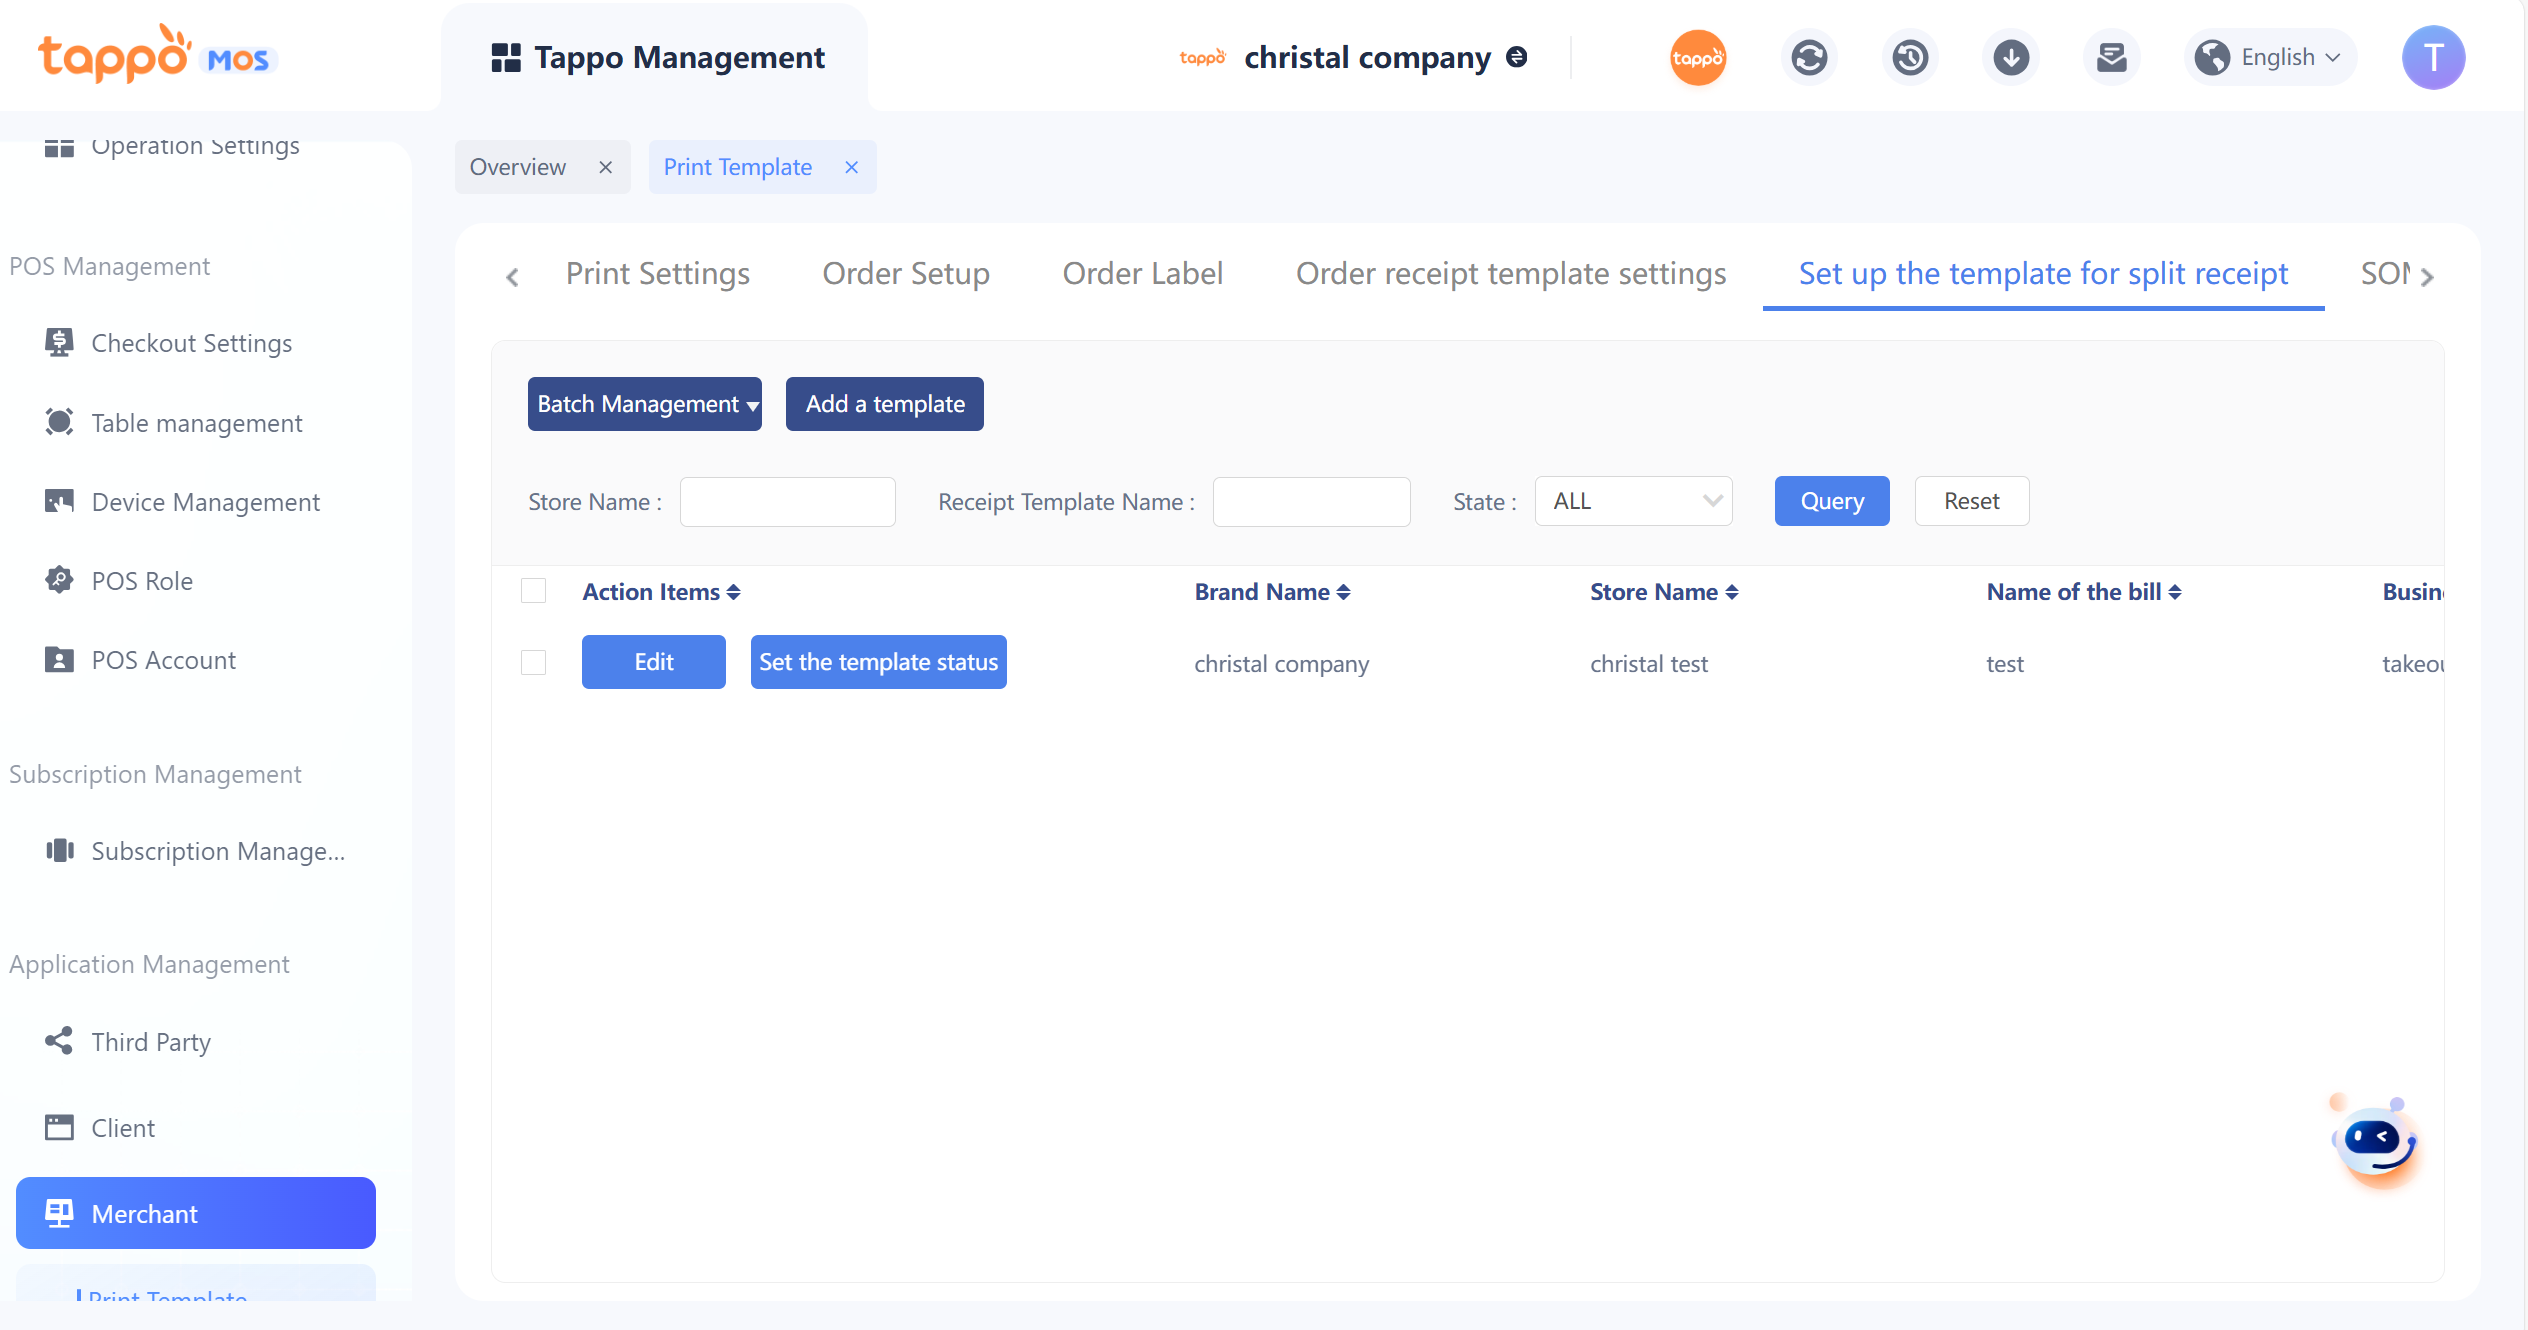
Set Up The Template For Split Receipt