- Home
- Guides
- TAPPO Management
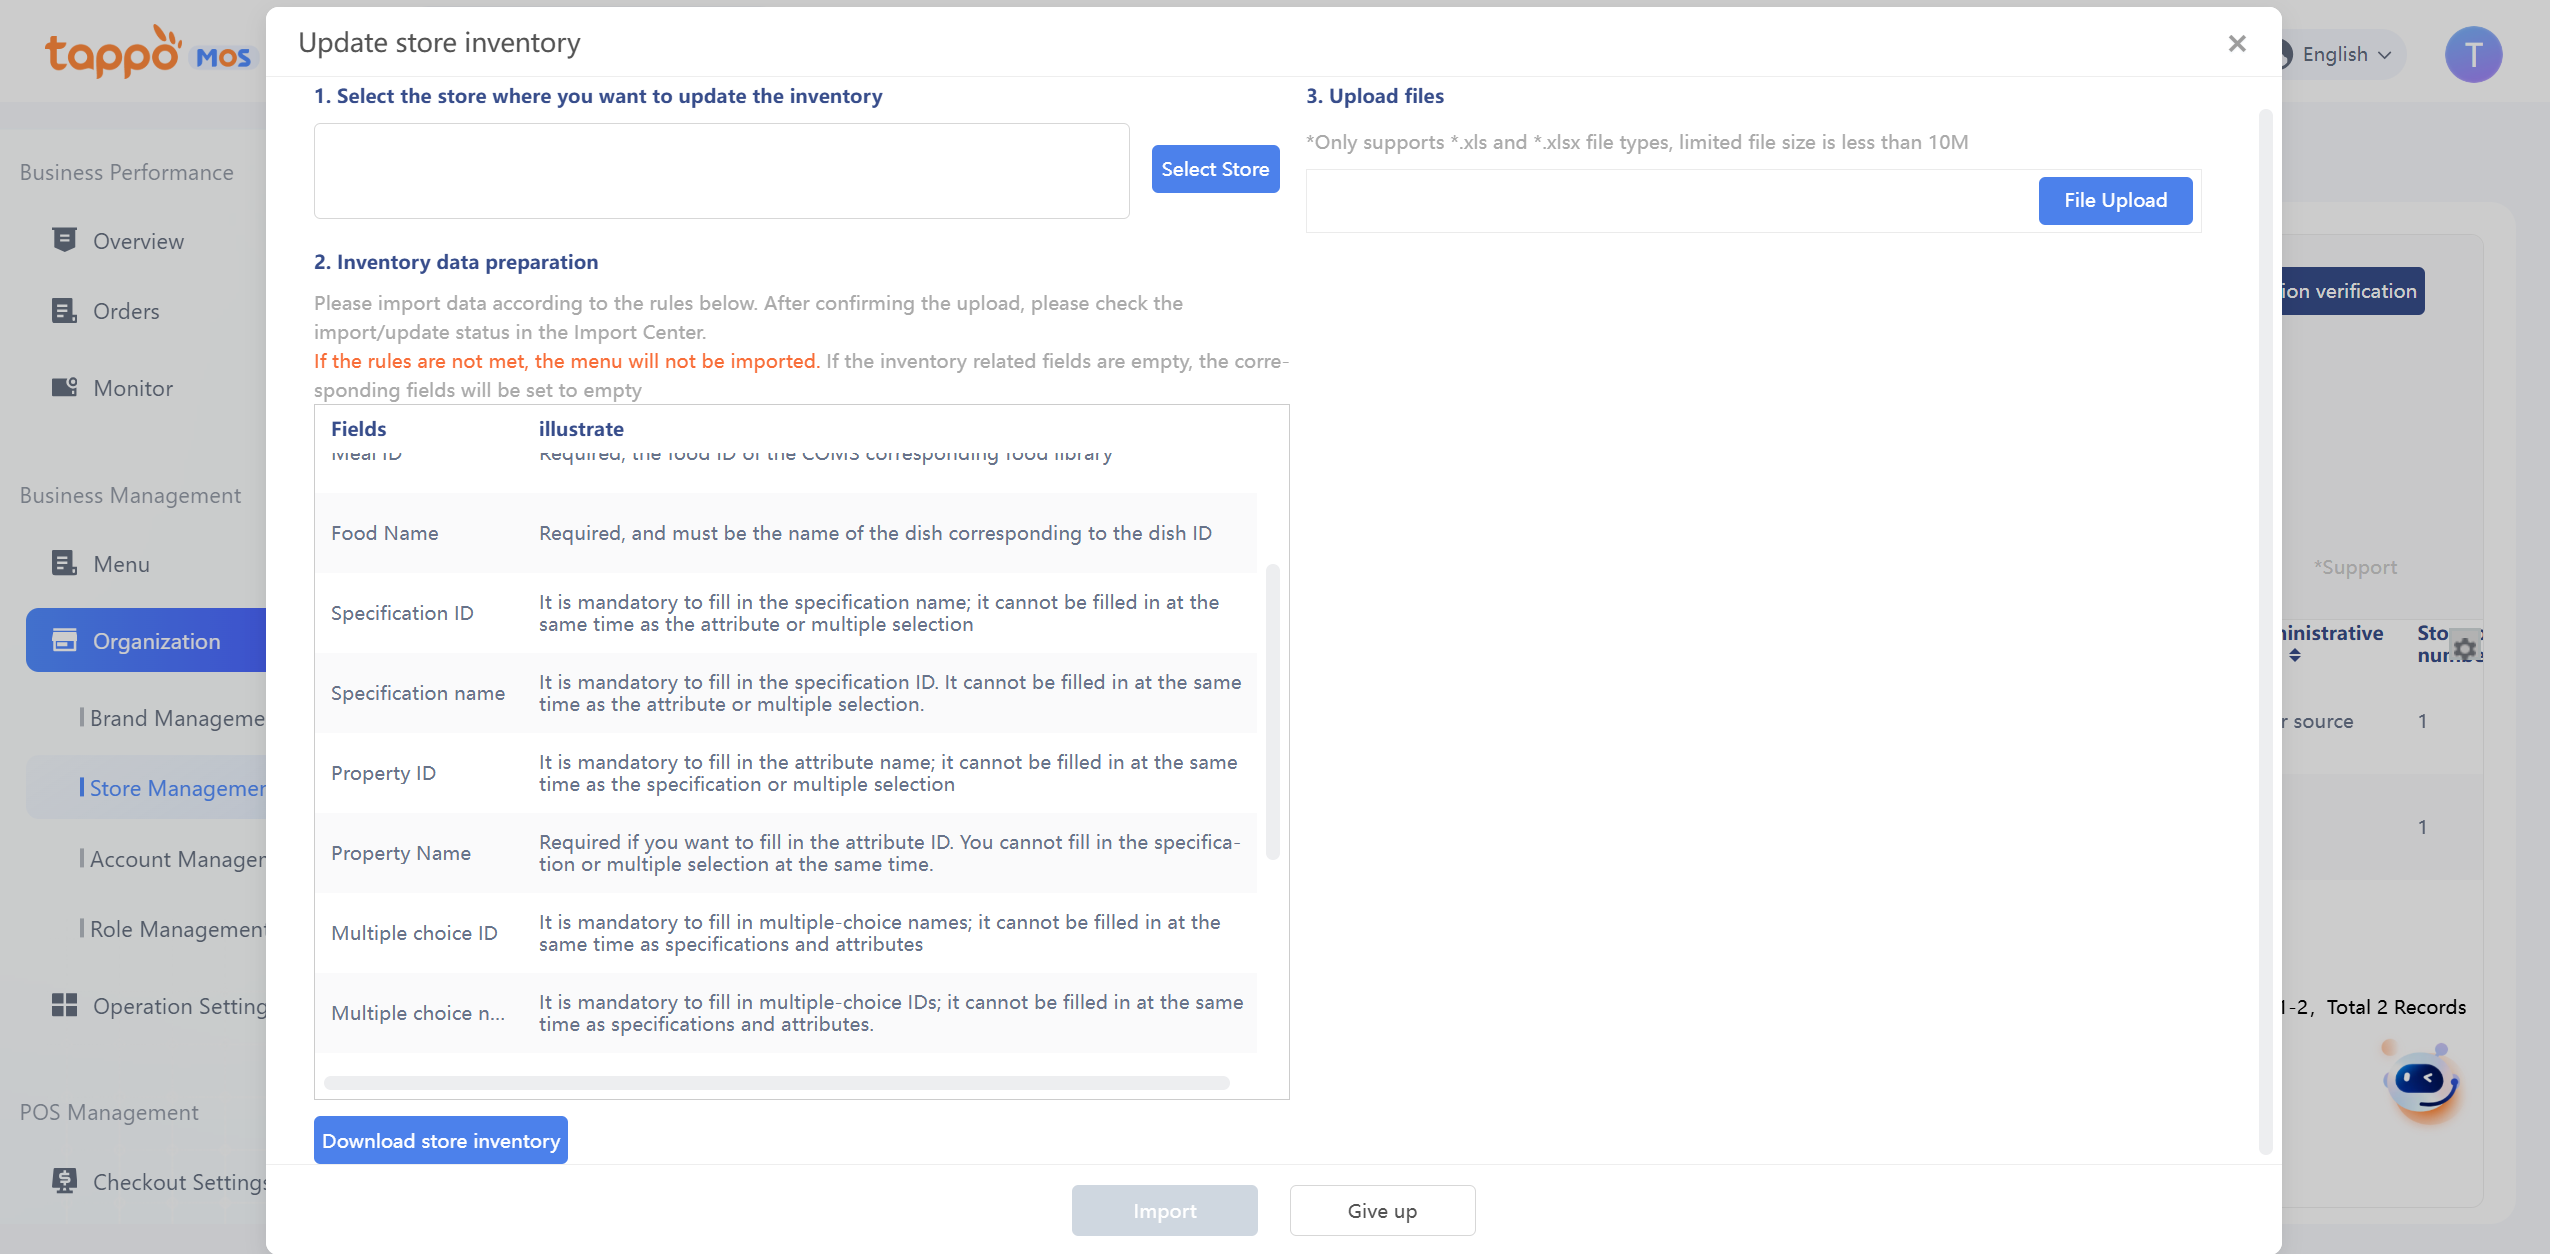
- Inventory Management
Inventory Management
Meals Inventory
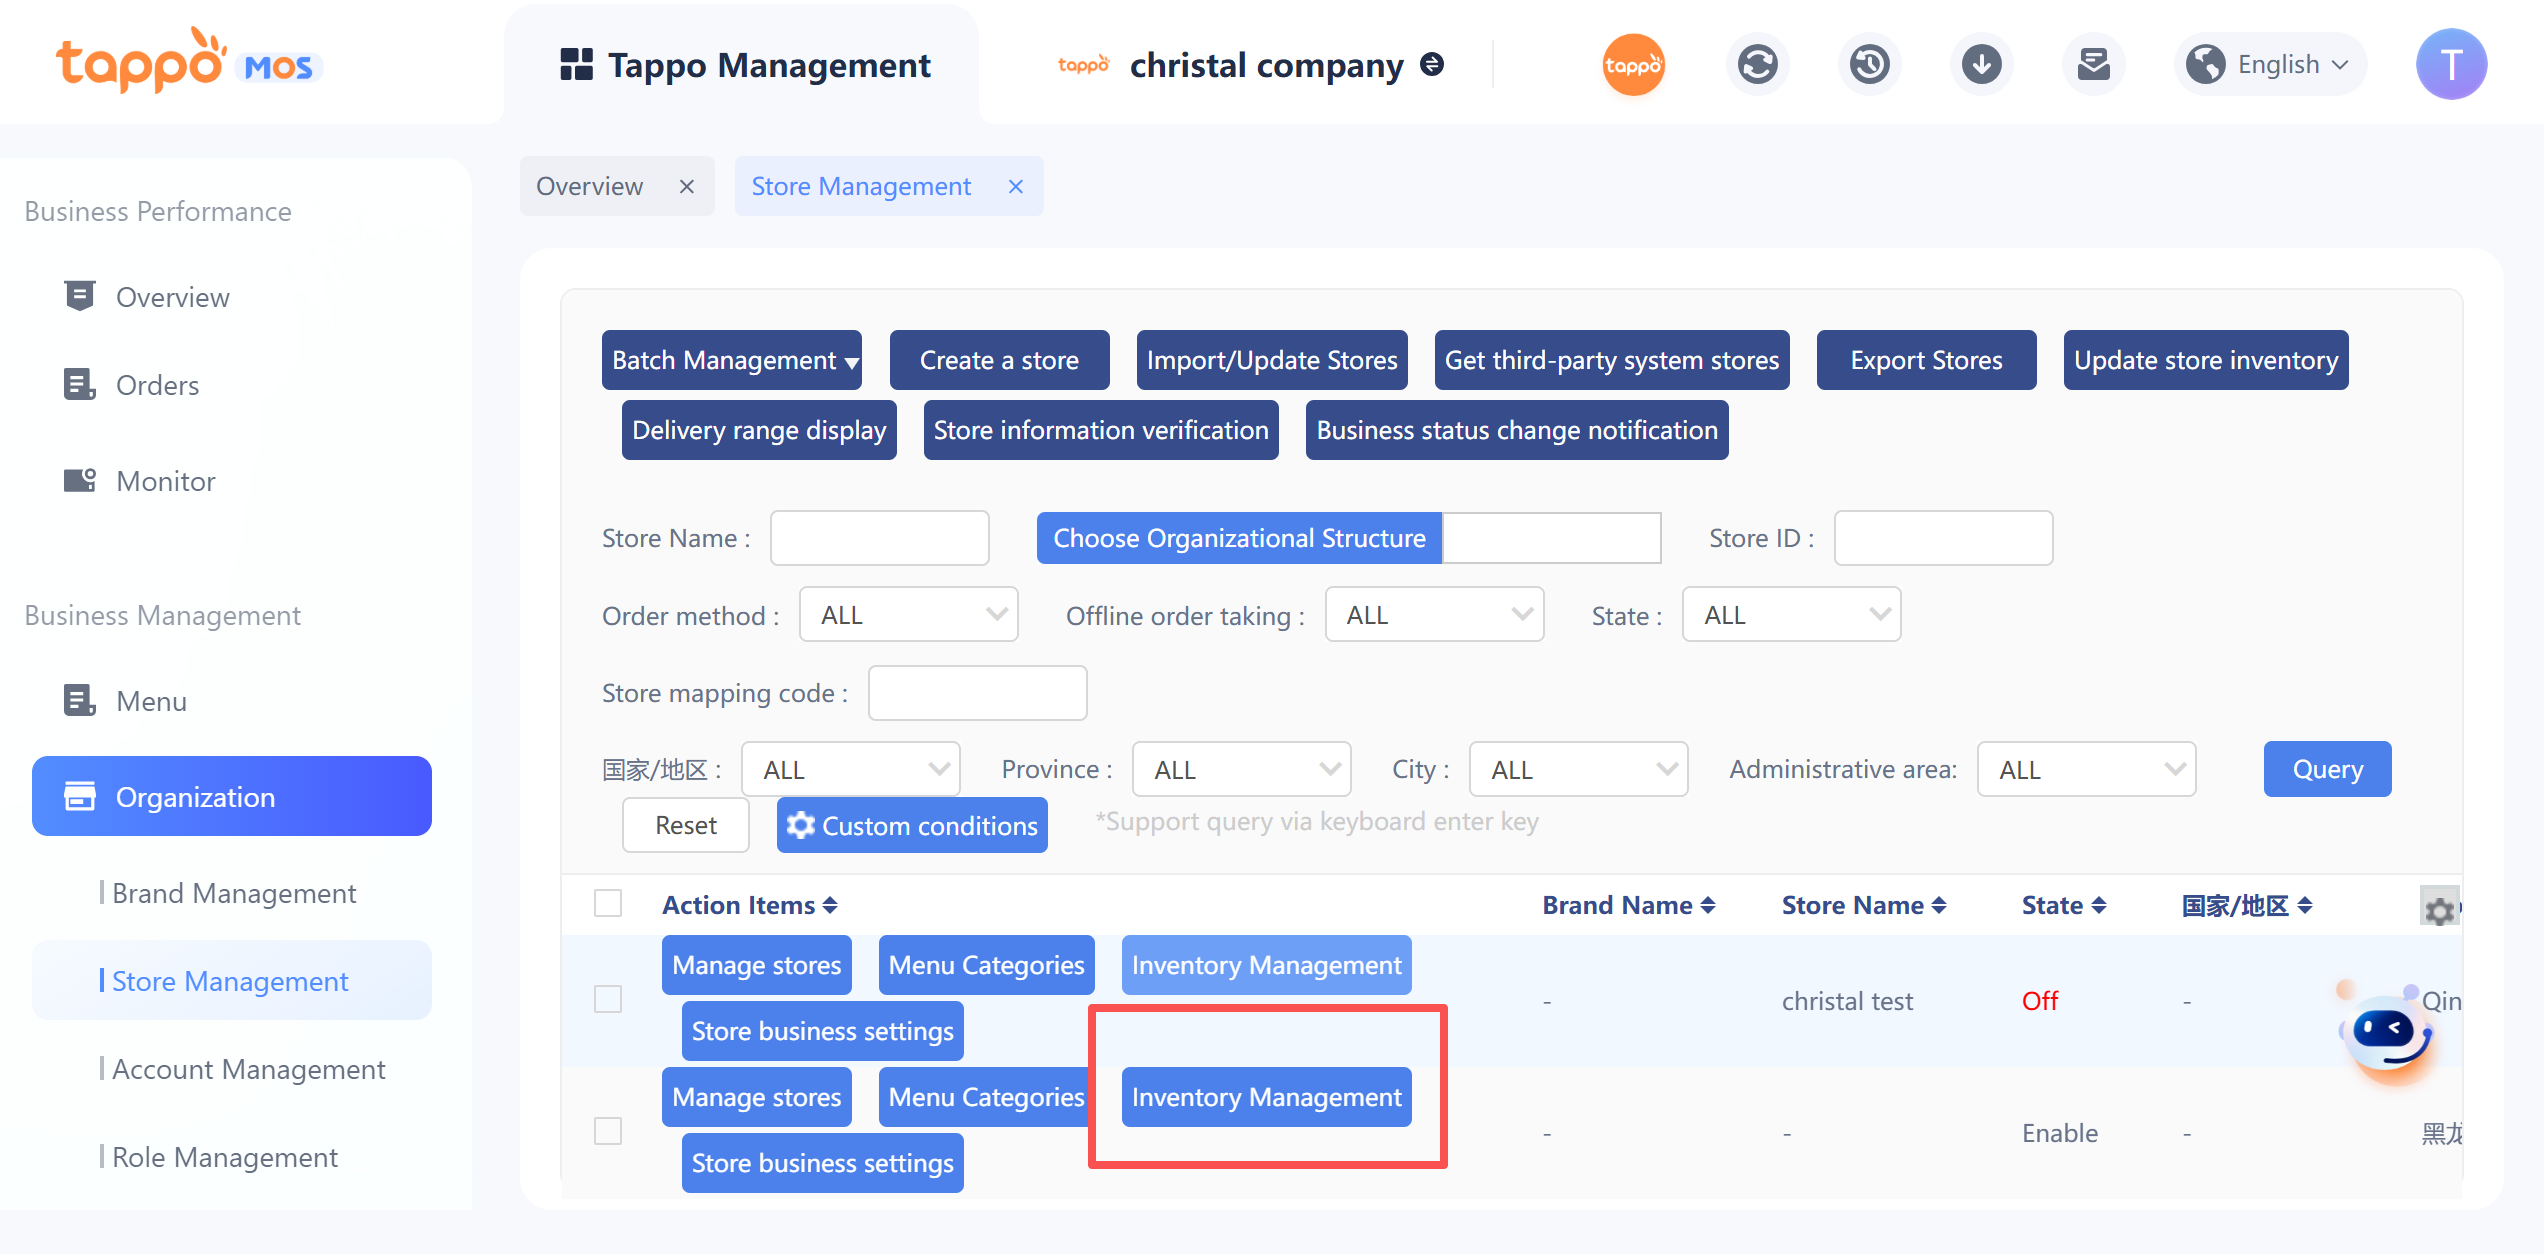
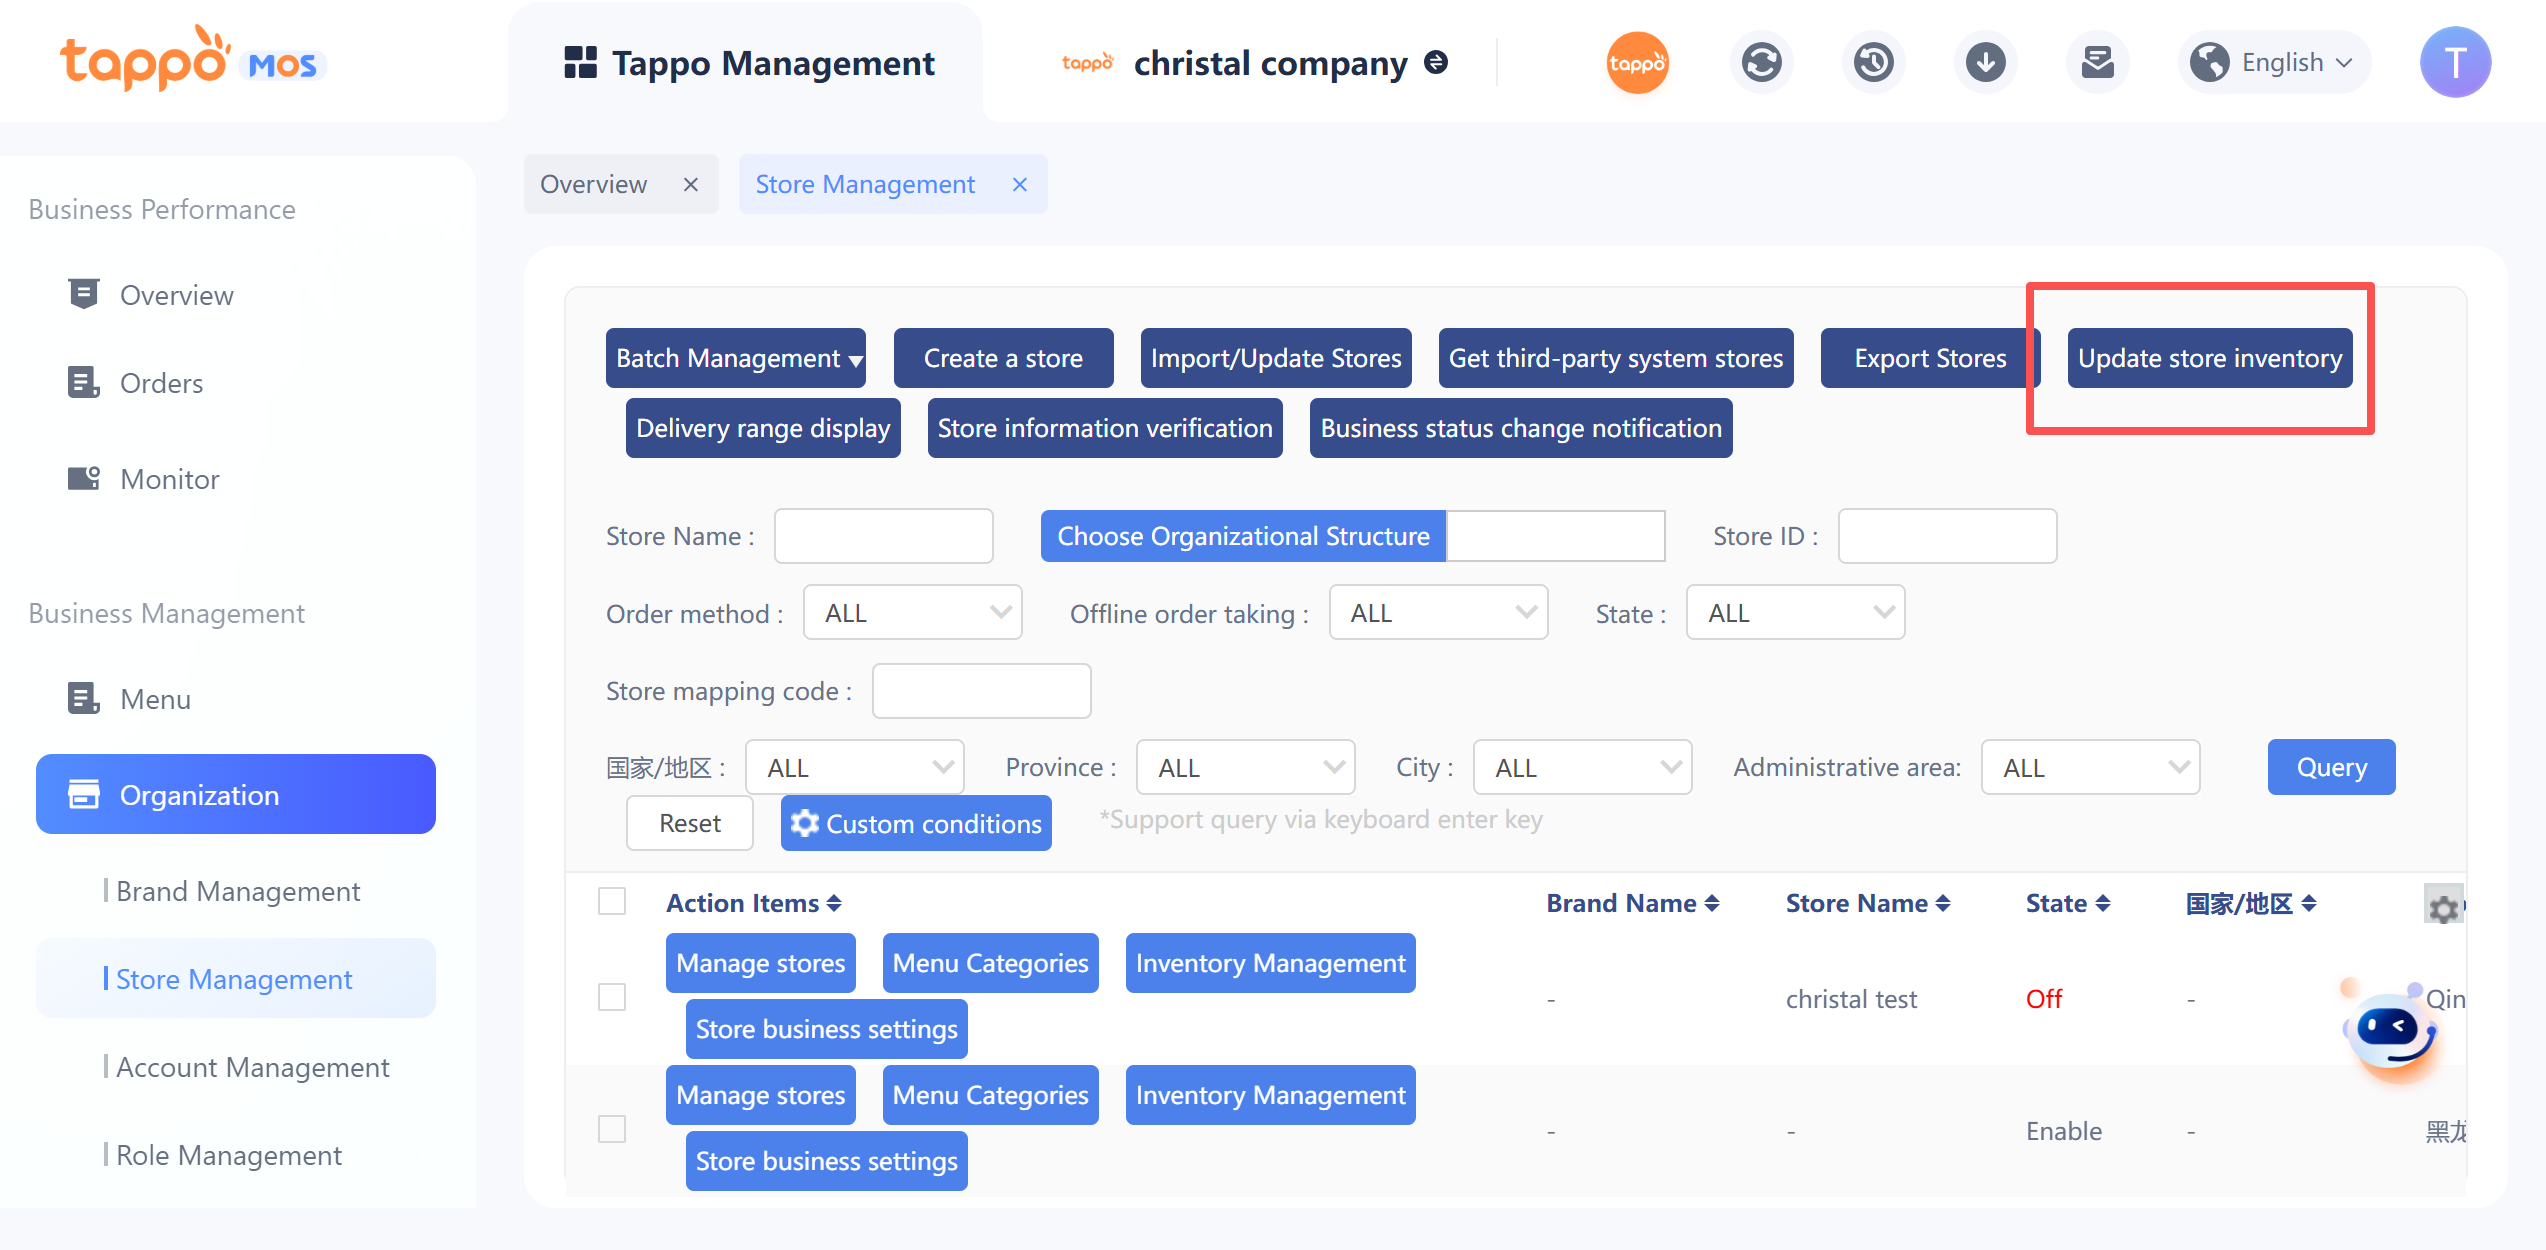
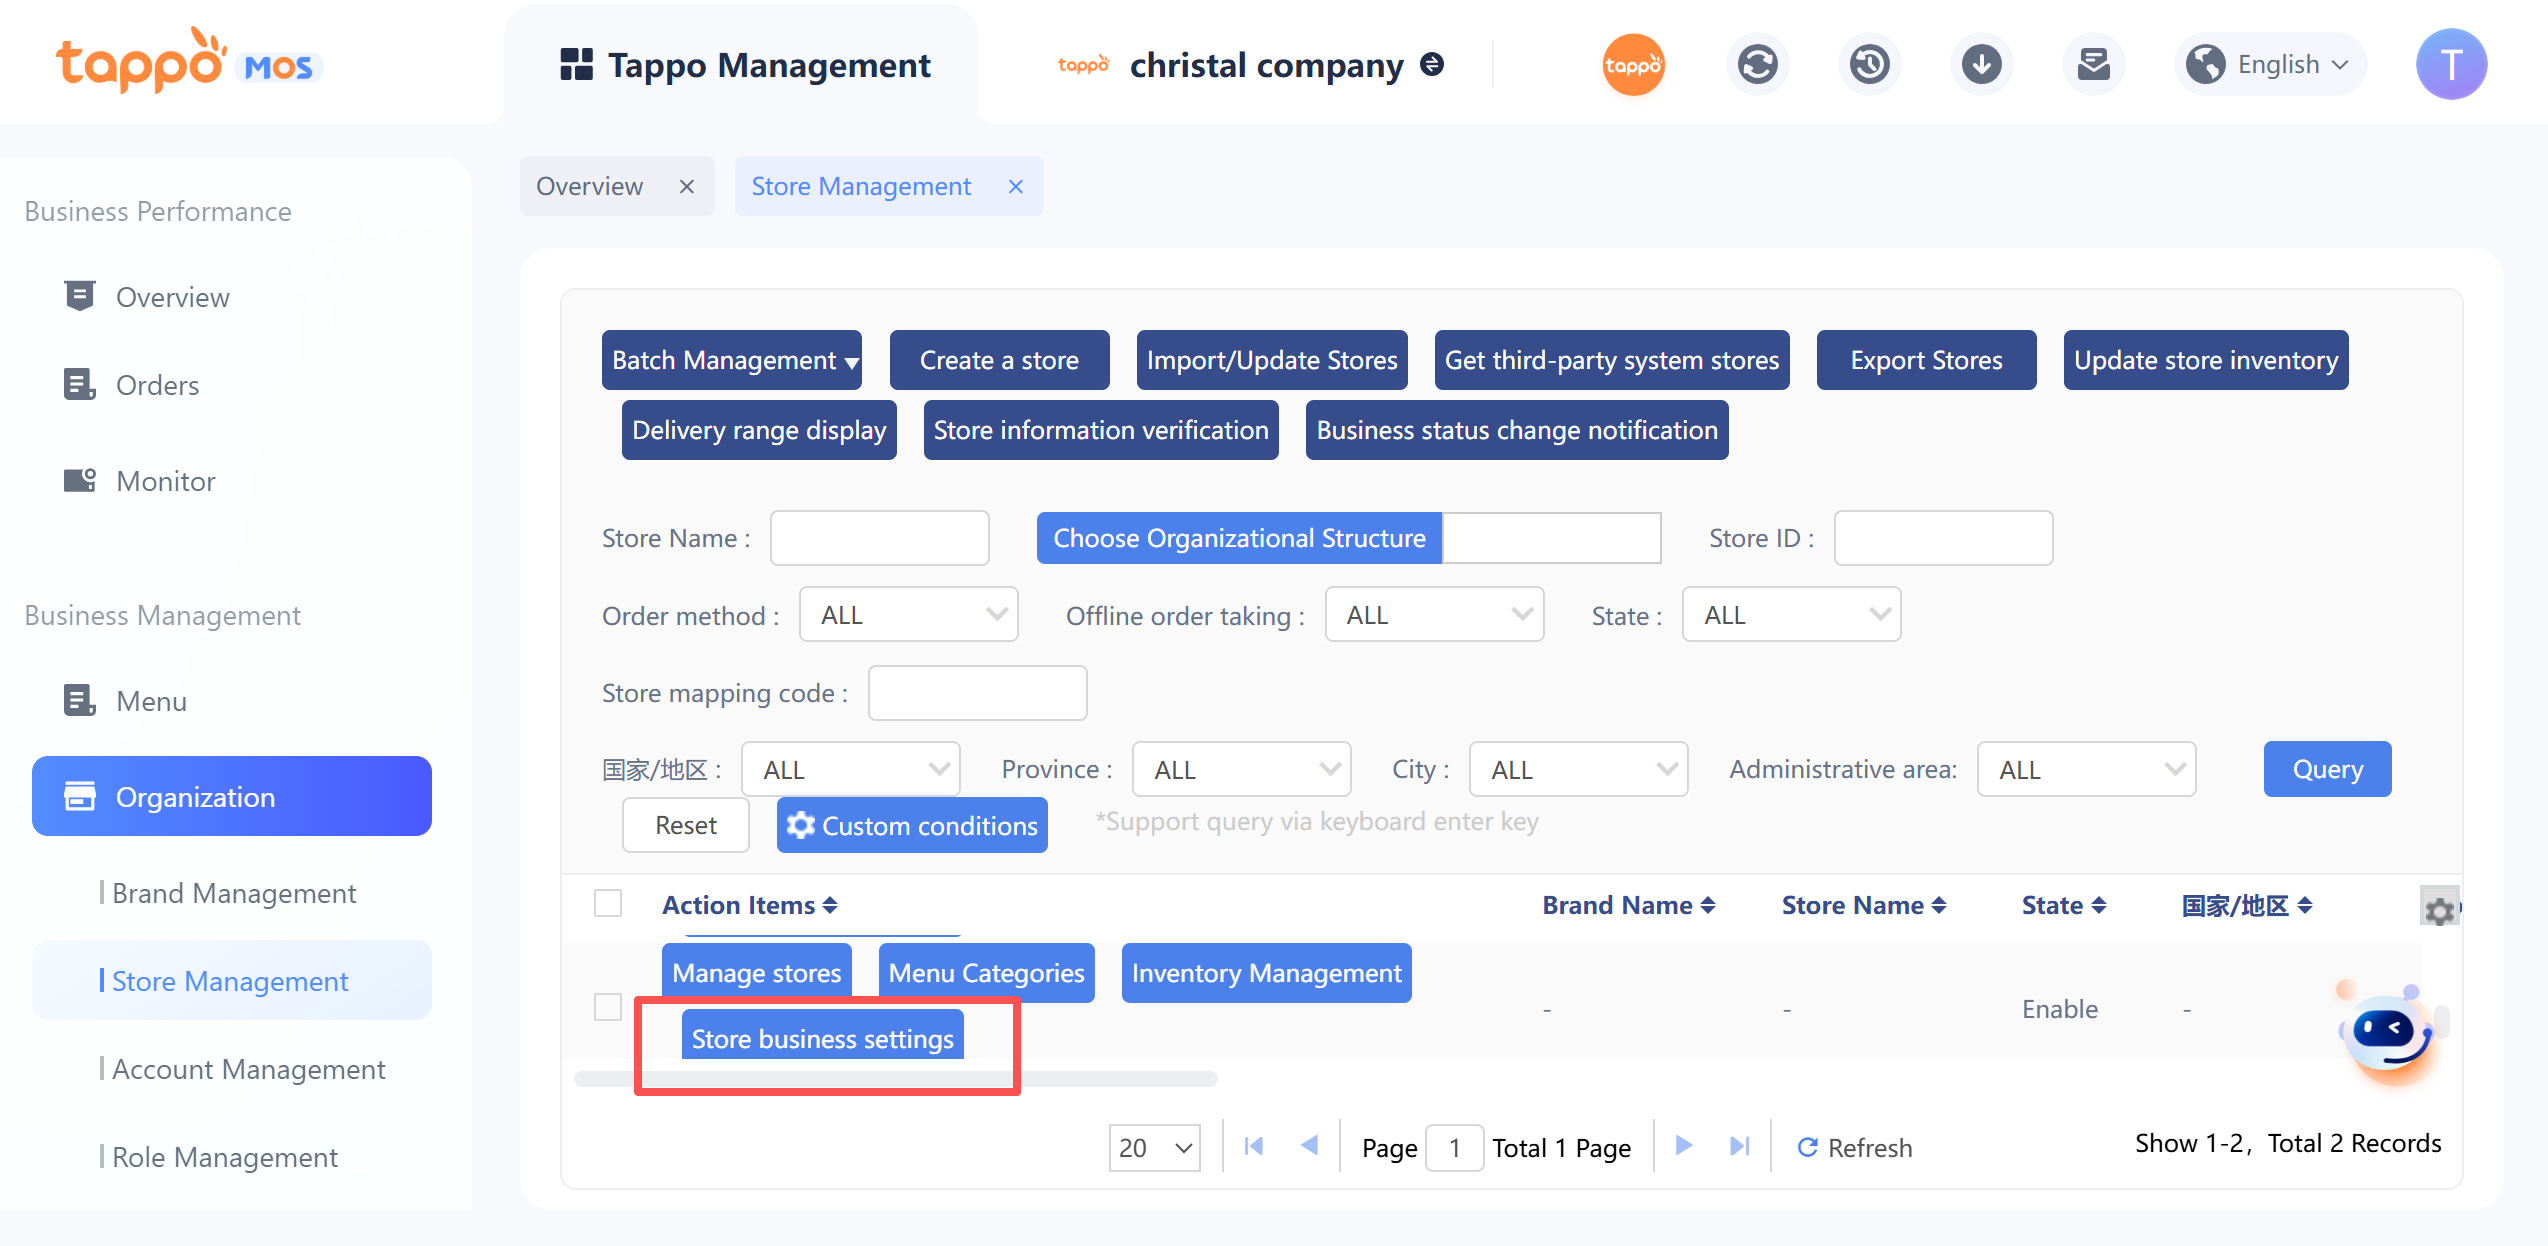
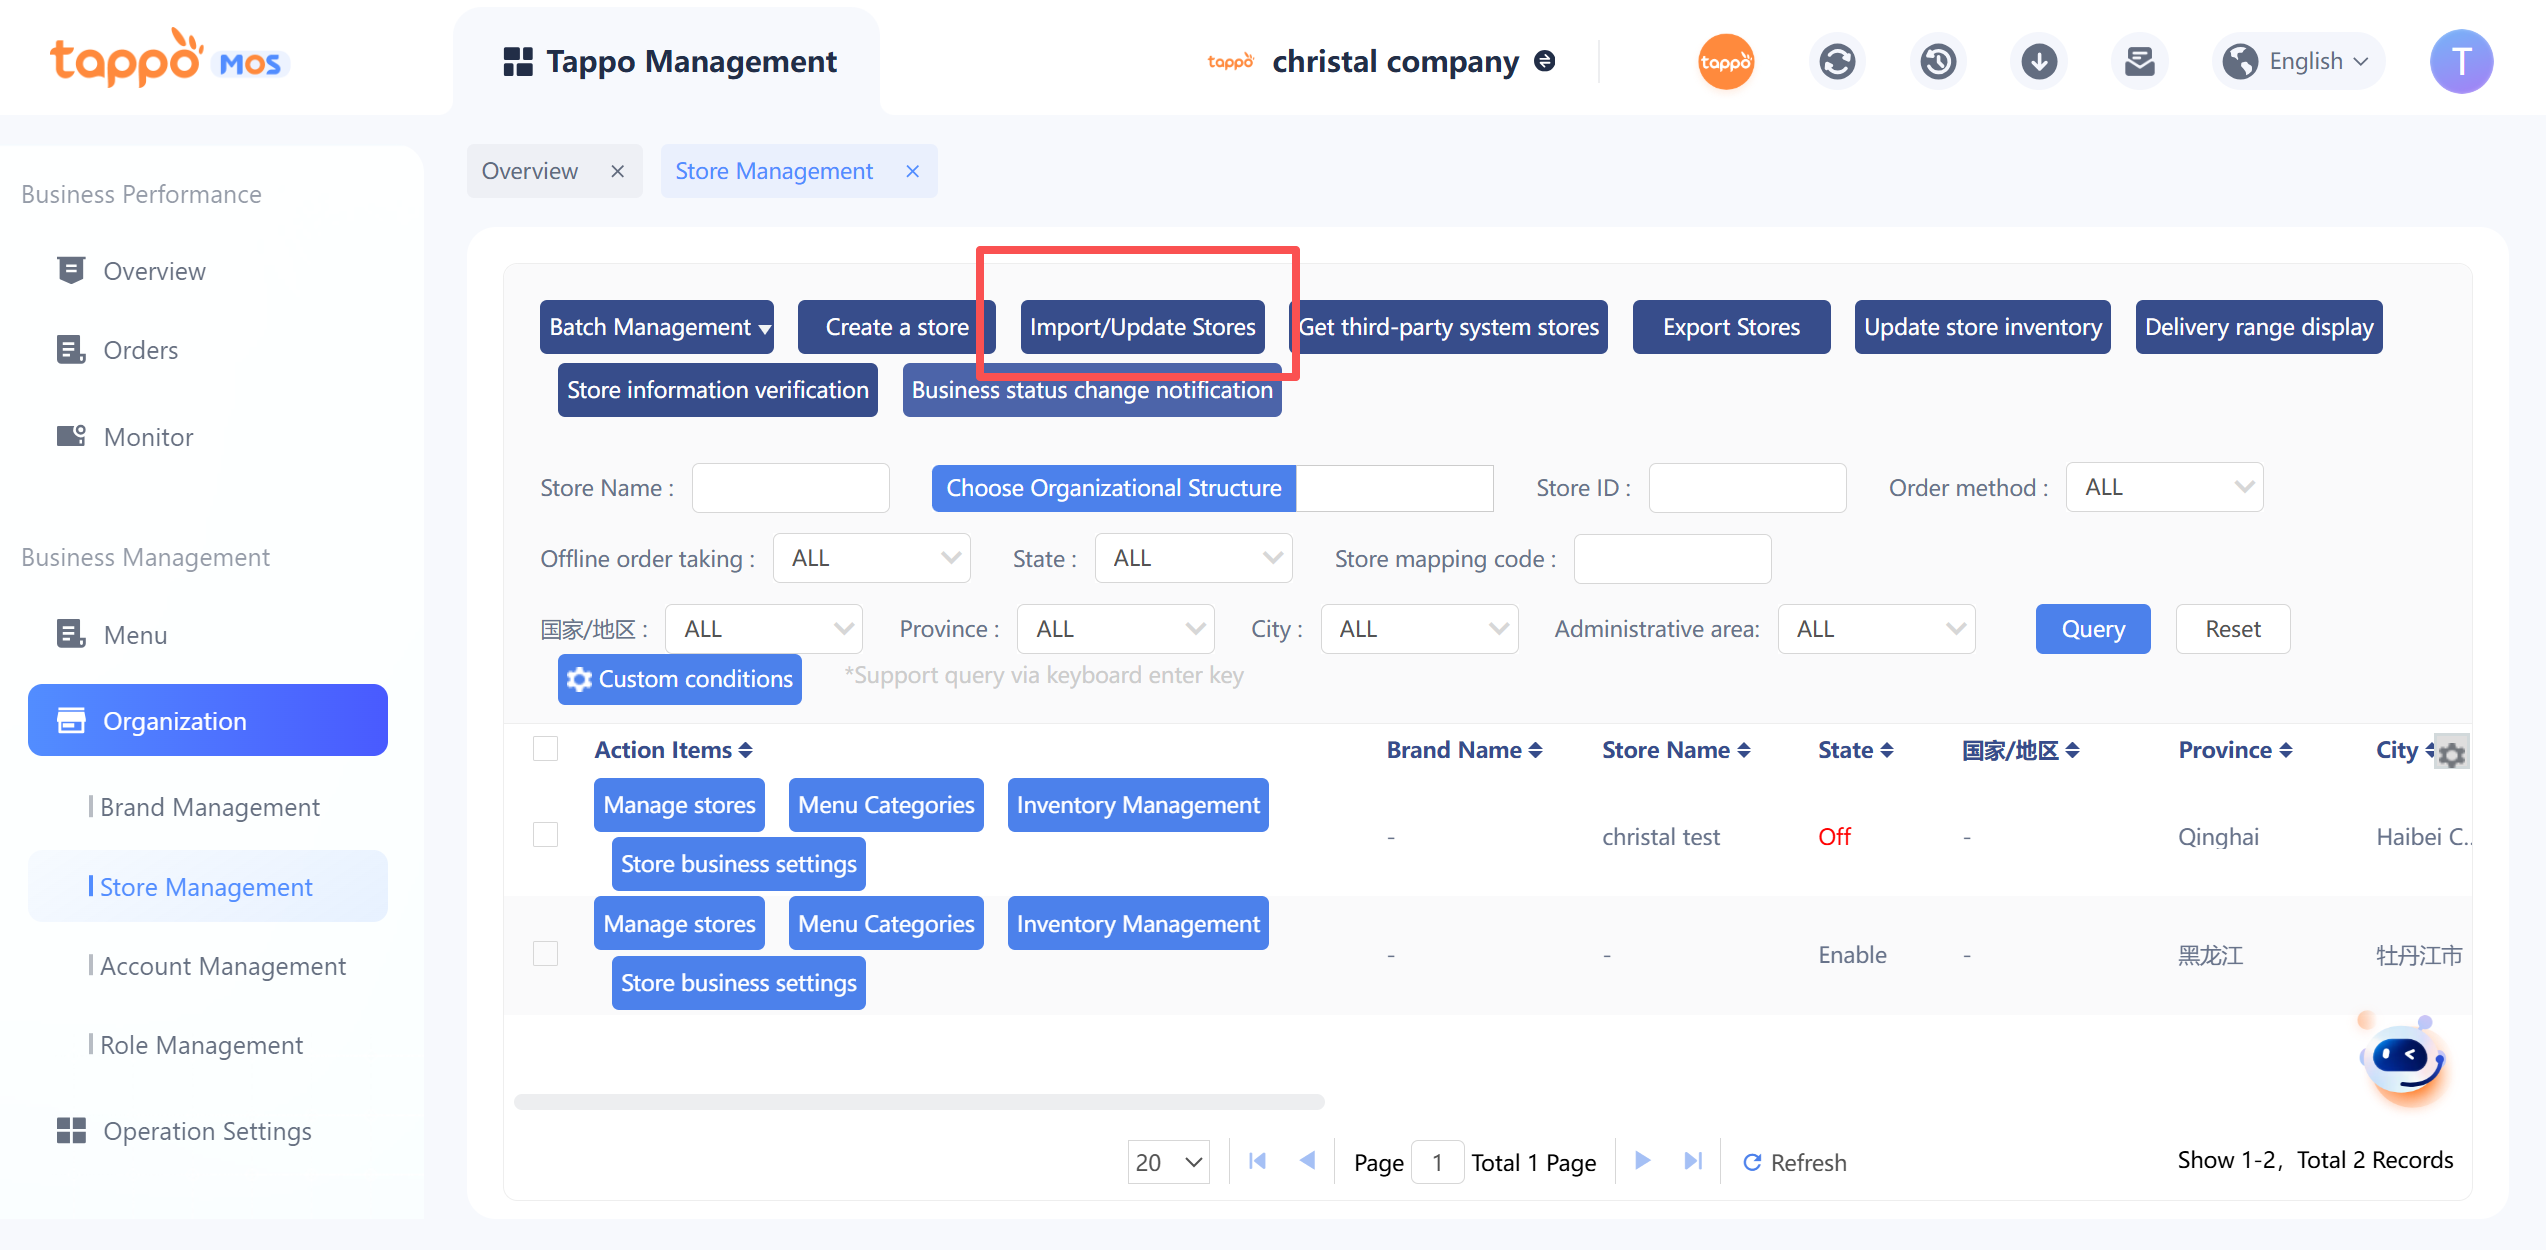
Click Store [Inventory Management]in the store list to open the dish inventory management page. Inventory management includes store inventory activation/deactivation, dish inventory settings, and out-of-stock settings. It also supports batch setting of dishes to be out of stock/available for sale and synchronization to third parties. The list displays the store’s dish information by default. The store can operate on dishes that need to set inventory or be out of stock.
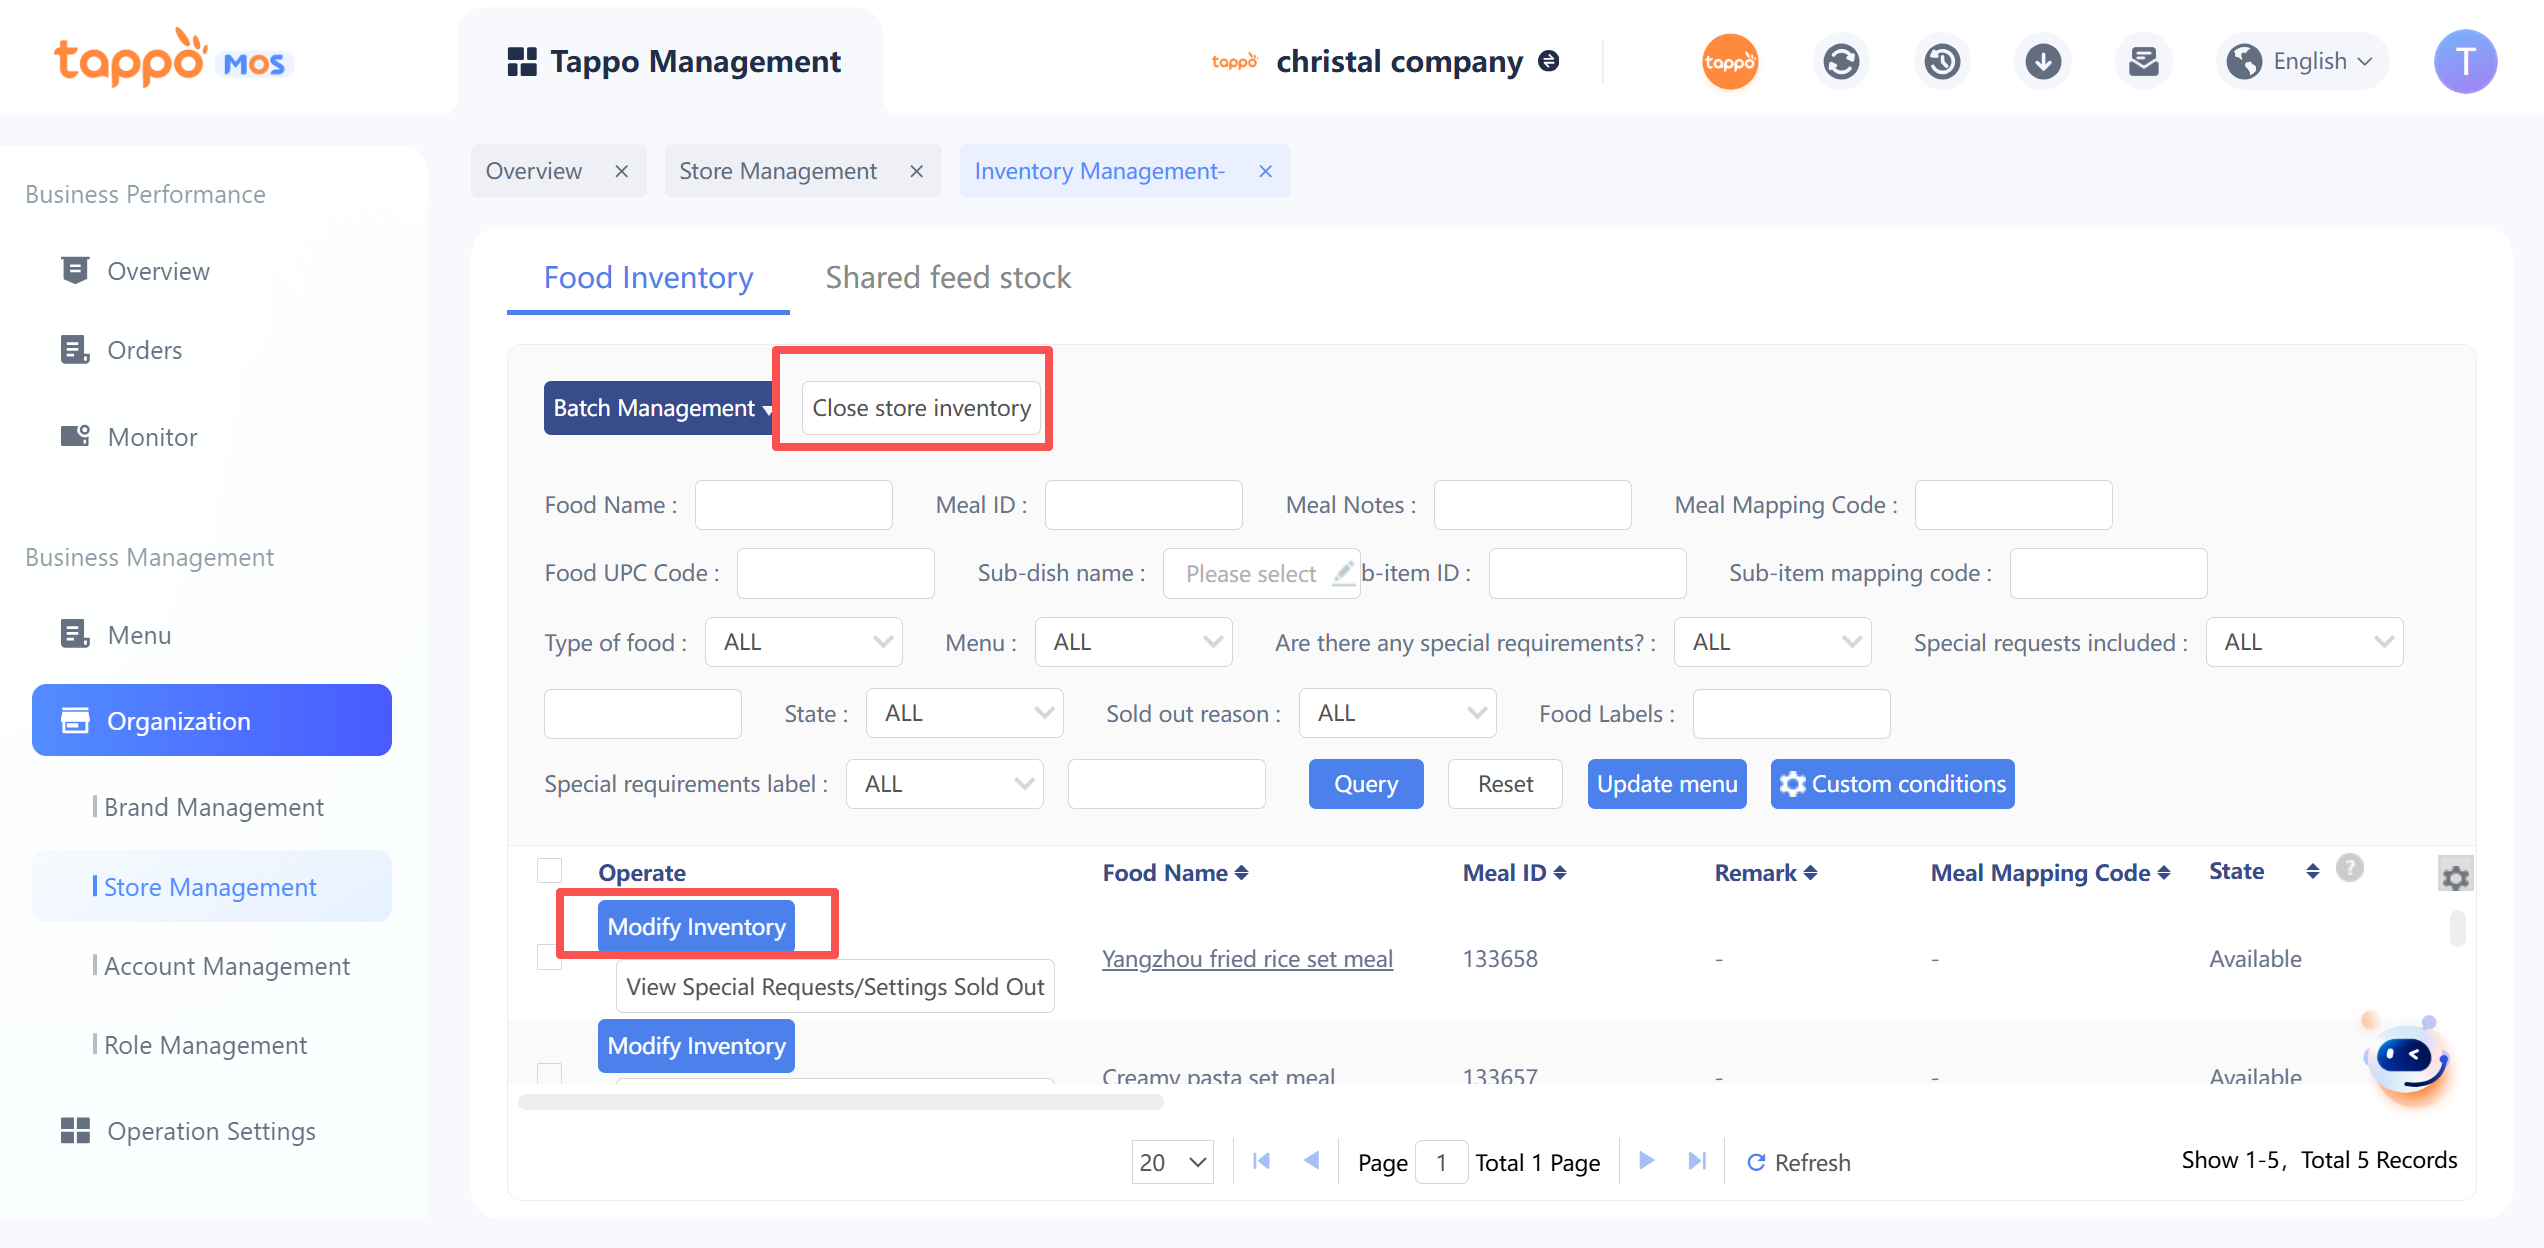
1. Disable Store Inventory
a. Select the corresponding store and open inventory management.
b. Click Disable Store Inventory.
c. In the state of disabled store inventory, the dish inventory cannot be modified again in store inventory management, and the corresponding inventory information fields and operation buttons for modifying dish inventory will be hidden in the list.
d. Stores with disabled inventory will not automatically deduct inventory when generating orders, and will not trigger automatic out-of-stock of dishes when inventory is reduced to zero.
e. Dishes with disabled inventory can still be manually set to be out of stock and synchronized to third parties.
f. Disabling the inventory function will also disable the inventory function of dish special requirements and shared toppings.
2. Modify Dish Inventory
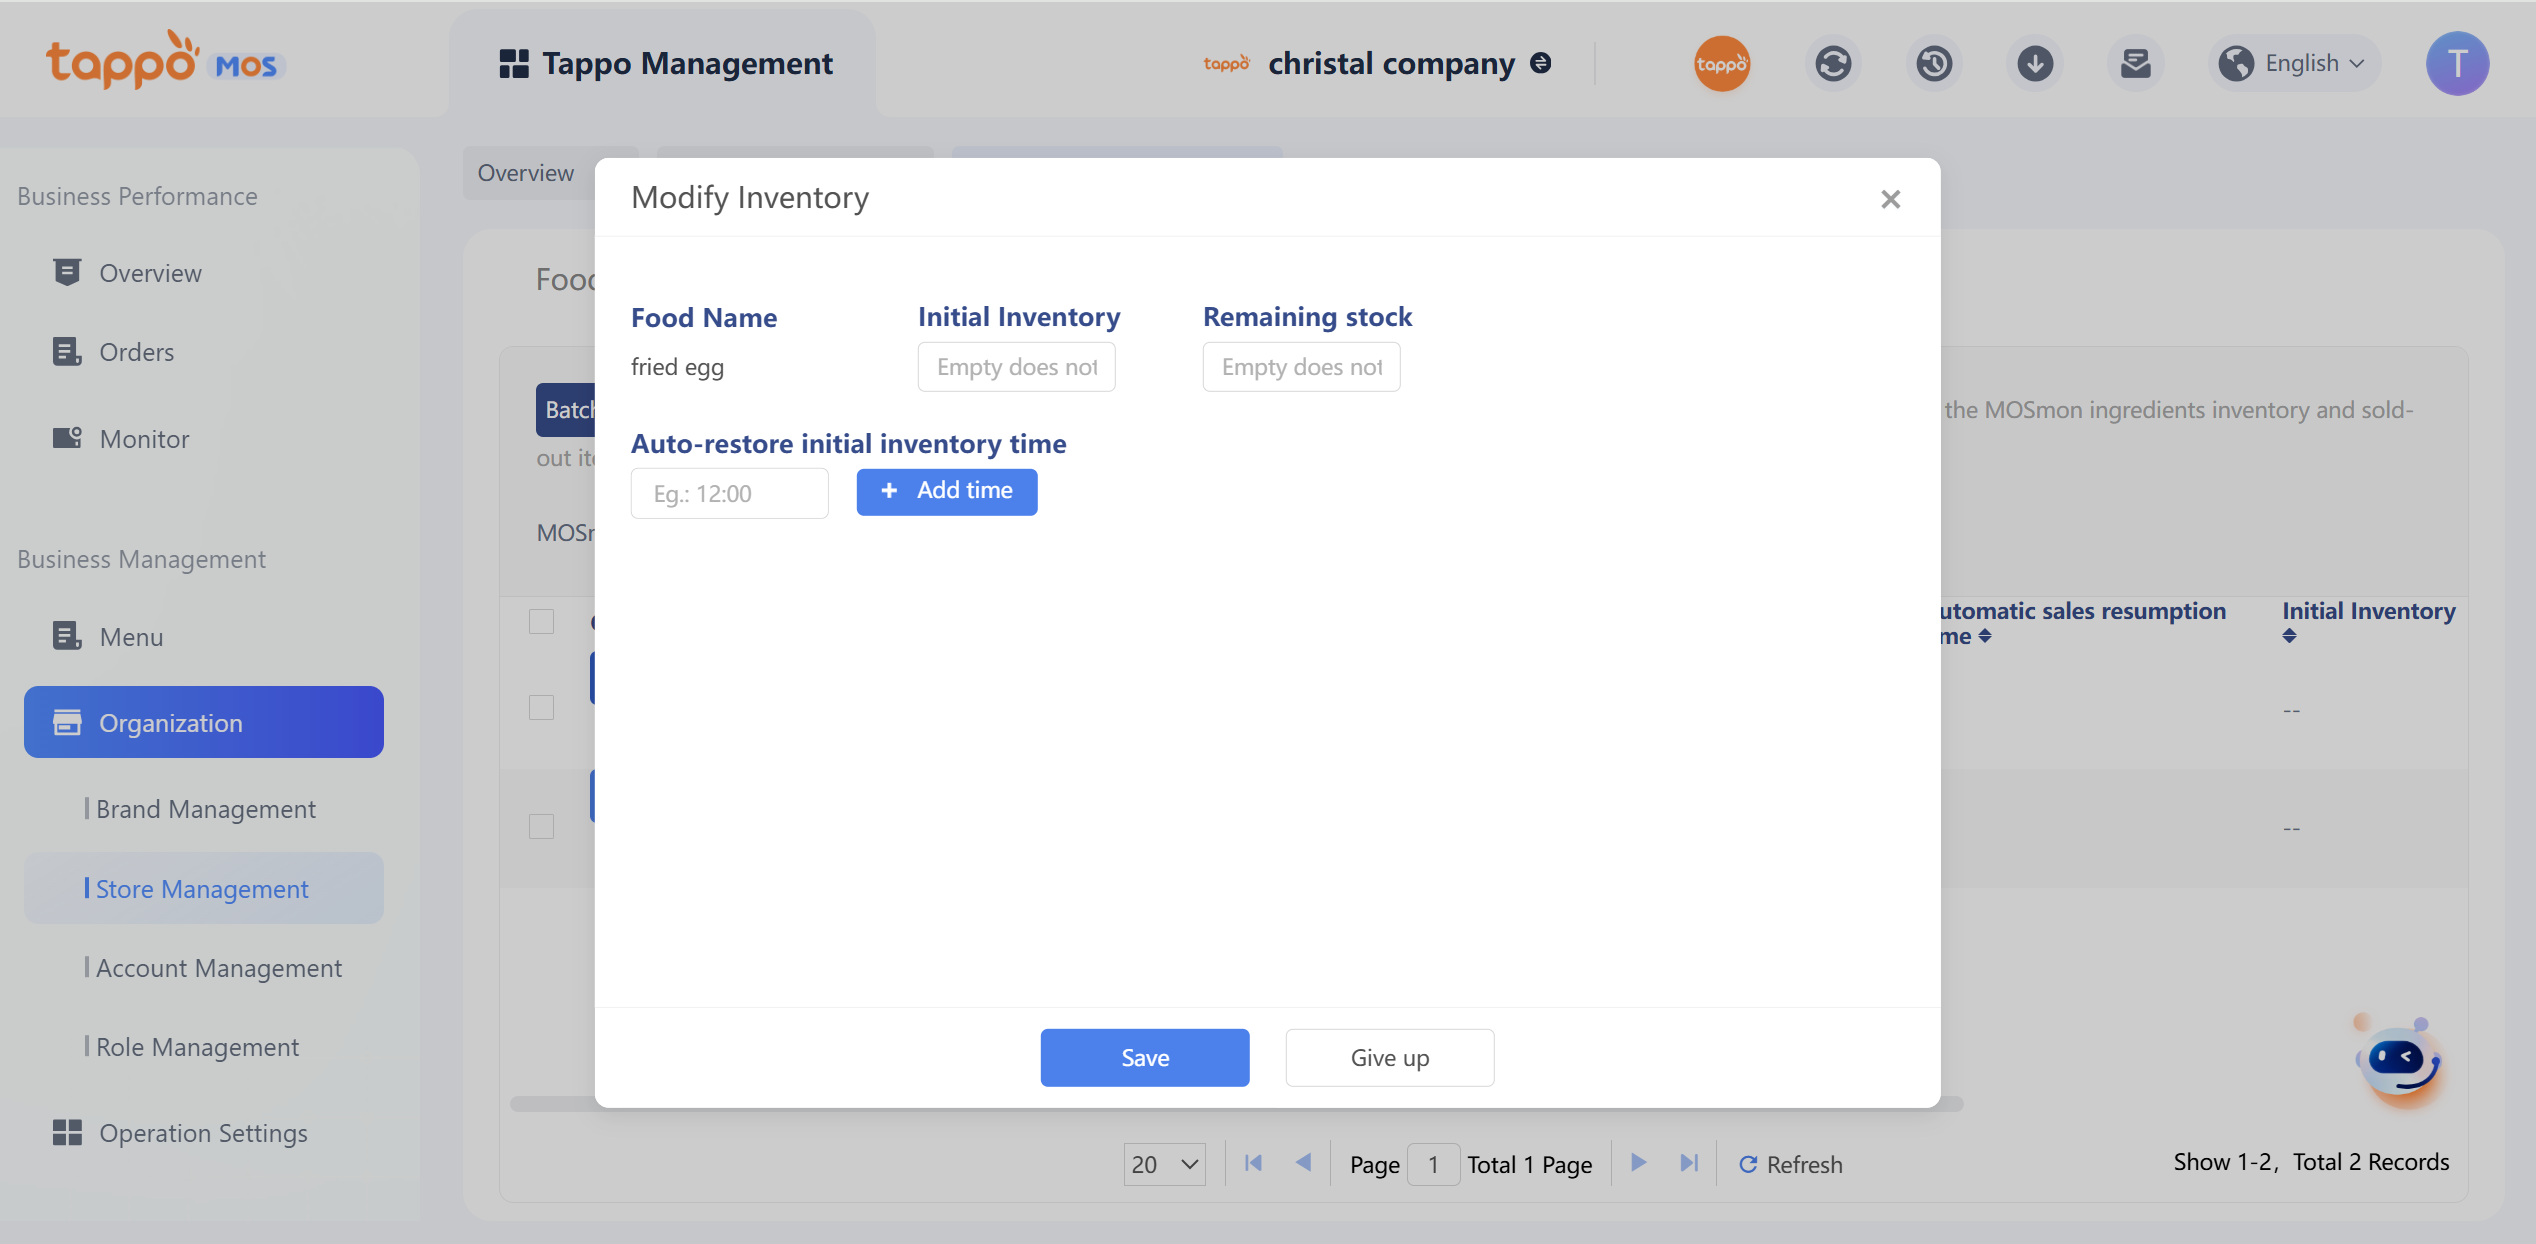
a. Find the dish and click [Modify Inventory].
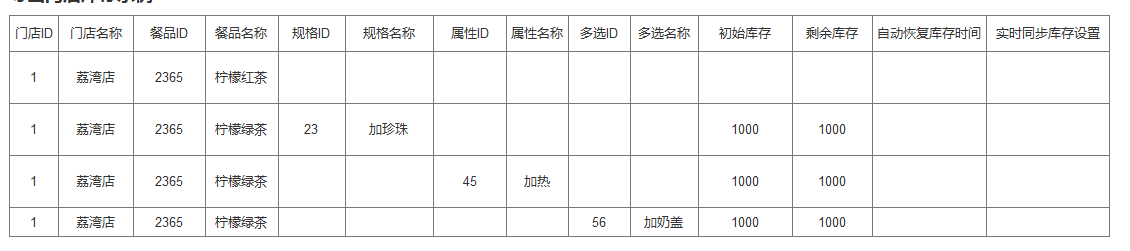
b. Set the initial inventory and remaining inventory of the dish.
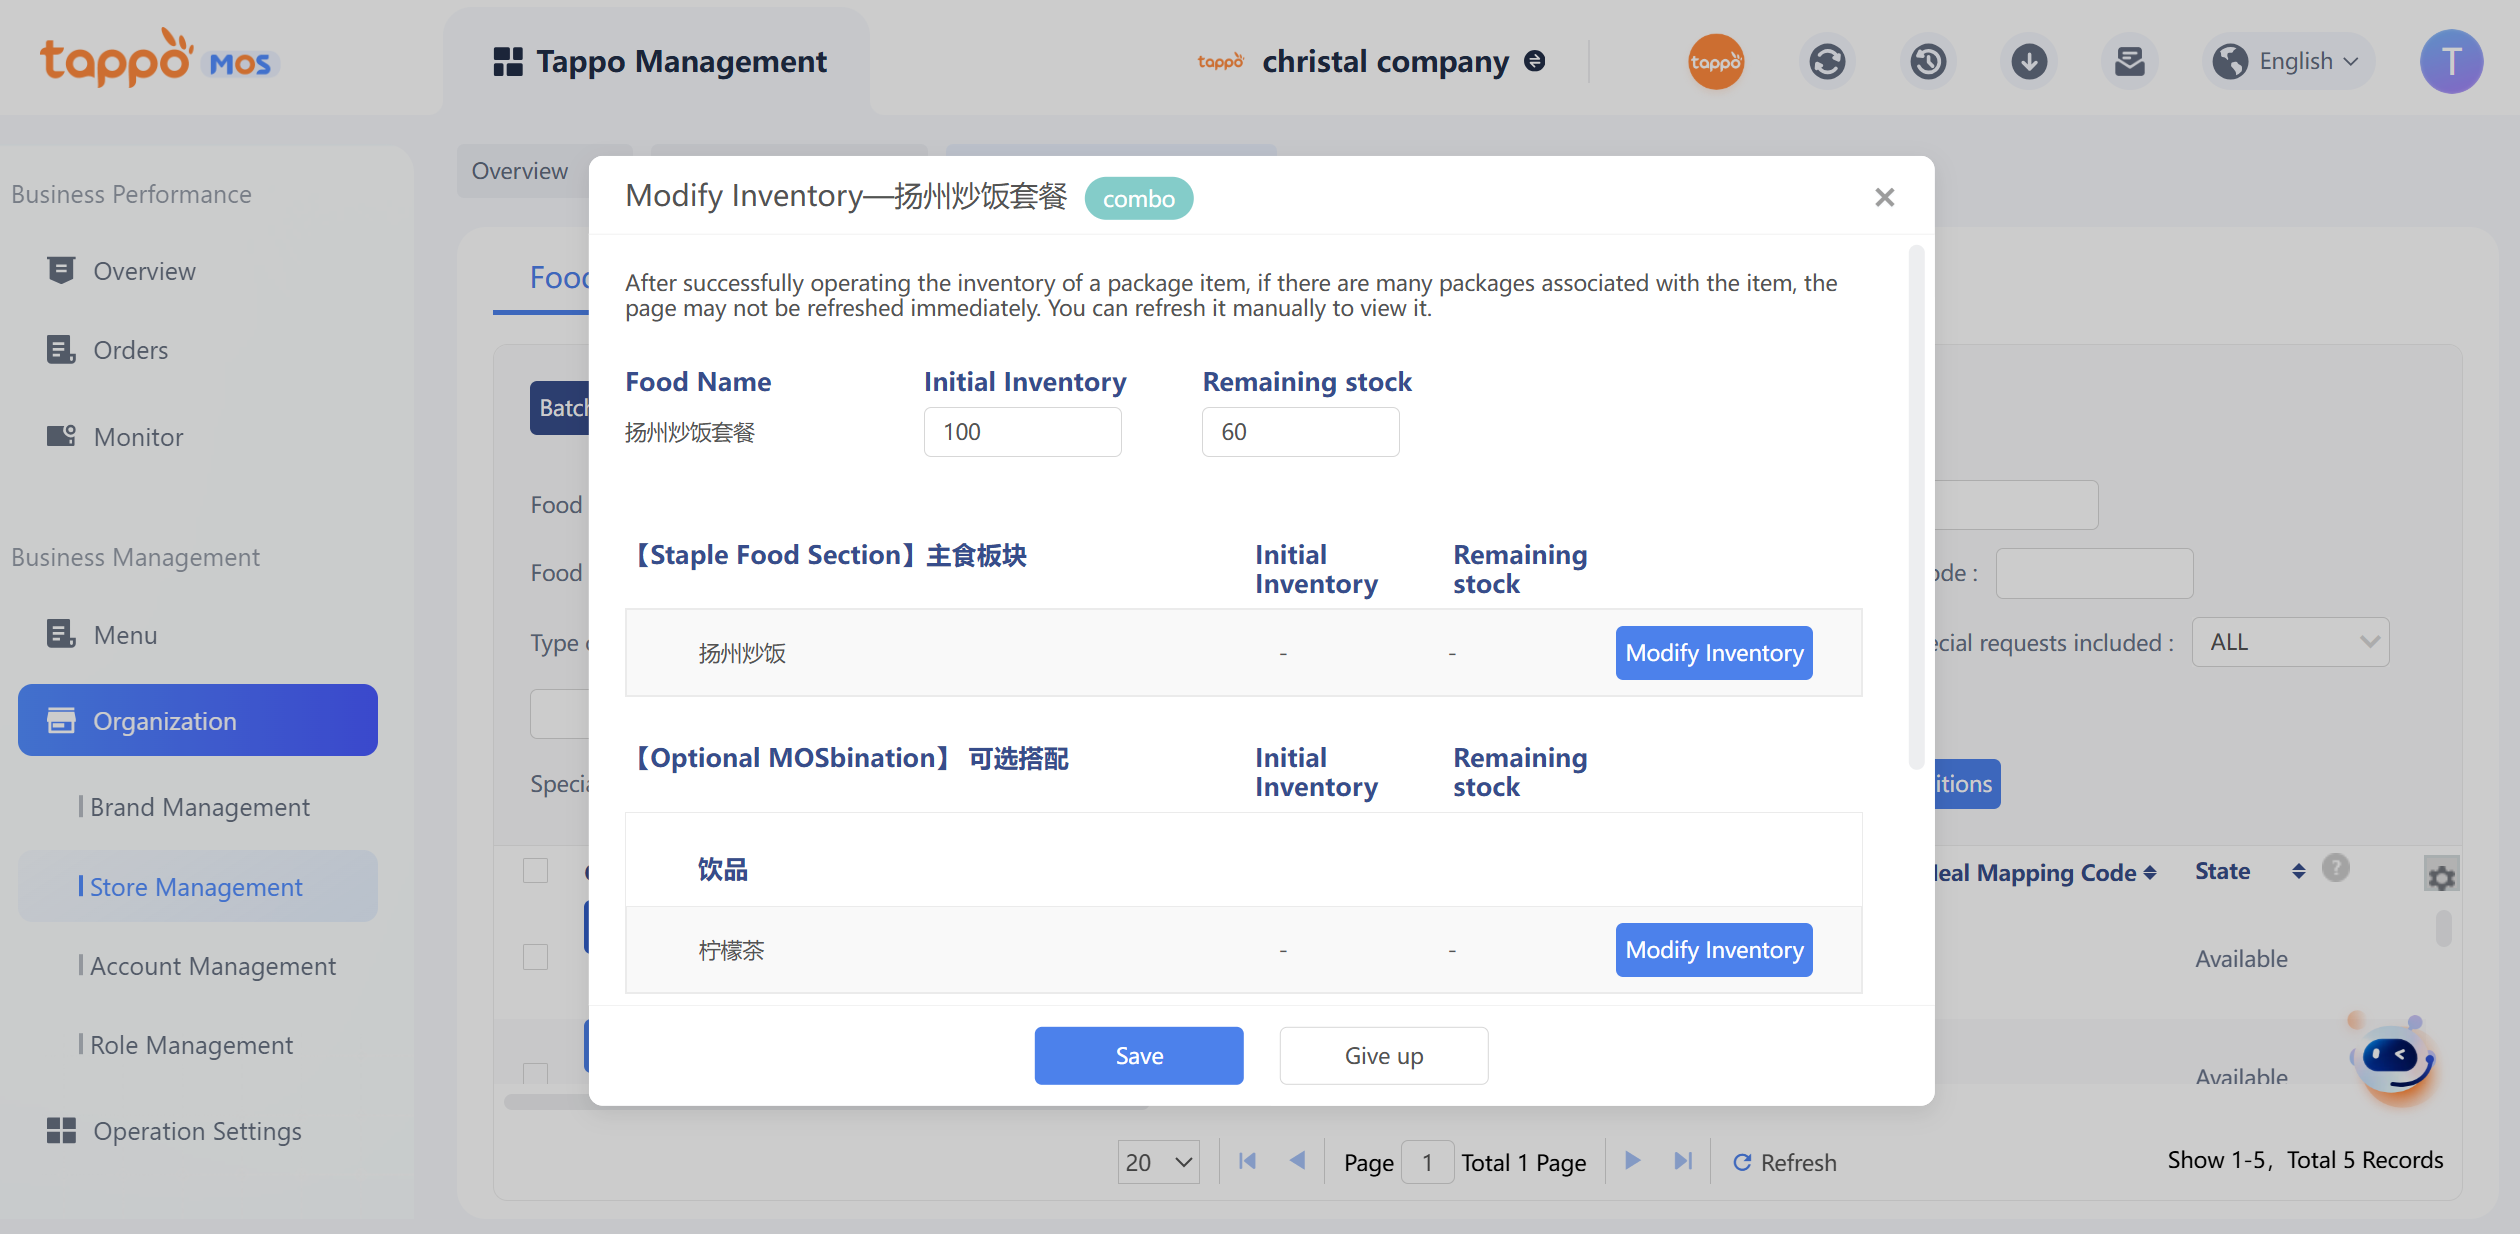
c. Set the initial inventory and remaining inventory of dish special requirements (optional; if not set, the dish inventory will be used for synchronization; otherwise, the corresponding specification inventory will be used for synchronization). Special requirements referencing shared toppings are prohibited from editing.

d. Set the initial inventory and remaining inventory of dish special requirements (optional; if not set, the dish inventory will be used for synchronization; otherwise, the corresponding specification inventory will be used for synchronization). Special requirements referencing shared toppings are prohibited from editing.
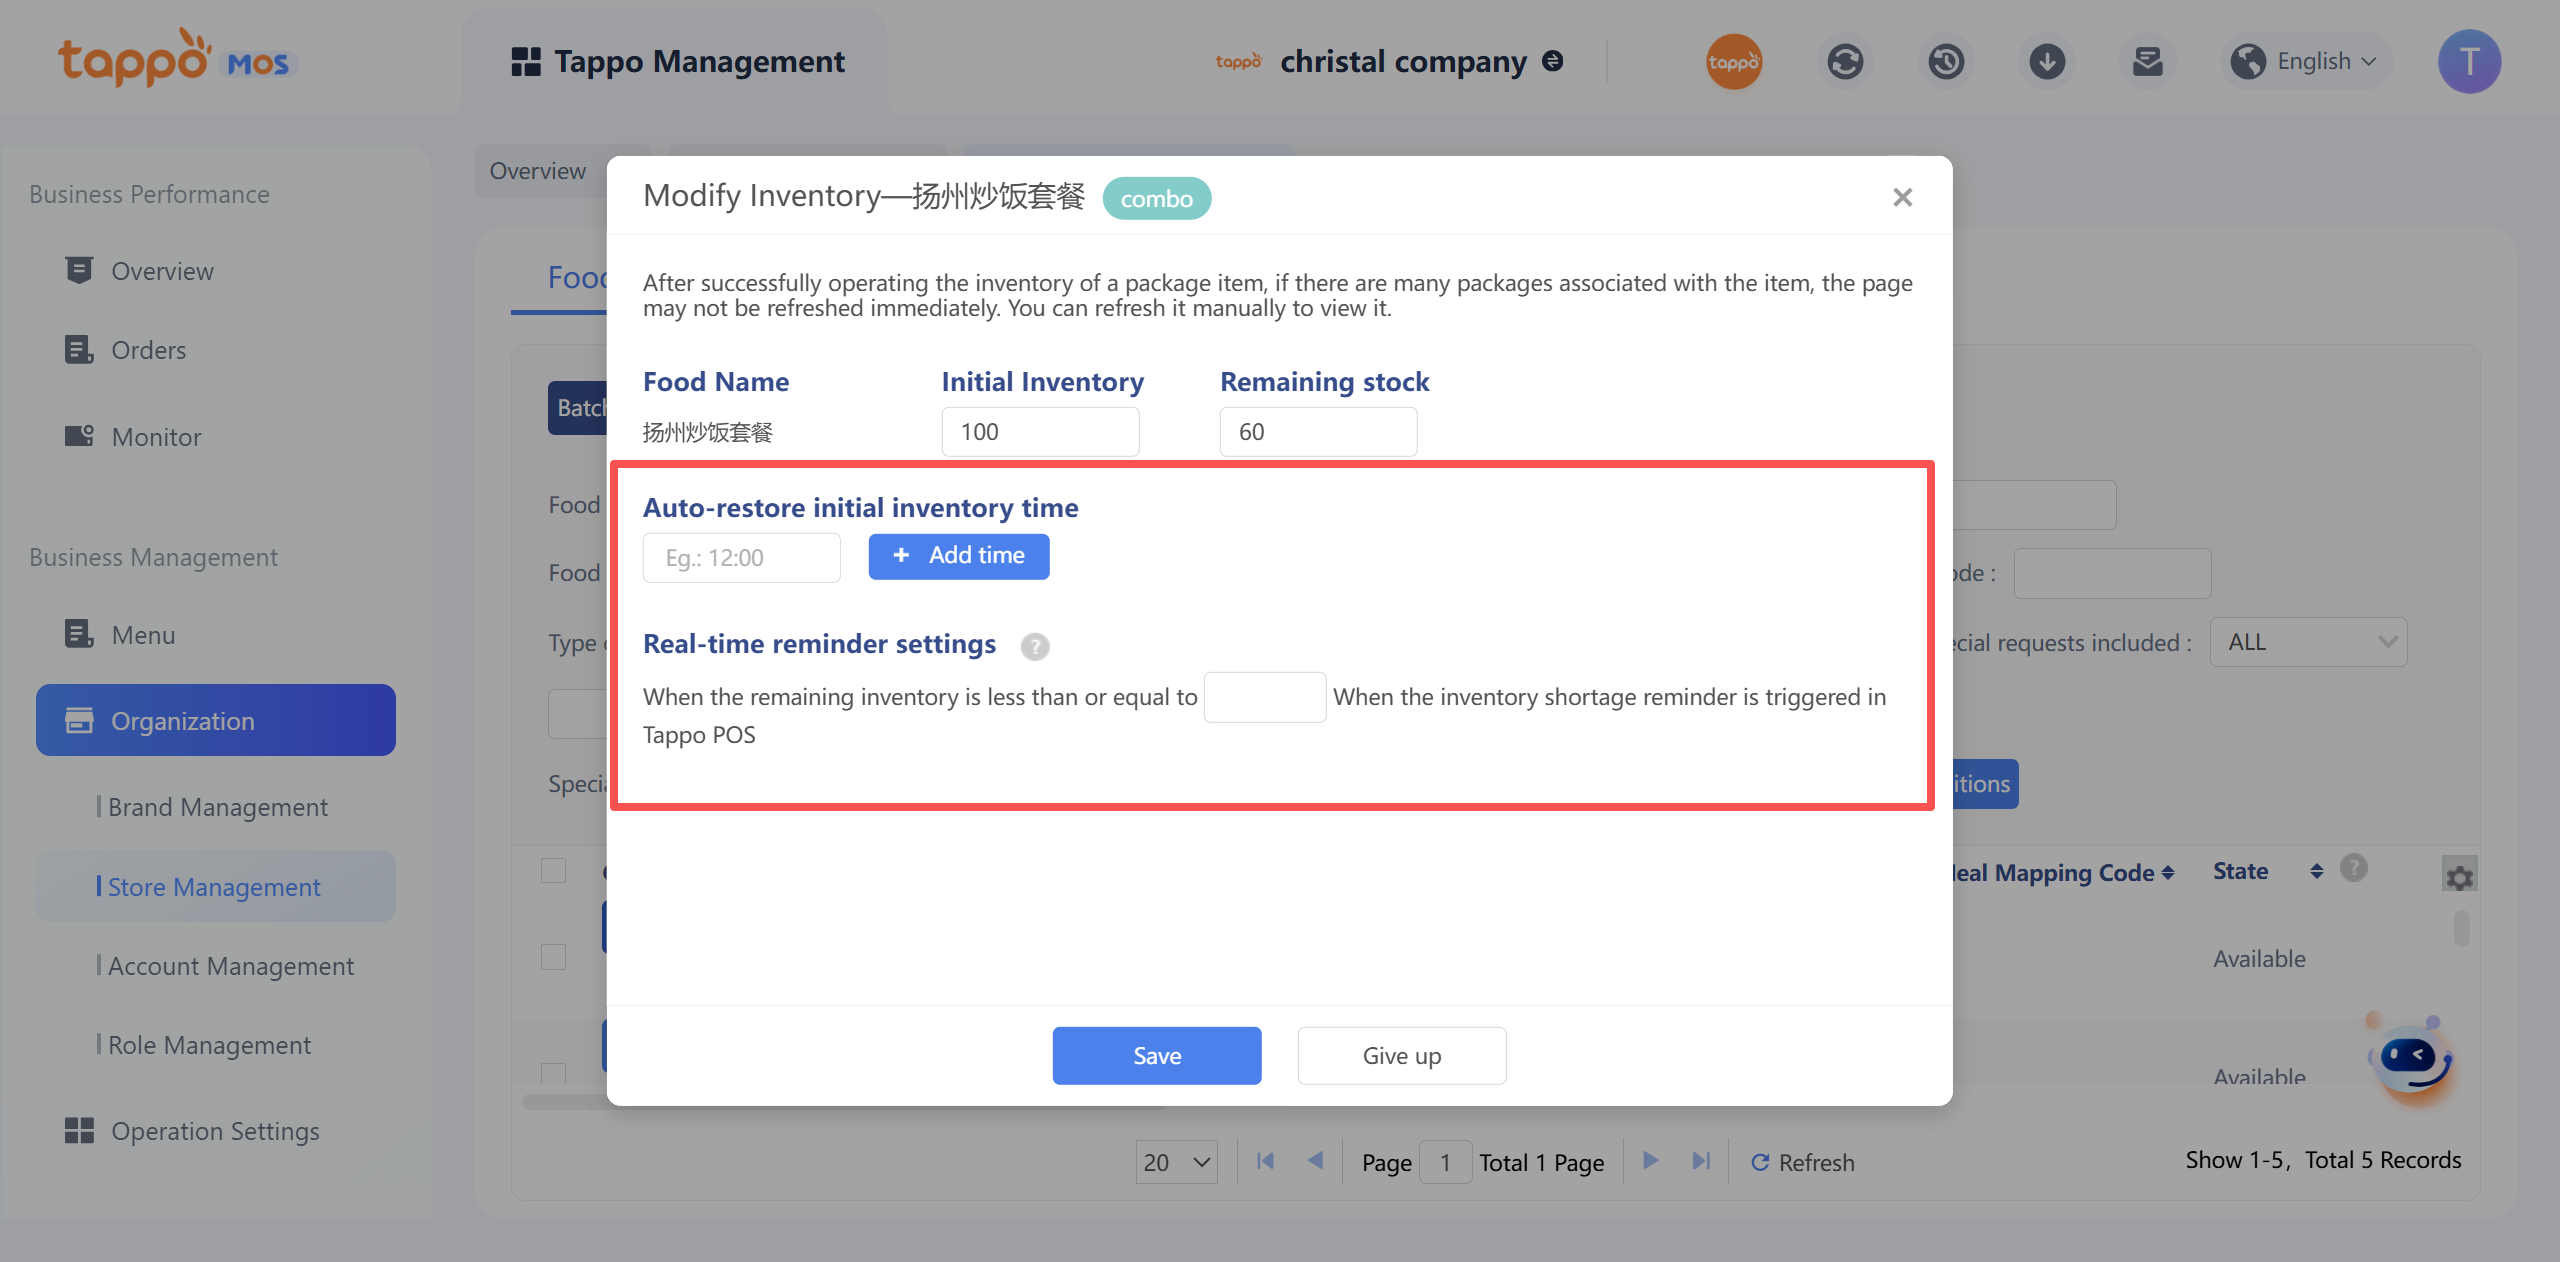
e. Click Save to take effect. Once the dish inventory is reduced to 0, it will be automatically out of stock, and the dish out-of-stock status will be automatically synchronized to food delivery platforms.
3. Set Dish Out of Stock
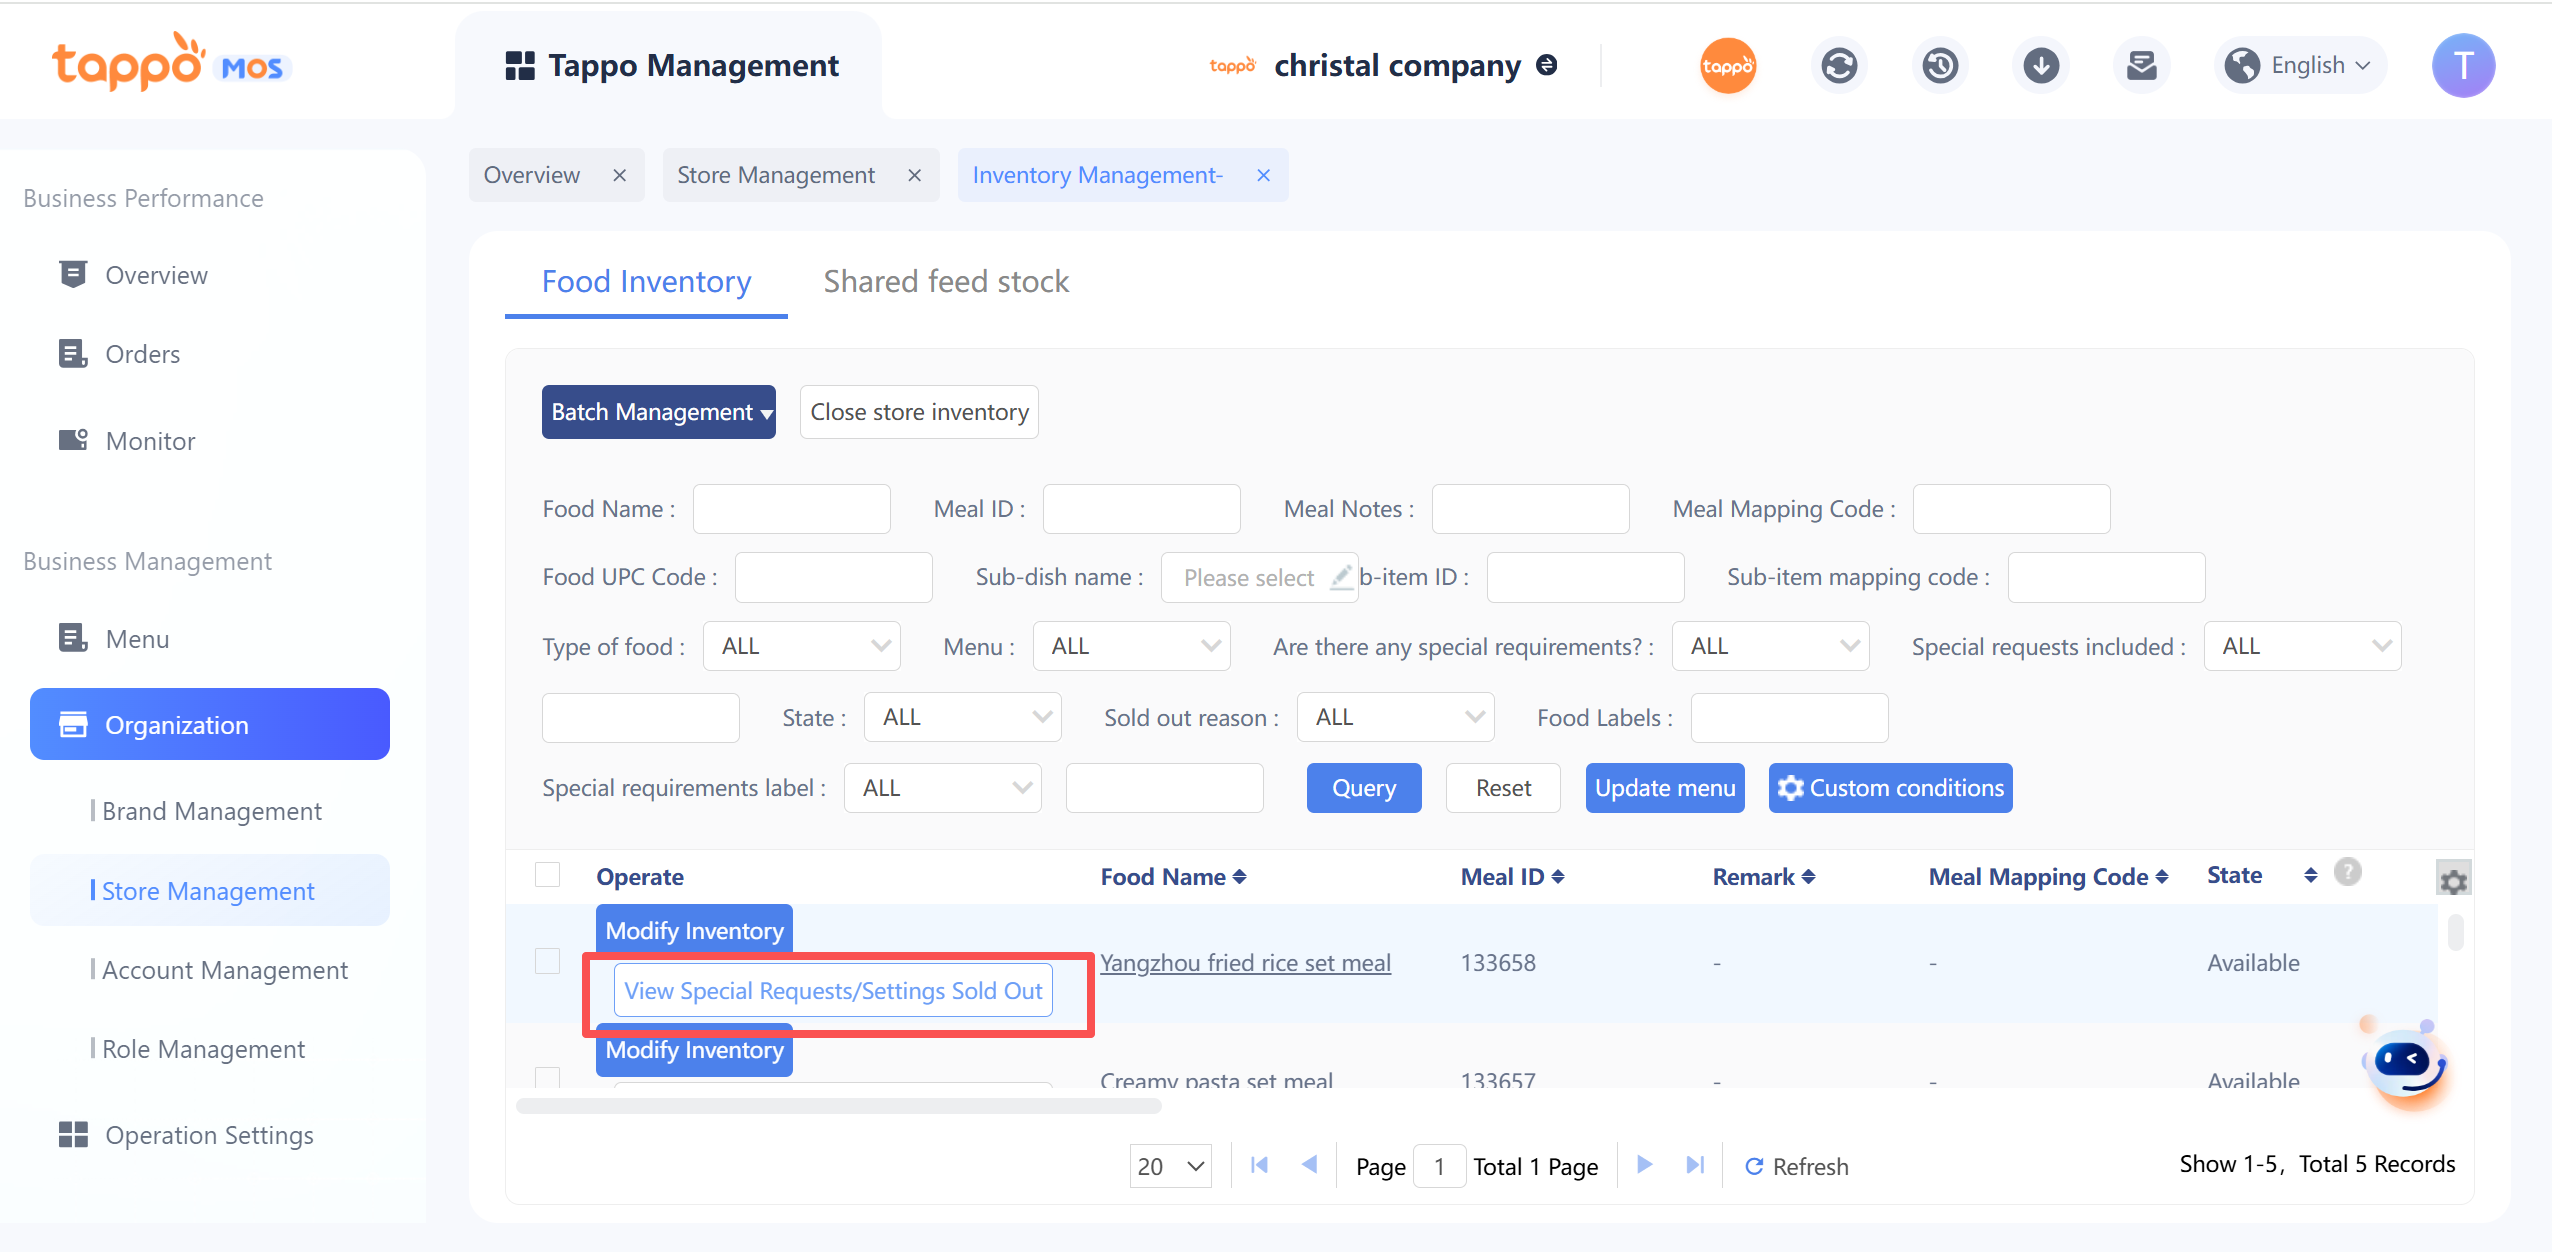
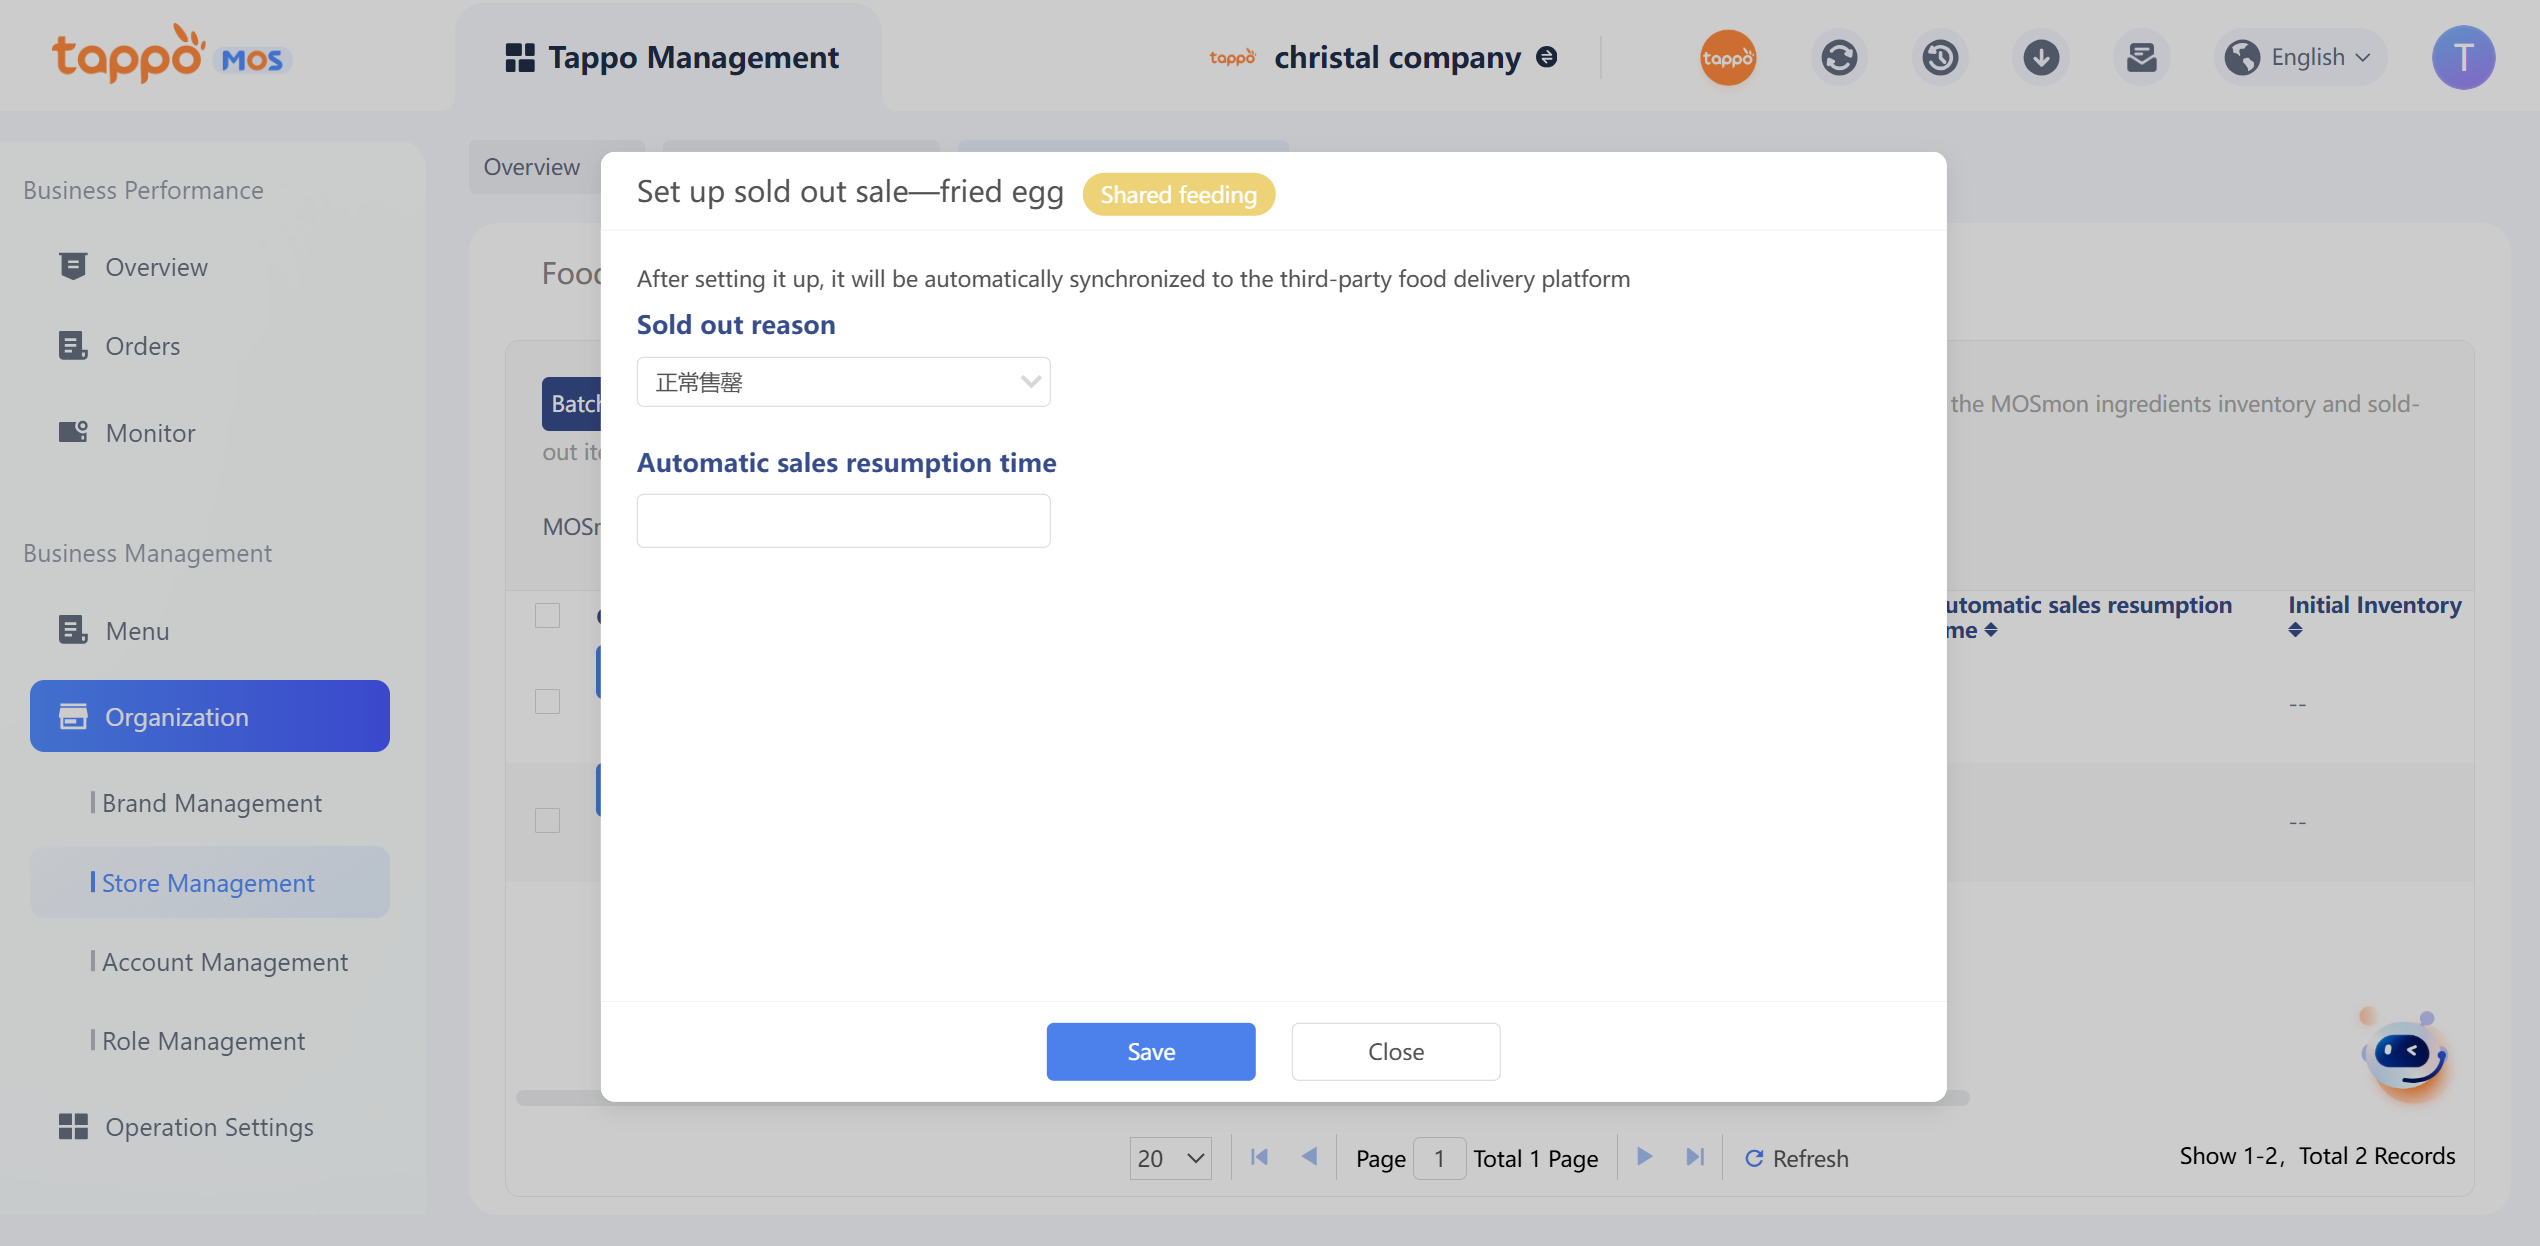
a. Find the dish and click [Set Out of Stock].
b. Select the out-of-stock reason. Note: The out-of-stock reason is fixed and cannot be customized
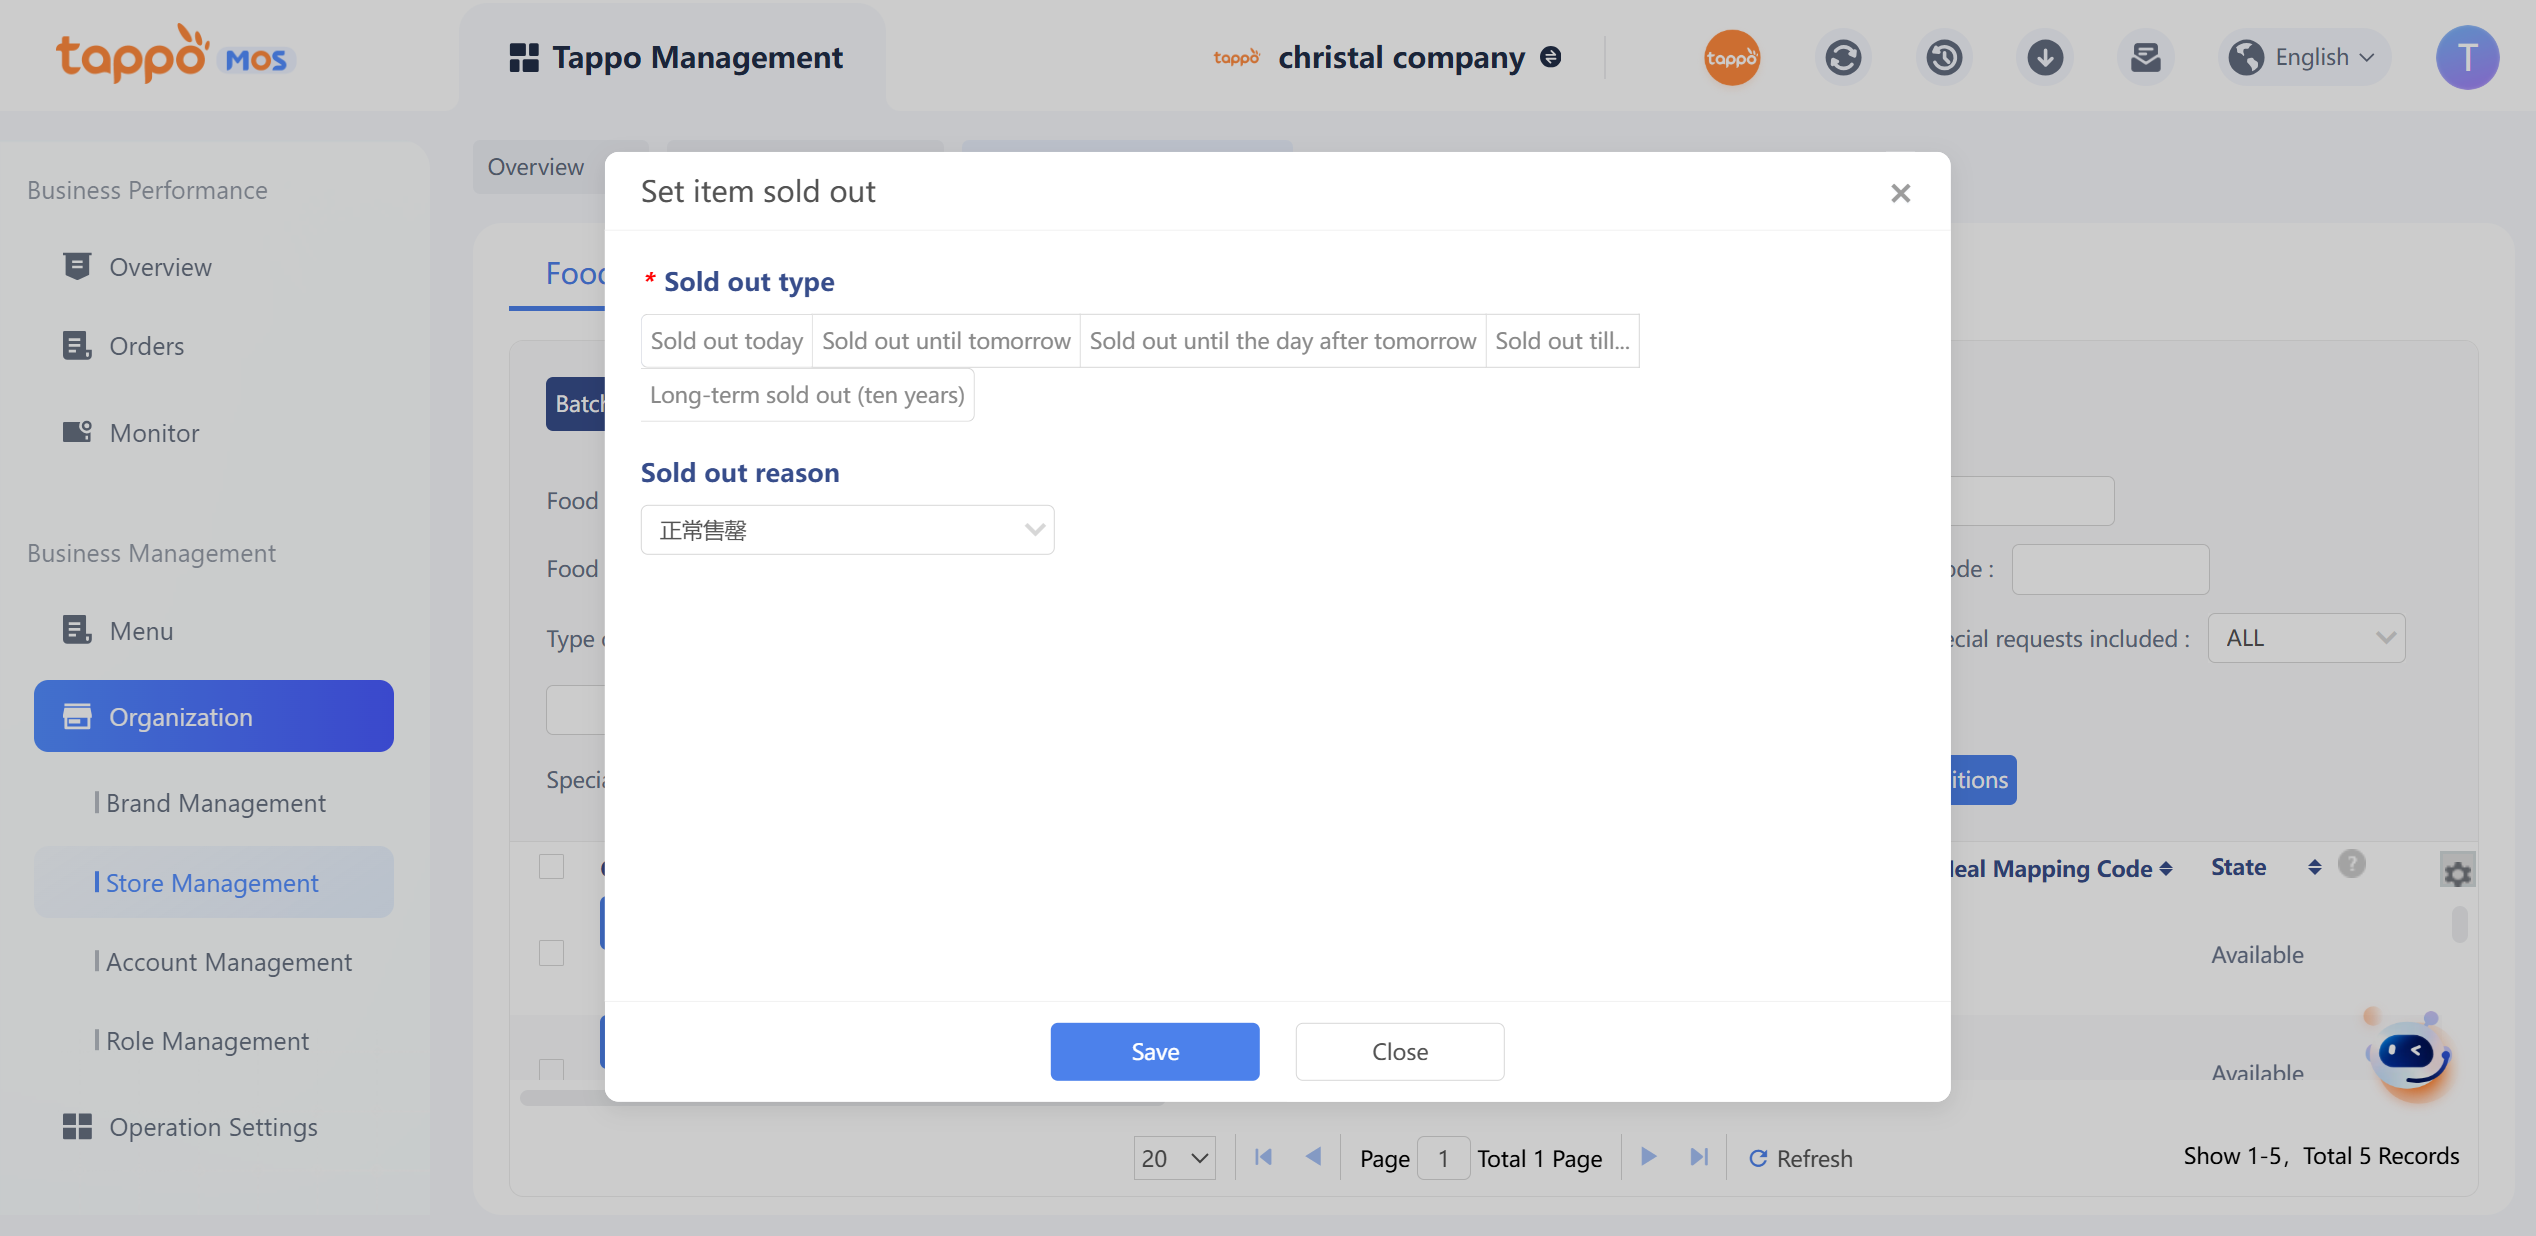
a. Set the automatic restoration time for sale. If not set, it will not be automatically restored for sale.
b. Click Save to take effect immediately and automatically synchronize to food delivery platforms.
4. Set Dish Available for Sale
a. Select the out-of-stock dish and click [Set Available for Sale].
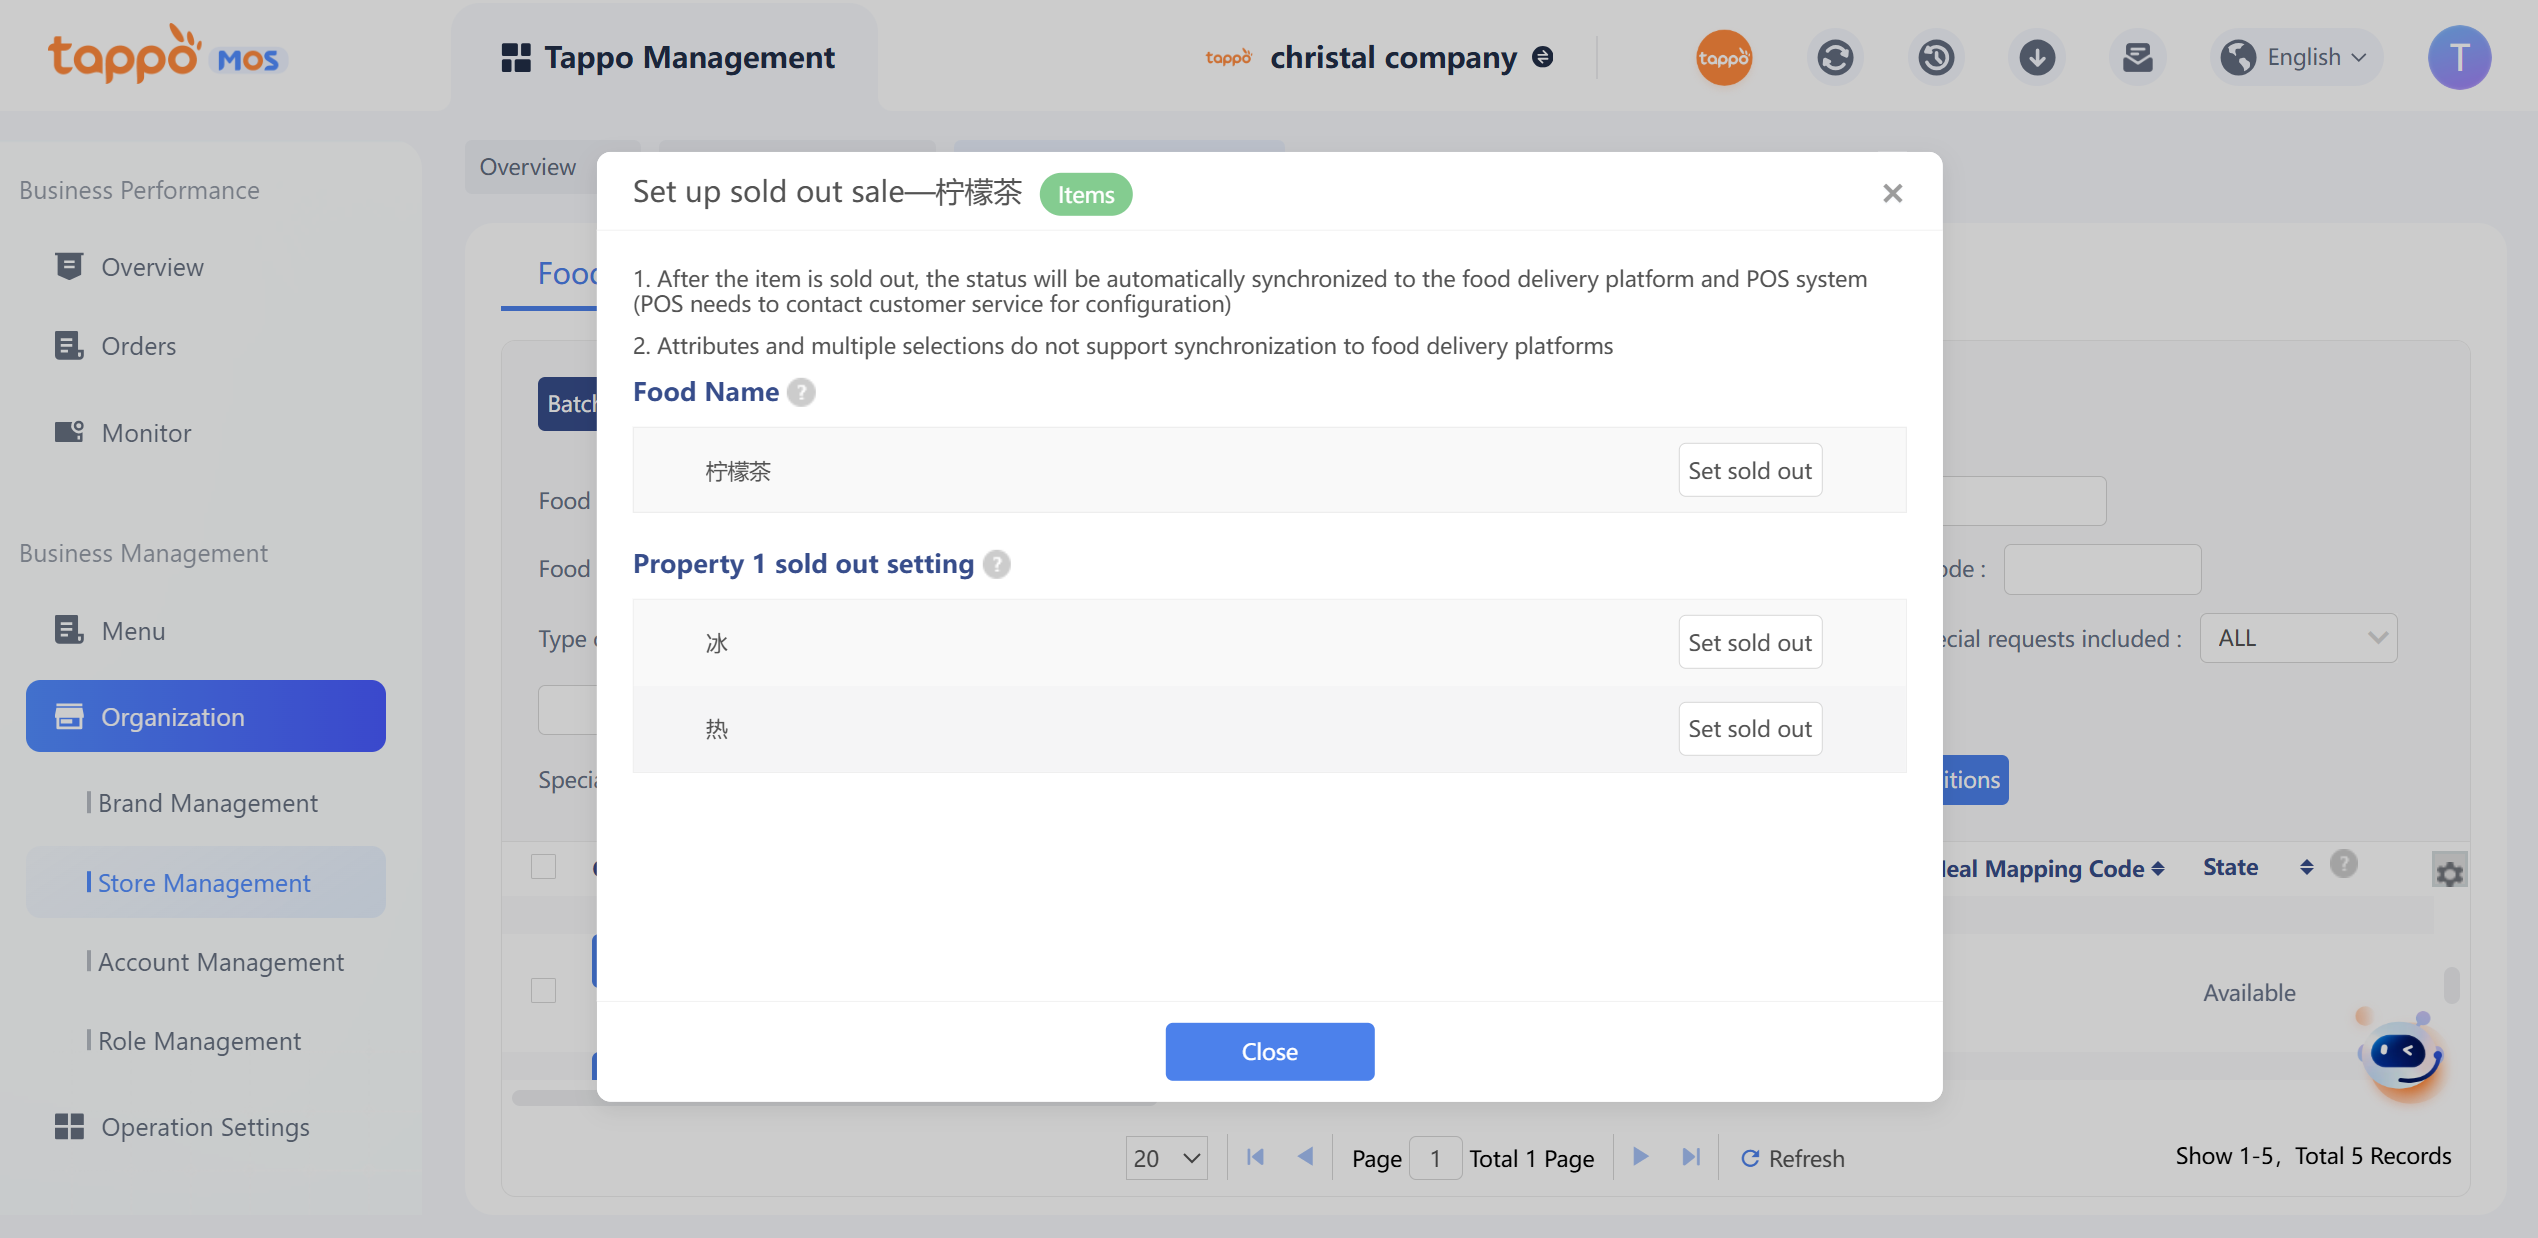
5. Set Special Requirements Out of Stock
Only single dishes with special requirements can have their special requirements (specifications/attributes/multi-select) set to be out of stock.
a. Query single dishes with special requirements and click [Set Out of Stock].
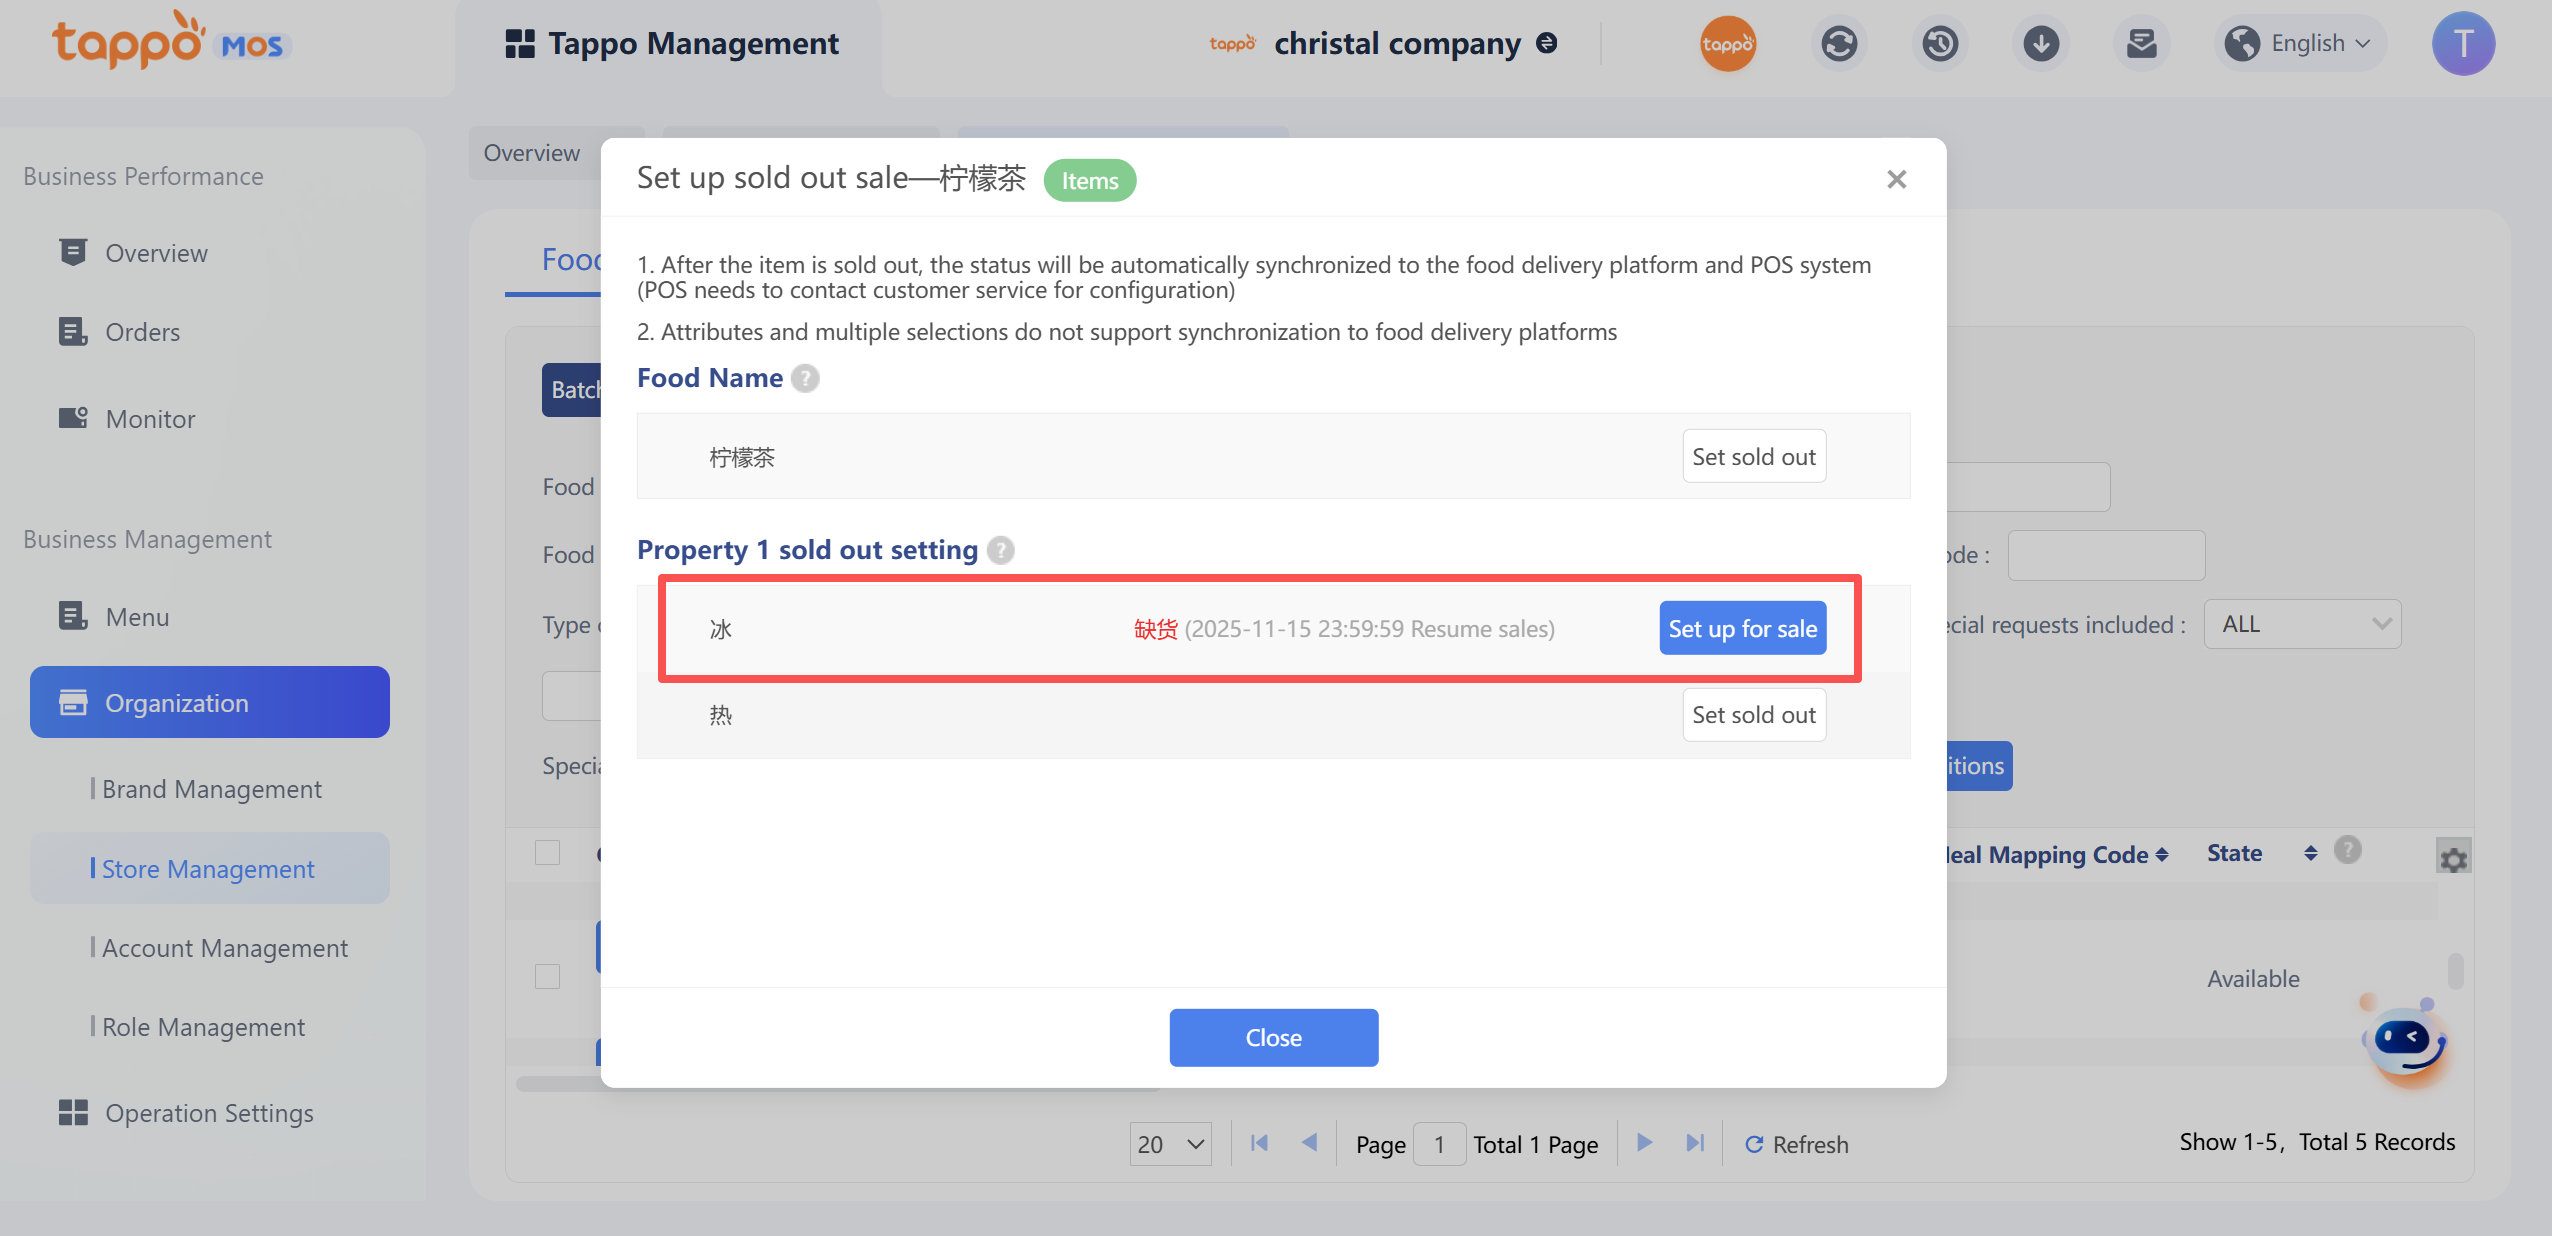
b. The pop-up window displays the special requirements of the single dish. Click [Set Out of Stock], select the corresponding out-of-stock reason, and set the automatic restoration time for sale. After secondary confirmation, the special requirements will be out of stock and automatically synchronized to third parties (only specifications). If the special requirements reference shared toppings, they cannot be edited.
c. The out-of-stock reason and restoration time for sale of specific special requirements can be viewed.
6. Batch Set Special Requirements Out of Stock
If you need to set the same special requirements in multiple dishes to be out of stock (available for sale), follow the steps below:
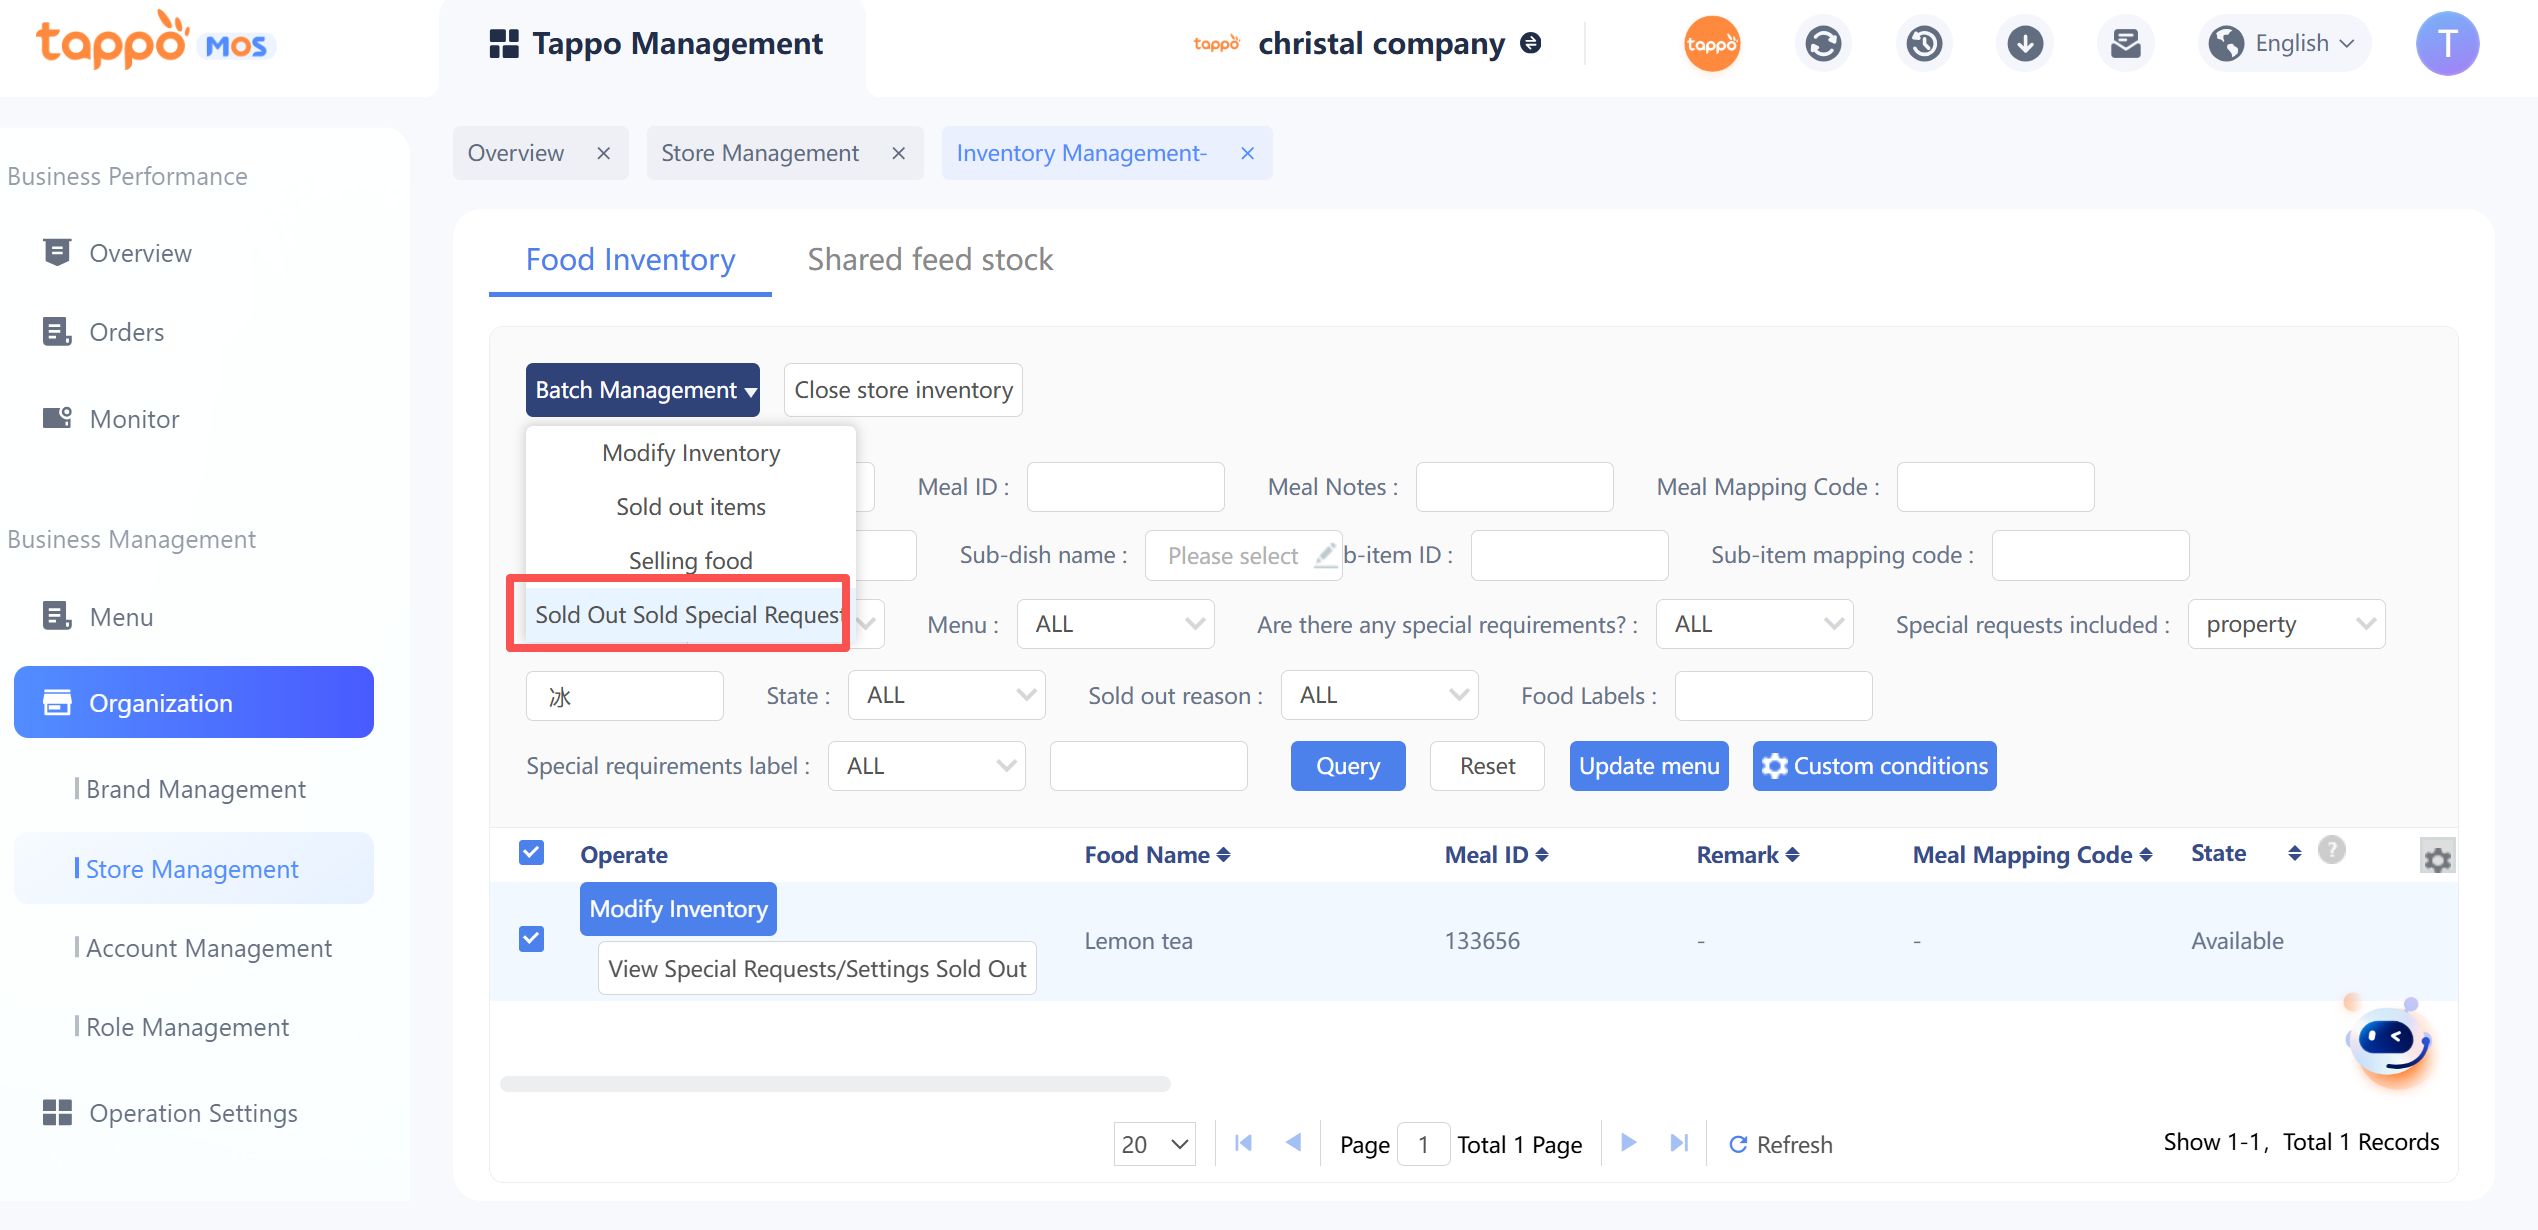
a. Enter the special requirements in the query criteria to query all single dishes containing the specification.
b. Select all queried dishes, click [Batch Management] – [Set Special Requirements Out of Stock/Available for Sale], and a confirmation pop-up window will appear as shown in the figure below. Select to set out of stock or available for sale.

c. Click Save, and the special requirements in all selected dishes will be out of stock or available for sale.
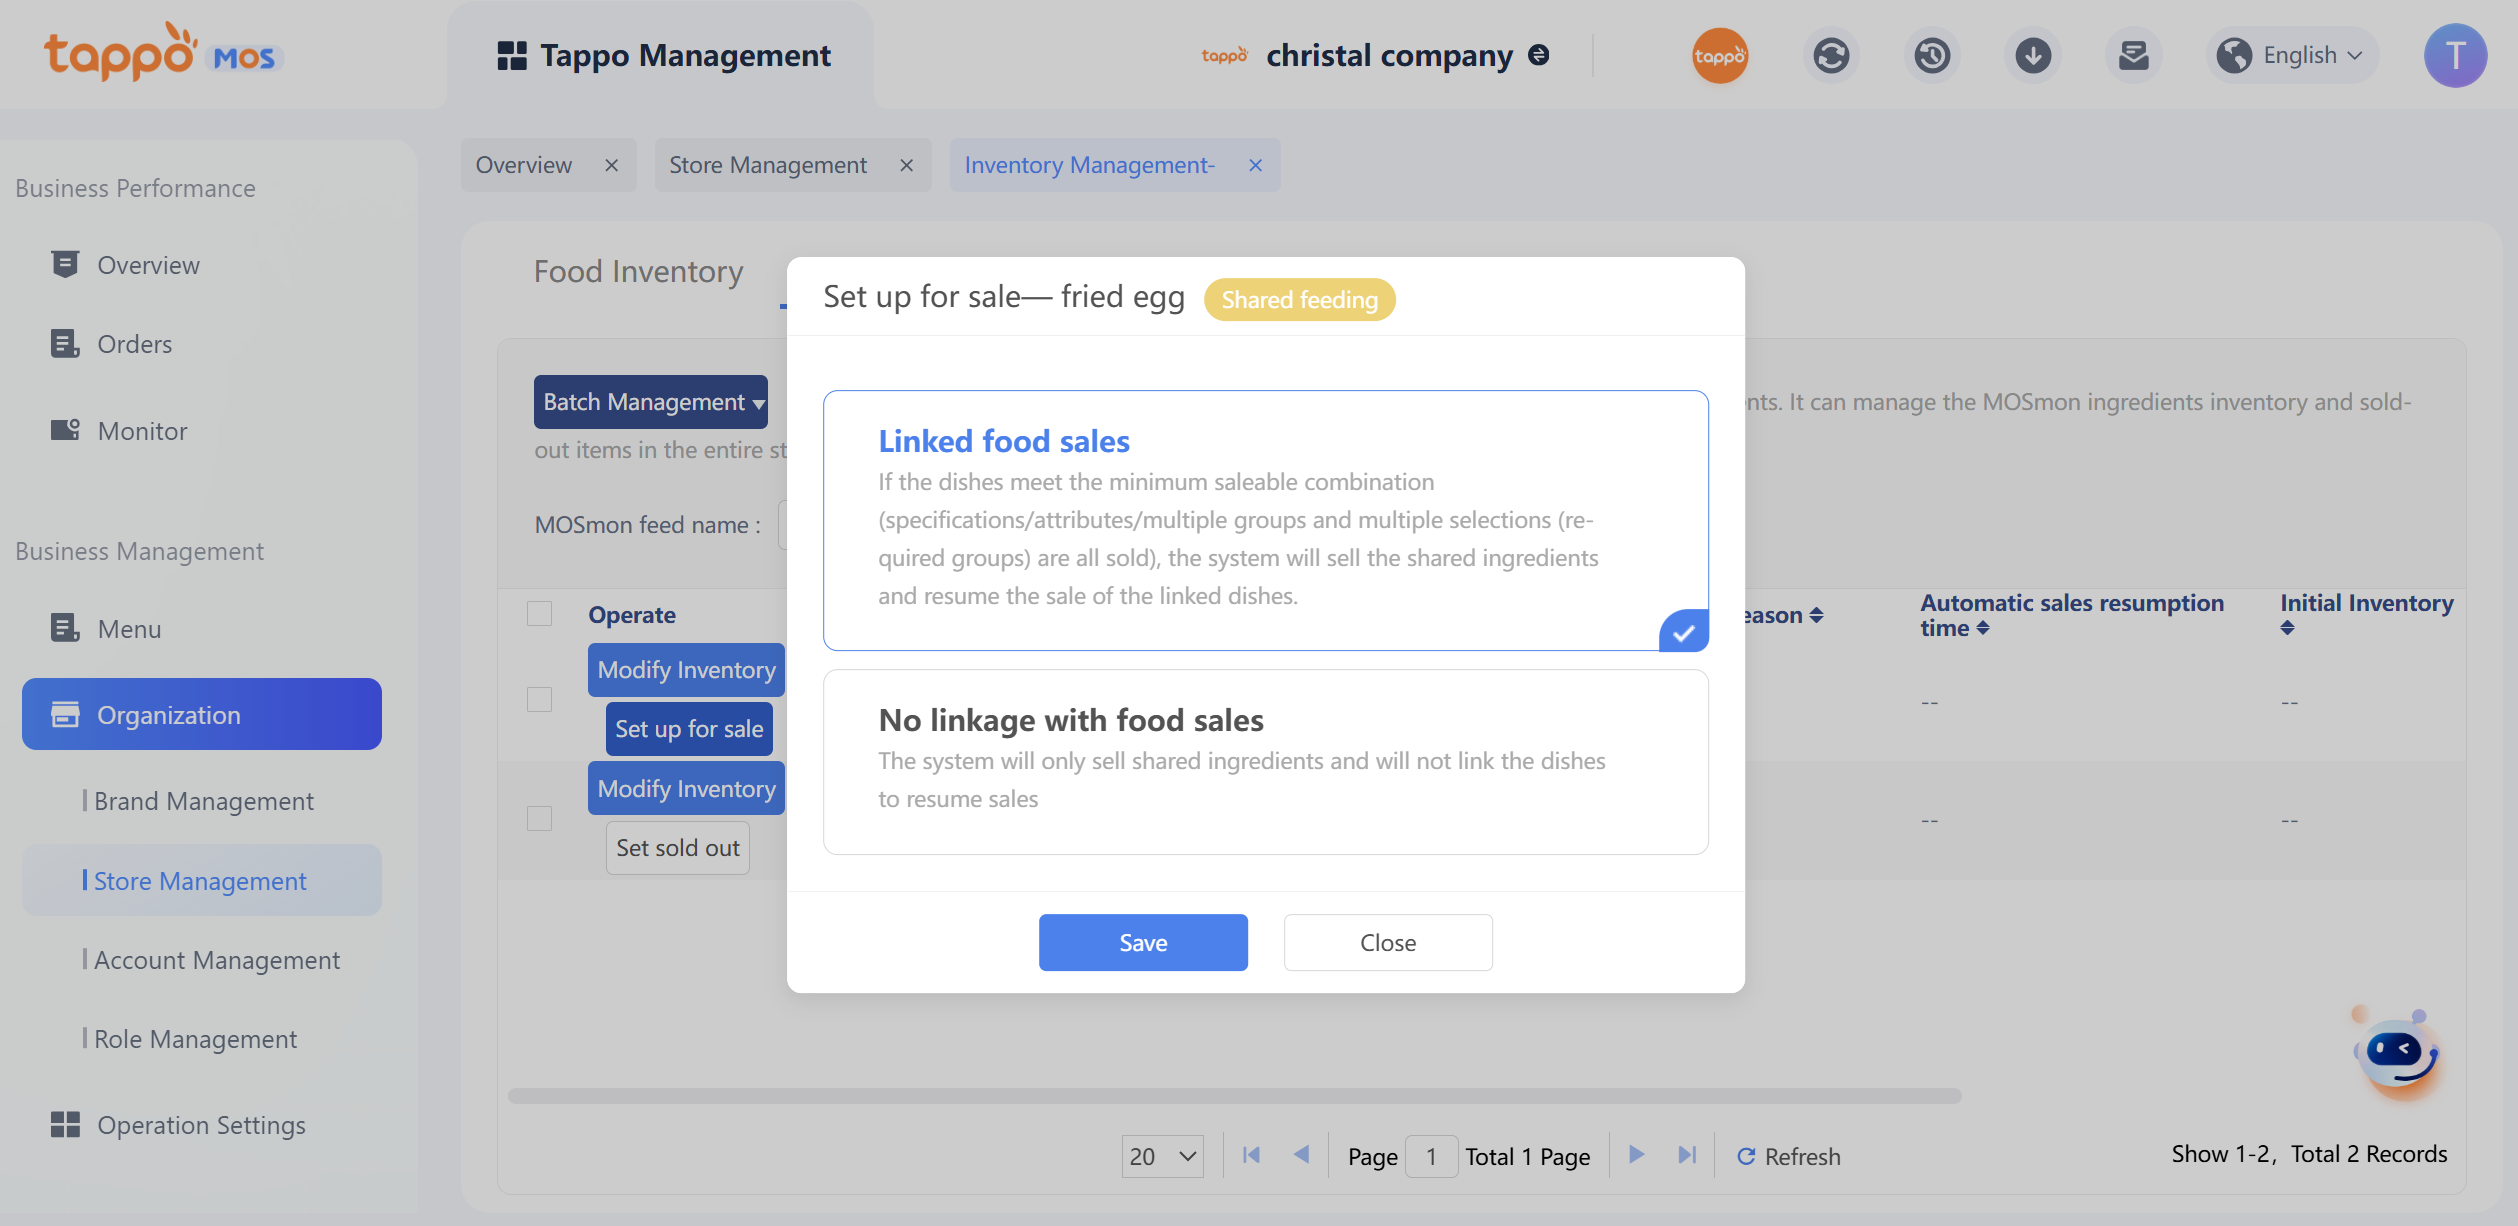
Shared Feed Stock
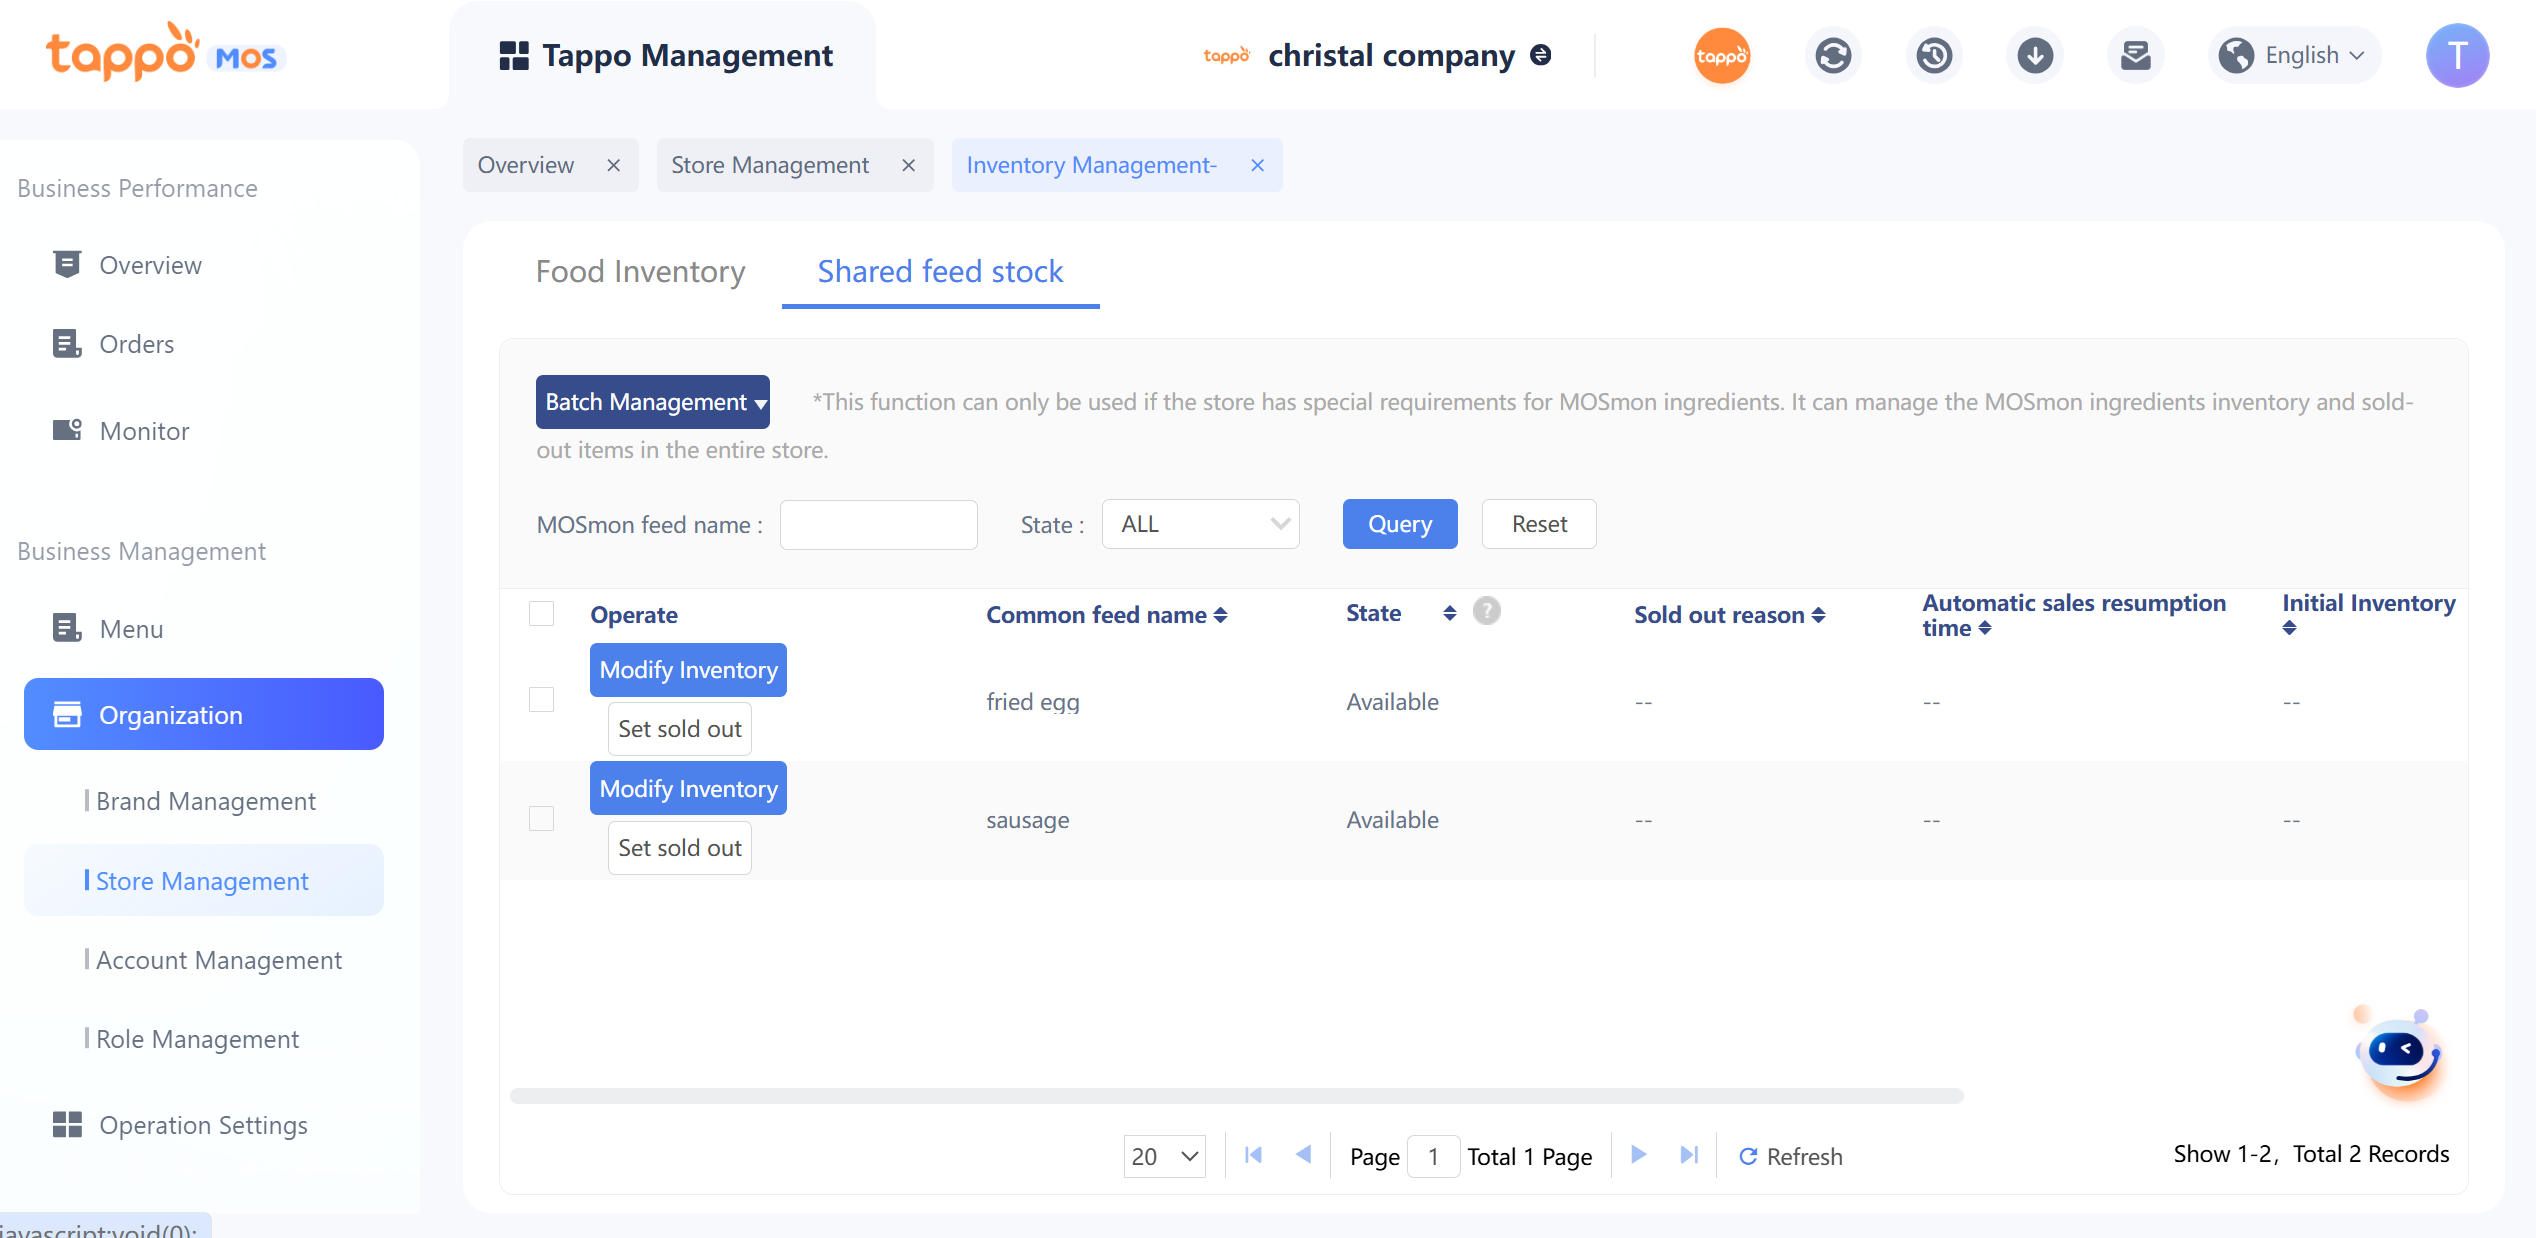
Click Store [Inventory Management] – [Shared feed stock] in the store list to open the shared topping inventory management page. Inventory management includes shared topping inventory settings and out-of-stock settings. It also supports batch setting of shared toppings to be out of stock/available for sale and synchronization to third parties. The list displays the store’s shared topping information by default. The store can operate on shared toppings that need to set inventory or be out of stock.
1. Modify Shared Topping Inventory
a. Find the shared topping and click [Modify Inventory].
b. Set the initial inventory and remaining inventory of the shared topping.