

- Home
- Guides
- TAPPO Management
- Menu Management
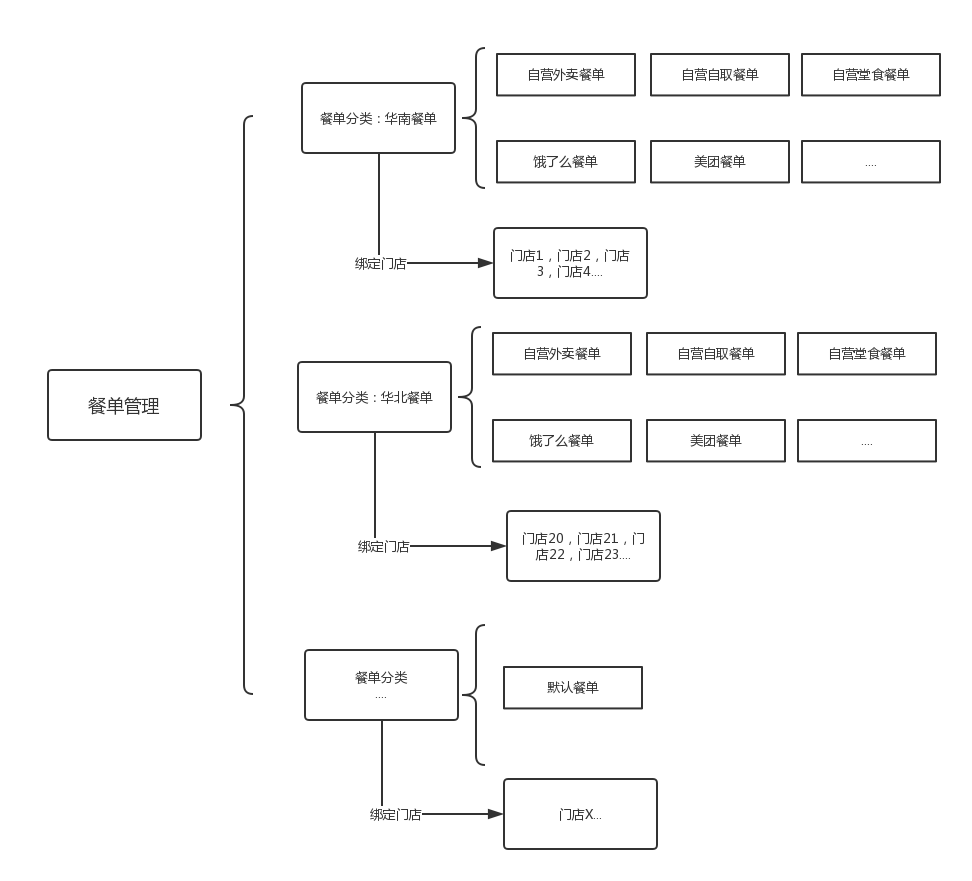
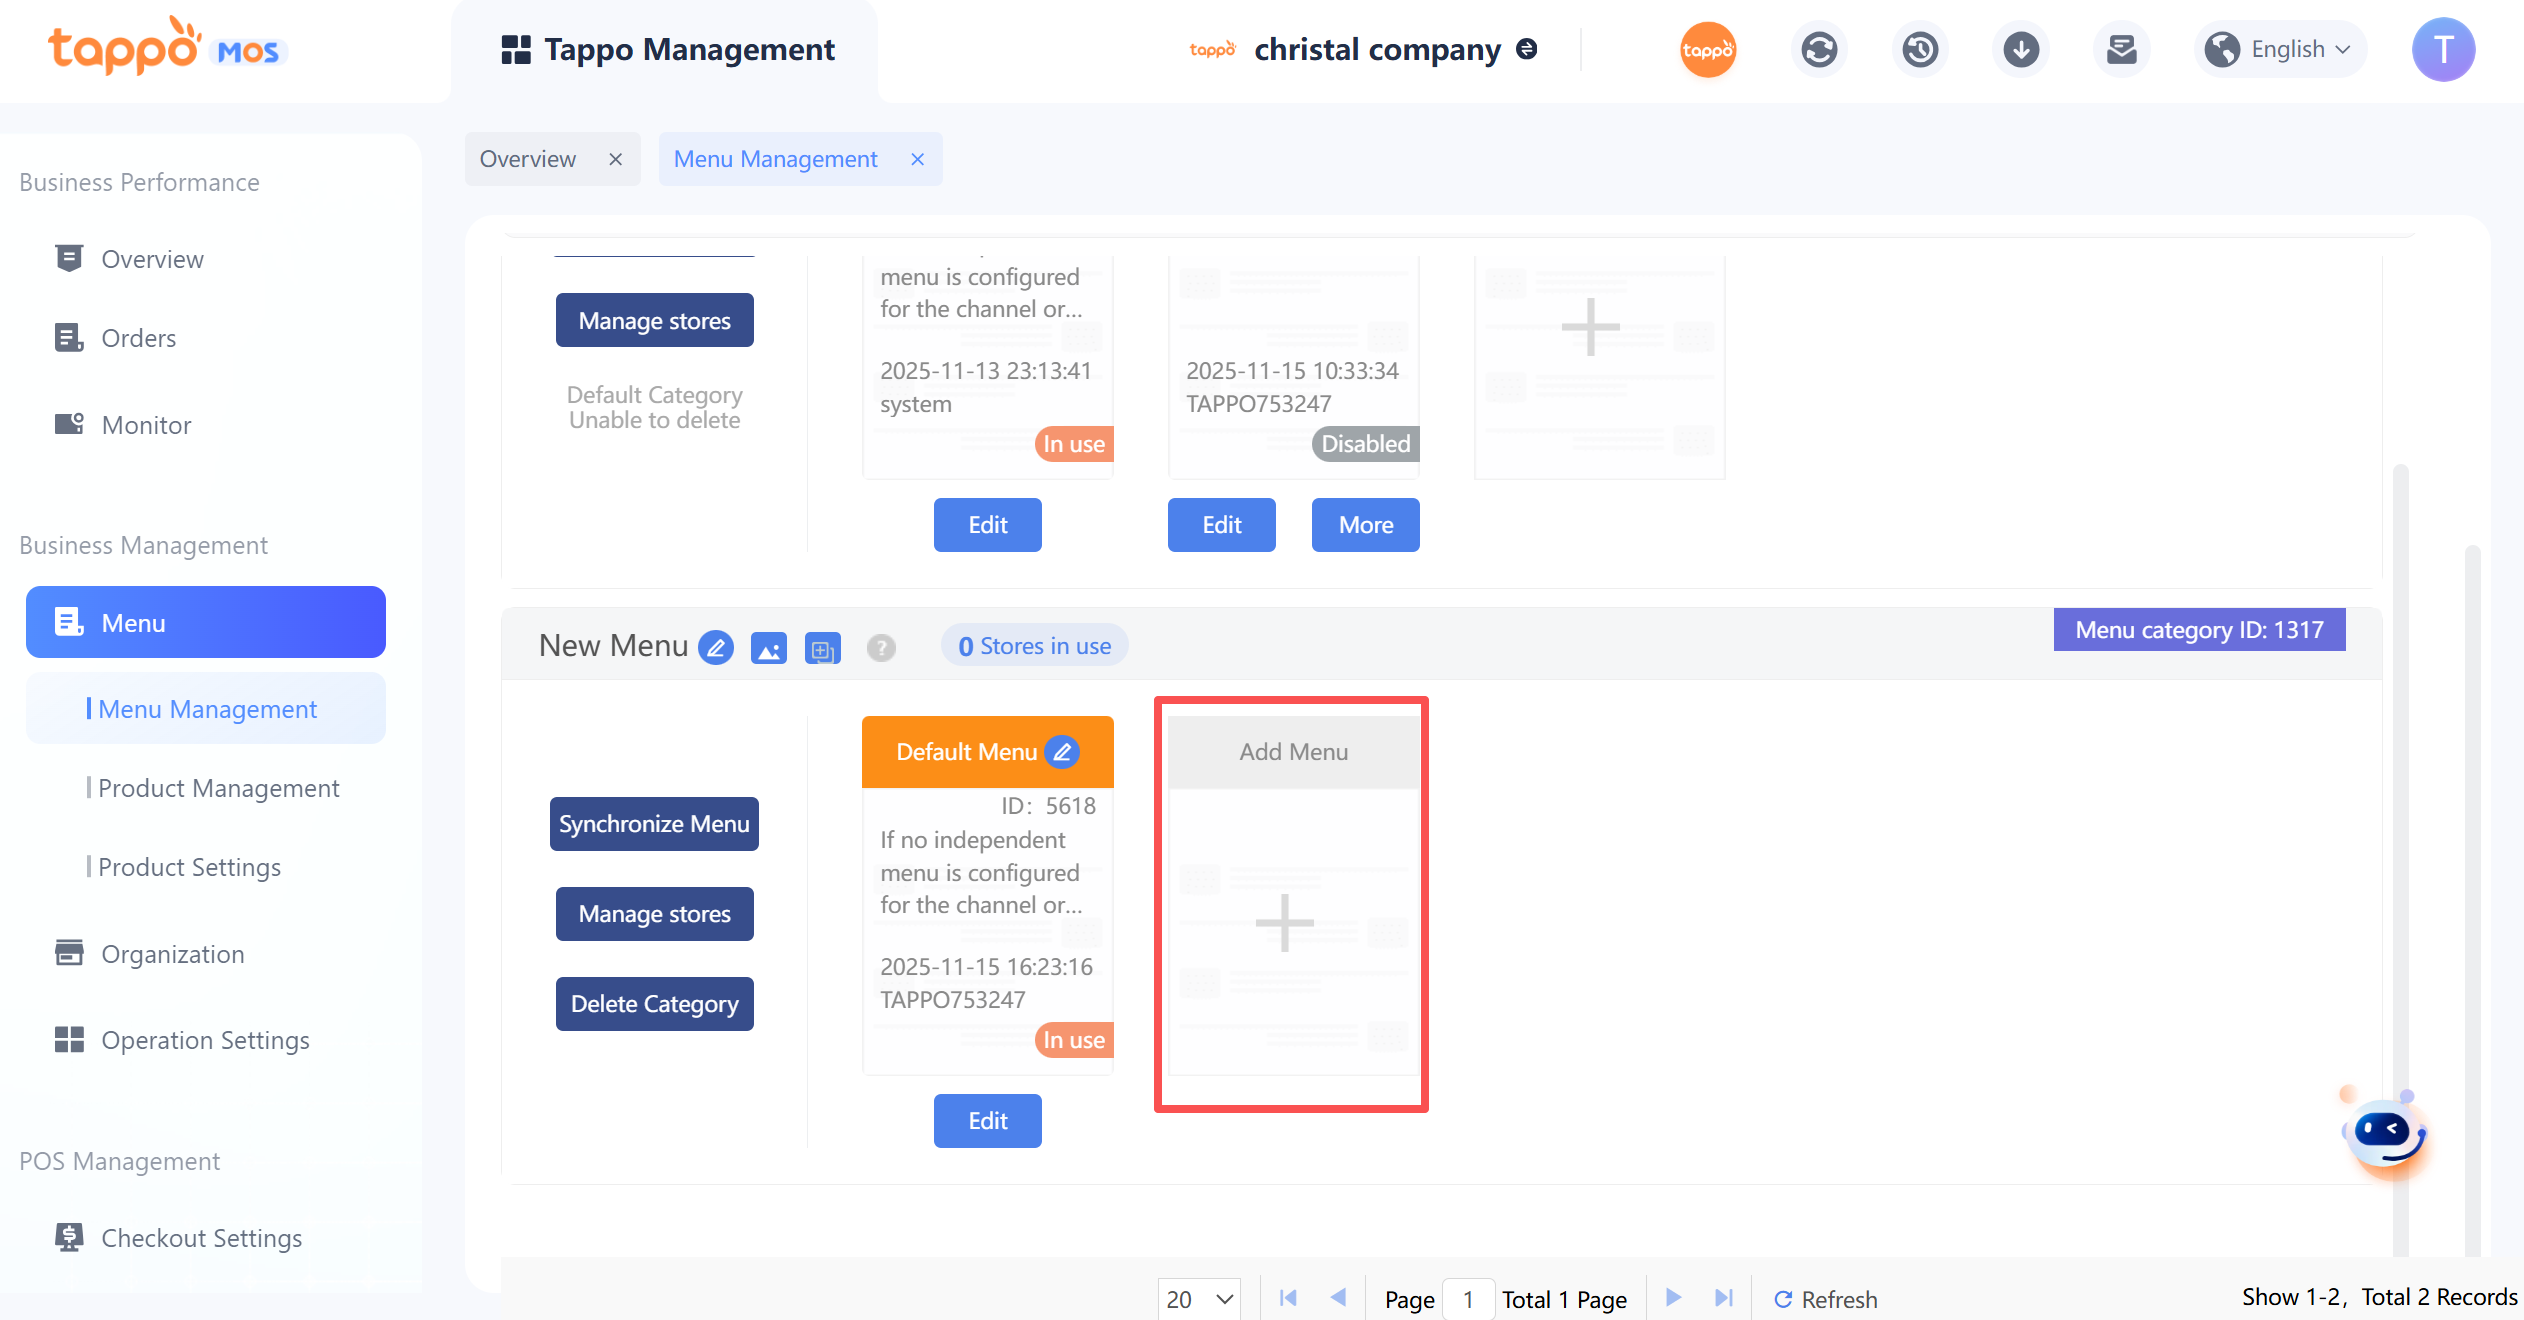
In Menu Management, “Menu Categories” are used to manage menus for different stores. Stores in the same “Menu Category” use the same set of menus. A “Menu Category” can include menus for different channels and business types, as shown in the figure below.
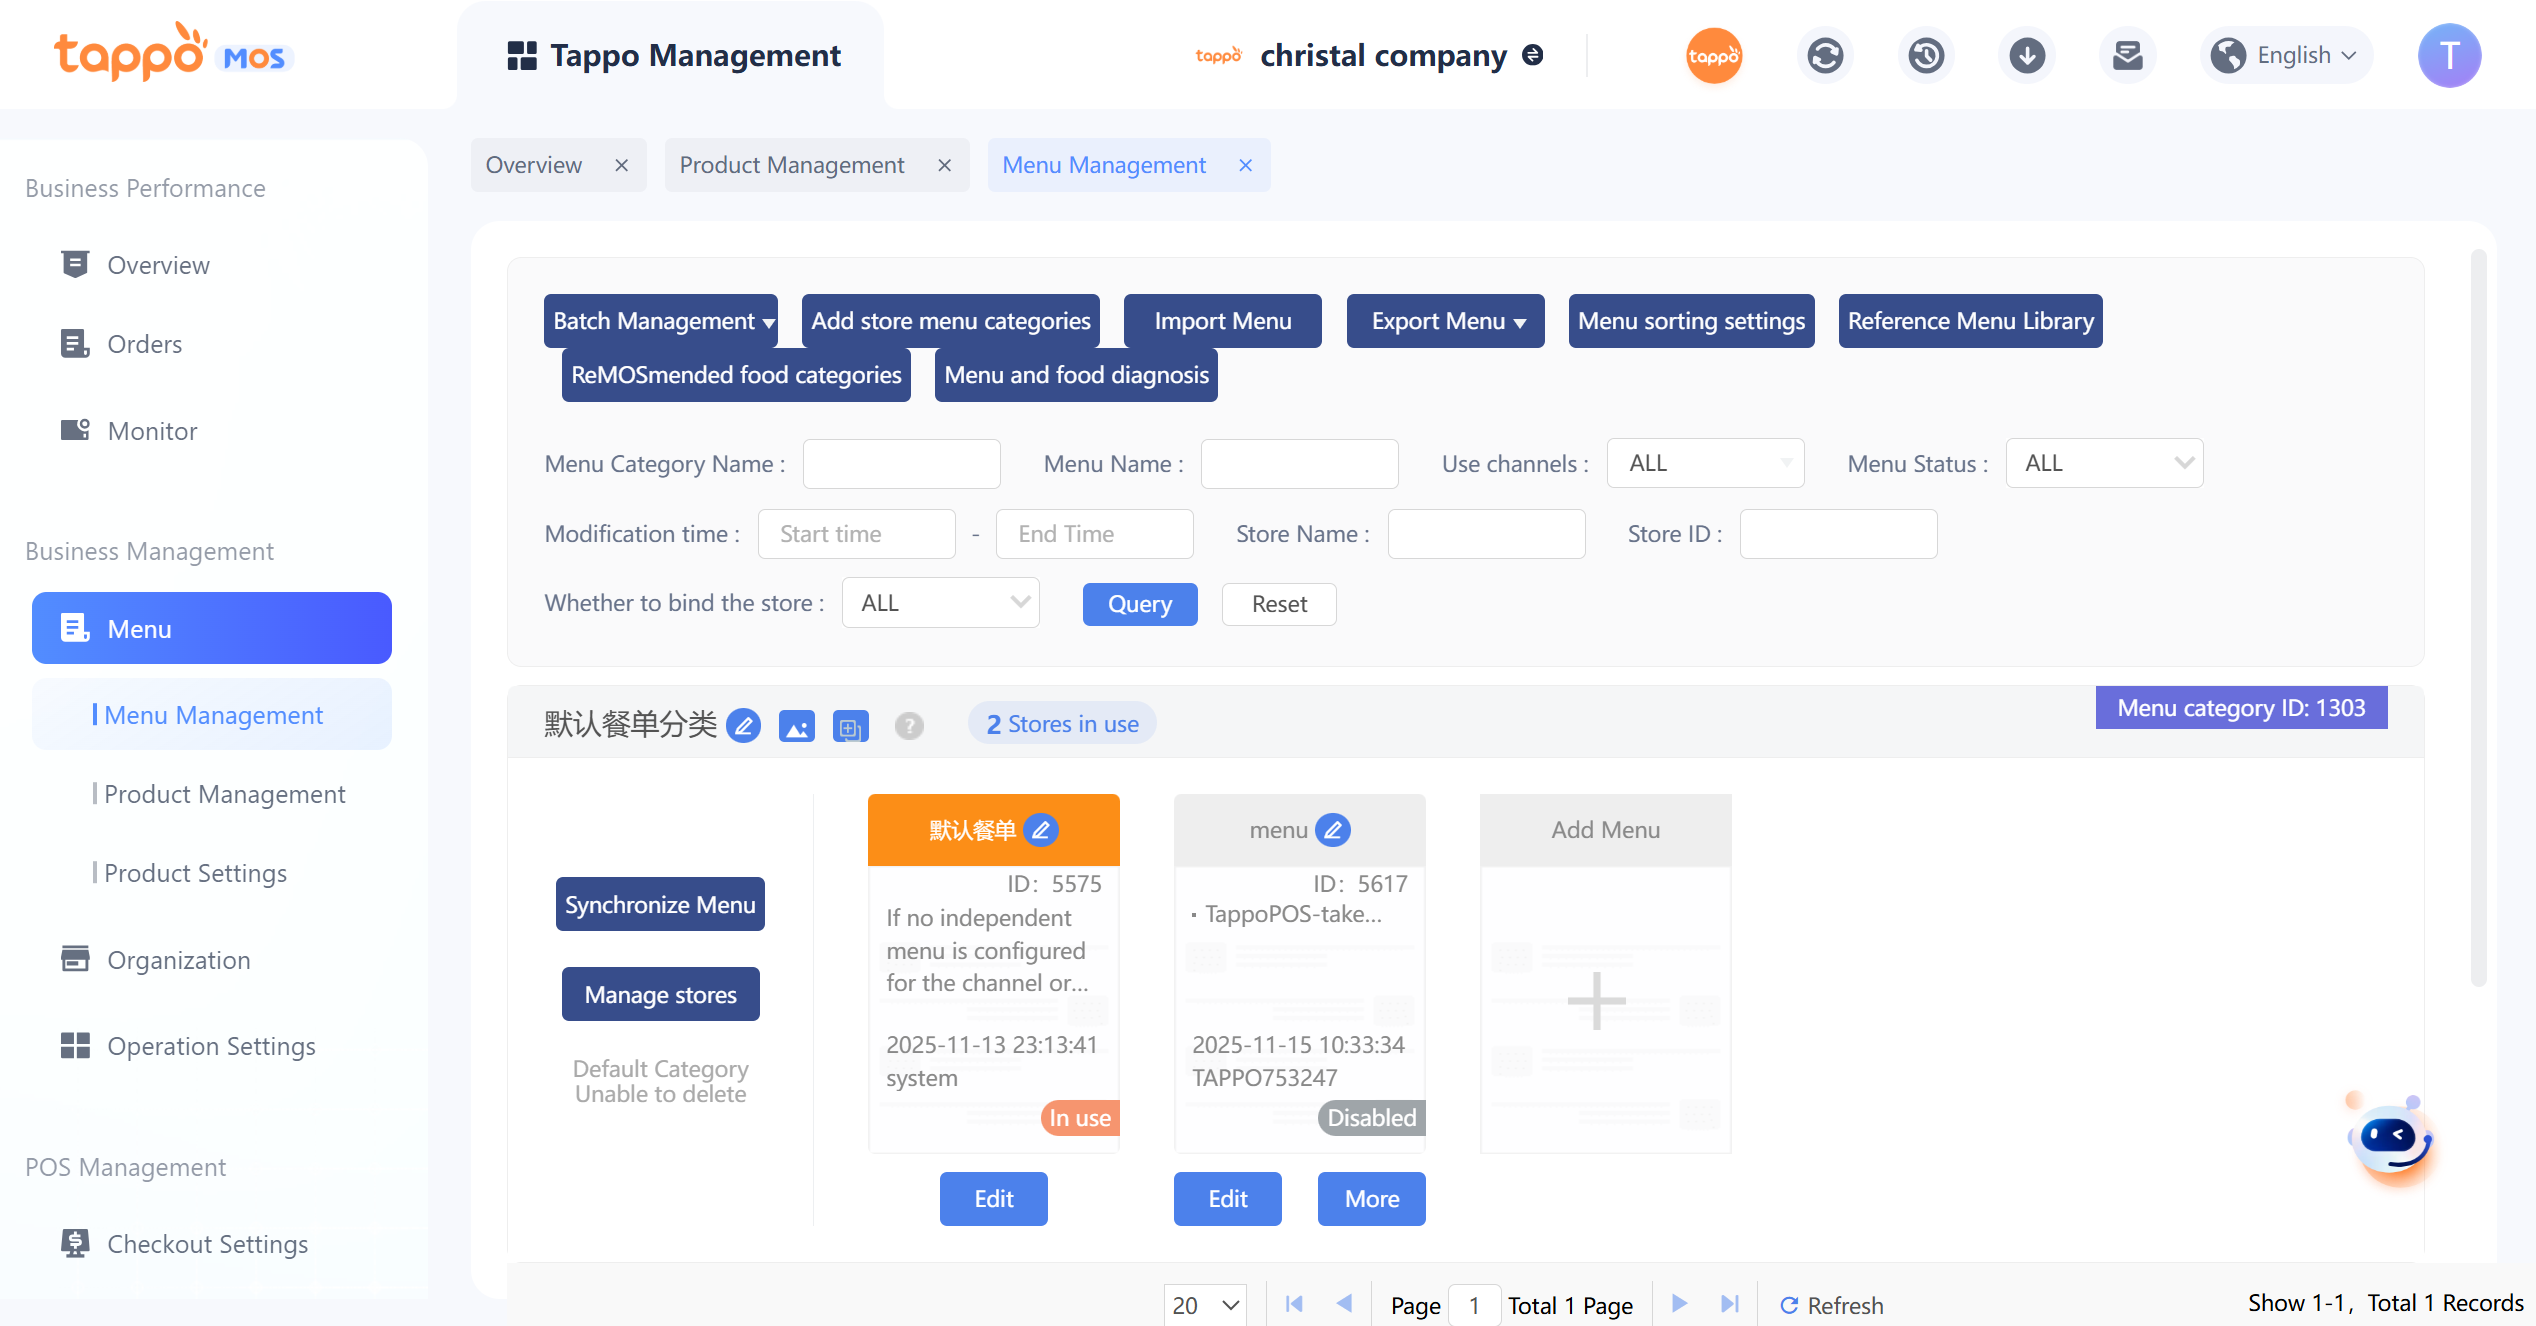
1. Default Menu Category: Each brand has a default menu category that cannot be deleted. Newly created stores are automatically bound to the default menu category.
2. Default Menu: Each menu category has a default menu. If no independent menu is configured for a channel or business type, the default menu will be used, as shown in the figure below.
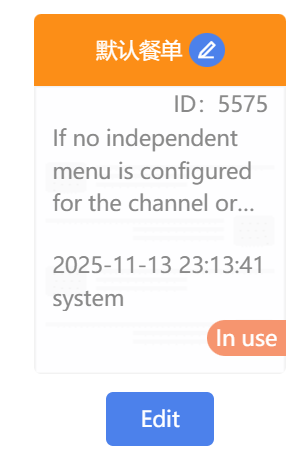
3. Independent Menu: Channels or business types with configured independent menus will no longer use the default menu. An independent menu can be bound to multiple channels or business types. If an independent menu is set to inactive, the default menu will be used.
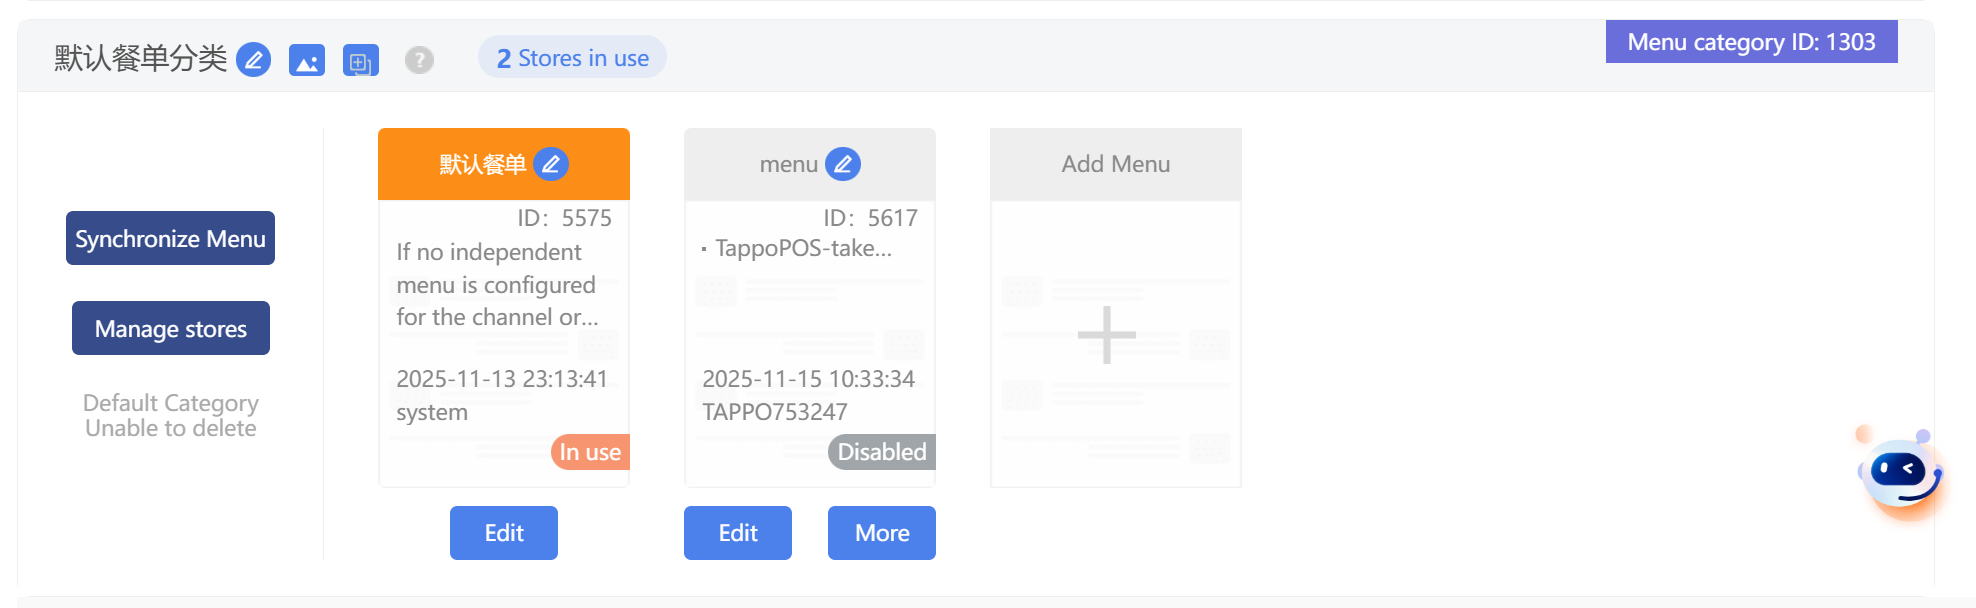
Add Menu Category
1. Click [Add Store Menu Categories]
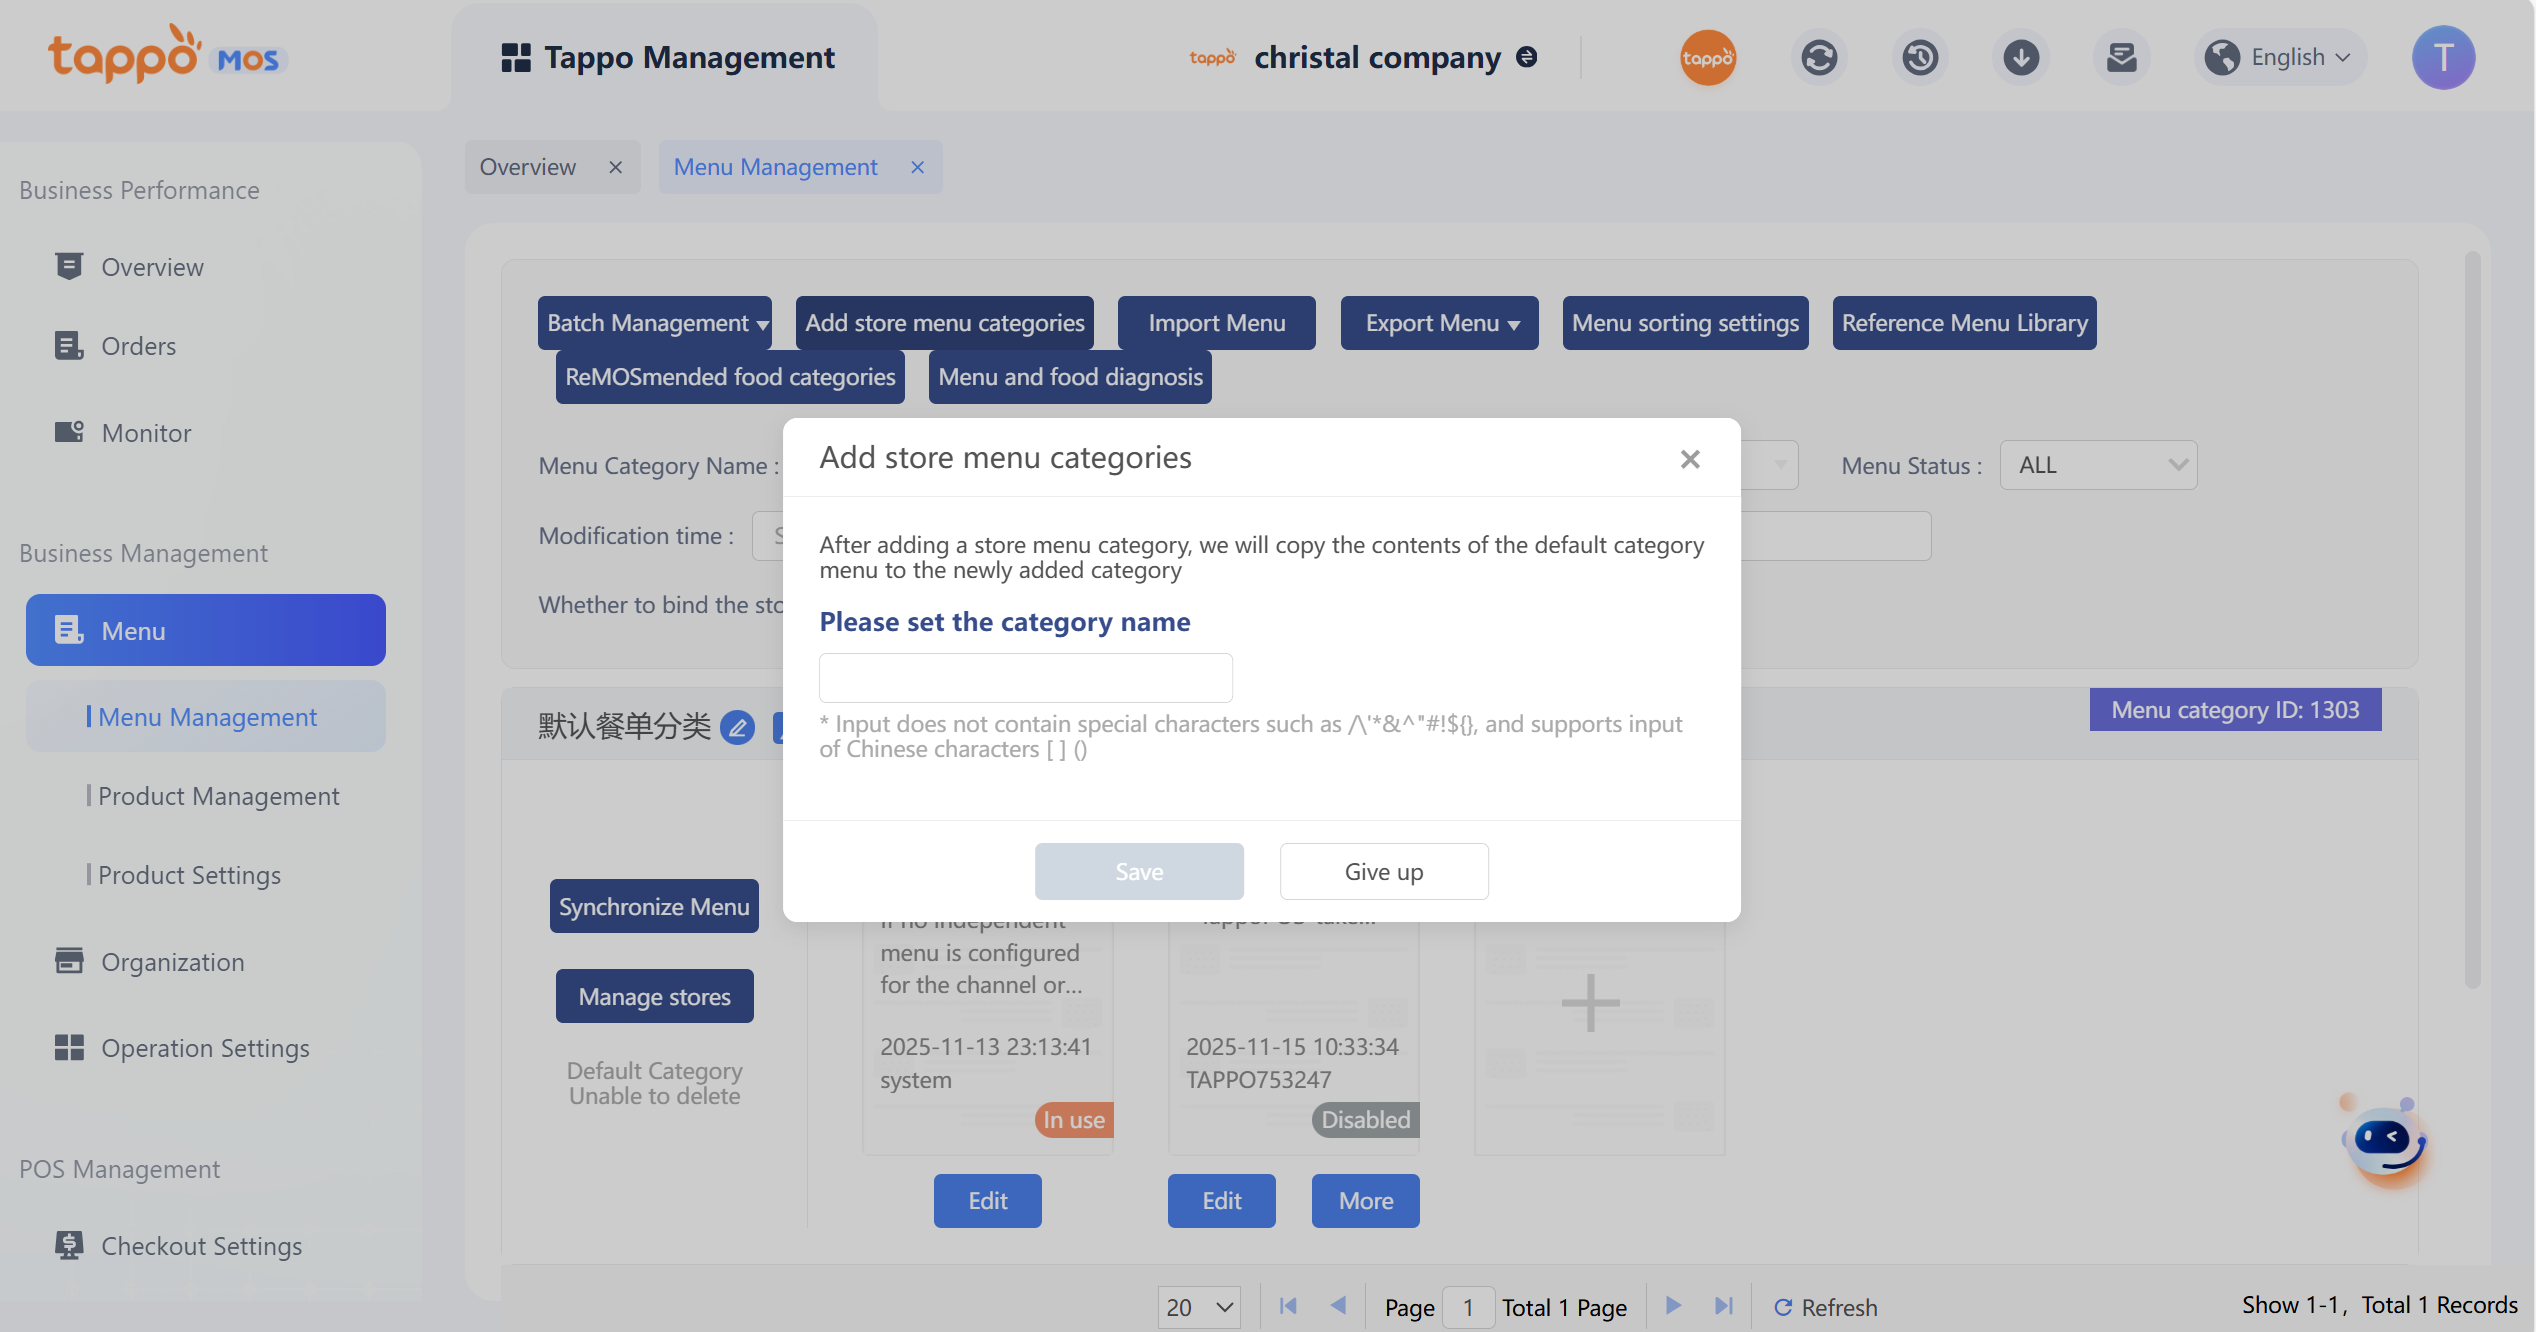
2. Enter the name and click Save. The system will copy the content of the “Default Menu” in the “Default Menu Category” to the default menu of this menu category.
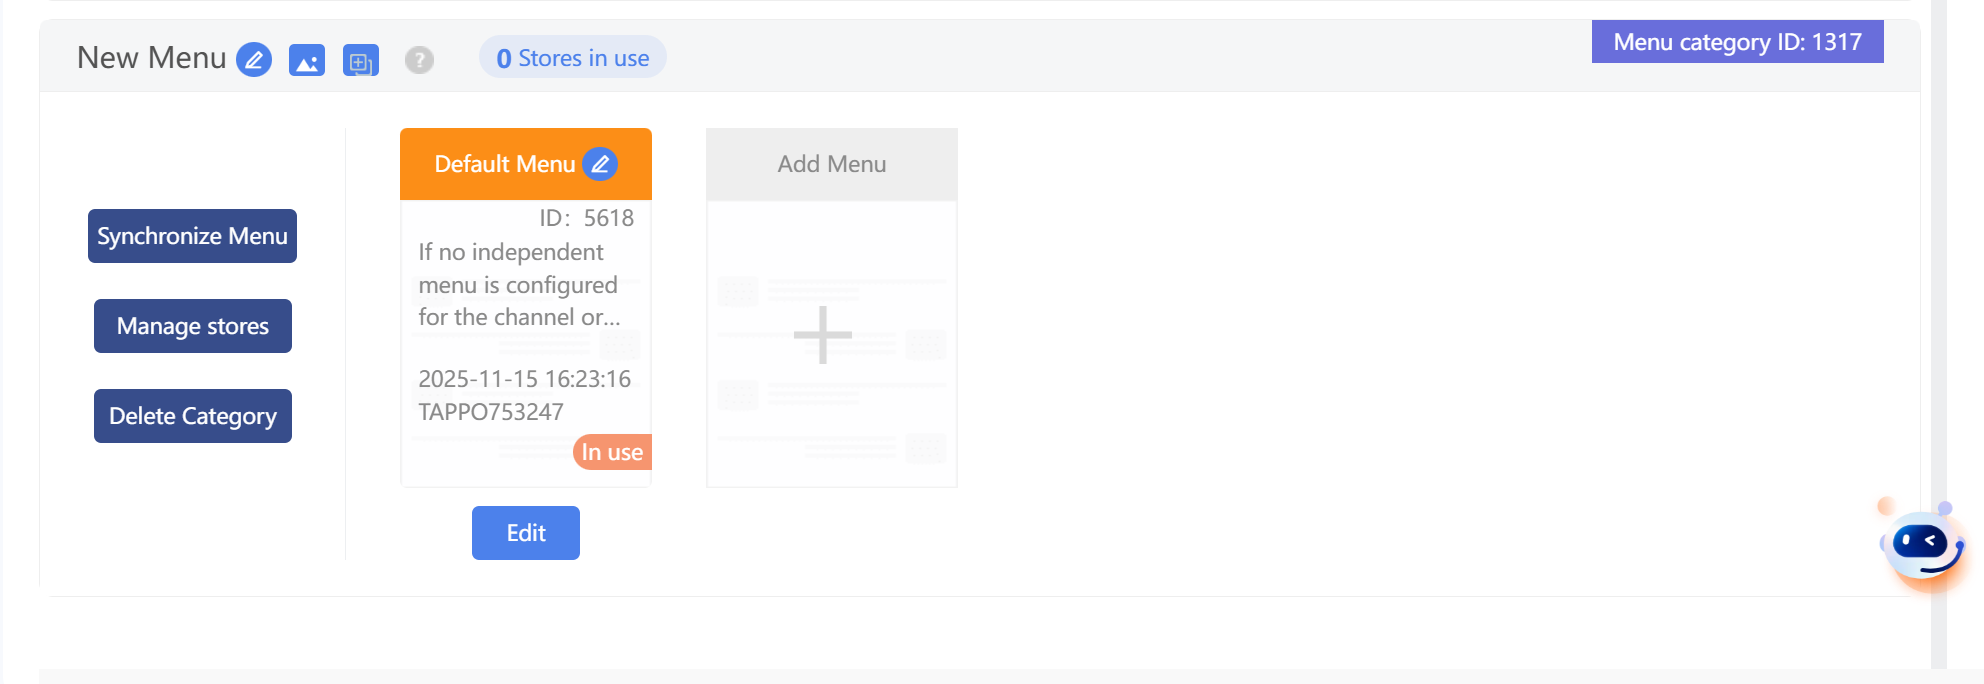
3. Click [Move in Stores] to bind stores that will use this menu category.
Create Menu
The steps to create a menu are as follows:
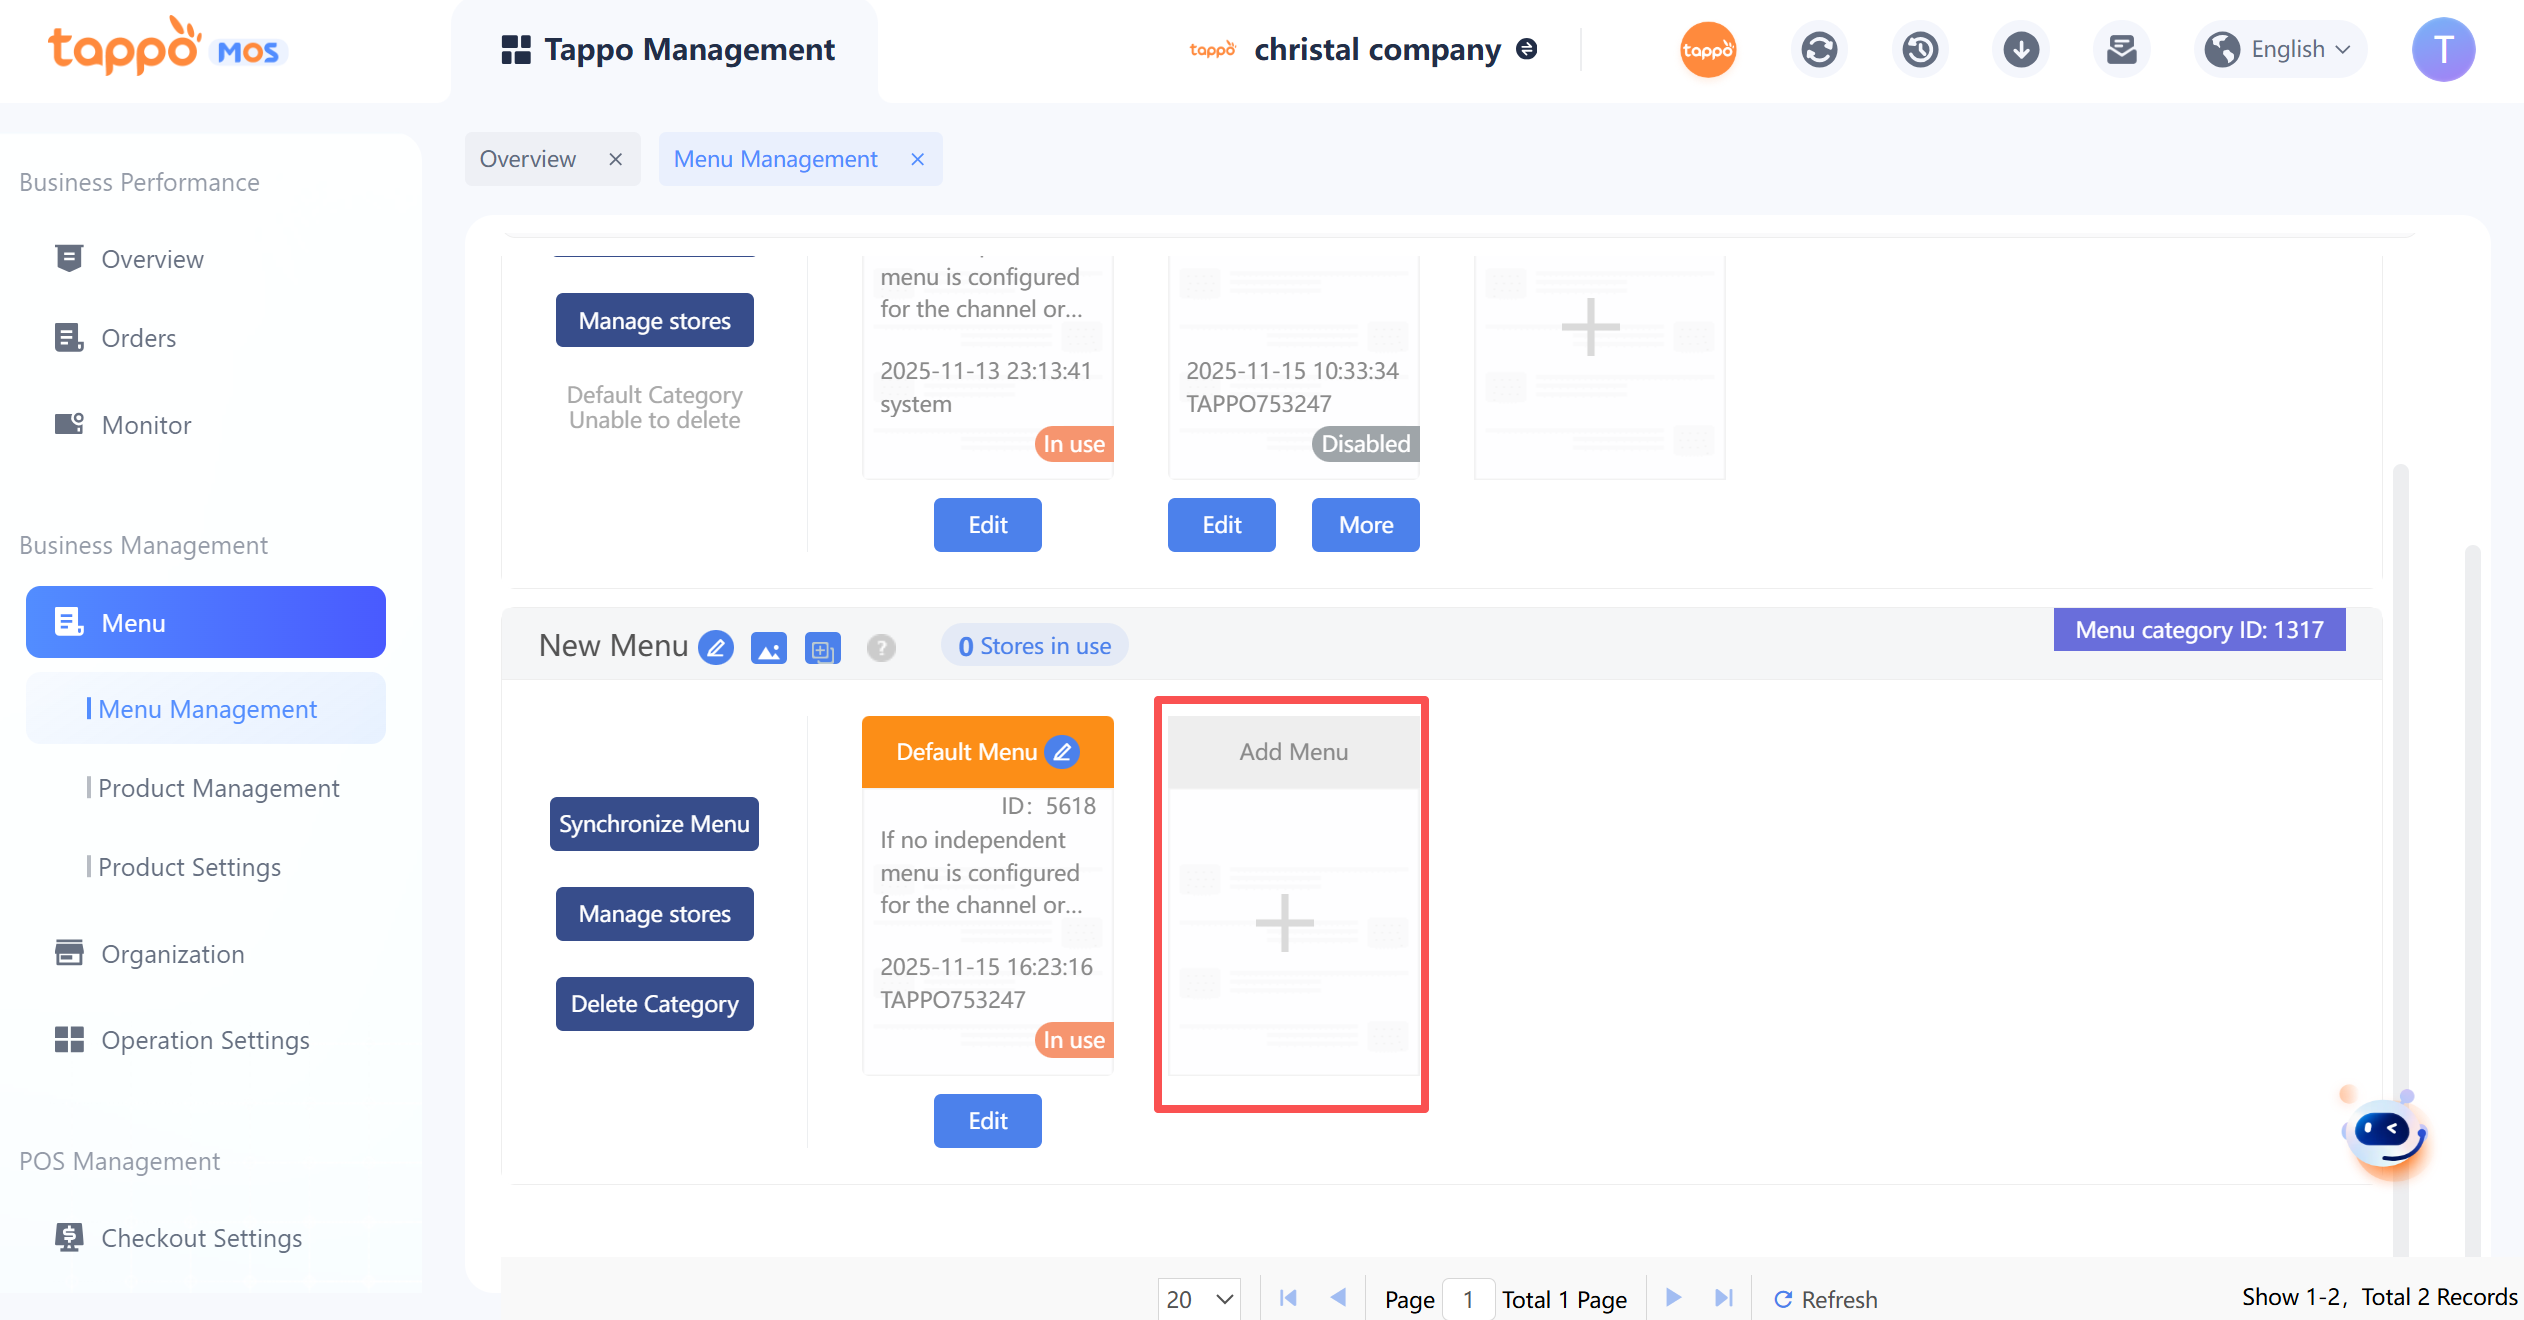
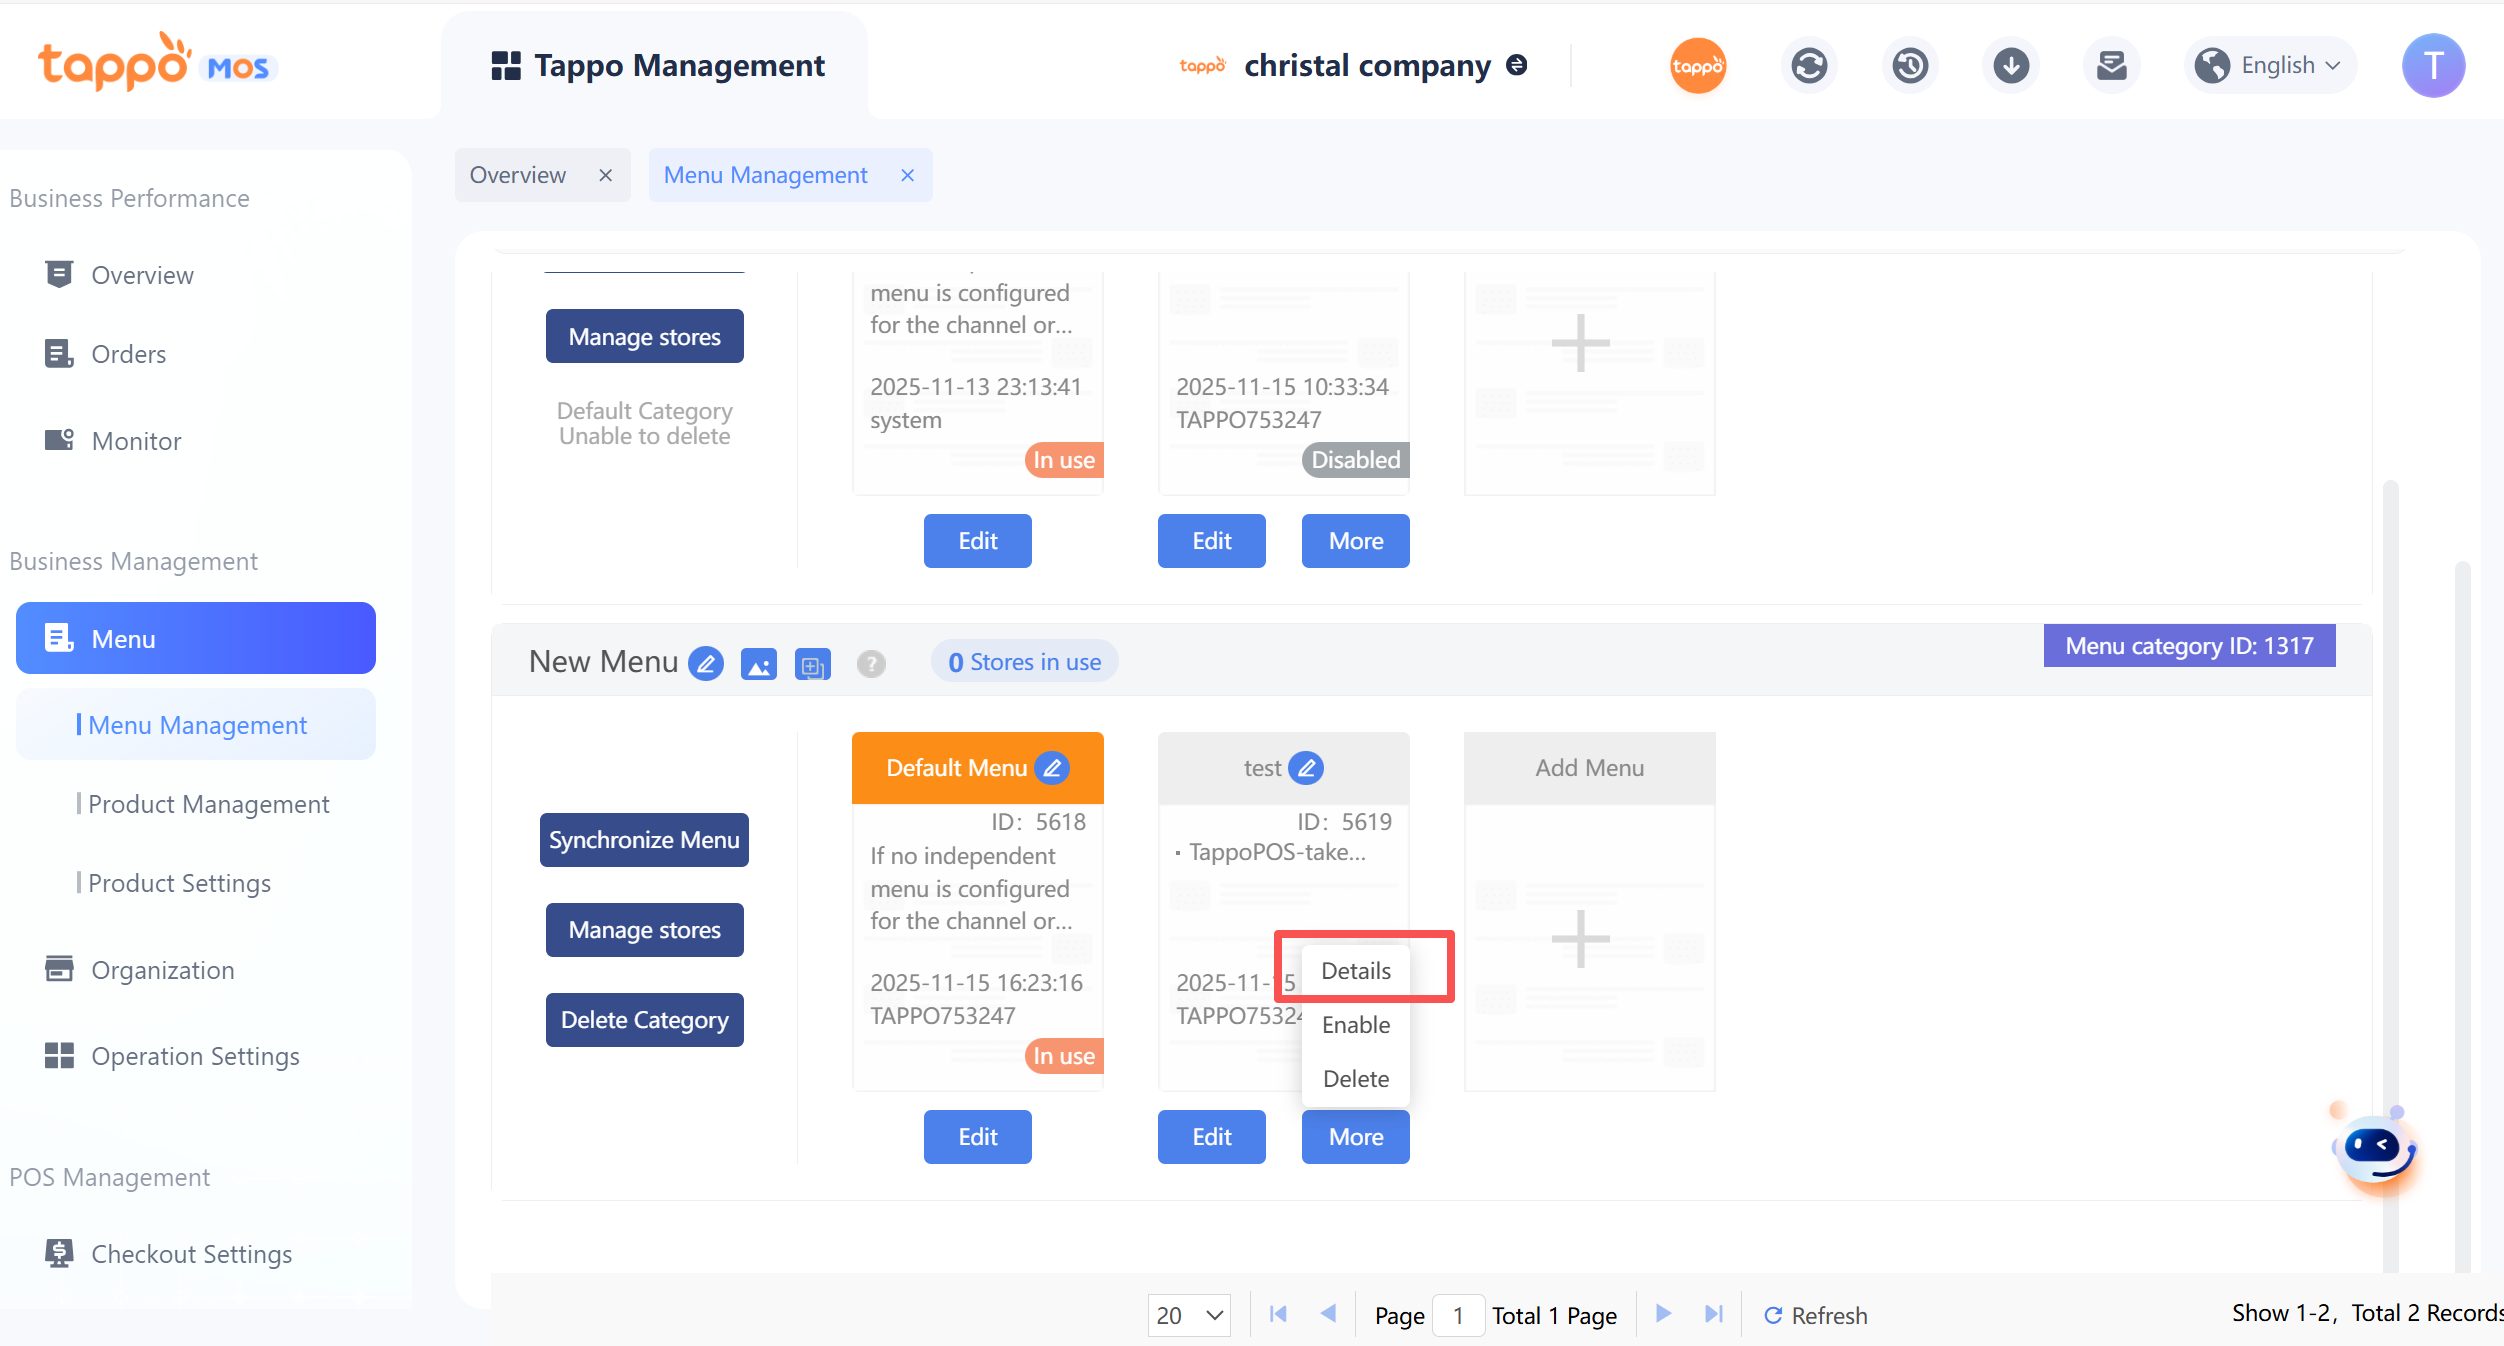
1. Select a menu category and click the [Add Menu] button at the end of the menu category, as shown in the figure below.
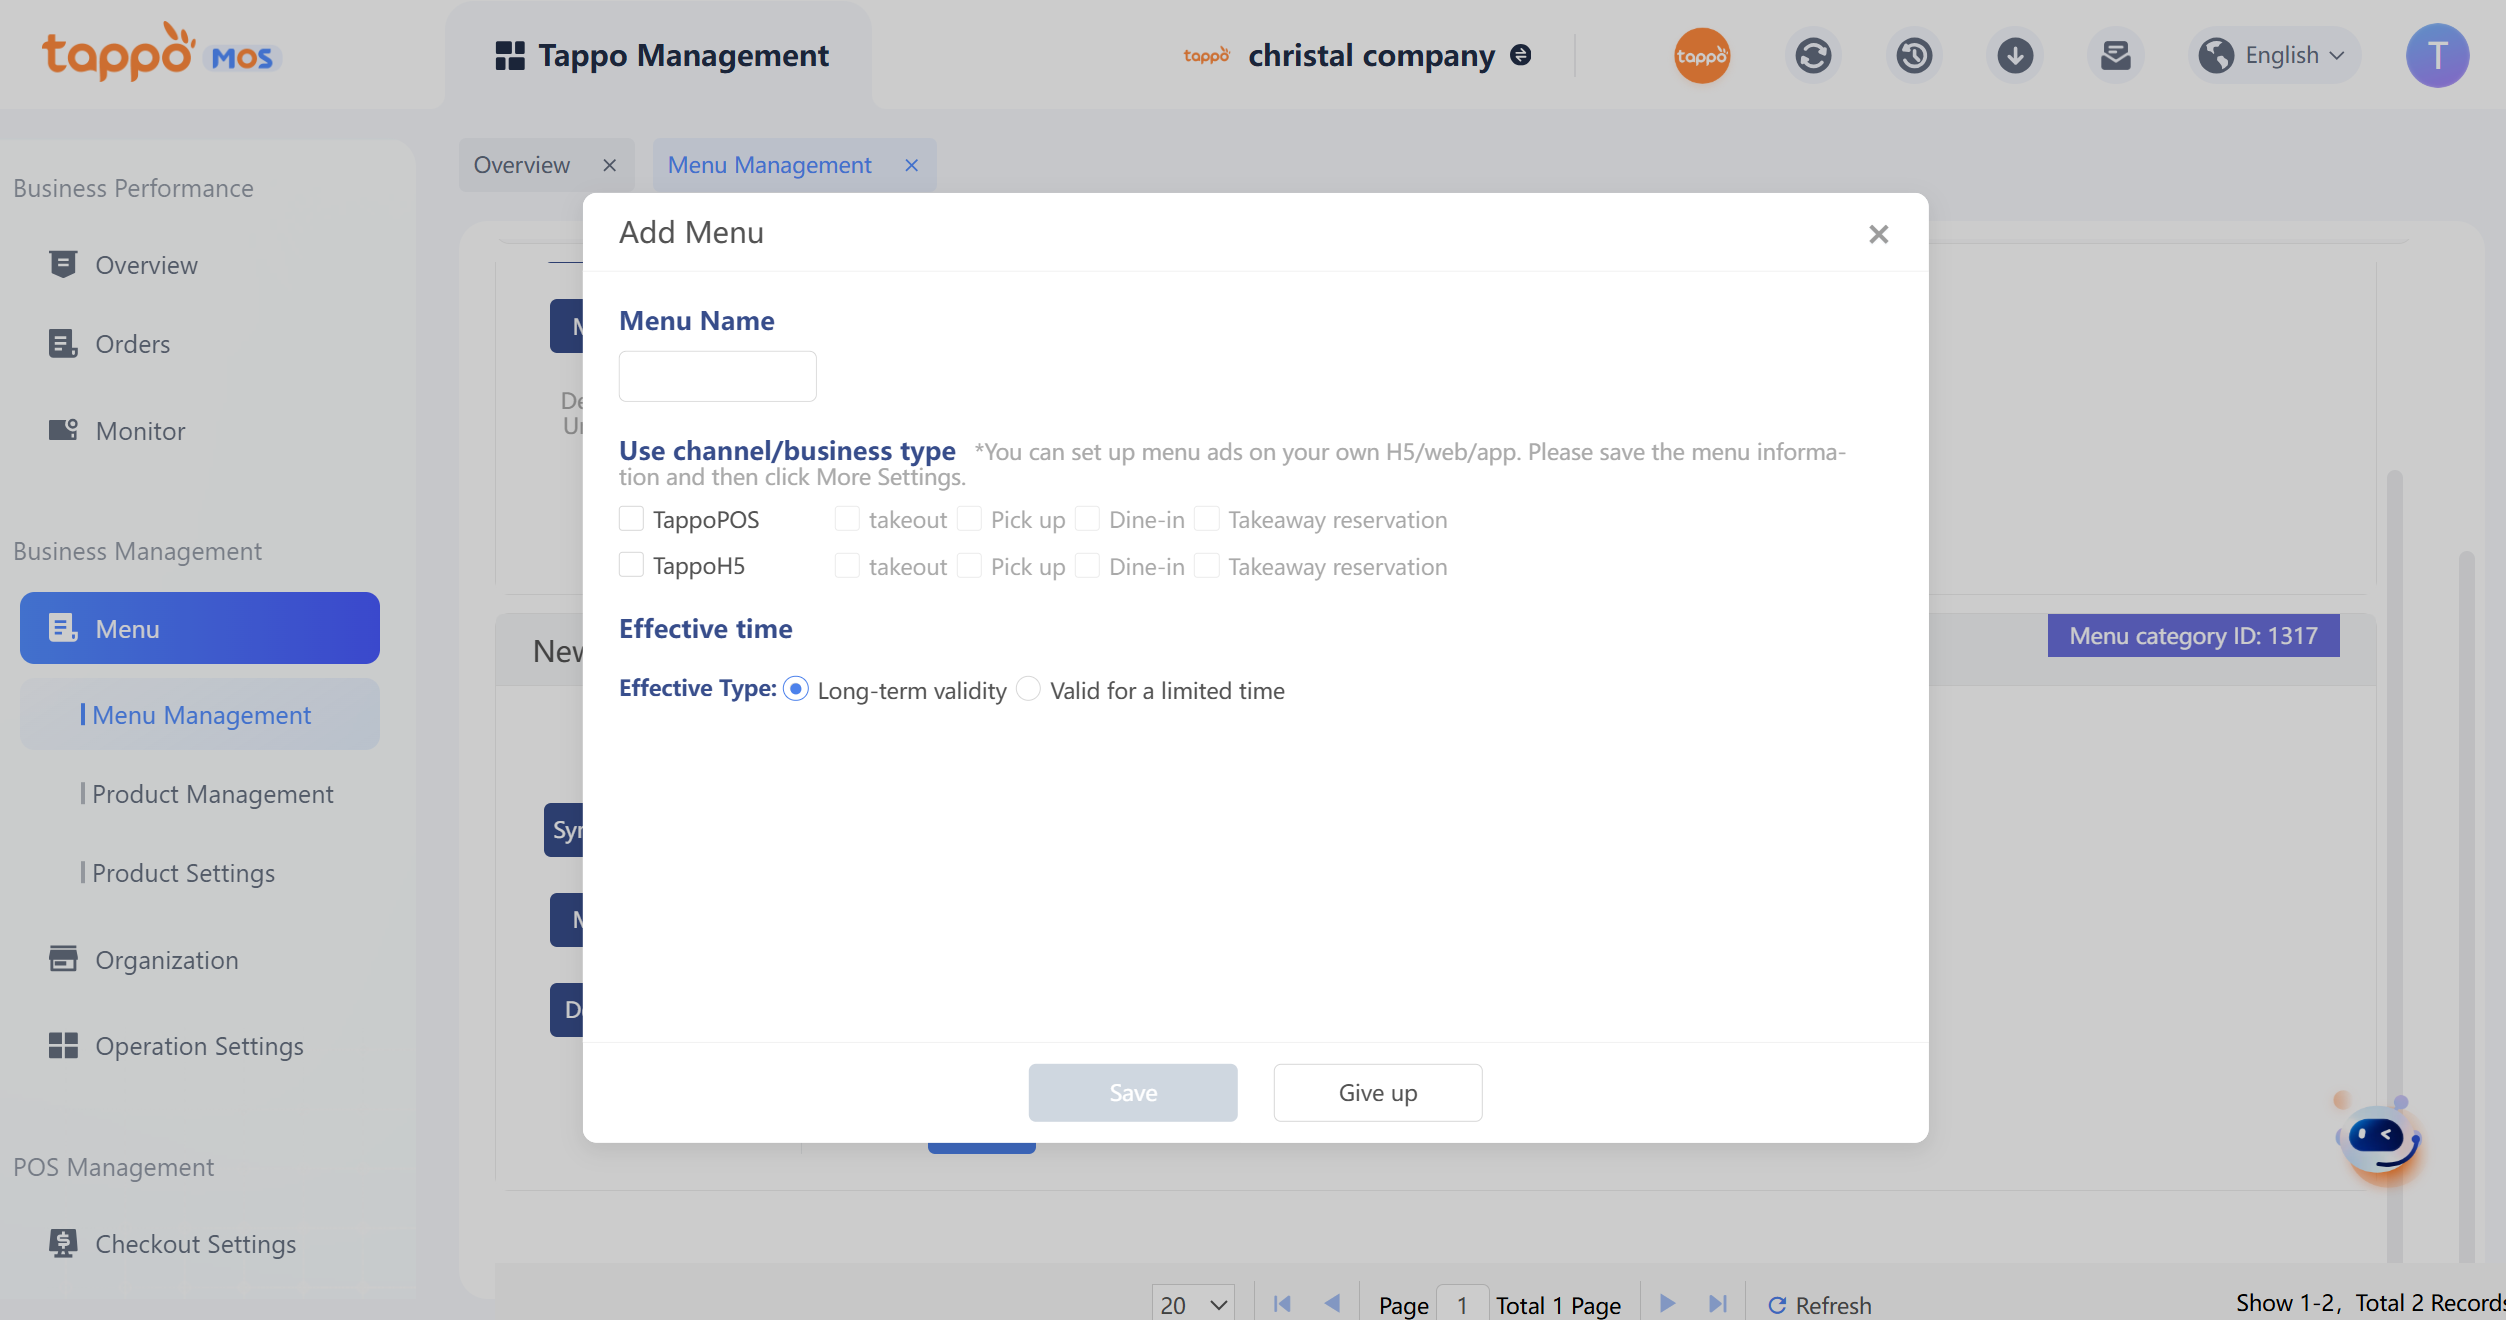
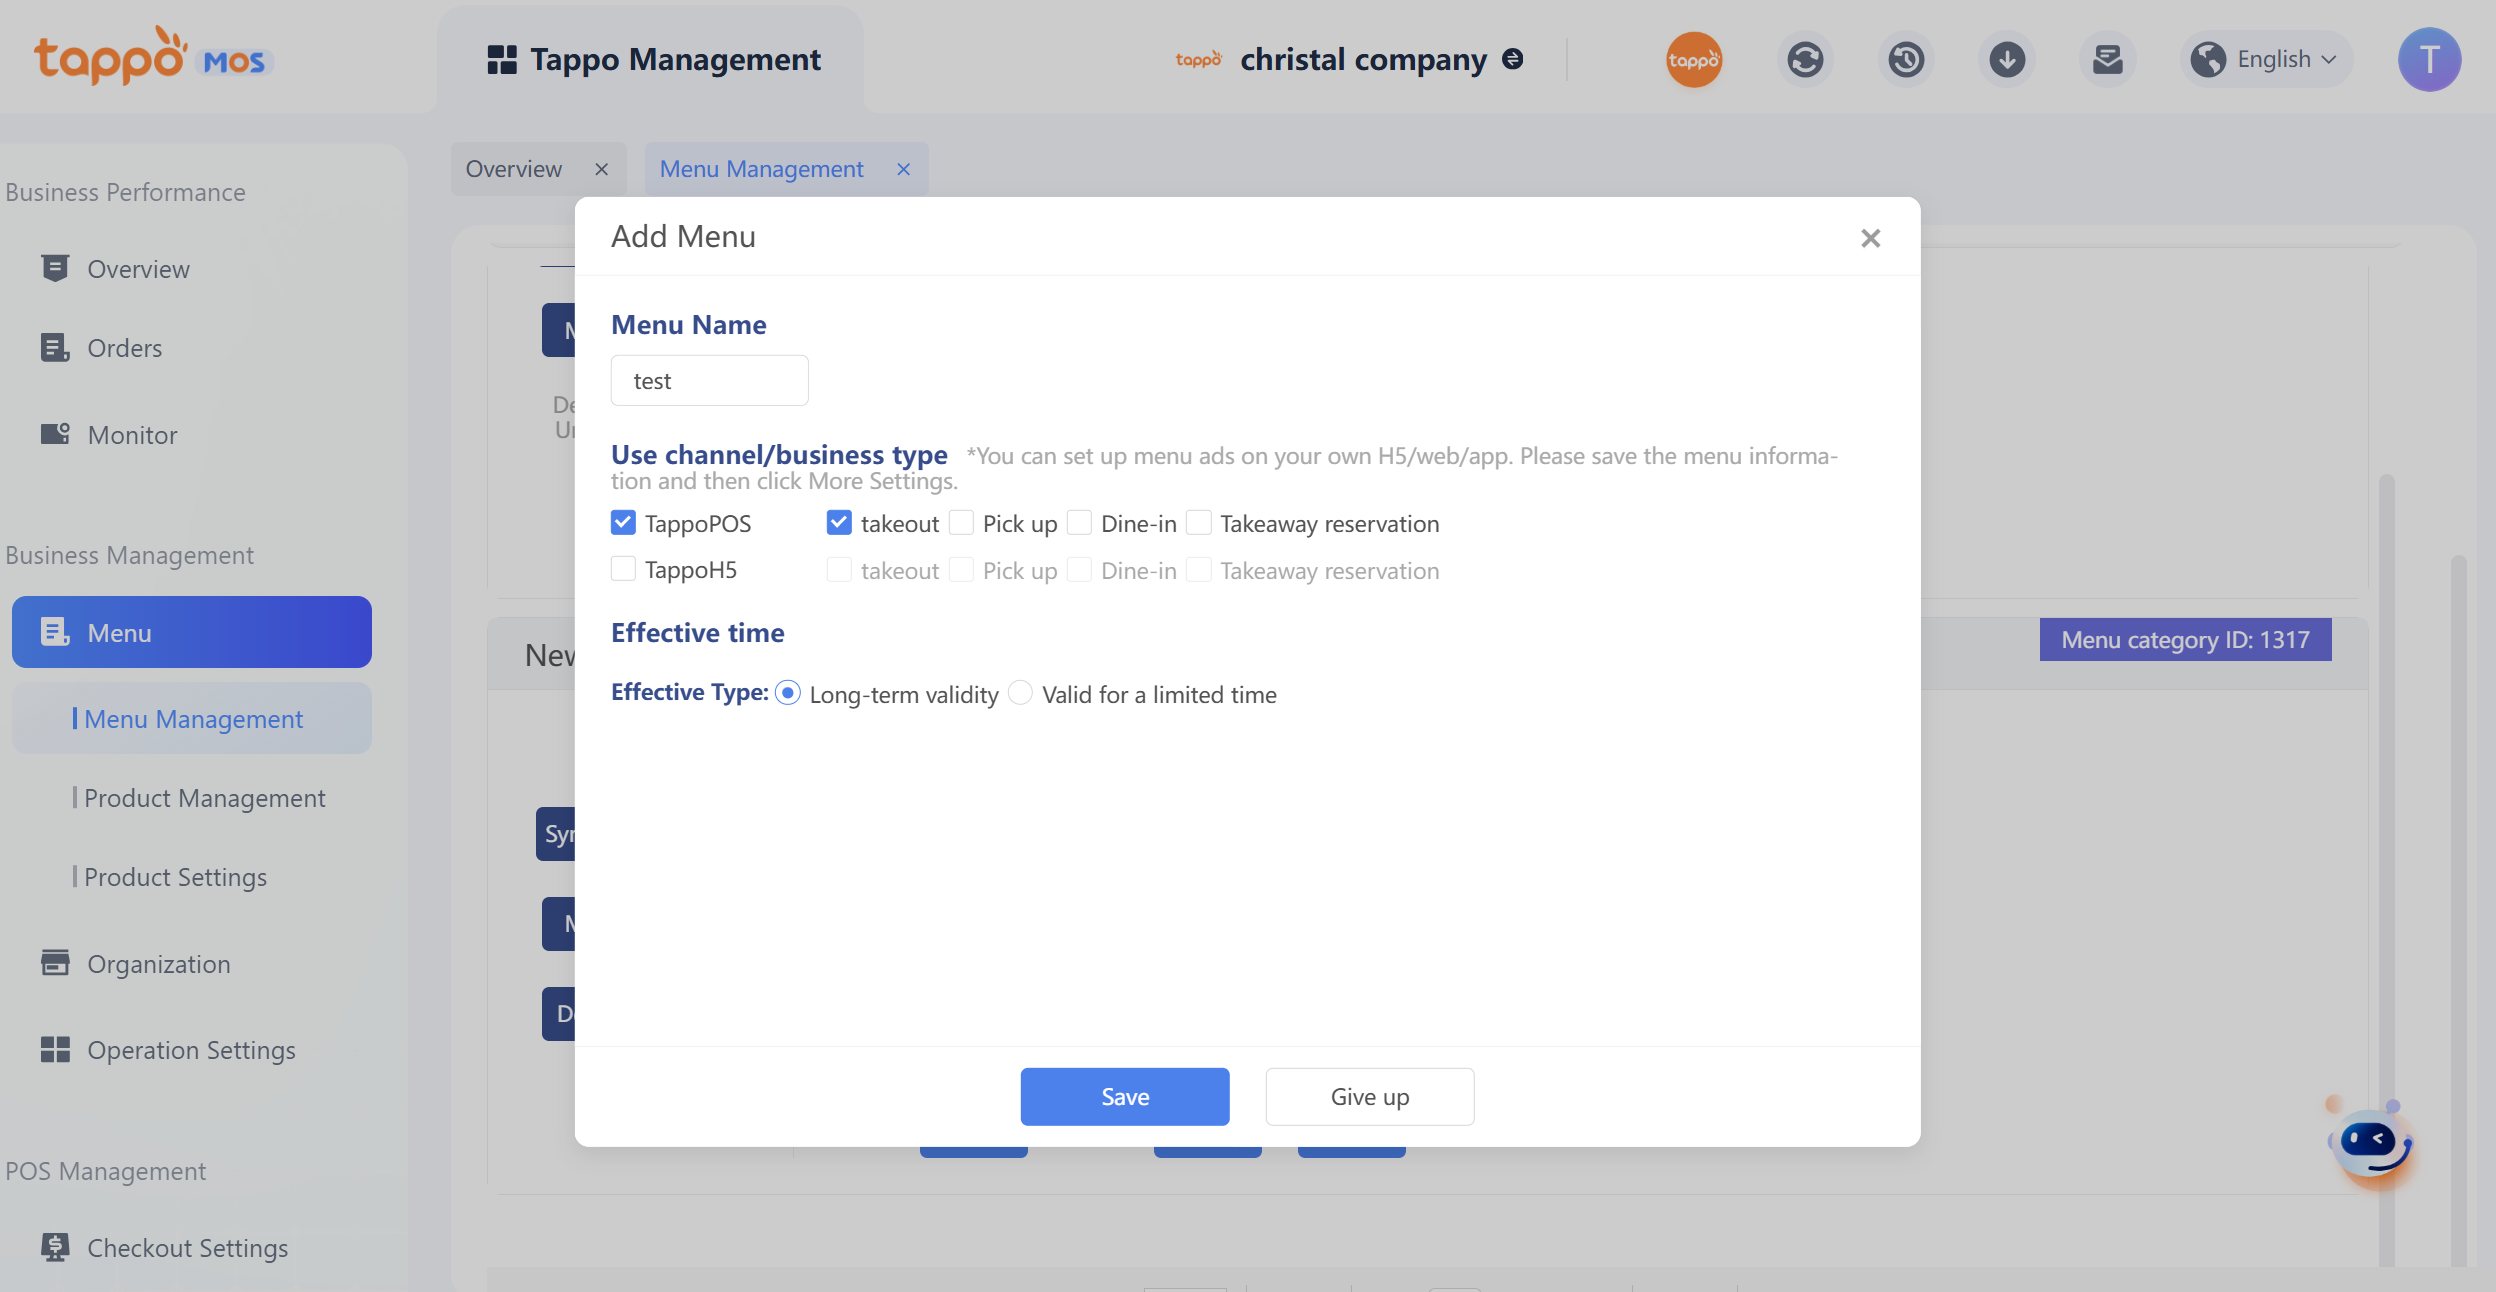
2. Enter the menu name, select the channel or business type, and click Save, as shown in the figure below. If an independent menu has already been configured for the channel or business type, it cannot be created again.
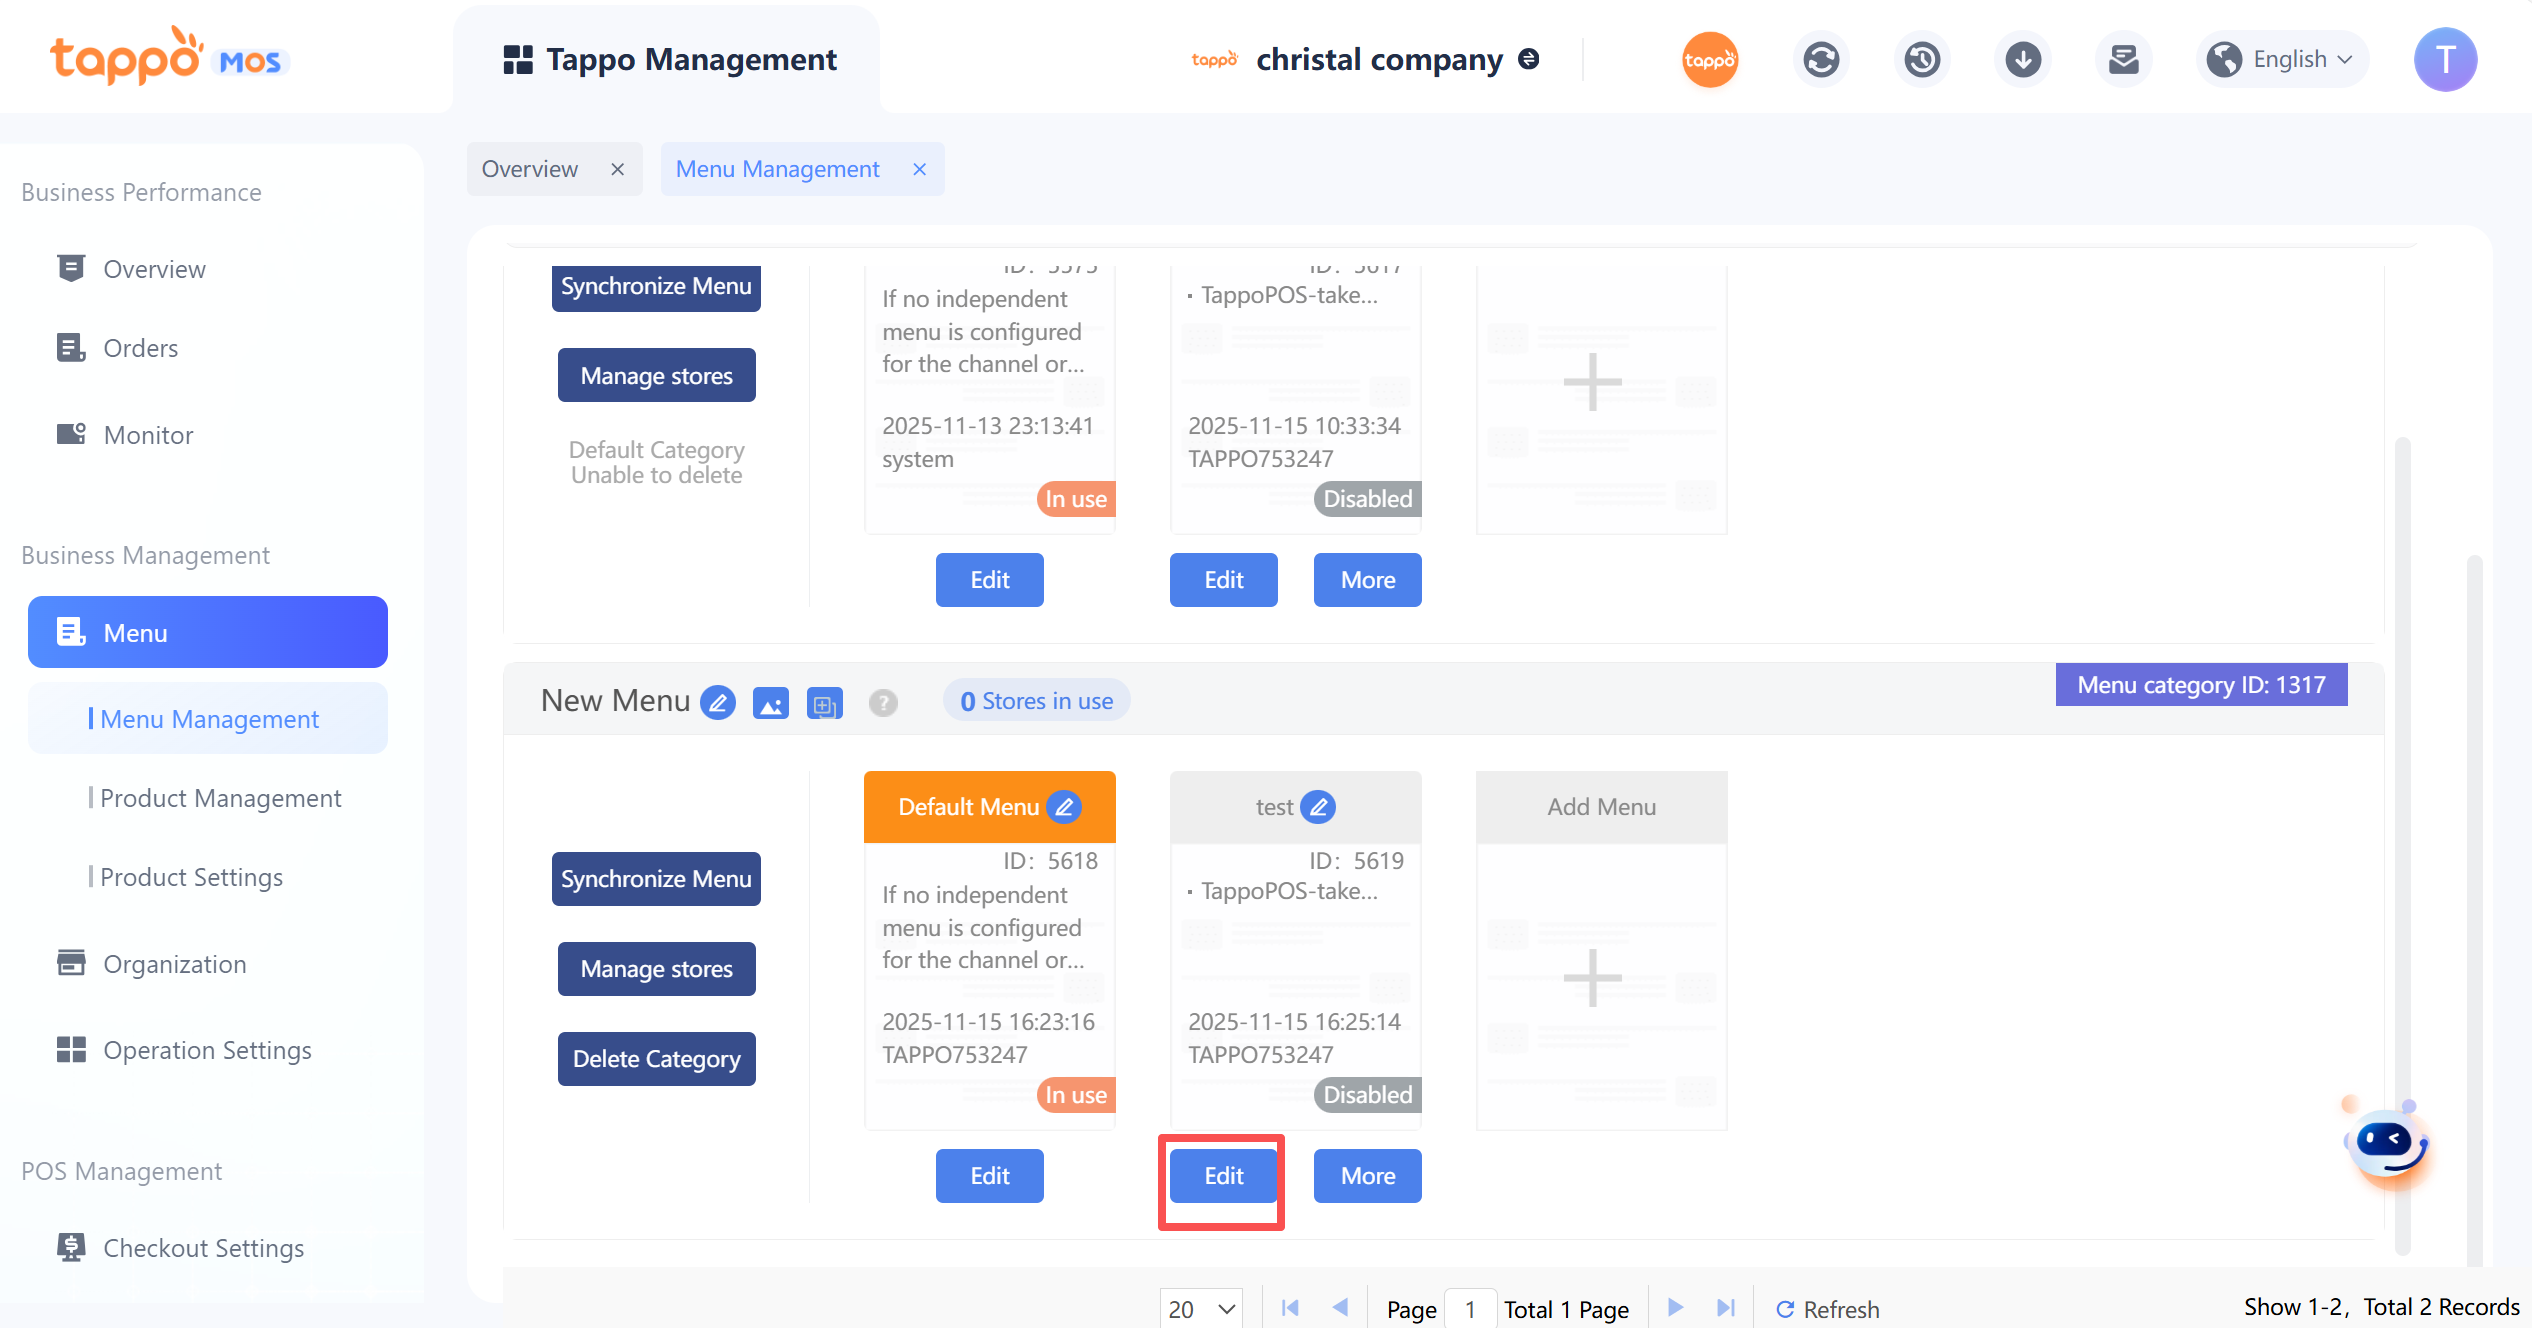
3. In the menu category, click the [Edit] button under the menu to enter the menu editing page.[Image]
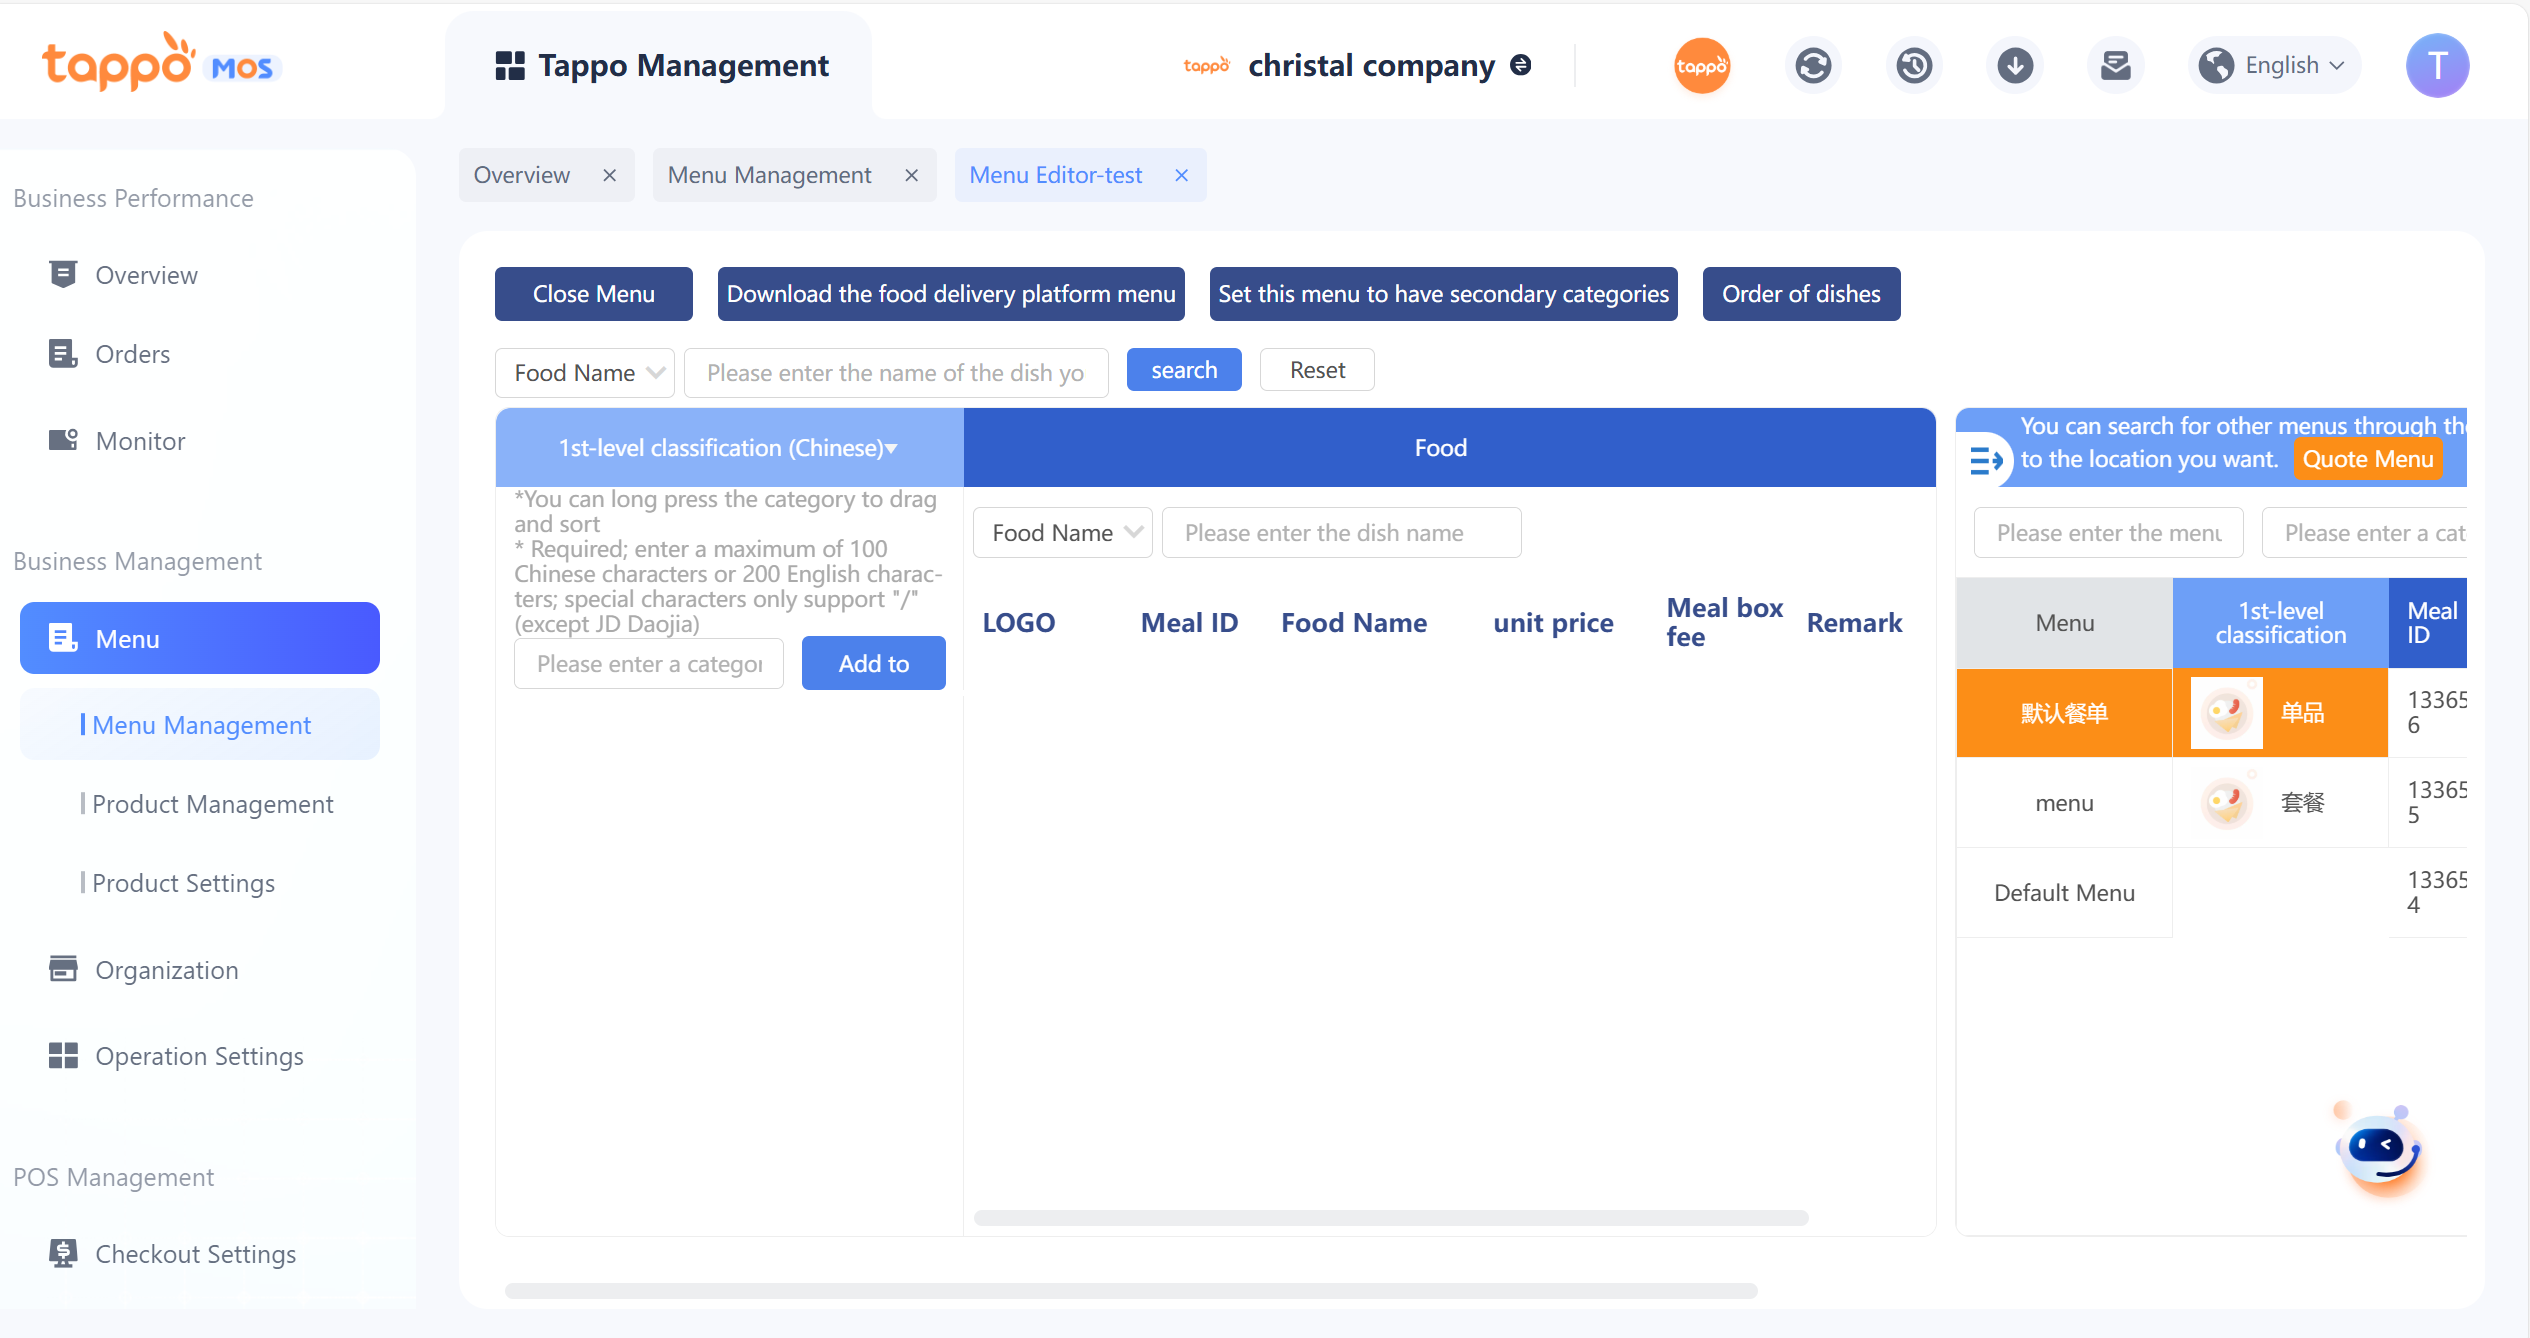
When editing a menu for the first time, you can set secondary categories. After adding any dishes or dish categories, you cannot modify whether the menu includes secondary categories. If the food delivery platform does not support secondary categories but the menu is configured with them, the system will only synchronize first-level categories to the platform; if supported, both first-level and secondary categories will be synchronized.
4. Enter the category name and click the [Add] button to complete the category addition. You can adjust the category order by dragging.
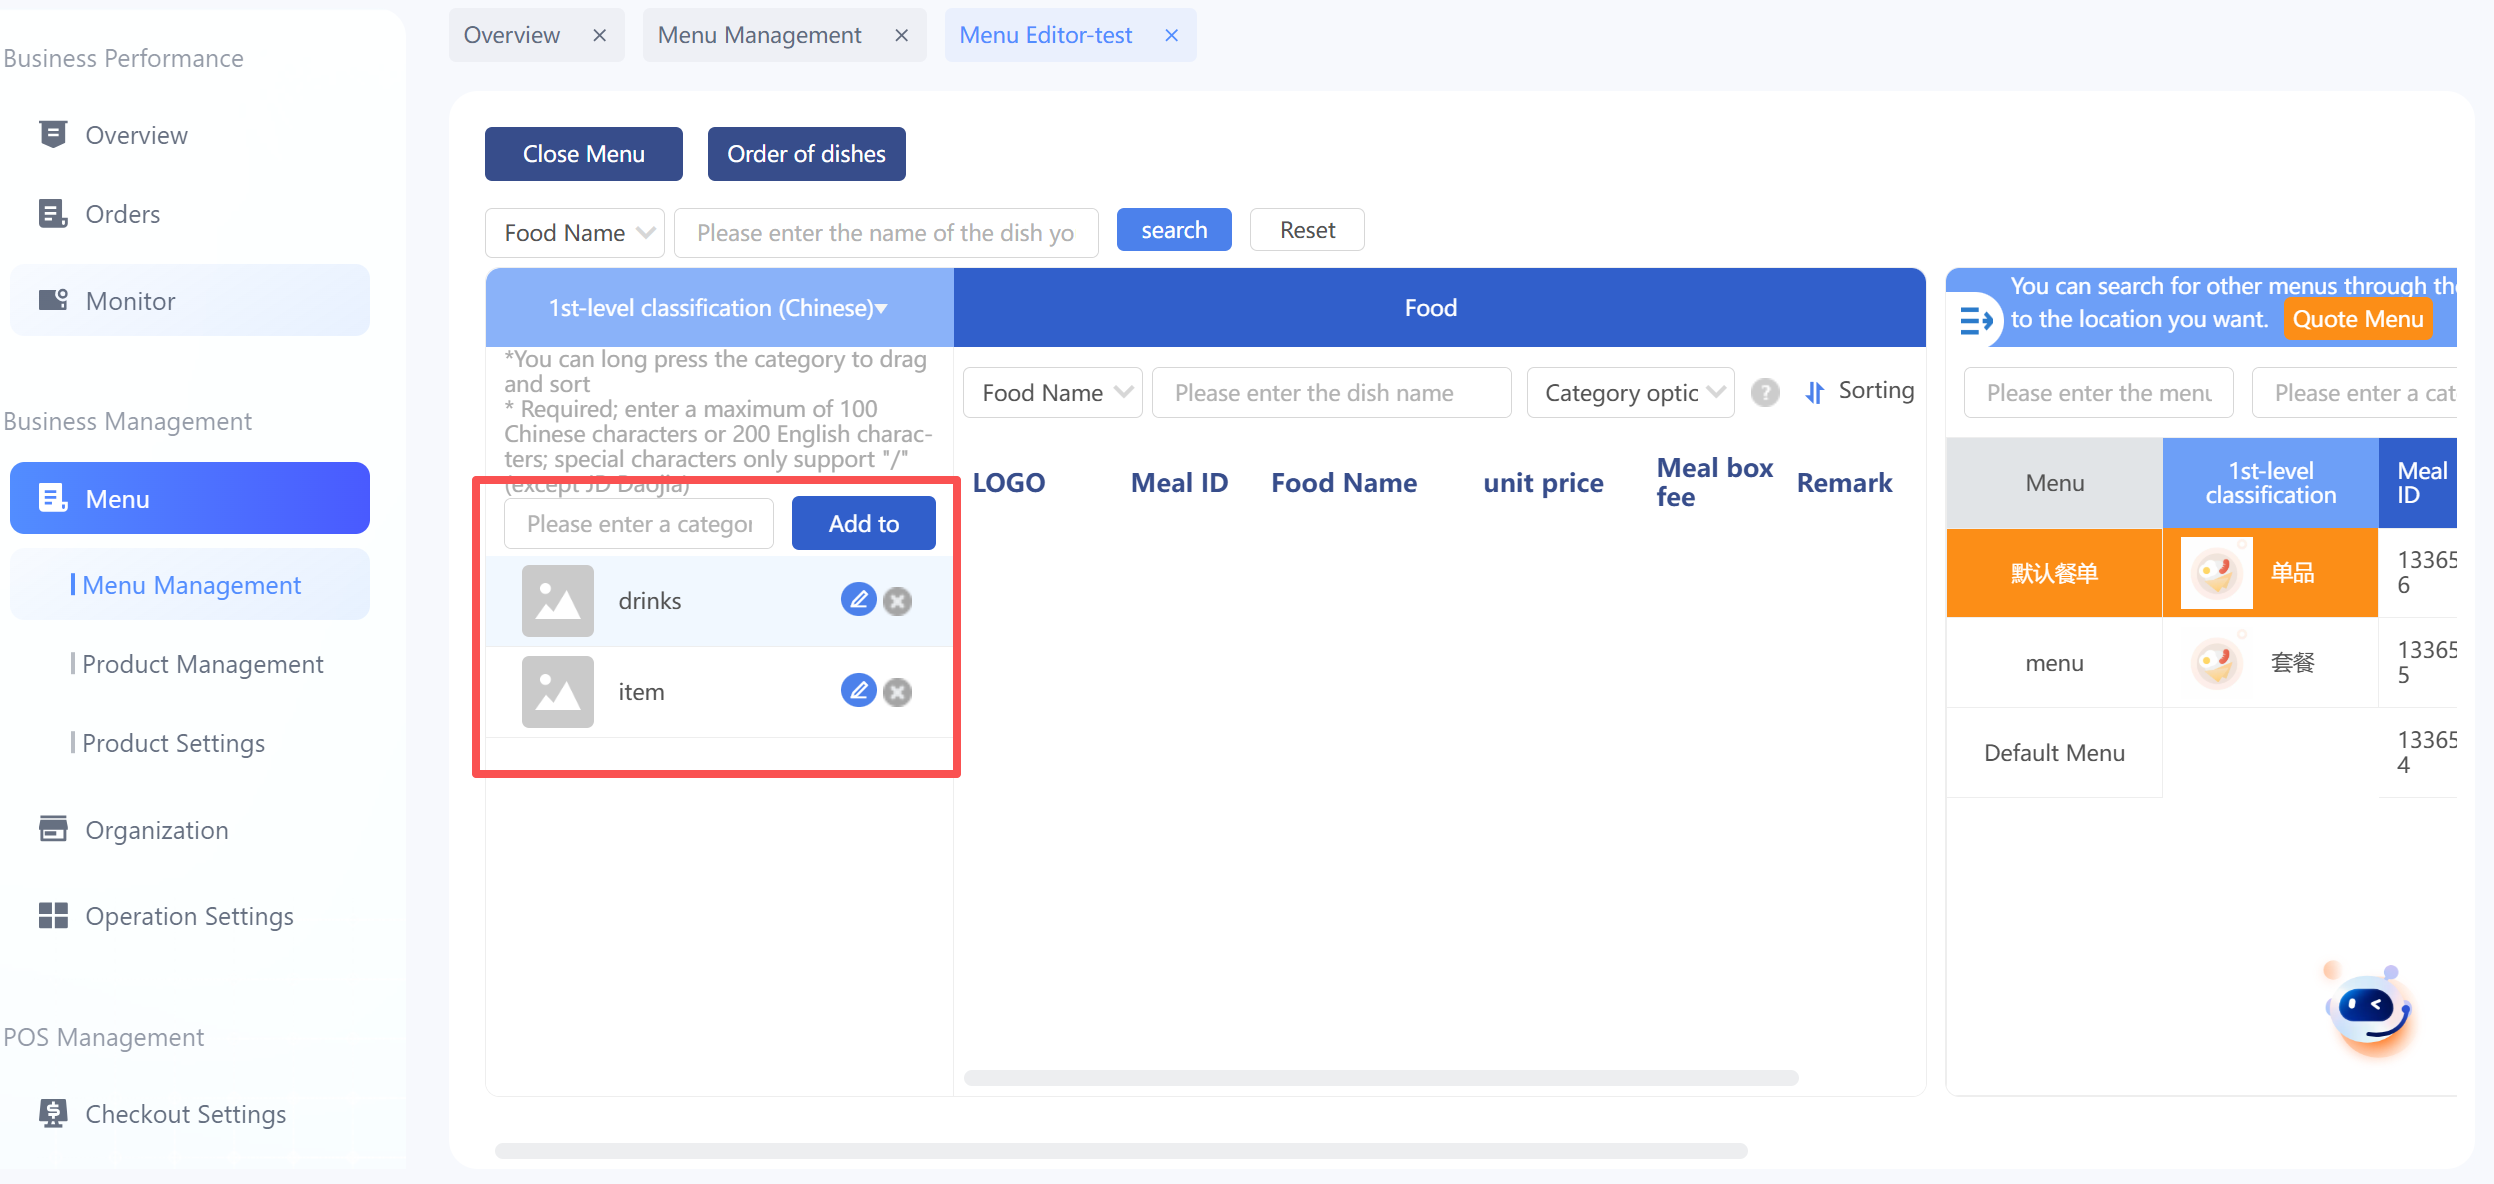
5. Click the [Edit] button of the category to enter the category name editing interface; you can edit the category name, category description, upload category images, and set category time-period pinning.
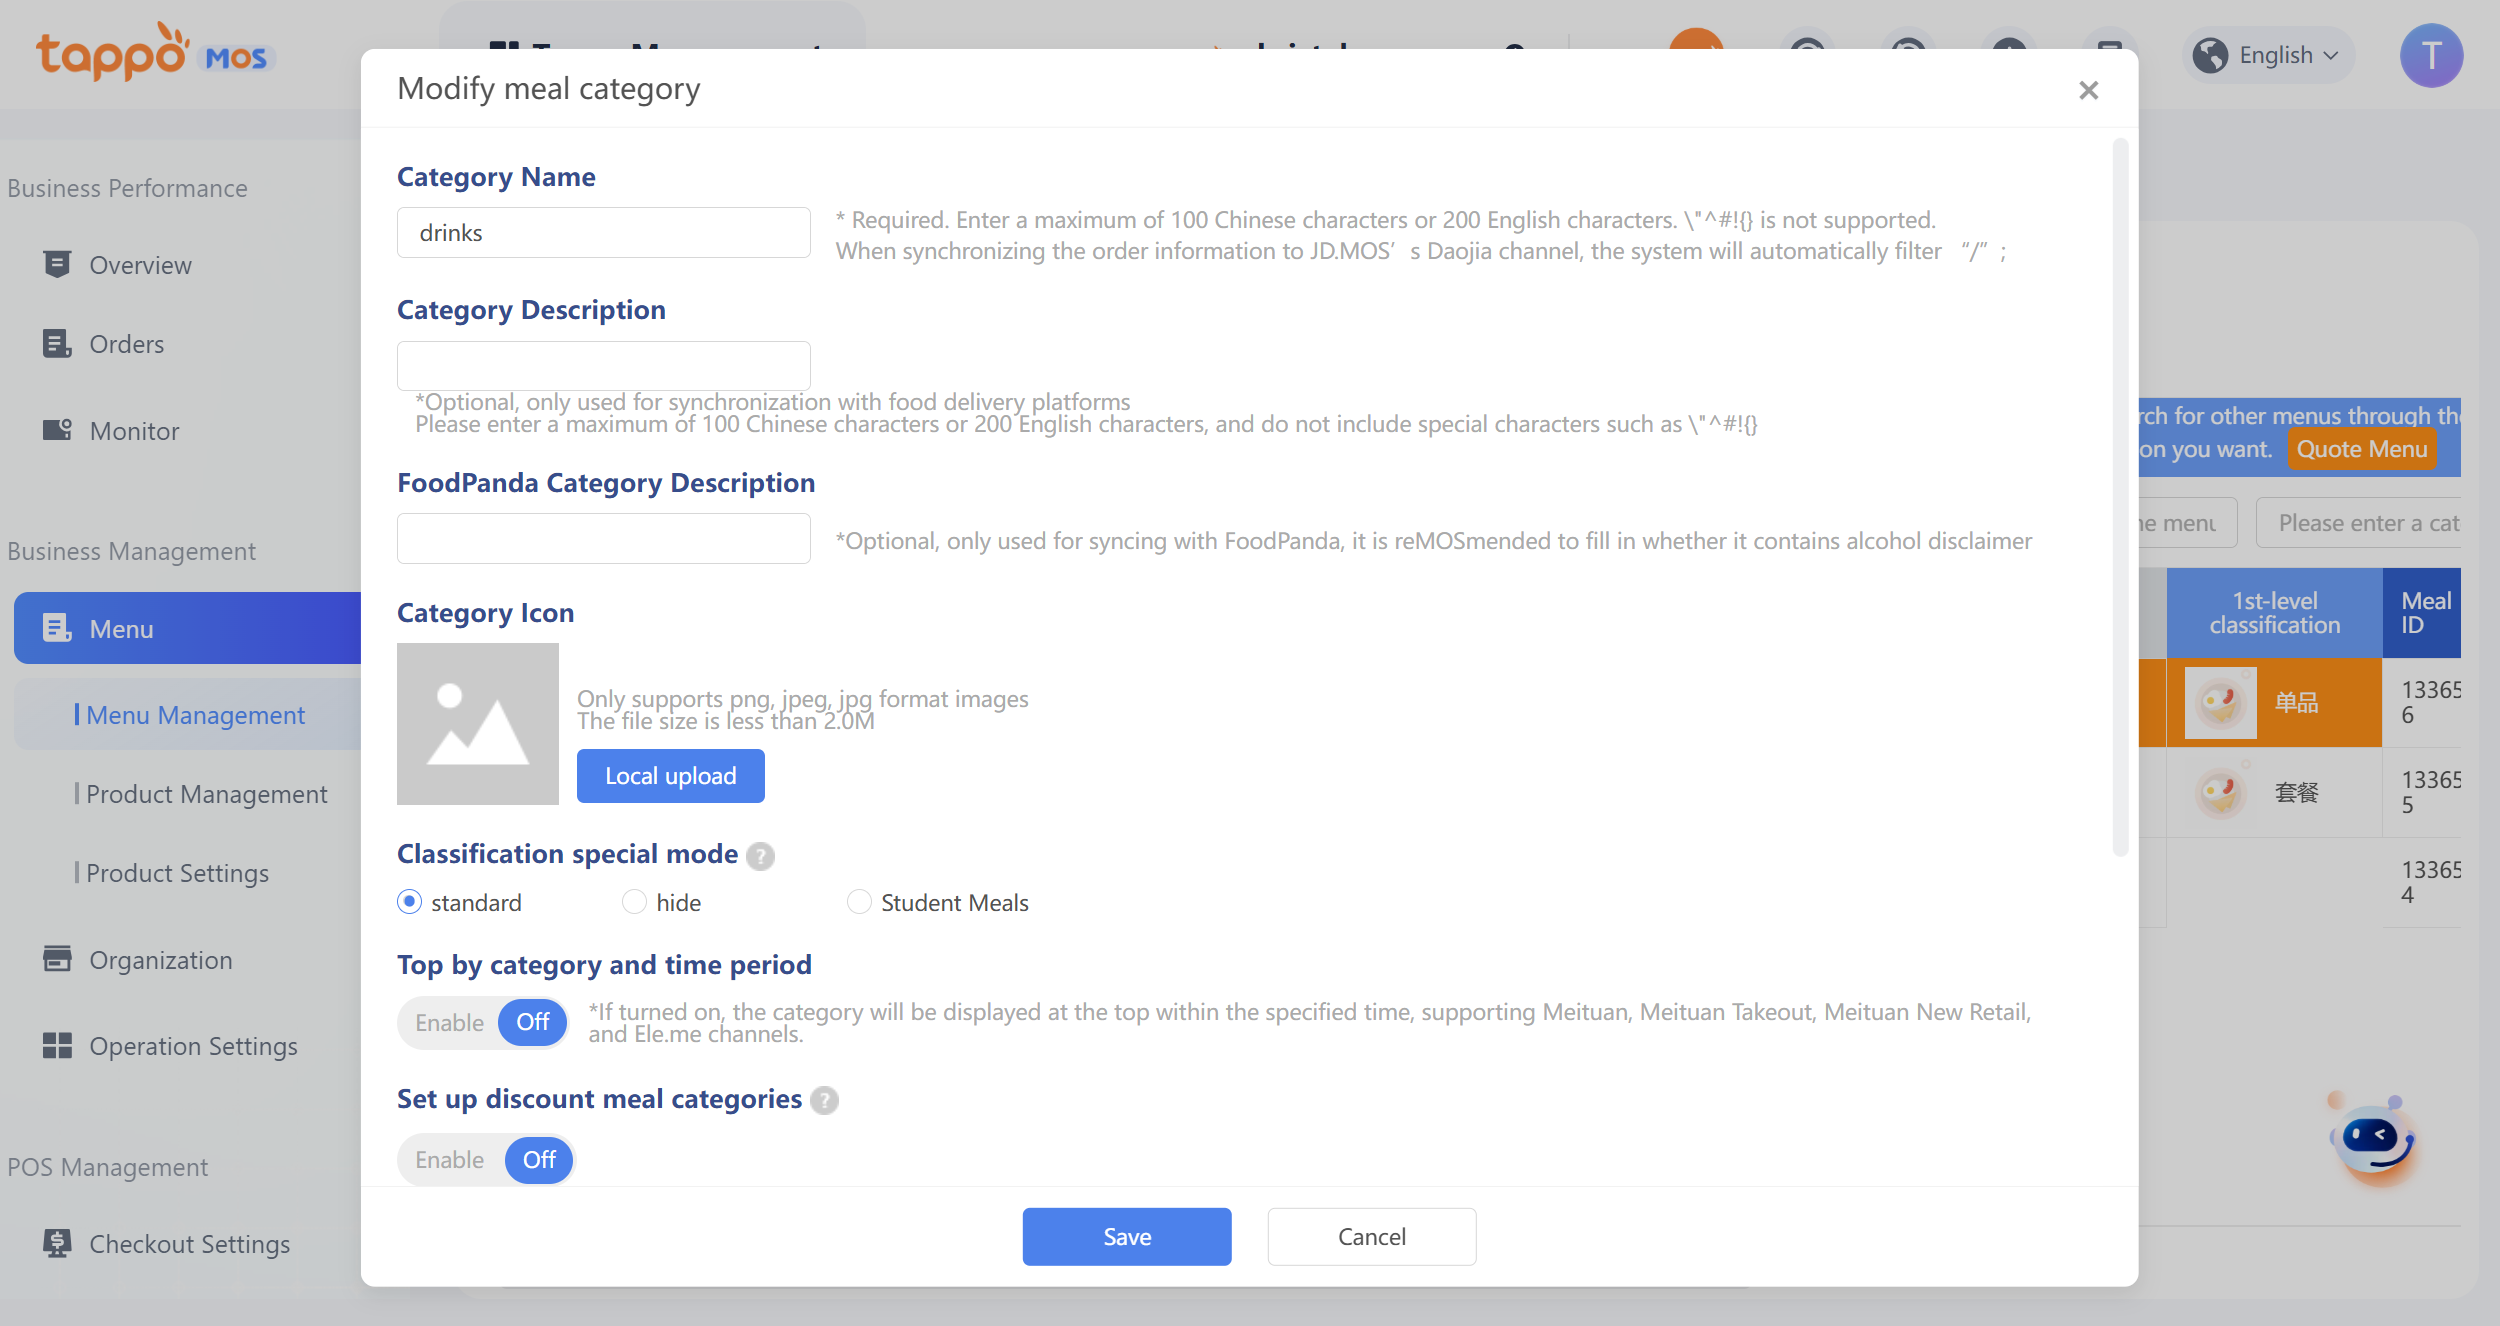
6. Category Time-Period Pinning Setting: This configuration allows setting the corresponding category to be pinned during a specific time period. Currently, it only supports Meituan New Retail. You can set the pinning date, pinning day of the week, and pinning time period. If multiple categories are set to be pinned during the same time period, they can be synchronized to the food delivery platform automatically or manually when saving. Note that the menu will be synchronized simultaneously.
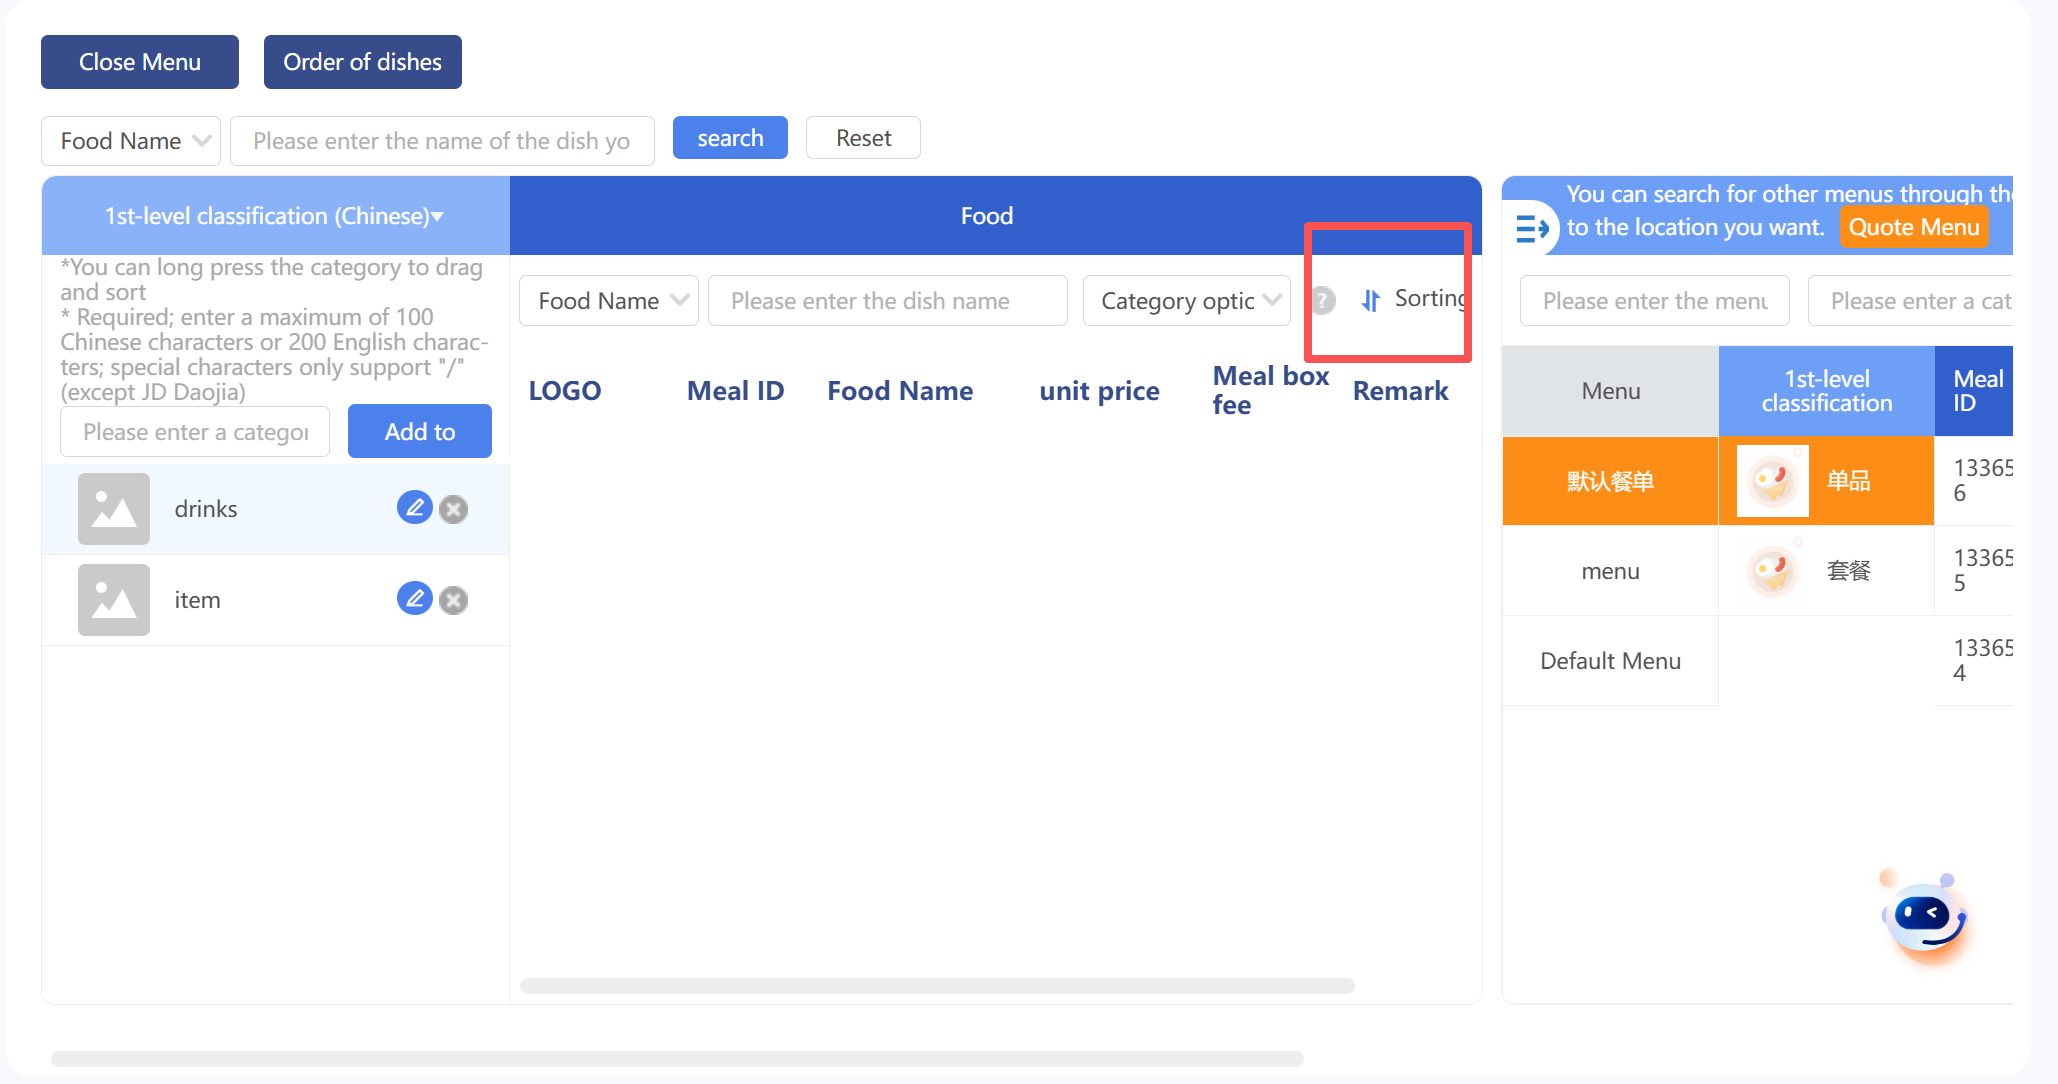
7. Select the method to add dishes, enter the dish name/or dish ID, select the dish, and complete the dish addition. You can click [Sort] to adjust the dish order.
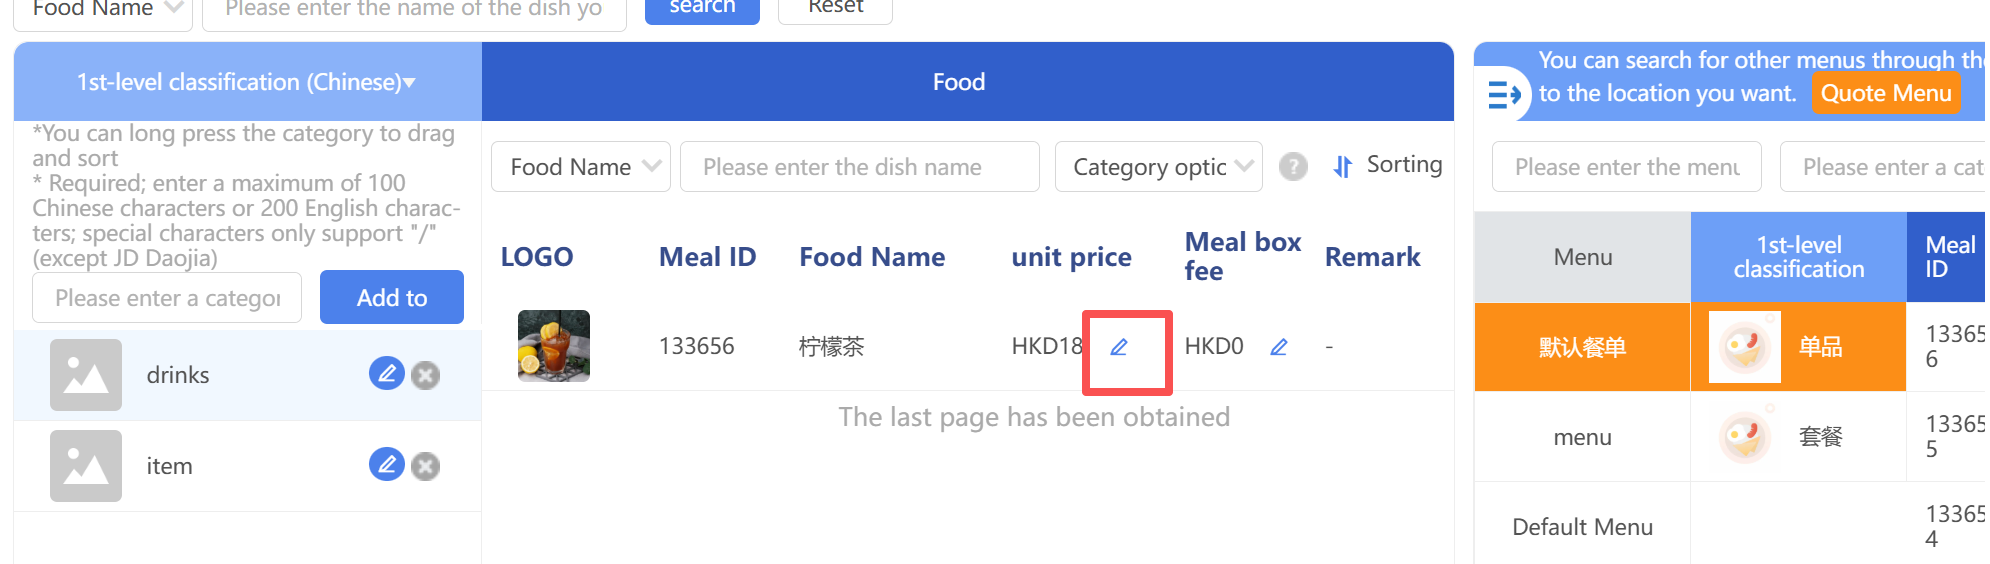
8. If you need to adjust the price and packaging fee of a dish in the menu, click the [Edit] button of the dish to modify.
9. Click the [Save Menu] button to save the menu, which is inactive by default.
10. Click More – Activate to enable the menu. If you need to synchronize it to the food delivery platform, go to Third-Party Management – Food Delivery Platform Synchronization Management to synchronize the menu.
Modify Menu Channel/Business Type
Select the menu, click More – Menu Information, and you can modify the menu name, channel, and business type, as shown in the figure below.
Edit Menu
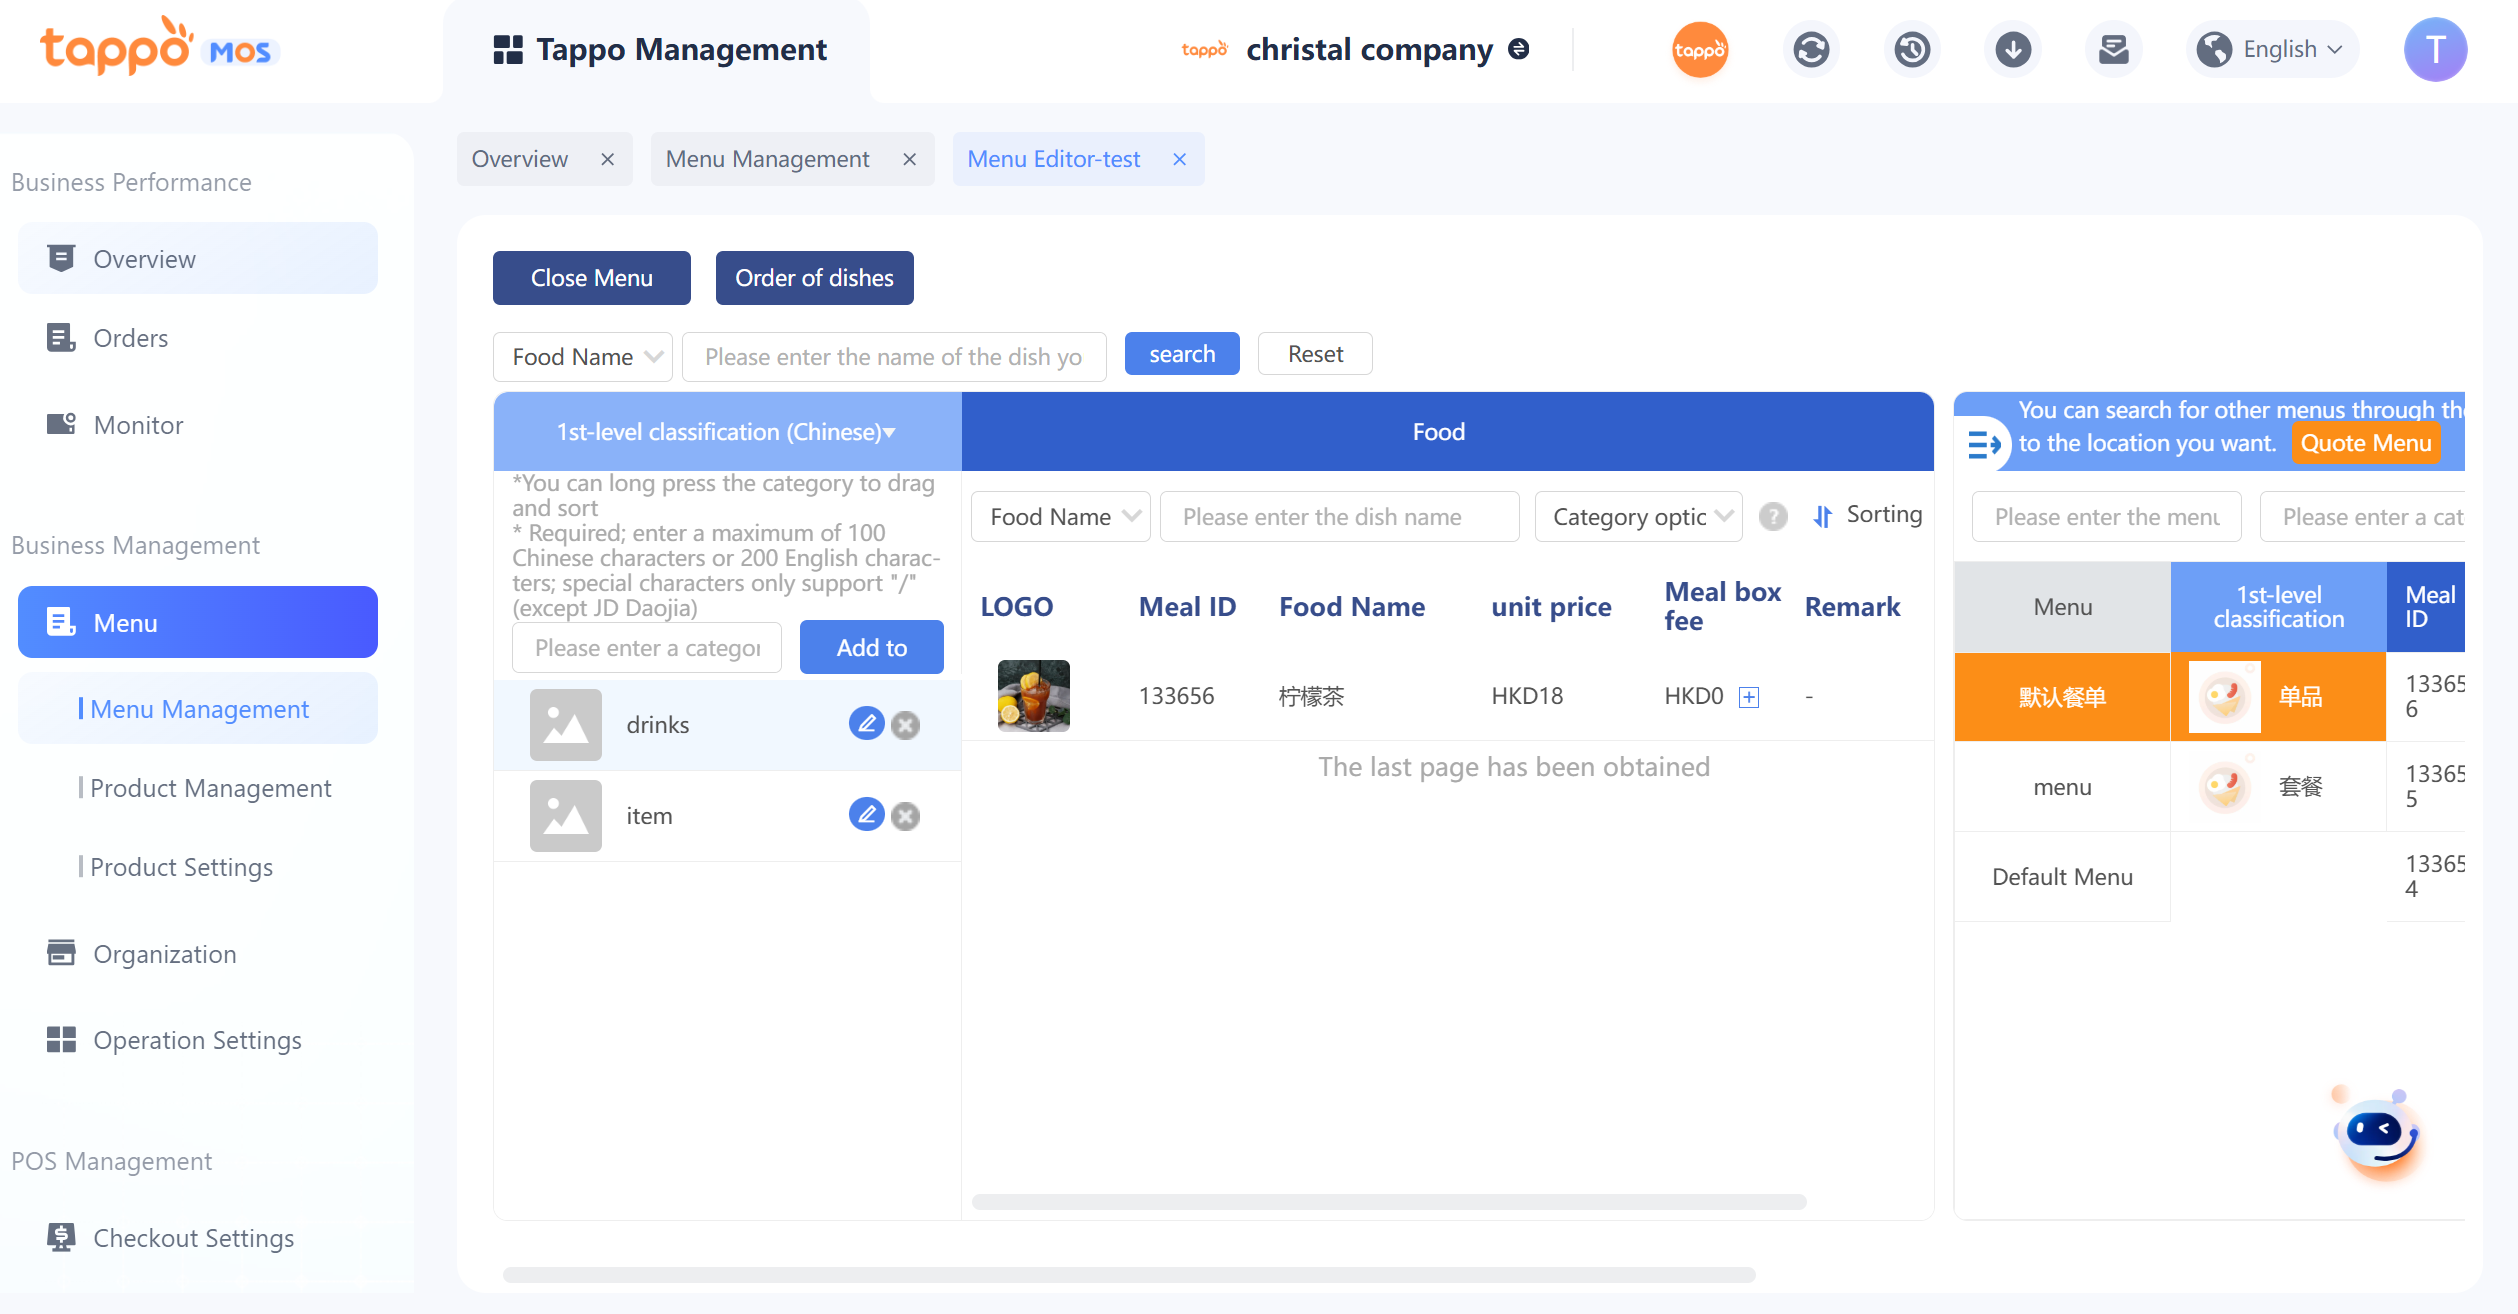
You can edit the menu, including adding/removing categories, adding/removing dishes, modifying dish unit prices, packaging fees, and sorting order. You can drag dishes to the specified category to move them to other categories. The right side is the search panel, which can search for dish categories and dish information from other menus of the brand and support copying to the current menu.
Regarding the setting of packaging fees, it supports setting by single item or combination. Click the + button next to the packaging fee of a dish in the menu to enter the packaging fee setting interface, as follows:
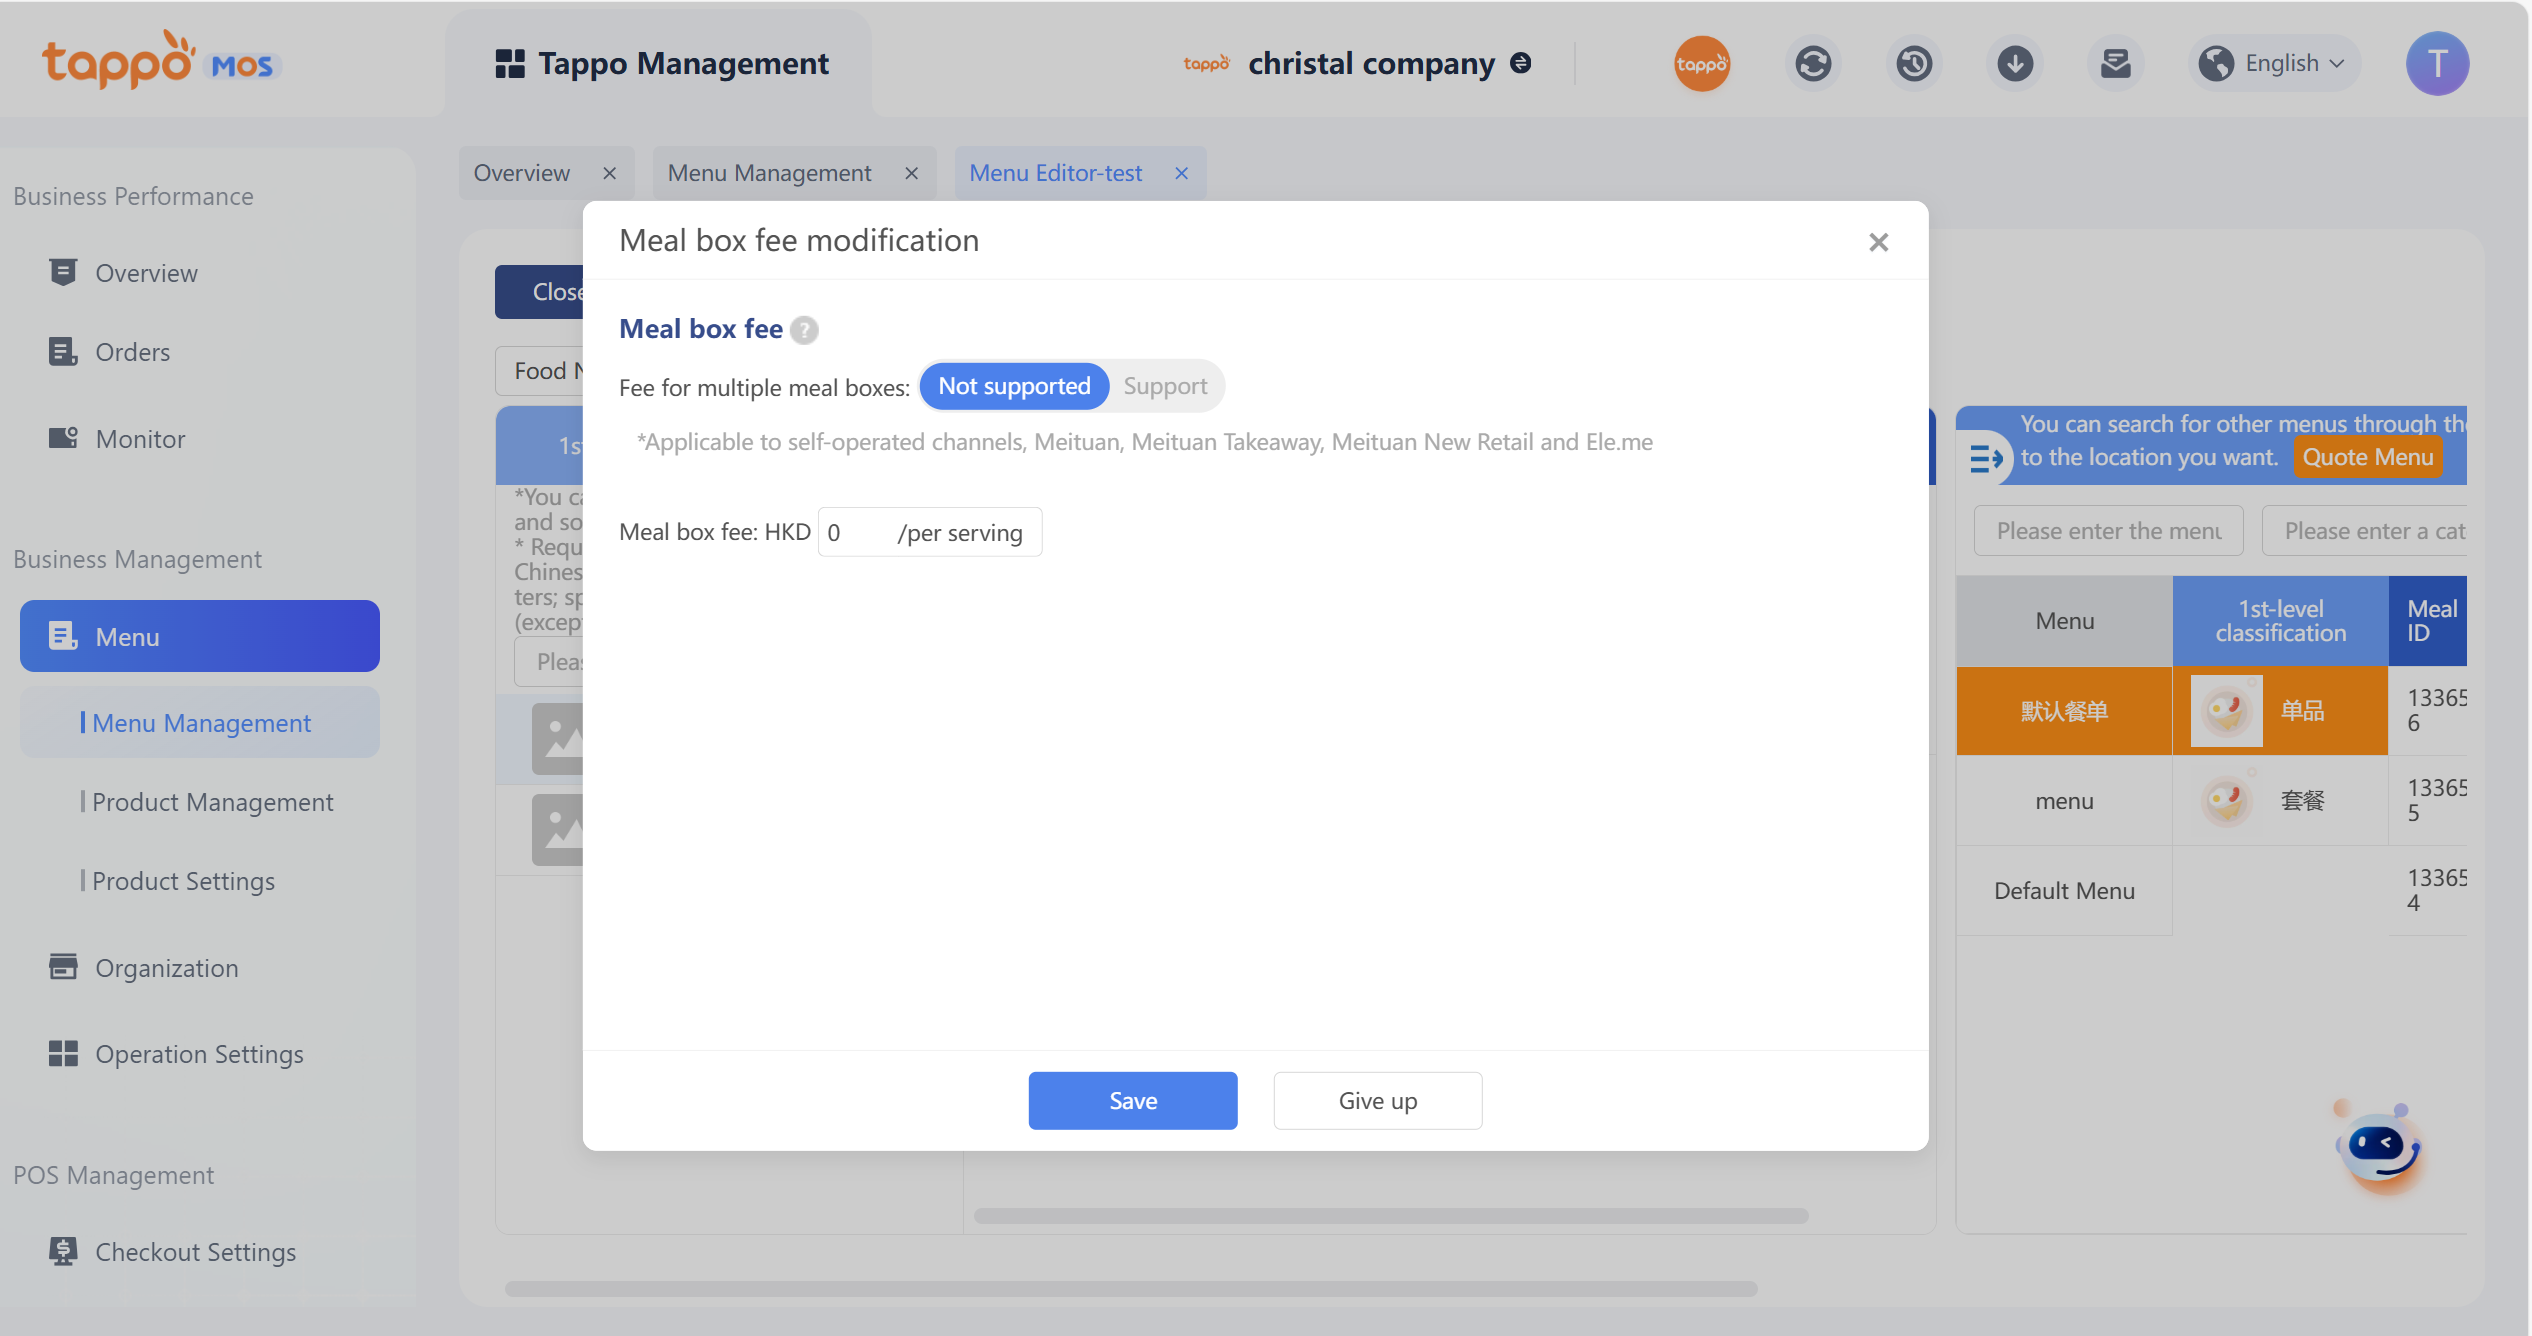
It supports setting mandatory category selection. If mandatory category selection is enabled, users must select at least one dish from the mandatory category to place an order successfully.
Batch Edit Meal Categories
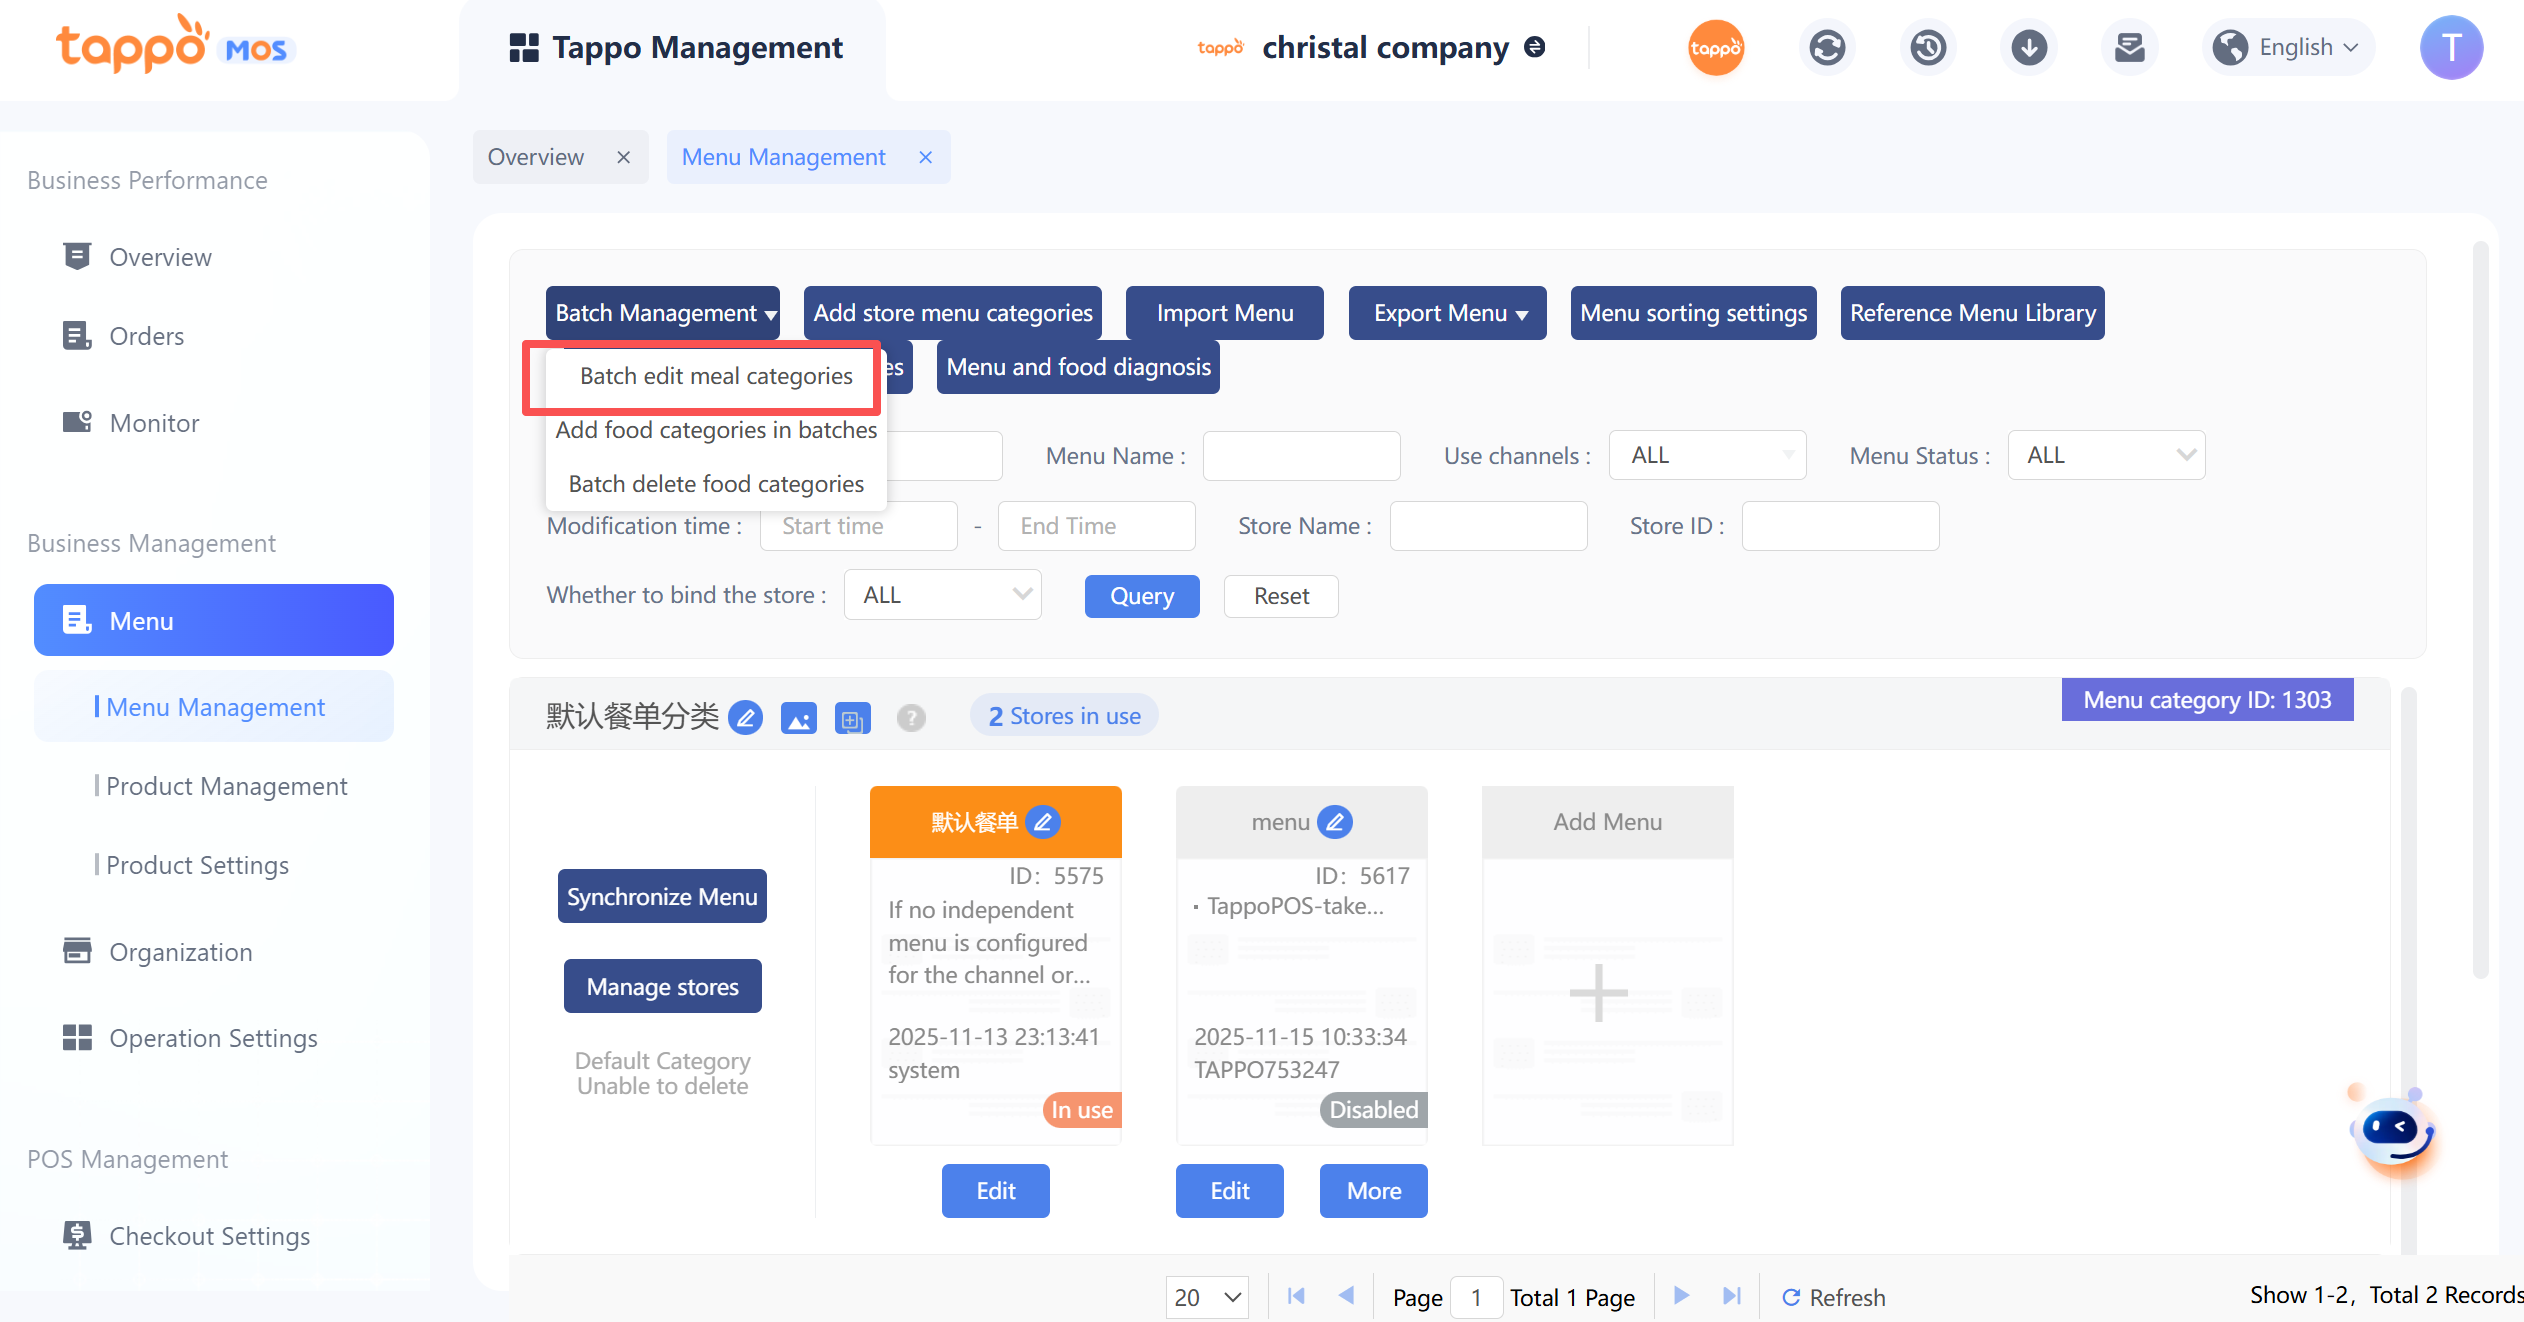
Click [Batch Management] – [Batch Edit Meal Categories] to pop up the category selection window.
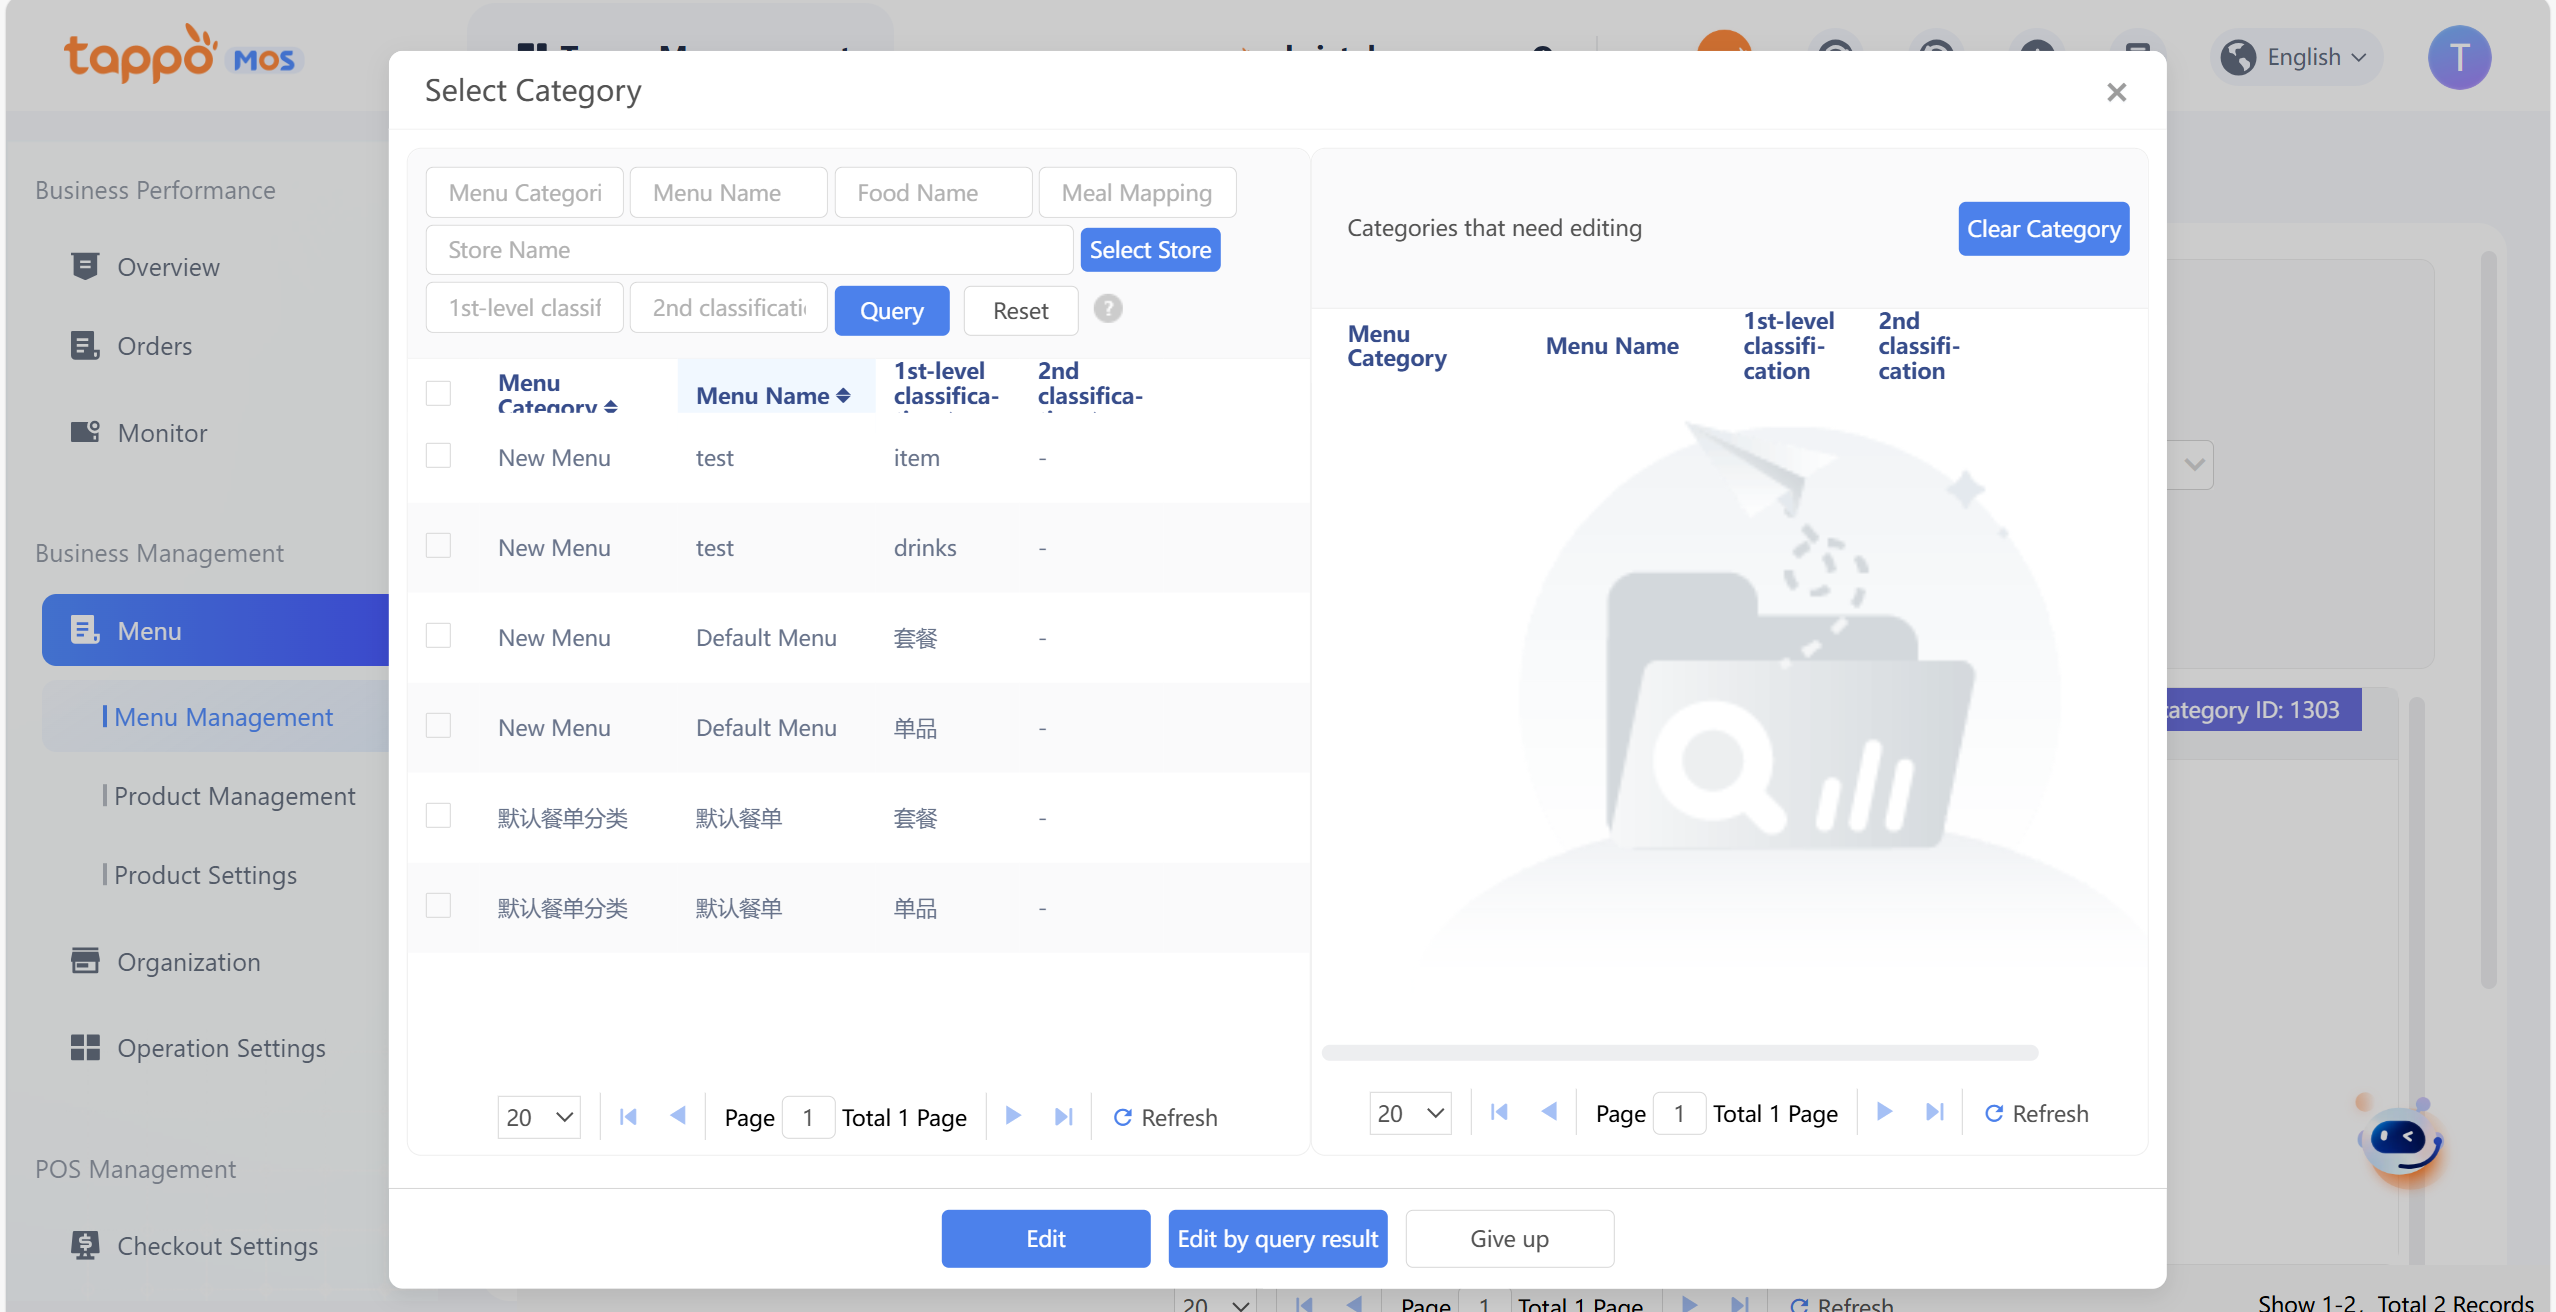
Select the dish category to be edited, click Edit to enter the batch edit dish category window.
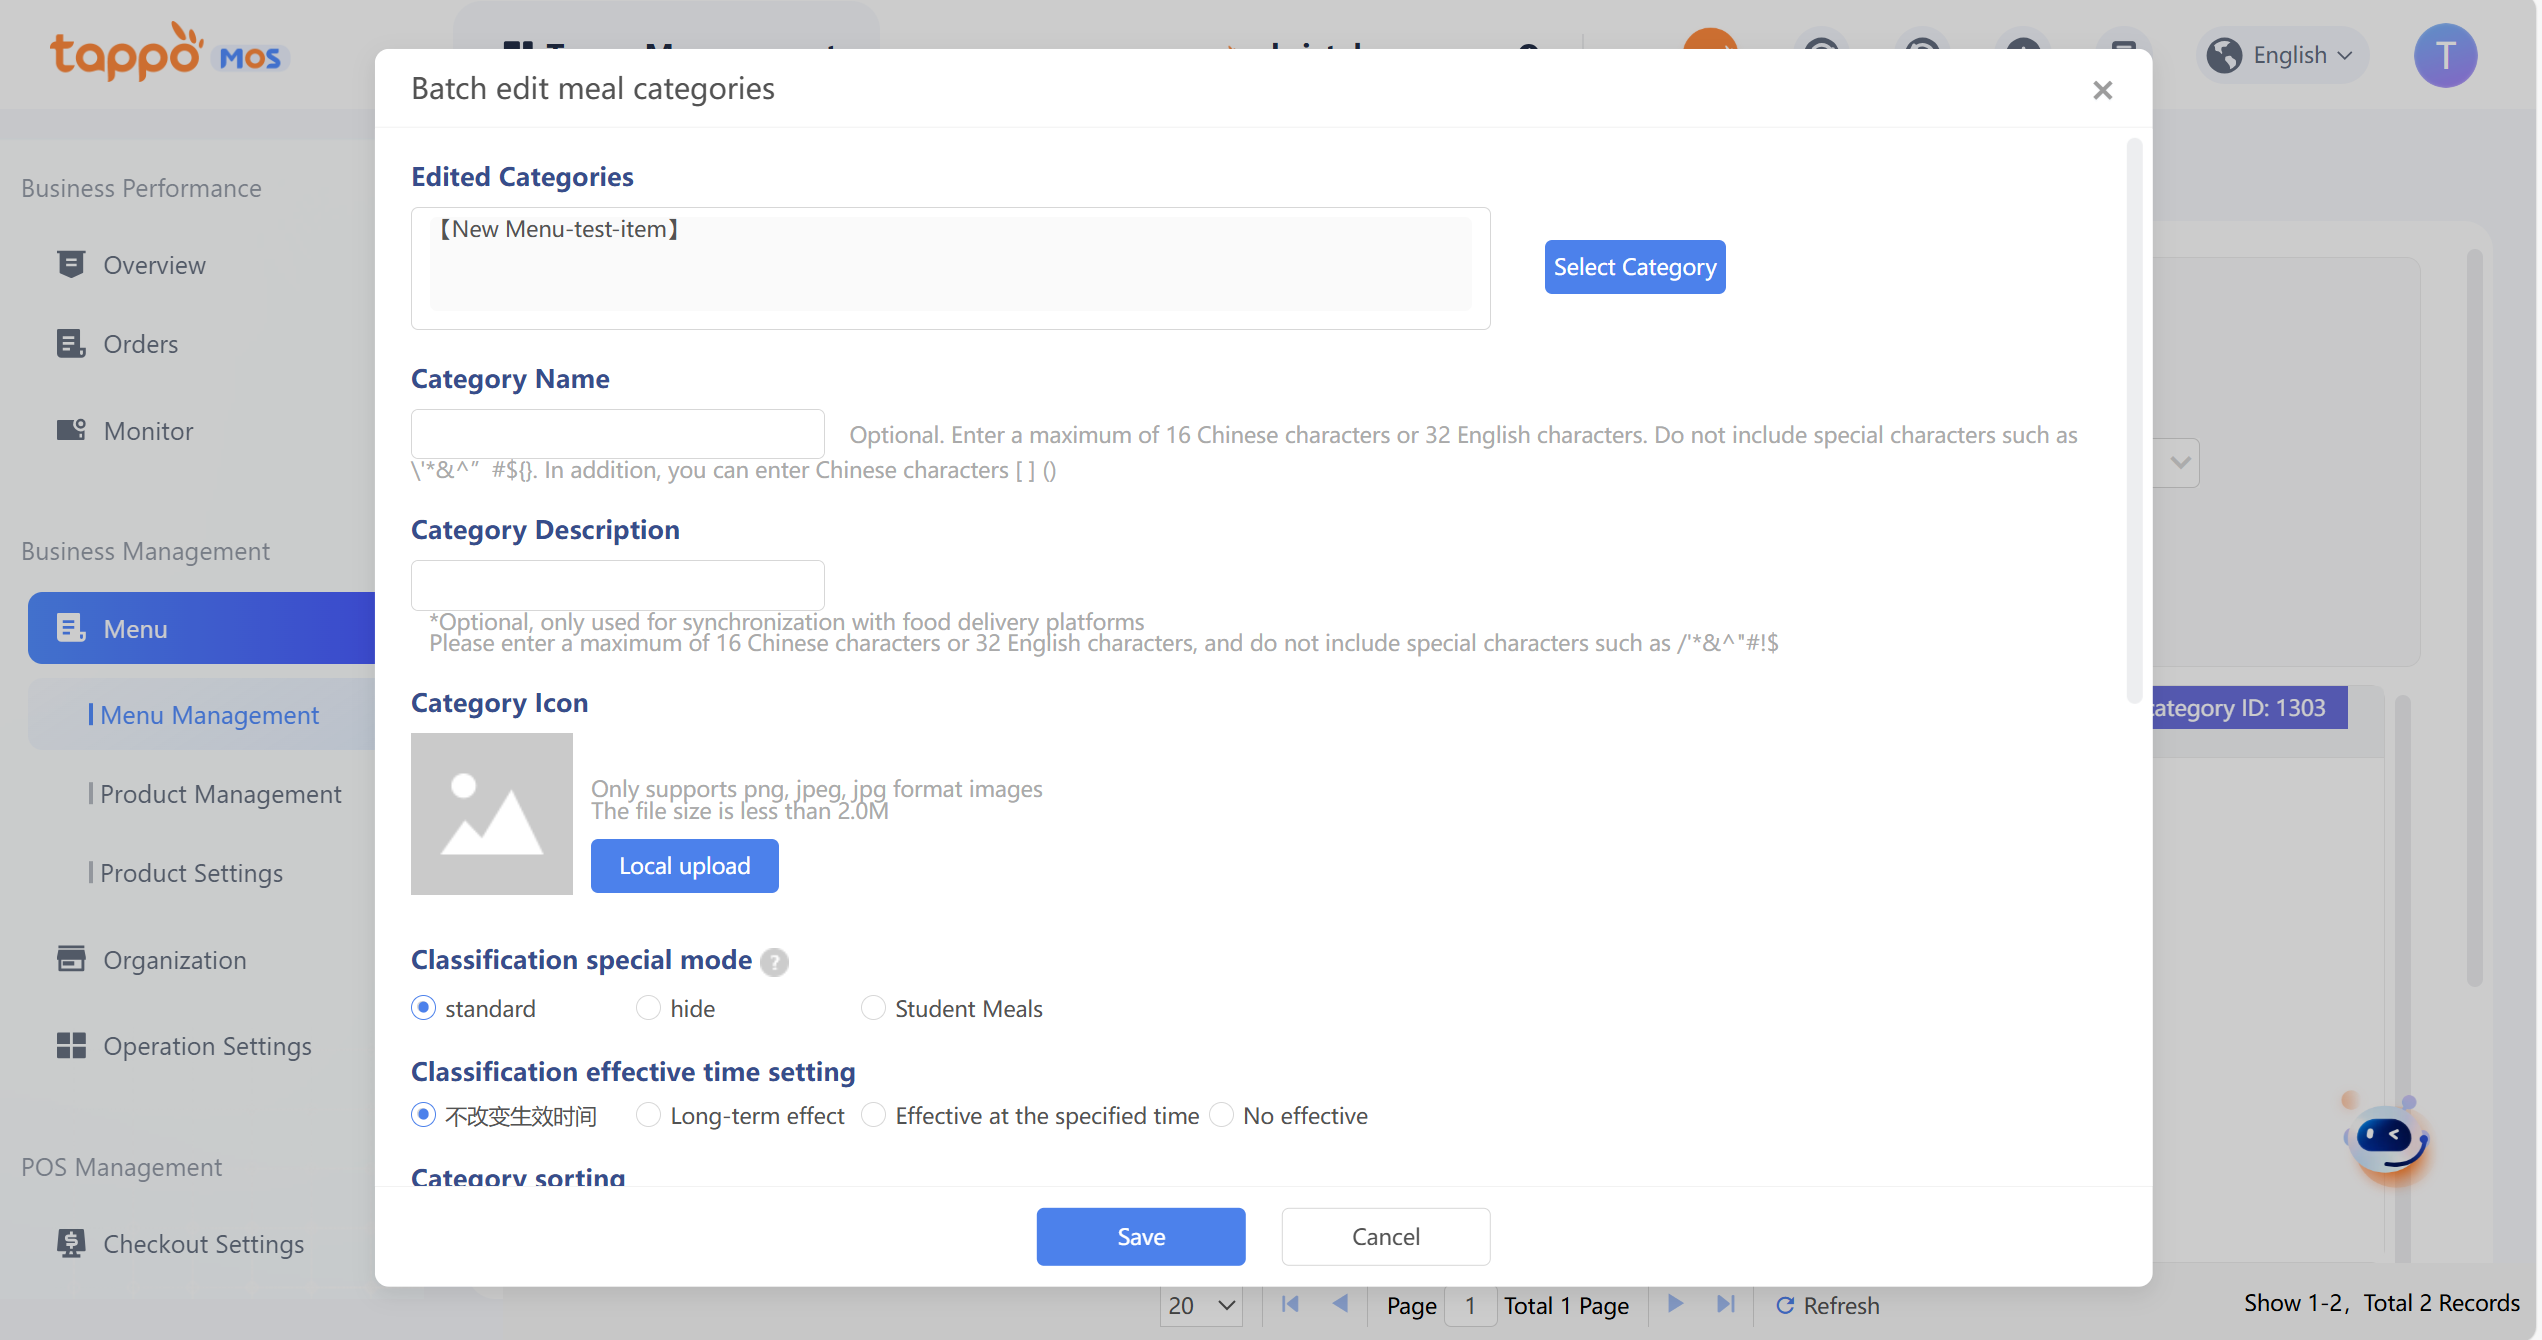
In the above window, edit the category name, category icon, category description, set category sorting, add dishes to the dish category, set categories for added dishes, delete dishes in the category, and click [Save] to batch edit the selected dish categories.
Import Menu
Click [Import Menu] on the menu management page to pop up the import menu window.
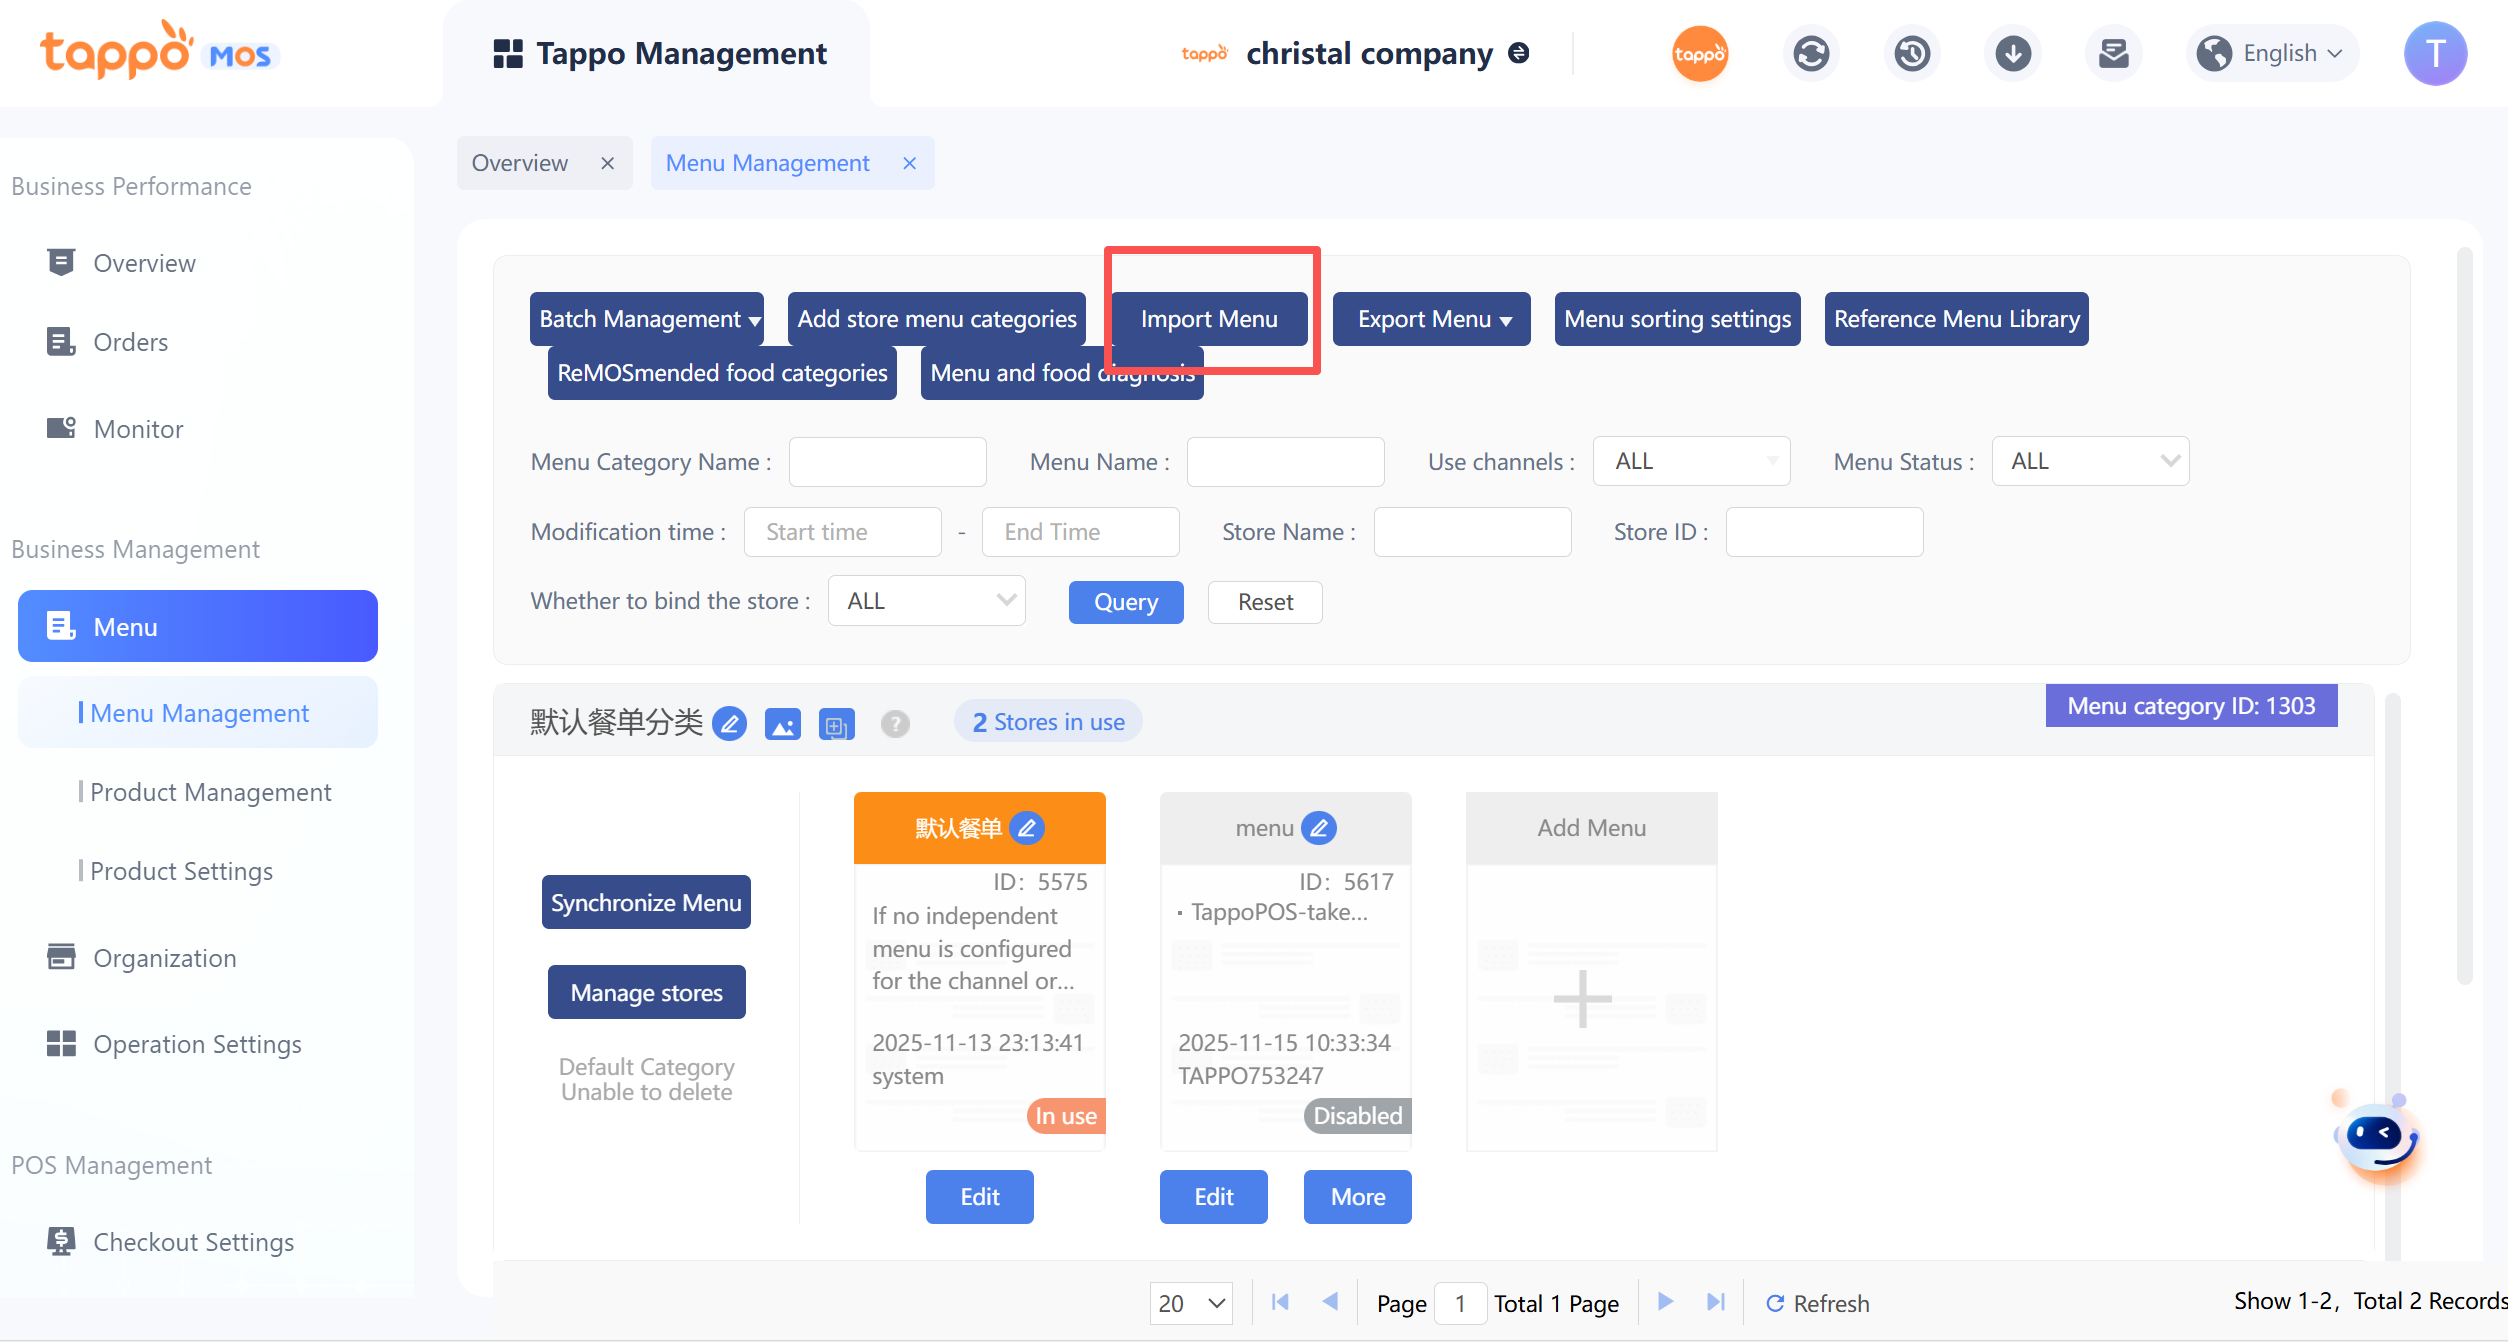
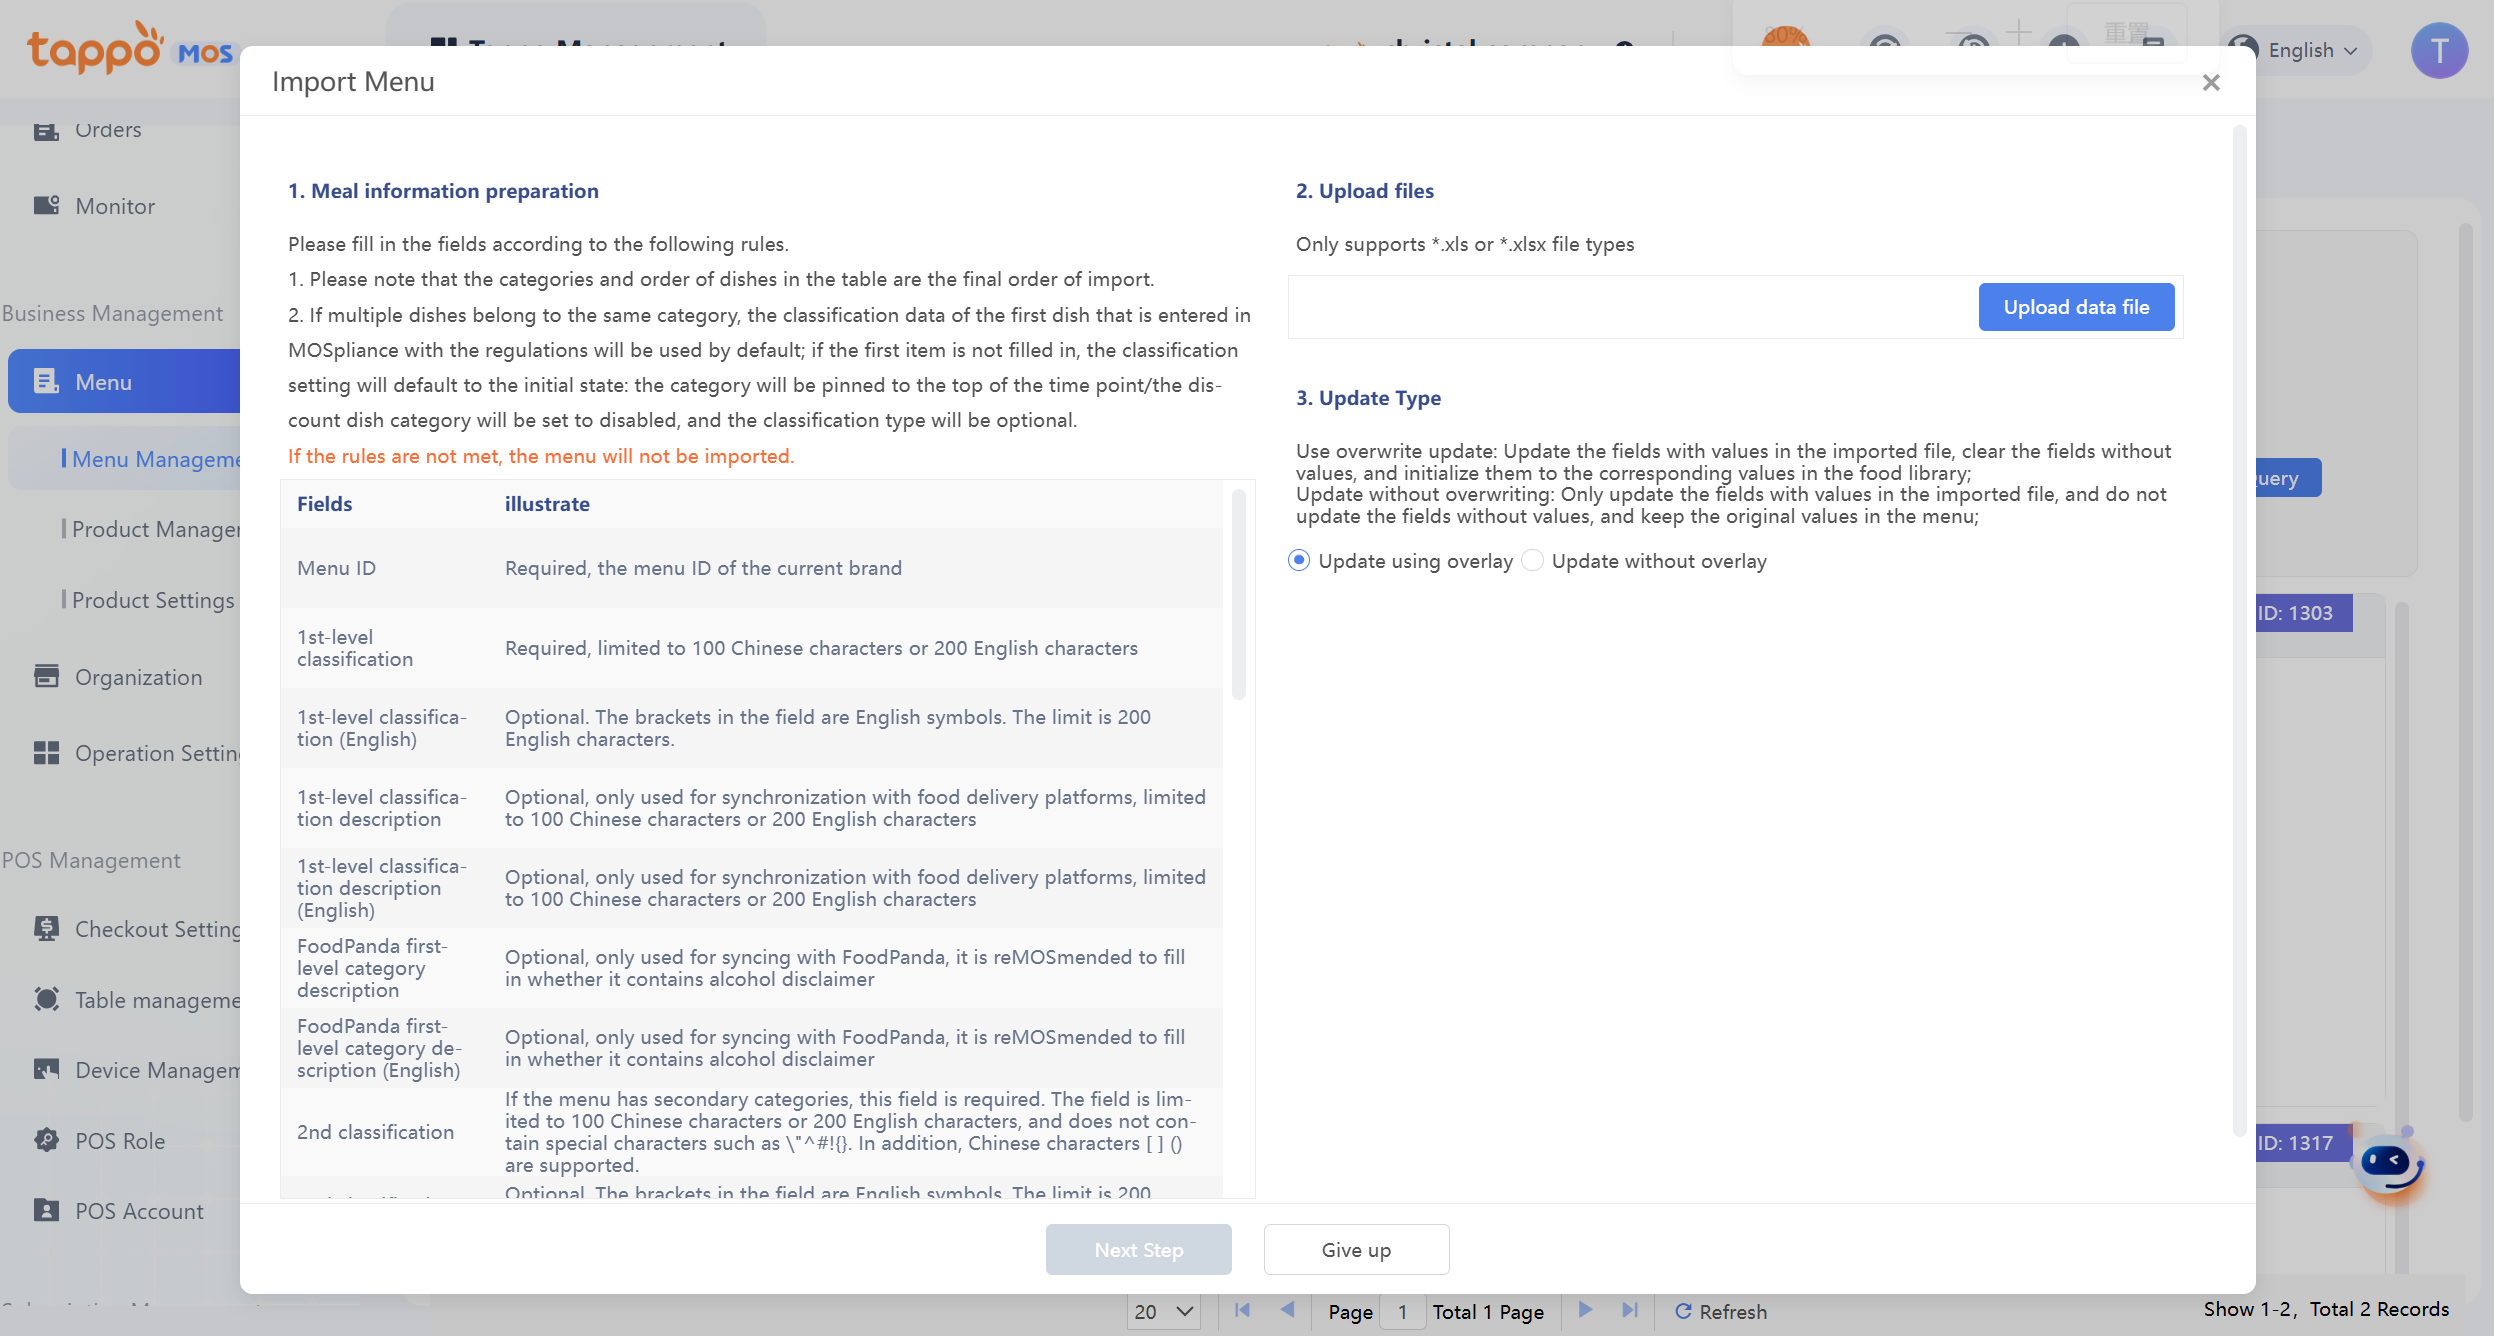
Some dish fields can be imported and updated when setting the menu, including: dish description/(English), tags, supply time, dish name (English), etc. Download the import template, fill in the menu information as required, and upload the corresponding Excel file to import the menu. Note: The menu import operation is an overwrite import, i.e., the information of the corresponding menu will be cleared first, then the new menu information will be imported.
Export Menu
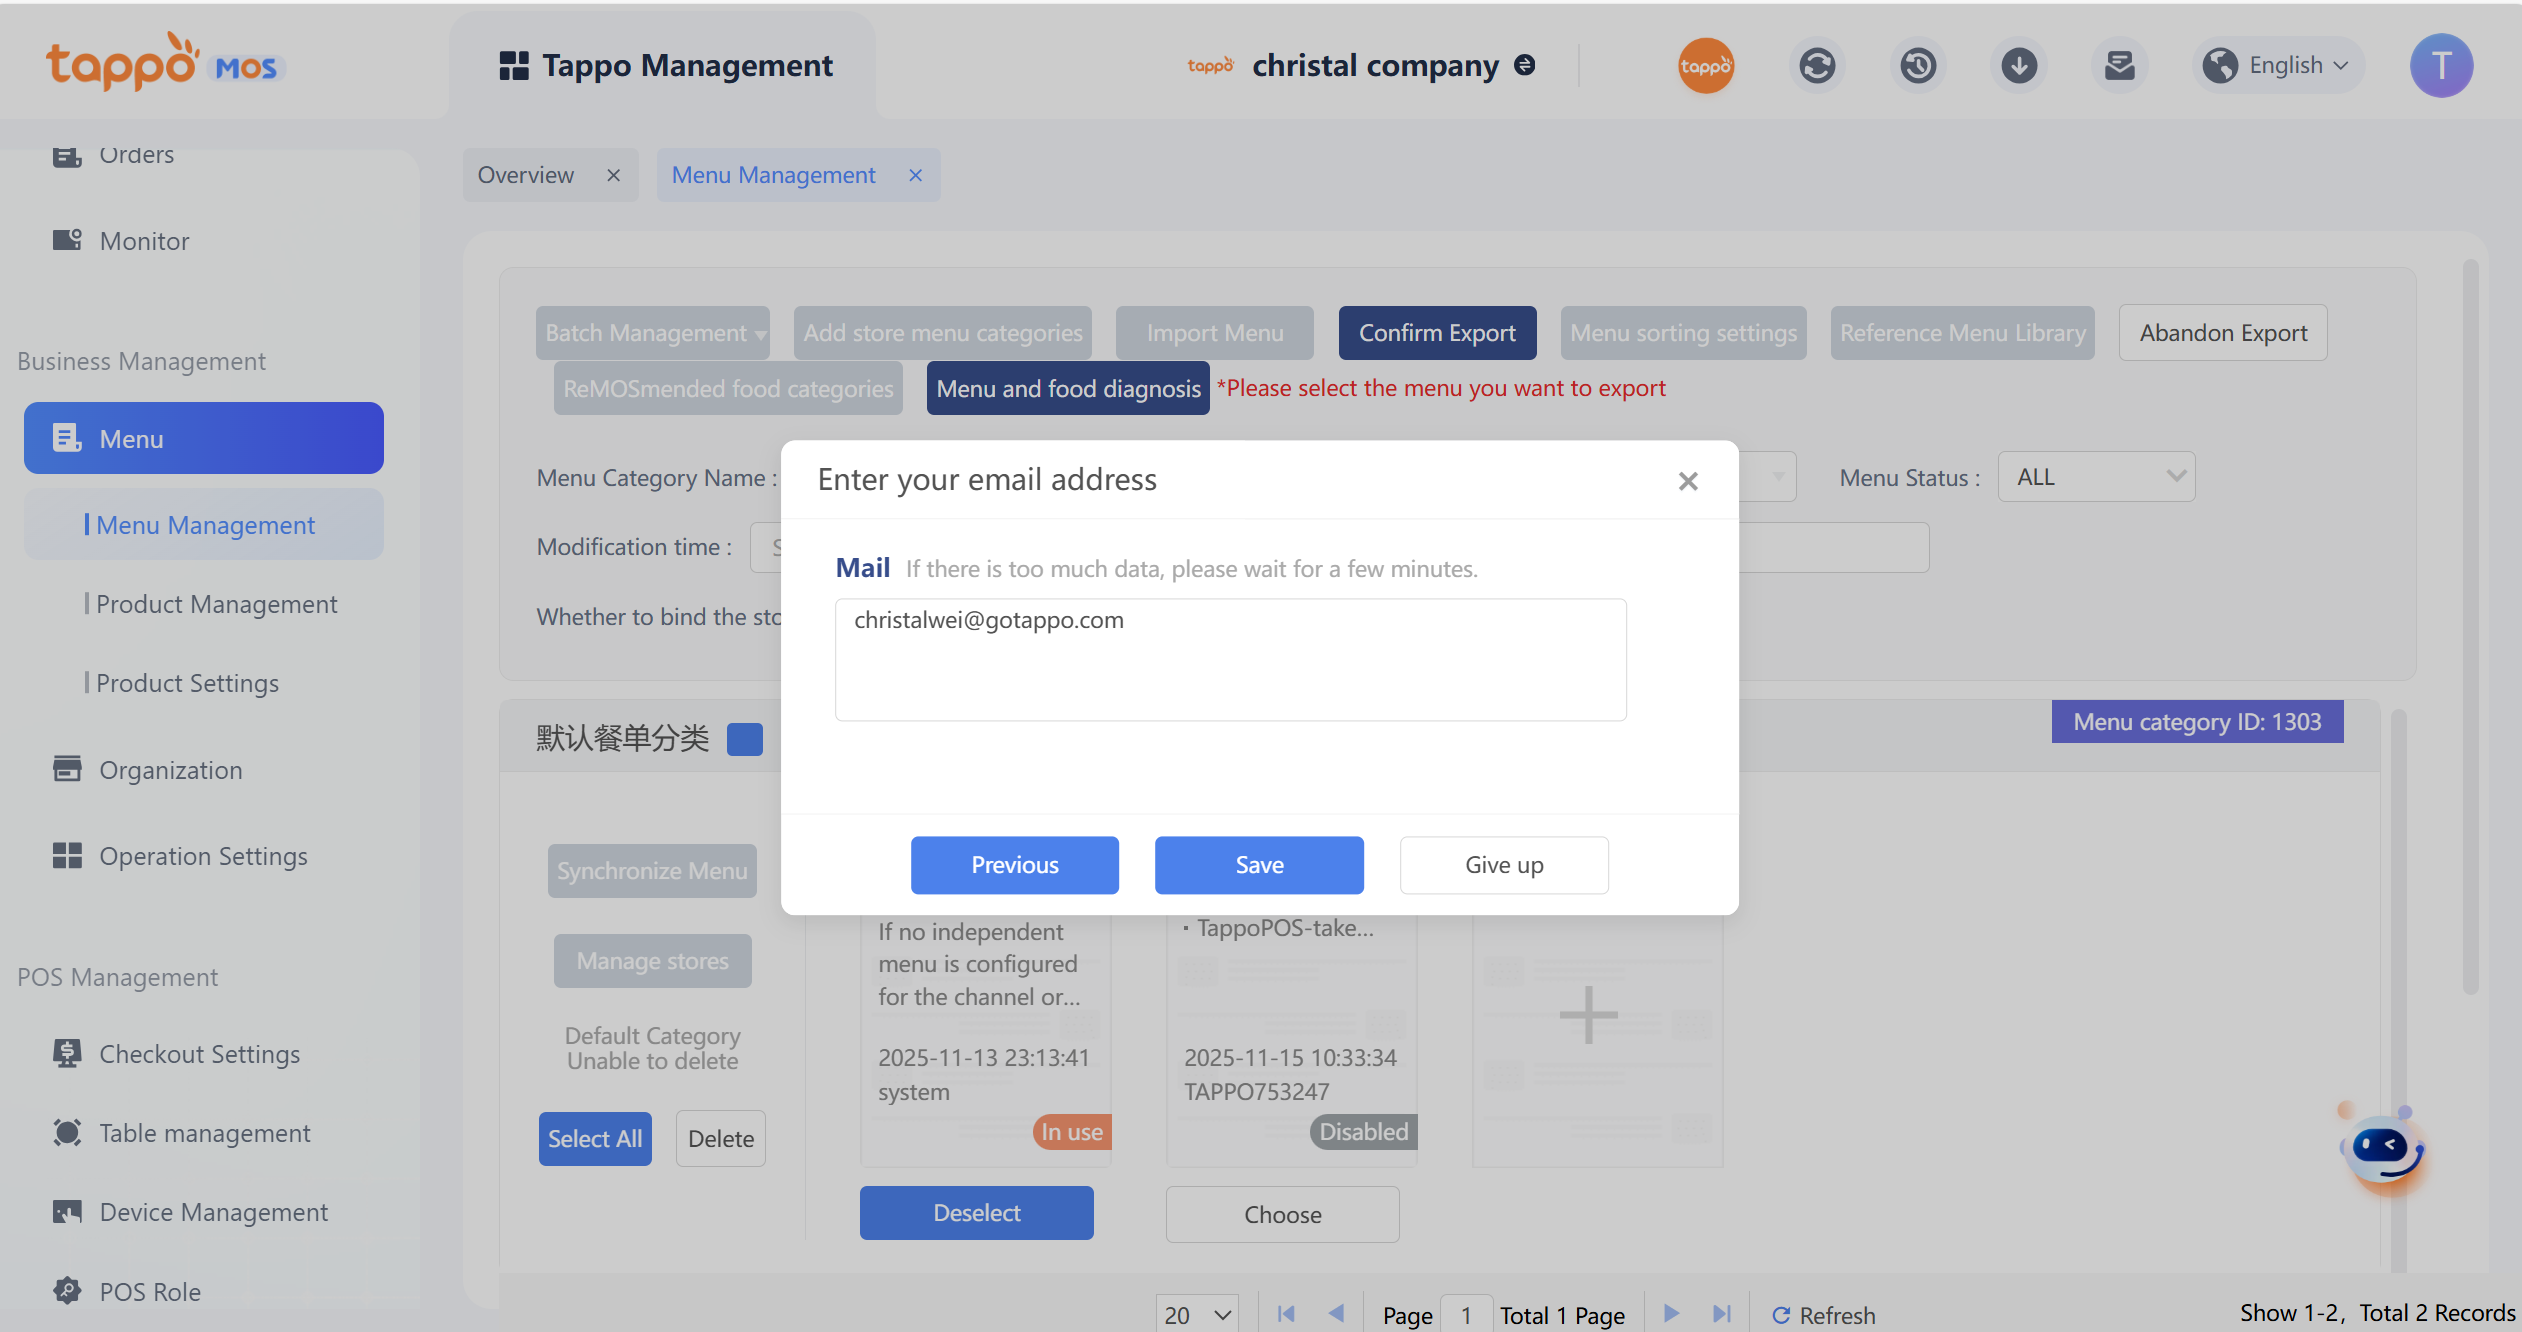
Click [Export Menu] on the menu management page and select the menu to be exported.
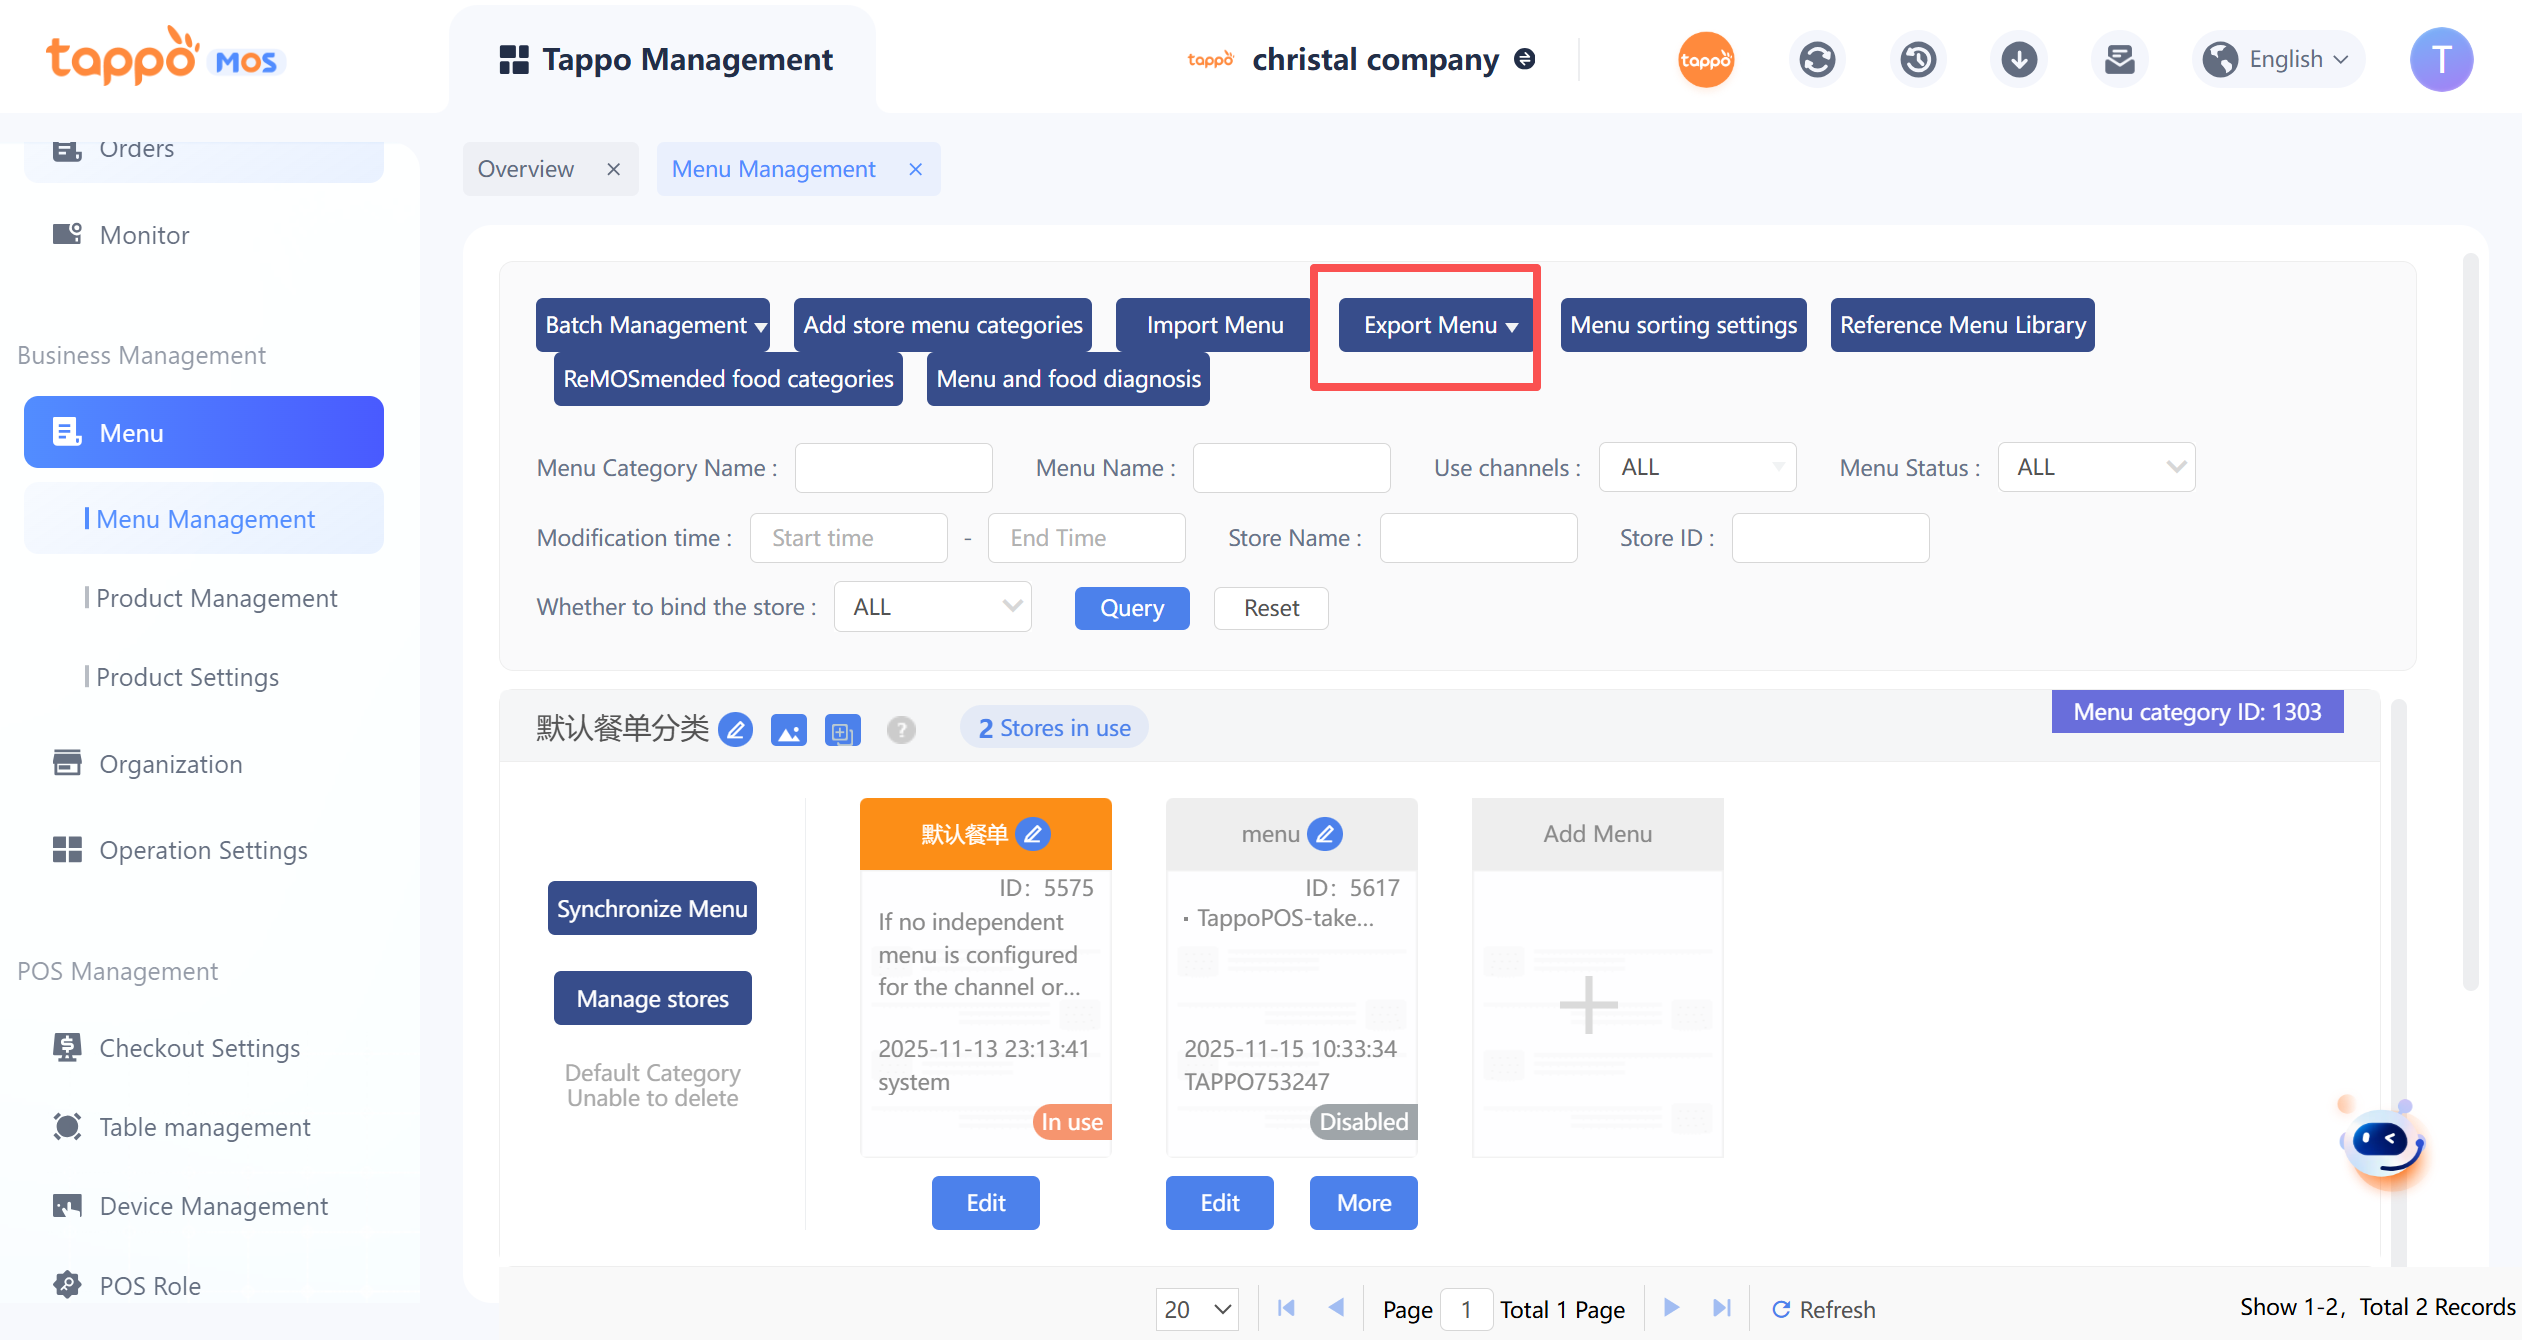
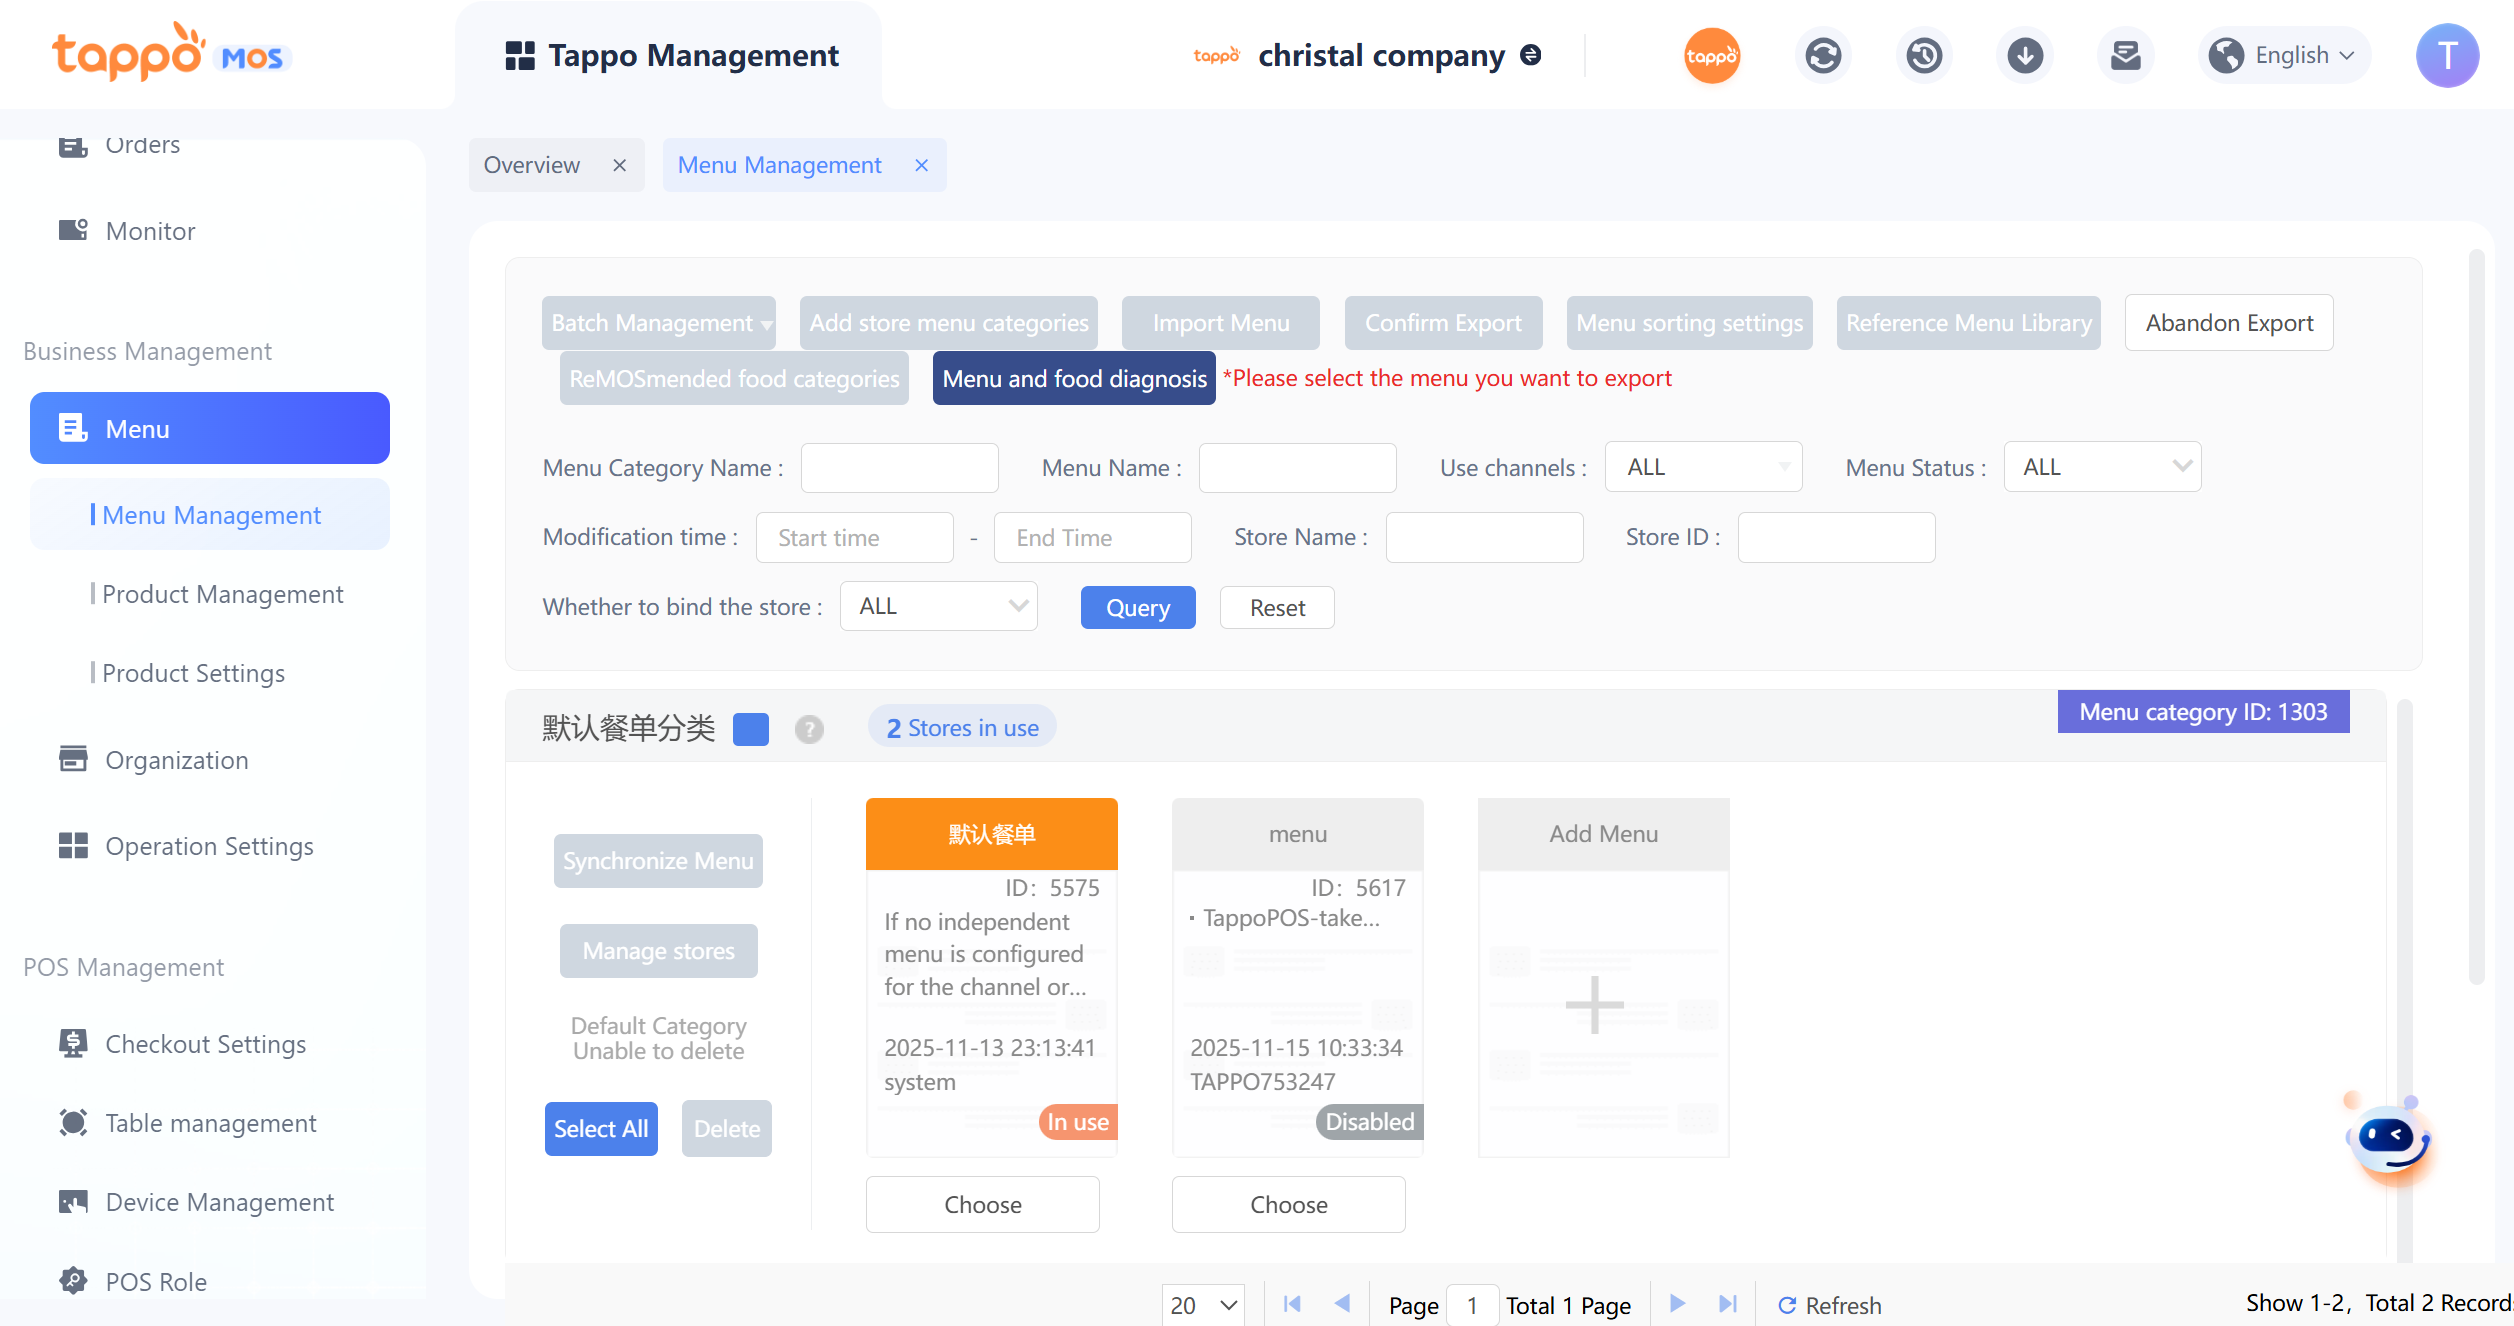
Click [Confirm Export], enter the corresponding receiving email, and the export of the corresponding menu can be completed.
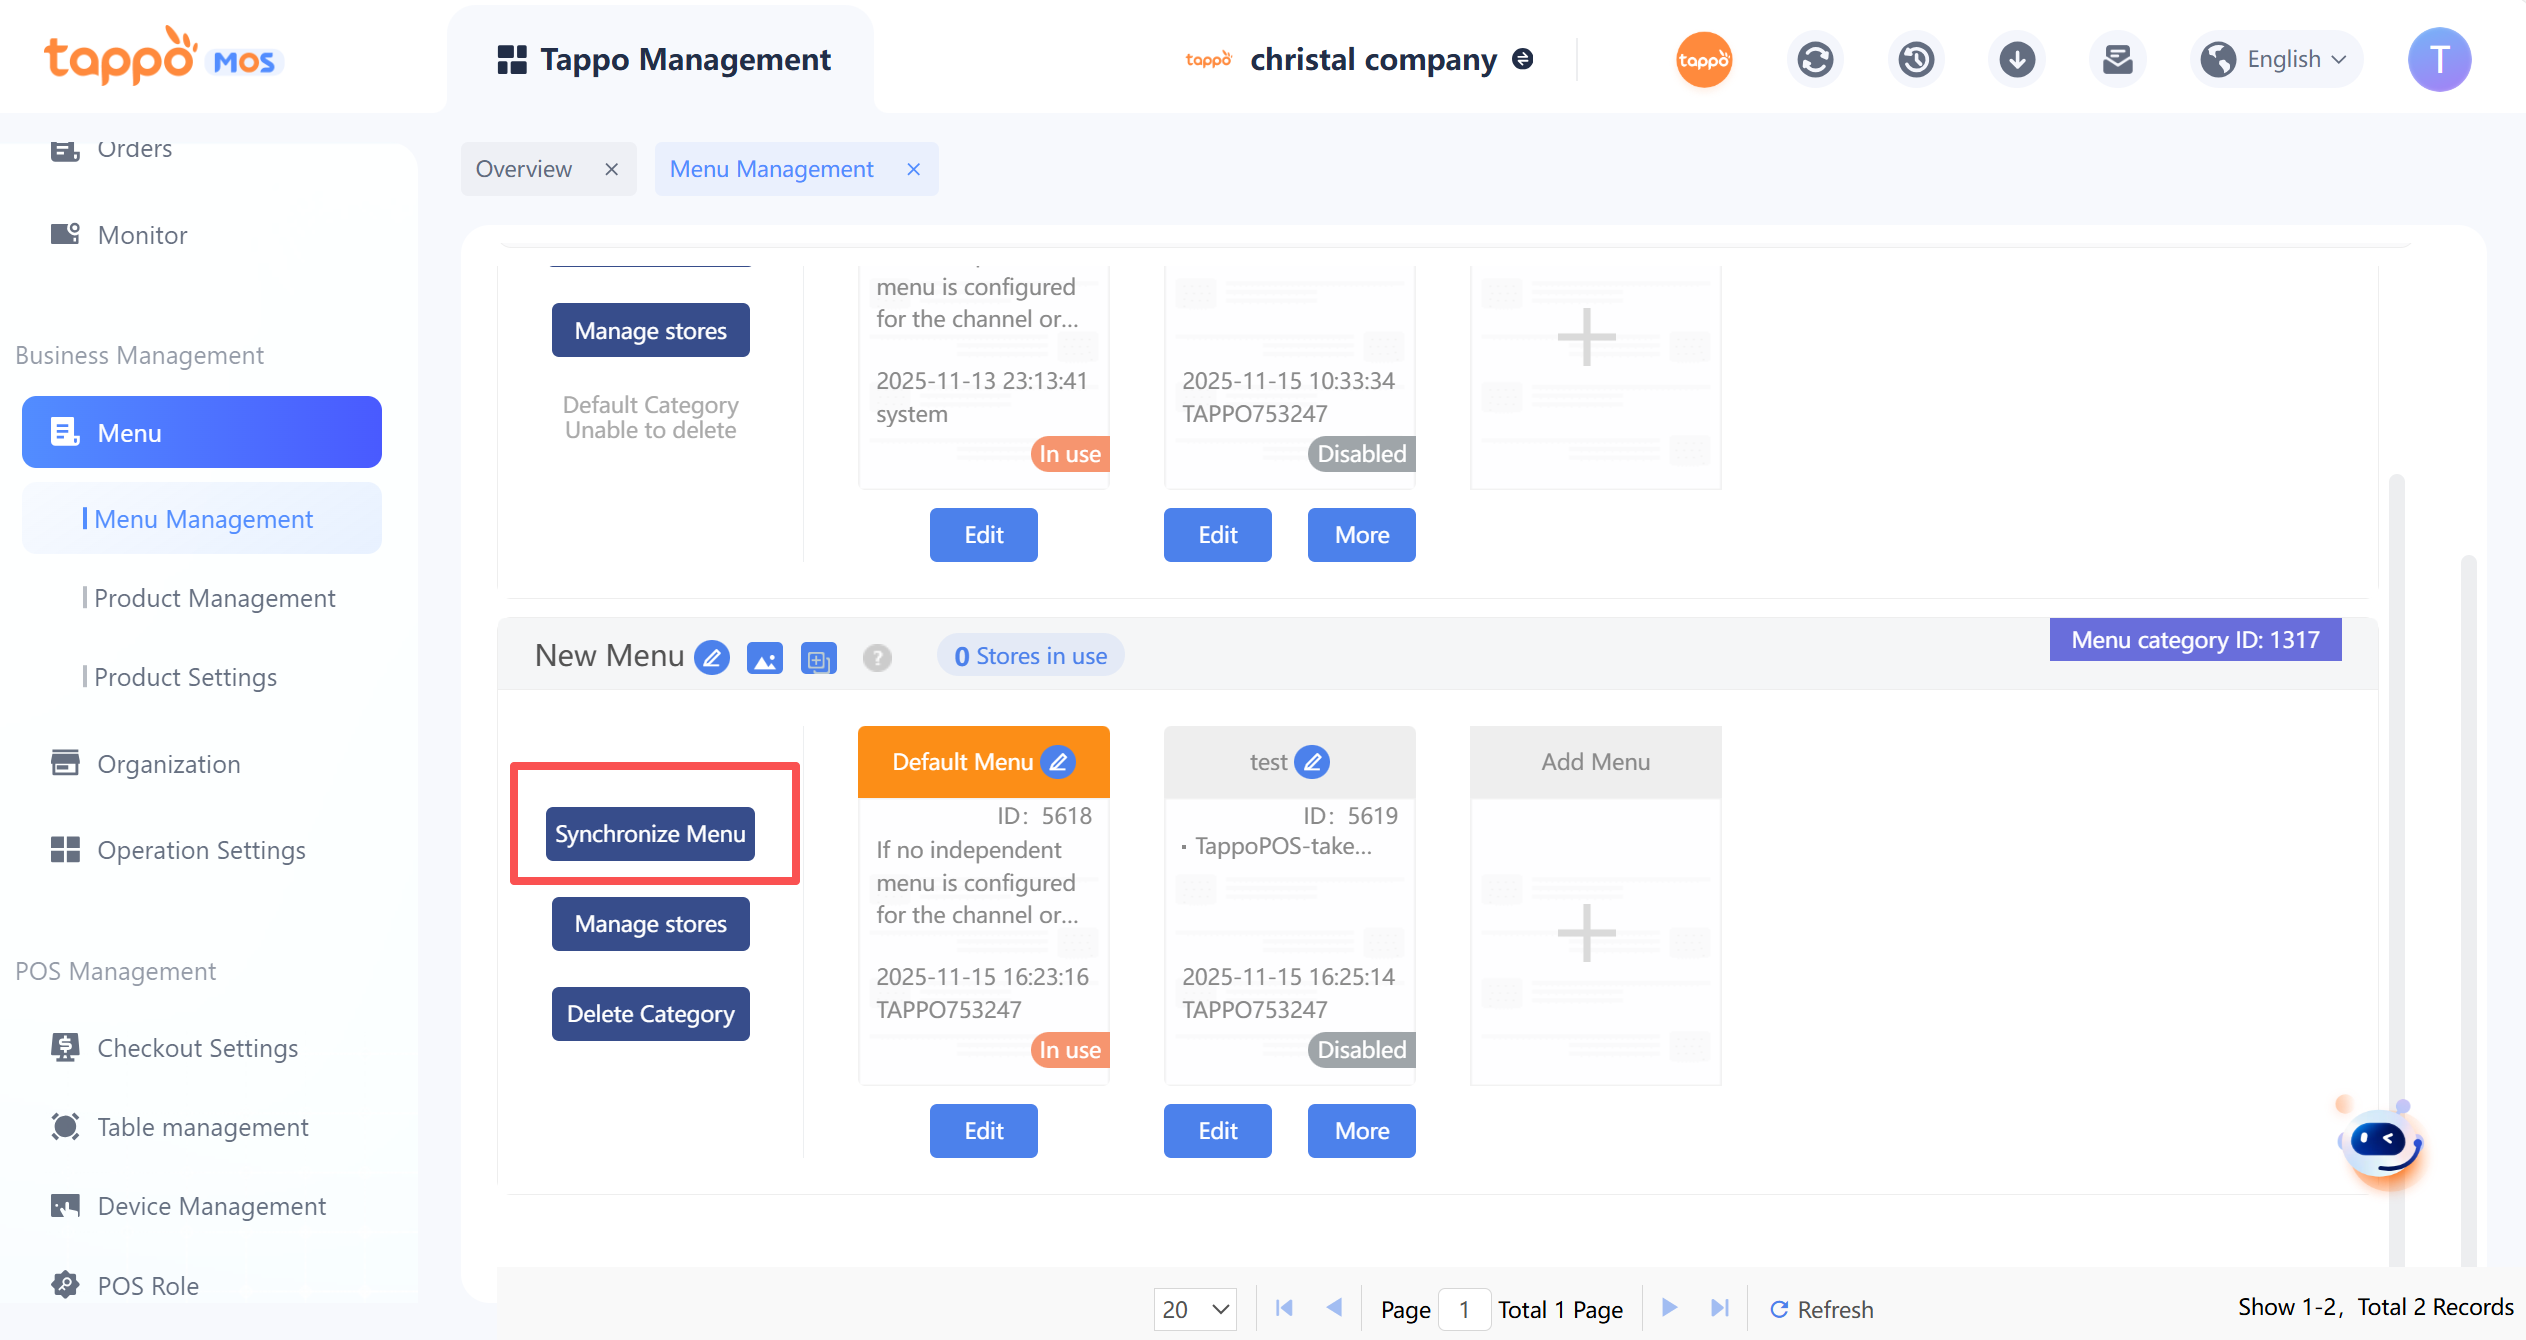
Synchronize Menu
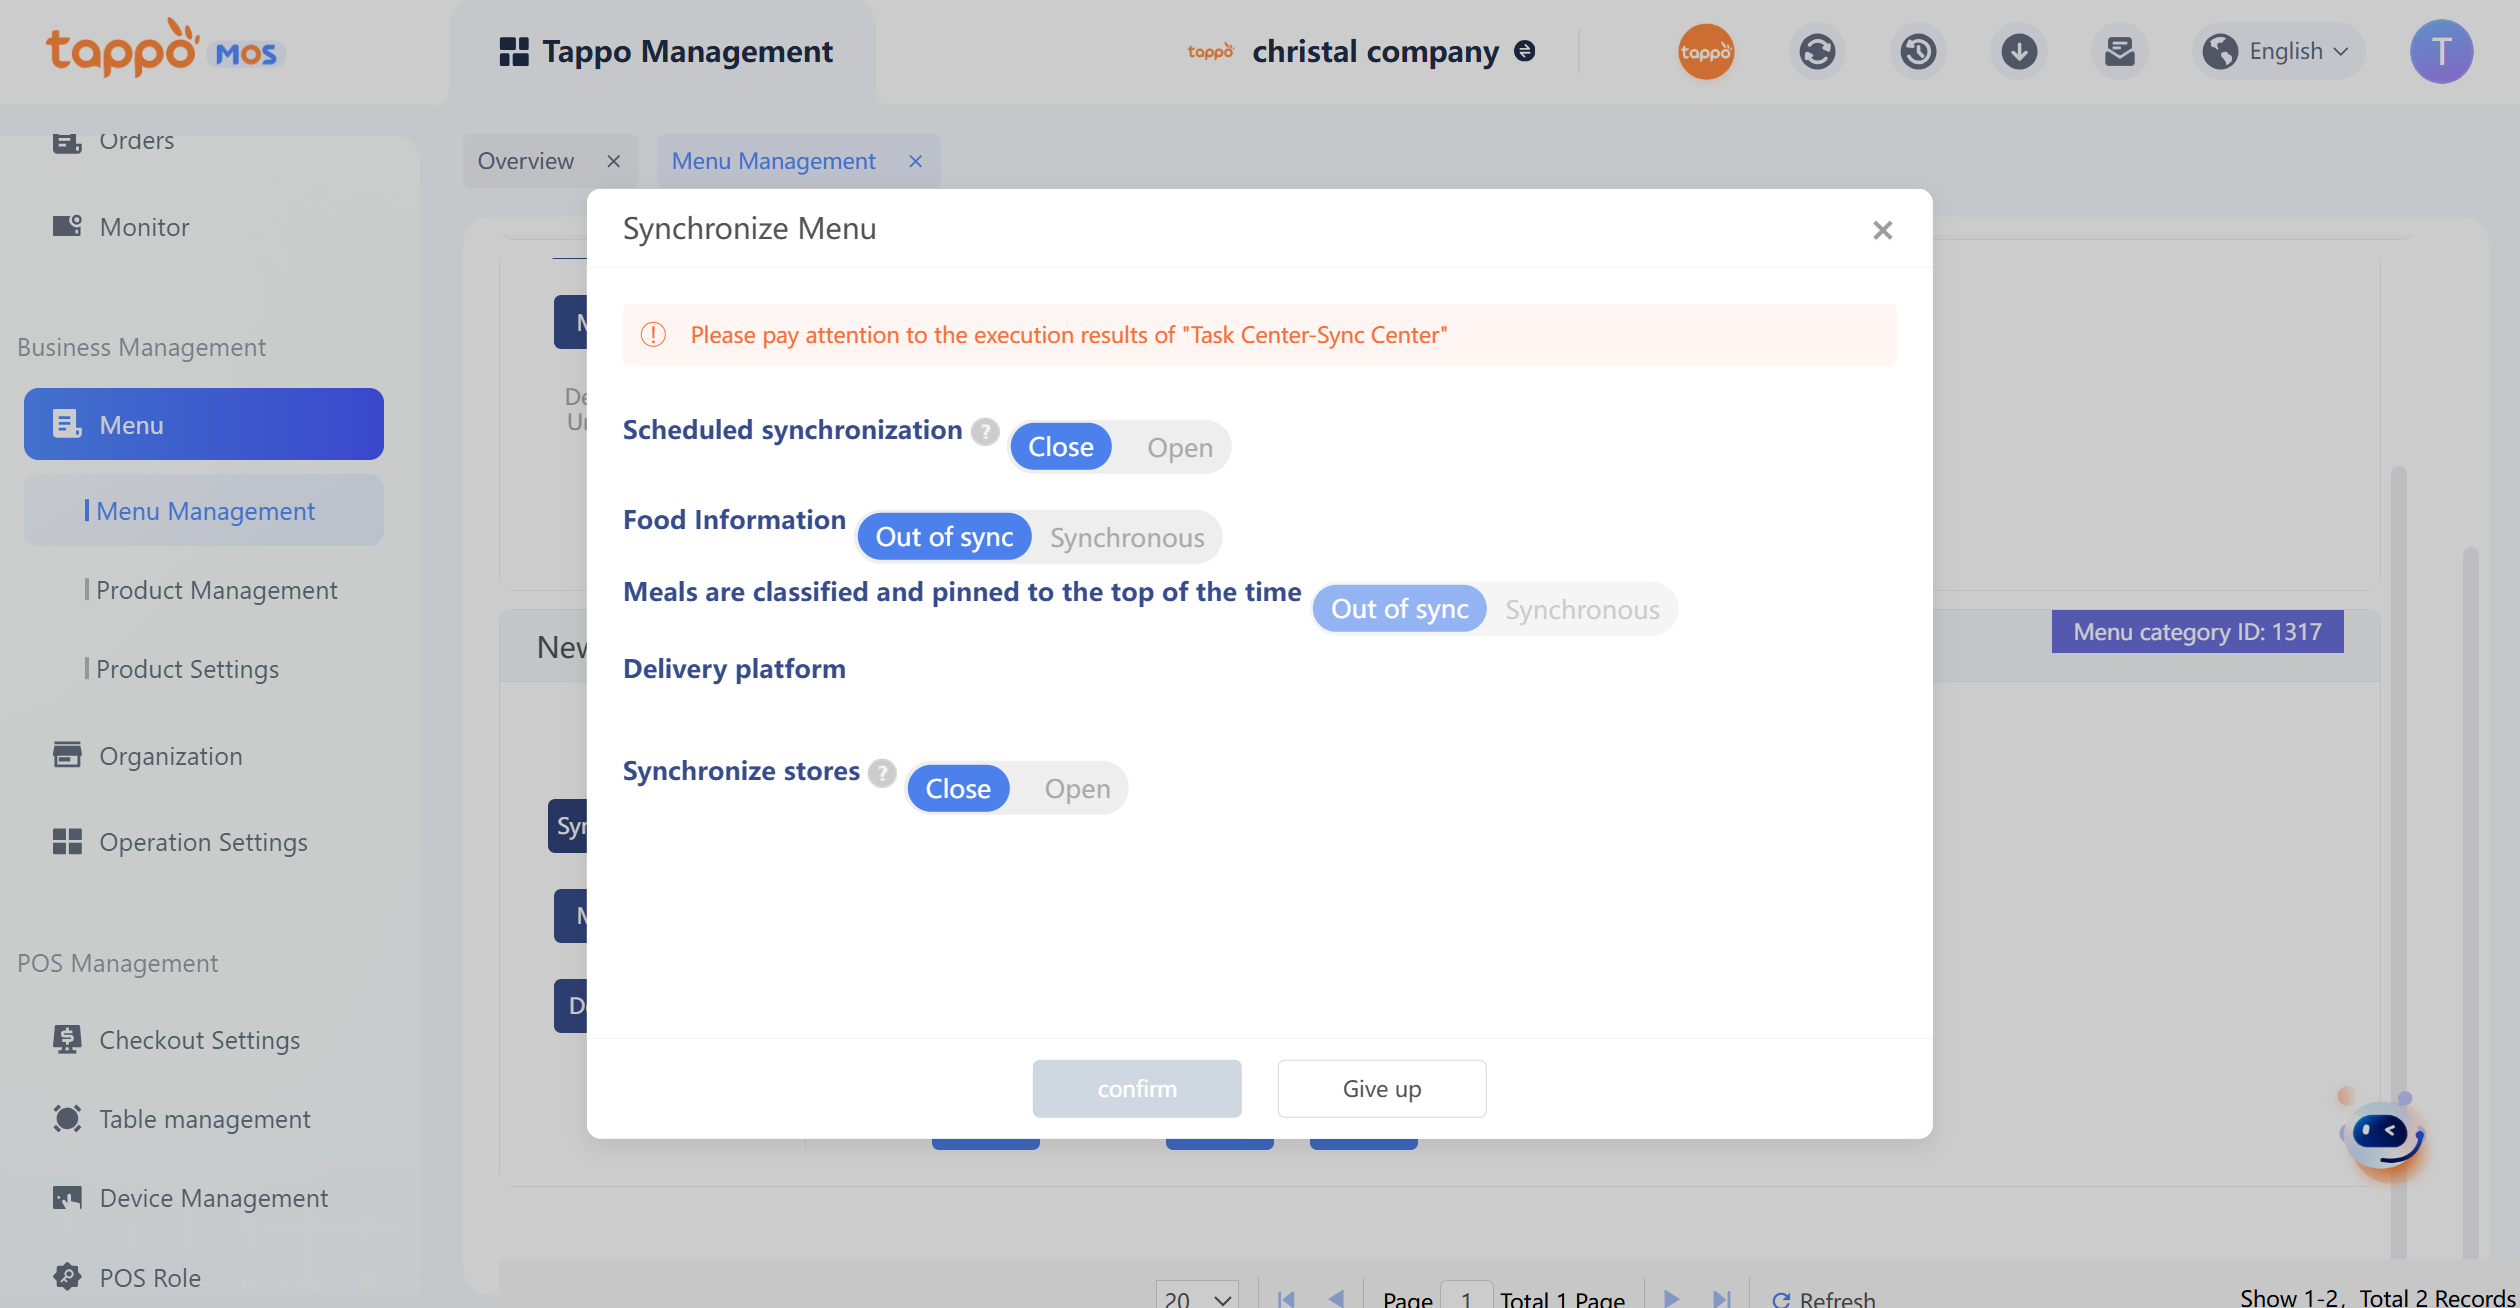
On the menu management page, click the [Synchronize Menu] button in the menu category to select the channels to be synchronized and the content to be synchronized (synchronize the entire menu or specified dishes, synchronize category time-period pinning settings) to synchronize all stores using this menu category (if synchronizing the entire menu information, the category time-period pinning settings of all categories in the menu will be synchronized).